Homemade Vanilla Extract
Imitation Vanilla is typically made from a derivative of wood pulp and cloves. There isn’t any vanilla in it at all! Pure Vanilla Extract is very expensive, but you can make your own with just vodka and vanilla beans.
Equipment
- 1 Measuring cup
- 1 glass bottle with cap
- 1 digital scale
- 1 funnel
Ingredients
- 4 whole vanilla beans
- 8 ozs. 80 proof vodka
Instructions
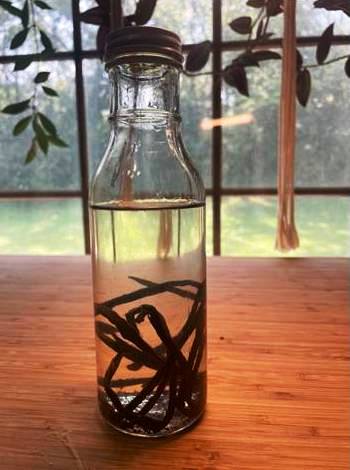
- Open up your vanilla beans. First, I sliced my beans lengthwise to open them up. If you use Grade A beans, they’ll have a higher moisture content than Grade B. Either works fine for vanilla extract. You’ll see inside the tiny specs that look like the specs in natural vanilla ice cream! Try not to lose any in the process. You can leave the beans attached at the end or cut them entirely apart. It doesn’t matter as far as the flavoring goes. Here's a chart that shows you the proportions of vanilla beans to vodka:

- Place the beans in your container. I slid all the beans into my glass jar, trying to make sure all those little specs went along for the ride.
- Completely cover the beans with the alcohol. This will prevent bacteria from growing. I used a funnel to make it easier. Put the lid on and give it a few shakes. I used a chopstick to push down any bits of bean that were sticking up out of the vodka, and ended up adding just a little extra vodka to the mix.
- Store the vanilla out of direct sunlight and at room temperature. You’ll want to shake it occasionally – every couple of weeks to once a week is great.
- Wait. You can use your vanilla after a month, but you won’t get the full flavor until about a year has passed. It will have a rich, dark color and delicious aroma!
- As you use your extract, you can replace the alcohol you used. Shake it up afterward. You can keep doing this for several years or until the flavor starts to wane. Then, you’ll want to take out the used beans and replace them with fresh beans.
- .As long as the beans are completely submerged, your vanilla extract can last for several years. If you remove the beans, it will last indefinitely.
TIPS
- Homemade vanilla extract works the same as store-bought and vanilla. Use the same amount that the recipe calls for (unless you’re like me and you love extra vanilla flavoring!). You don’t need to spend a fortune on alcohol! The flavor will come from the vanilla beans, so you don’t need to worry about getting high-quality alcohol as long as it is 80-proof. Avoid flavored alcohol, as that will mess up the flavor of your vanilla.
Non-Alcoholic Vanilla Extract
- You can make a non-alcoholic version by using glycerin
- Ingredients:3 - cups glycerin 1 - cup water 3 - vanilla beans
- Follow the directions as listed above, but the extract will be ready in about two months. It will have a thicker, syrup-like consistency, but the flavor will be similar. It should last up to 4 years. Glycerin extracts are gluten-free, sugar-free, and alcohol-free. You can use vegetable glycerin to make it appropriate for vegetarian diets.
Instapot Method
- If you’re in a hurry, you can use your Instapot to make vanilla extract, although I have not tried it myself. The flavor will not be as rich or as smooth as Vanilla extract that has been aged for six months to a year. Follow the directions above for Vanilla Extract made with alcohol, but put your vodka and vanilla beans in 12-ounce canning jars. You’ll want to leave about an inch of headspace at the top of the jar, so use roughly 8 ounces of vodka in a 12-ouncecanning jar. Use traditional metal canning lids and finger-tighten them closed. Add one cup of water to the bottom of the Instapot.Place the Instapot trivet in the bottom of the pot and place the jars on the trivet. Close the Instapot lid and set the pressure valve to sealing. This is important because alcohol vapors are flammable. By the way, make sure you aren’t using any open flames during this process!
- Use the manual setting (or high-pressure cook setting) for 35 to 45 minutes. Allow the pressure to naturally release for 1 hour after cooking is complete. After the hour mark, you can turn the valve to vent to release any leftover pressure. Carefully open the lid away from you so you don’t get burned. Unplug your Instapot and allow the jars to cool before removing them. You can leave the extract in the canning jars or transfer it to pretty bottles if you prefer.
- Always be careful when using a pressure cooker and follow your machine’s directions.
Tried this recipe?Let us know how it was!