Survival Soup
Survival soup is a very basic soup that you can put together in jars, buckets, or mylar bags and keep in long-term storage. The base ingredients include rice and beans. These are stored dry until you are ready to use them.
Equipment
- 1 Soup pot or crockpot
Ingredients
- 1 cup rice
- 1/4 cup red kidney beans
- 1/4 cup lentils
- 1/4 cup green split peas
- 1/4 cup chickpeas/garbanzo beans
- 1/4 cup black beans
Instructions
- DIRECTIONS TO CREATE SOUP BASE:
- Gather ingredients
- Layer the ingredients in Mason jars or Mylar bags
- Seal and Label
How to Cook Survival Soup
- Rinse your beans and rice well in the Maso njar until water runs clear.
- You may want to soak your beans overnight for faster cooking. This is critical in an actual survival situation where cooking fuel might be in short supply. However, soaking rice for long periods of time can lead to bacterial growth. If this is a concern, you may want to store your rice and beans separately.
- Add soup base and 8 cups of water to a large pot.
- Simmer until beans and rice are tender. Stir often and add water as needed. It took about 3 hours for my beans to soften.
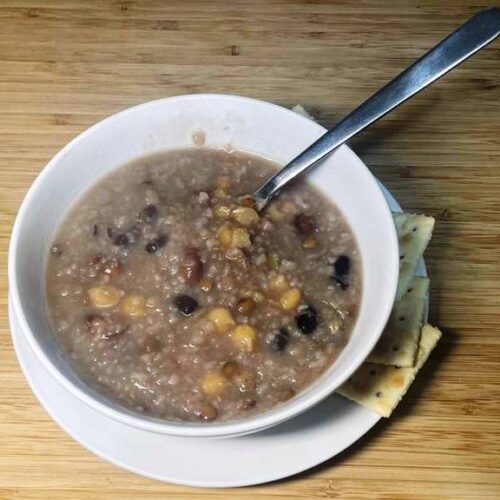
- Add any additional ingredients and simmer for another half hour or until everything is cooked and tender. I added five packets of beef bouillon to my soup, which gave it a mild flavor.
- Serve and enjoy!
Survival Soup Chili
- Simmer your soup with some browned ground beef or turkey and chili seasonings to make a hearty chili stew that you can eat alone, with baked potatoes, or in tacos.
Survival Soup Variations
- You can mix in several packets of beef or chicken bouillon or broth to add flavor and eat the stew as is.
Vegetable Survival Soup
- Use your survival soup as a base and simmer some fresh vegetables from your garden or freeze-dried, frozen, or dehydrated vegetables from storage. They’ll add flavor and nutrients to a hearty soup base.
Survival Stew
- You can add any left over (pre-cooked) meat to your pot and simmer for at least half an hour. Leftover bits of ham, turkey, or beef make a tasty addition. You could also use freeze-dried meat or beef jerky to supplement your survival stew. Soak your hardtack or stale (but still edible) rolls; bread or crackers in your survival soup to add more calories to it.
Storage
- To preserve your dry survival soup,vacuum seal the dry ingredients in Mylar bags. Label the bags with the ingredients, date, and cooking directions. Small packages of survival soup are lightweight and easy to pack in a bug-out bag or take camping.
Tried this recipe?Let us know how it was!