Estimated reading time: 9 minutes
Fall is busy for any homesteader, gardener, or forager. It's the time to finish up the garden, start hunting and forage the last of nature's bounty. Acorns are one of the nuts that become available during this time, and it's a resource that we can use in our food stockpile.
You might have a lot of questions like… “Are acorns edible? I thought they were poisonous!” Or, “What in the world would I do with acorns?” Or, “Sure, I can forage them, but how do I process acorns to make them edible?”
I understand your questions and hesitancy. I never knew that I could eat the acorns that grew in the woods around my home. My grandma had an oak tree in the back of her house for decades, and she did nothing with the acorns. That was a lot of wasted food.
Want to save this post for later? Click Here to Pin It on Pinterest!
So, if you live near an oak tree or two, you have a ready source of nutrition nearby. Native Americans harvested many varieties of acorns; they were a staple of their diet. Nowadays, acorns are usually considered a nuisance in the backyard. Since the birds and squirrels can’t take all of the acorns, they can become a hazard.
Have you ever stepped on an acorn accidentally? They’re little balls of ankle deaths.
You don’t want to miss out on an opportunity for a free harvest, so let’s talk about how to harvest, process, and eat acorns.
How to Harvest Acorns
Acorns are a fall crop that starts to drop from the tree as the weather turns colder. Gather the acorns that fall off the tree; don't remove them from the tree yourself. Those aren't ready just yet. Sometimes, you can find edible acorns leftover into spring, but the crop won't be as good as they are in the fall.
Bring the acorns into your home so they can start to dry. Drying them inside reduces mold growth.
How to Identify a Good Acorn
If you've never collected acorns, you might have no idea how to determine if they're suitable for eating or not. Here are some general tips to remember.
Tannin Levels are Most Important
Not all acorns are equal. Some contain more tannins than others, and tannins are what makes an acorn taste bitter. It has to be leached out before cooking. Some acorns are so full of tannins that you wouldn't even want to consider eating them. The best way to figure it out is to simply taste the acorns.
Typically, the larger the cap of the acorn, the more tannins it contains. The ideal acorn comes from an oak tree that produces large acorns with small caps, like these.
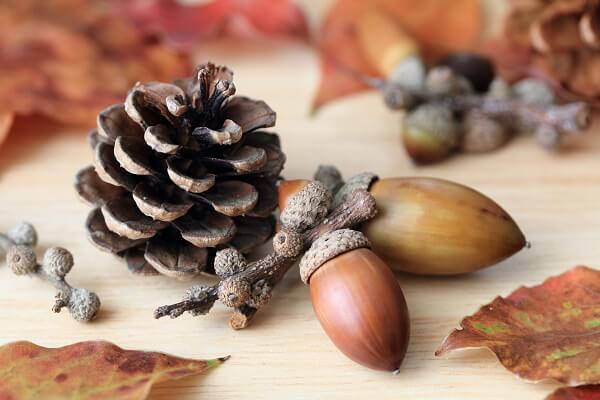
Look at the Acorn Meat
If the acorn meat is still white or light-colored, you have an acorn that is safe to eat. It could even be pinkish, but don’t eat a green acorn.
Sprouting Can Be Okay
You might think that an acorn that is sprouting can’t be safe to eat, but as long as the meat isn’t green, it’s safe to eat.
Wait for Later Acorns
The green acorns that fall from the tree earlier aren’t ripe, and there is a good chance that they have worms in them. Wait for darker acorns to fall from the tree before you start to harvest. If they do fall in their green state, wait until they turn brown. Brown means ripe.
Small Holes Equal Worms
Does your acorn have a small hole in it? If so, then chances are that little worms decided to call that acorn home. Toss them out!
Properly Storing Acorns
Acorns can be stored for long periods, if they’re kept dry. The squirrels don’t do anything fancy to store acorns, and neither should you. Keeping the acorns dry is the most important thing. Any moisture will cause the acorns to develop mold.
Native Americans stored acorns in baskets that were placed on elevated platforms. The woven baskets allowed for ample circulation and stopped animals from sneaking out some snacks.
Before you store your acorns, be sure to go through what you have and only keep the best ones. Any questionable acorns should be tossed out first. Then, store your acorns in large, open containers. Stir or move the acorn harvest around once a week.
Shelling & Cleaning Acorns
Once you've gathered all of your acorns, you need to remove the tannins and make them less bitter. The best way to do this is to cold-leach them in water, but that’s a time-consuming process. Some people boil the acorns, but it doesn’t offer the best results.
The first step is to shell your acorns, and that can be difficult if you’re working with fresh acorns. Those buggers don’t want to come apart without a fight, even if you use a large hammer.
Mature, dried shells can be cracked or cut open a lot easier, so many people prefer to store them and let them dry before attempting to shell. With proper storage, some acorns might crack open in storage, so you do need to check often.
You can leave them to dry on a cookie sheet in the oven with the light turned on to quicken the process. If you do this, they should dry within a day or two.
Either way, after the shell opens, the acorn is wrapped in a dark-looking skin that needs to be removed. The skin contains the tannins, so you need to take off as much as possible for the best flavor.
Skins can be troublesome to remove from dried acorns. To make the process easier, shell them in water and let them soak for 10-15 minutes. Soaking softens the skin and makes it much easier to remove.
After you take off the skin, quickly place the acorns into a bowl of cold water before they oxidize.
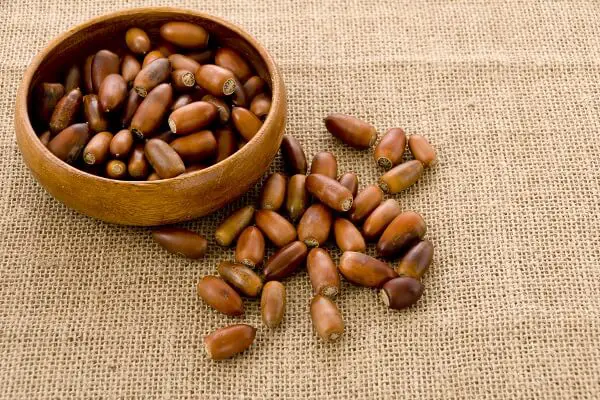
Processing Acorns for Consumption
Now, the time-consuming part begins. Use a durable food processor or blender to liquefy the acorn meats. Use equal parts water and acorns, creating a thick soup consistency. Small batches are best, and then collect everything in a glass jar. You need a large, 1-gallon mason jar.
By the next day, the acorn solids will be at the bottom of the jar with the surface water on top. Carefully pour out of the surface water without disturbing the acorns.
Fill up the jar with fresh cold water. Put the lid back on and shake it! Repeat this process daily.
In a few days, taste the solids. When they’re bland, the leaching is done. If they’re still bitter, try again in another day or two.
Drying and Grinding
Now, it’s time to dry and grind. Line a strainer with a fine cheesecloth and pour the acorn water mixture into it. Let the liquid drain out until it stops. Wrap the cheesecloth tight and squeeze the water out.
Now, spread the wet acorn out on a cookie sheet or a flat pan. Using a food dehydrator or your oven on low, dry the acorn meal thoroughly.
Depending on the method and efficiency of the dehydrator or oven, it can take a few hours or overnight. Just be sure to check it often and make sure it’s not burning!
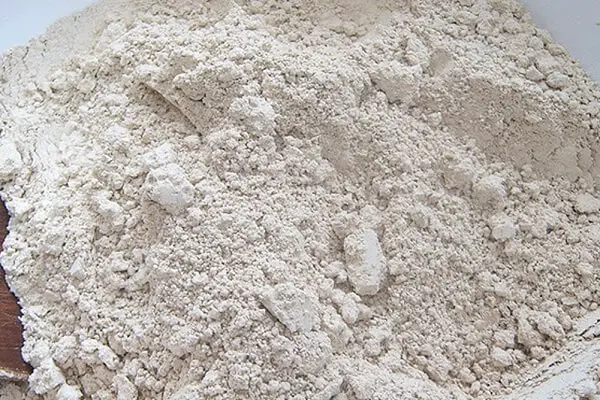
Once dried, you can either use the coarsely-textured acorn meal just like you might use cornmeal. You’ll notice that the texture feels very similar. The other option is to grind it into acorn flour.
To create acorn flour, you can use:
- A flour mill
- A food processor
- A blender
- A small coffee grinder
Eating Acorns: How Can You Use Them?
Acorns generally are not eaten plain, like you might eat peanuts or walnuts. Instead, you use them in a few ways, such as acorn meal and acorn flour.
Acorn meal, sometimes called acorn grits, can be used in a lot of ways. Here are some ideas to get you started.
- Use them in bread recipes. Try this easy acorn bread recipe.
- Make pancakes or pizza. Give this recipe for acorn pancakes a try.
- Add acorn meal to cooked cereals or as your cooked cereal.
- Add it to a stuffing recipe.
Acorn flour is incredibly versatile. Here are some ideas for using it.
- Try making an acorn cake that uses acorn flour.
- Use in a smoothie.
- Use as your binder to make yummy meatballs with acorn flour.
- Hide it in gravies.
Acorn flour has a nutty, sweet taste that is gluten-free. You can use it as a substitute for gluten-free flours, but you don’t want to substitute it for all-purpose or wheat-flour unless you add vital gluten.
It works well in cookies, cookie bars, as a sauce base, or a soup thickener.
You can work acorn flour into existing recipes by swapping out ¼ cup of your required flour with acorn flour. It changes the nutrient value of the recipe. Since acorn flour is a bit sweeter, you might have to decrease the sweetener you use a bit. It might take a try or two to get used to using acorn flour, but it’s a healthy flour choice.
Final Thoughts
Acorns that you harvest in the woods are a good food source if you take the time to process them correctly. You might have to fight off a hoard of angry squirrels, but most humans aren't searching for acorn harvests. Aside from the forest friends, you'll have tons just for you.
Like this post? Don't Forget to Pin It on Pinterest!





This was so informative!
Thank you for sharing this. I’m going to looking for acorns and try to make flour.