Estimated reading time: 19 minutes
There’s a raised bed gardening concept that’s relatively new. It’s called a “wicking bed” and it originated in Australia. It’s designed for areas prone to drought and the Australian Outback has defined the concept of drought for centuries. The primary benefit is that it will water itself up to two weeks depending on the size of the bed.
But even if you don’t live in an area subject to heat waves or drought, a self-watering garden bed can make your gardening a whole lot easier. The fundamental concept is similar to some self-watering flowerpots. A small reservoir of water at the bottom of the container holds water that is wicked up to the roots of plants.
A key component of any self-watering or wicking bed is the texture and characteristics of the soil mix. This isn’t about dumping black dirt into a raised bed and hoping for the best. The soil needs to be a carefully balanced blend of numerous organics like peat, potting soil, compost, coir (ground coconut husks), Perlite and even small wood chips. The reason this kind of blend is so important is due to the “wicking” properties of these materials.
Another important element is a top mulch to prevent evaporation. This could be a layer of wood chips, wood shavings, or any other mulch you use in your gardens. This will not only help to keep the weeds down, but prevent too much evaporation.
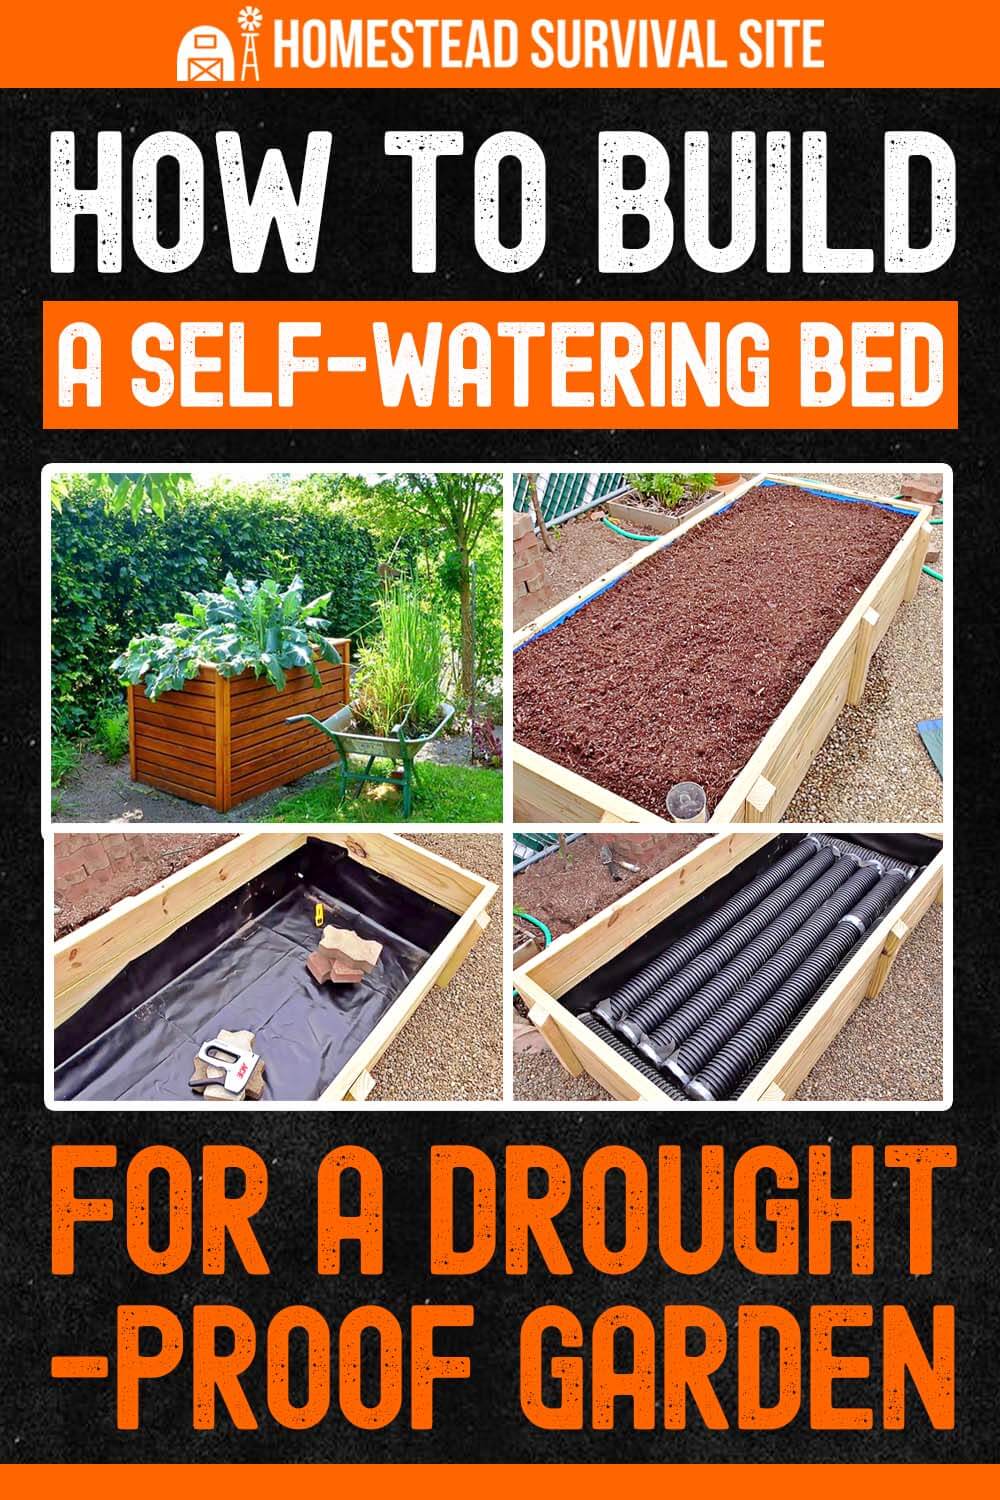
Want to save this post for later? Click Here to Pin It On Pinterest!
And There’s Another Difference
A traditional raised bed garden is in direct contact with the soil at its base. That’s not the case with a wicking bed. The bottom of a wicking bed is actually watertight with a single drainage tube to keep the reservoir of water at the bottom from overfilling.
The single drainage tube is about 4 to 6-inches above ground level depending on the size of the bed. The idea is to prevent the watertight bed from becoming oversaturated due to heavy rainfall. You want to contain water in the bottom to allow the highly permeable soil mix to wick the water up to the roots from a steady supply of water at the base, but you want to manage the amount of water.
Size Doesn’t Matter
Your wicking bed can be any size from a plastic tub to a watering trough to a custom built, raised bed. As long as there is a steady reservoir of water at the bottom with drainage and a proper soil mix for wicking –it all works.
Implementing the Basic Concept
We’re going to go through the steps for one design of a wicking bed. There are other variations but all of them contain water in some way with the growing medium on top.
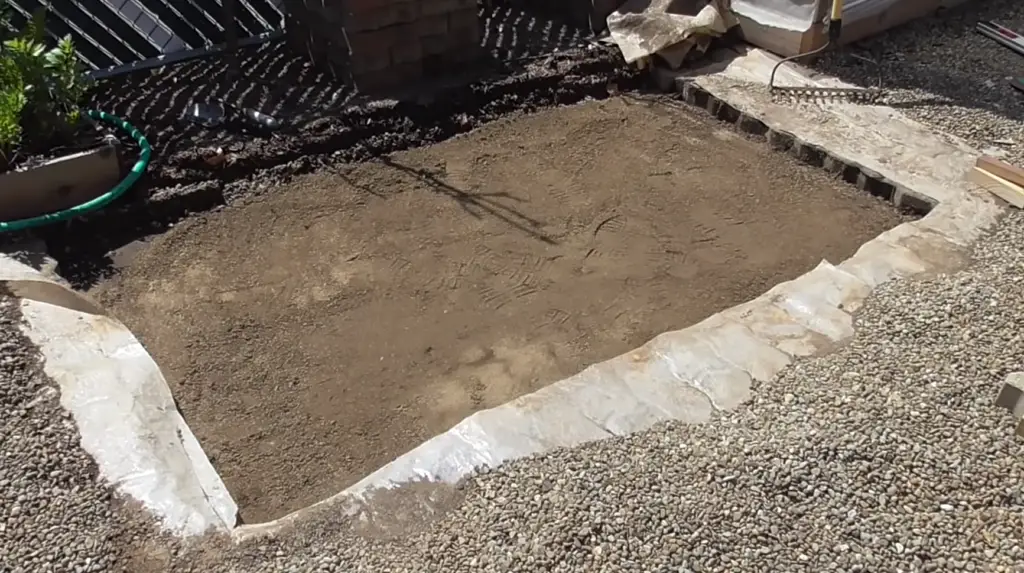
This variation is explored in an excellent YouTube video that explains the full concept. This design starts with a cleared area that is leveled with sand. A level base is important to keep the water at the base even, level and consistent across the bed.
The next step is to build a raised bed frame. We’ll cover other variations on wicking beds but the most common is in a raised bed.
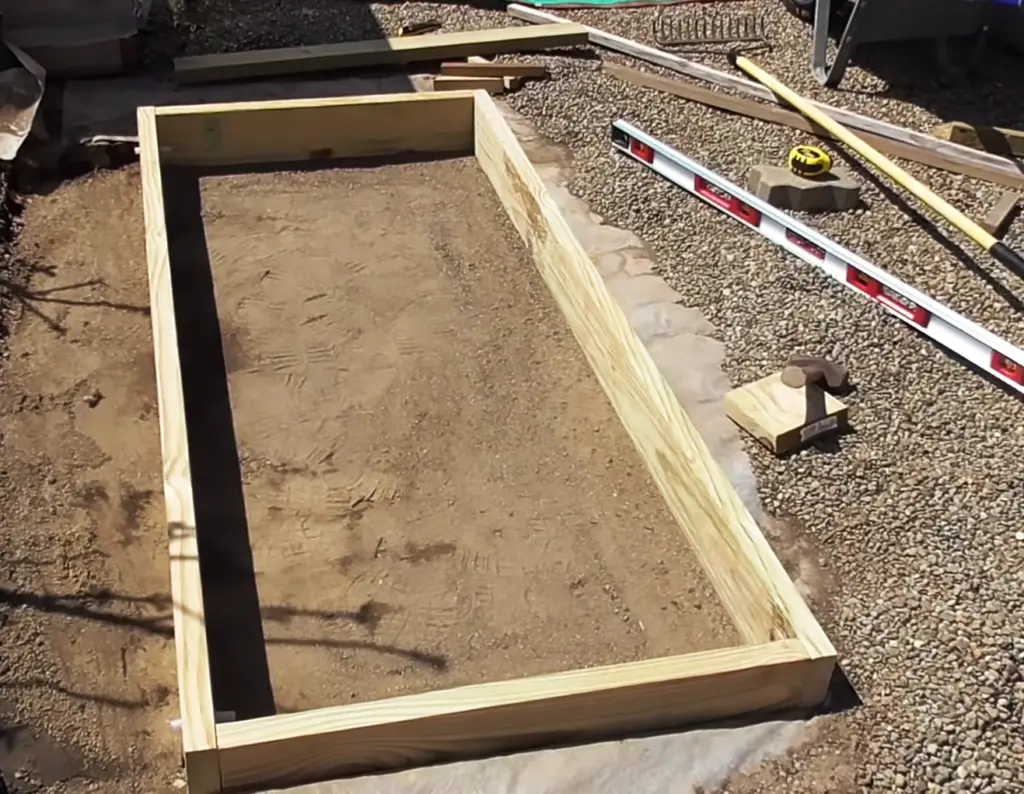
The amount of lumber you’ll need depends on the size of your raised bed. However, while the length and width can vary the height should be at least 16-inches tall or taller. This will allow for a reservoir at the bottom 4 to 6-inches deep with at least 12-inches of soil mix on top of the reservoir. It can be deeper but most recommendations are for a wicking bed that’s at least 16-inches deep overall.
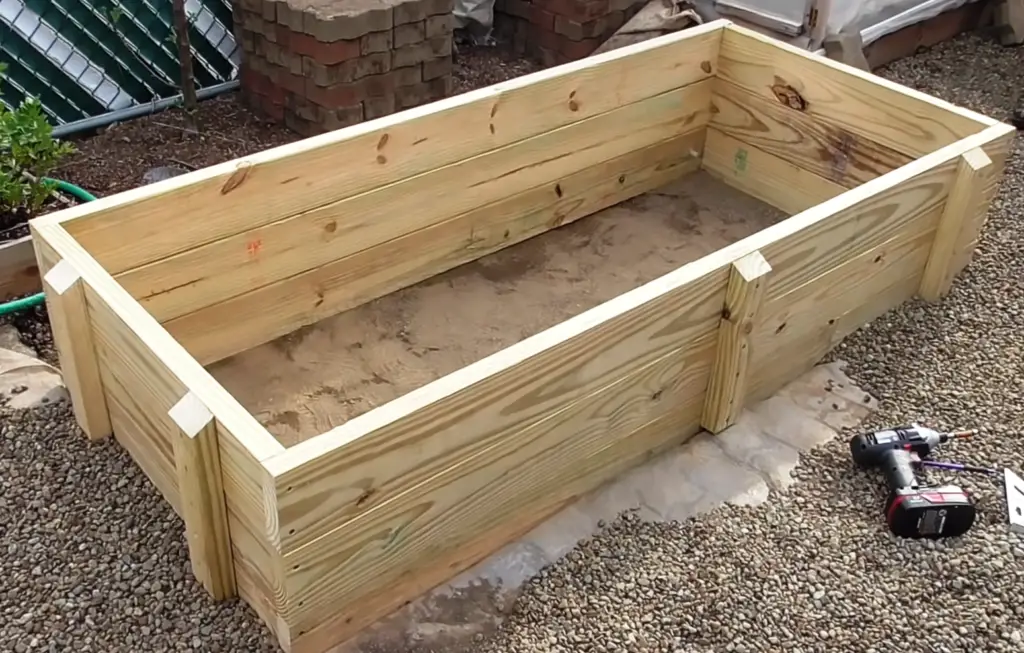
Continue to add your boards to get the proper height, and support the horizontal boards with vertical braces screwed into the sides of the boards.
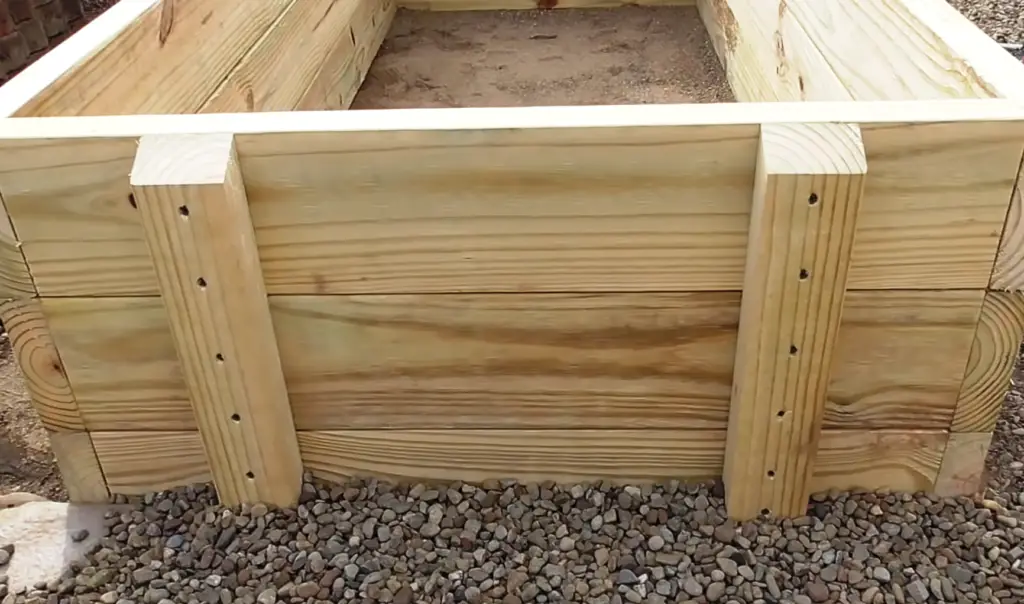
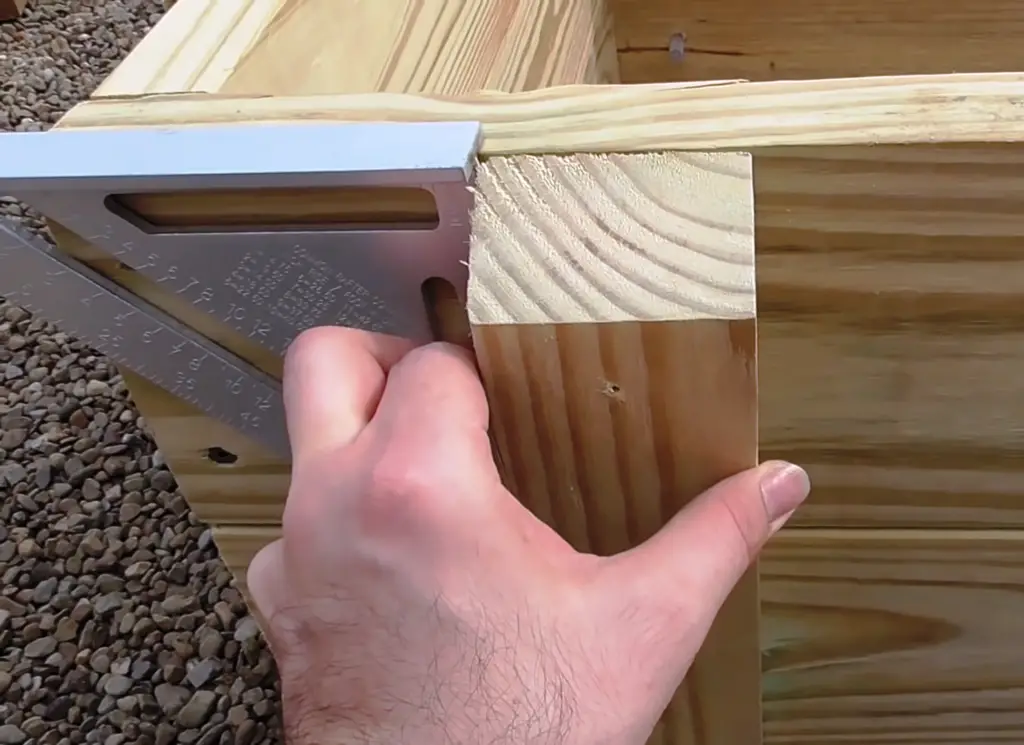
A rafter square on the top board will help you keep any support boards squared on the frame.
The next step is to line the bottom of the bed with waterproof plastic or rubberized liner. A common recommendation is for waterproof plastic or rubber material that is at least 6 to 8 mils or more in thickness.
The liner is stapled to the sides of the frame. Fold the corner in and staple. You want a watertight bottom. Some people even coat the staples with silicone sealer. The ability of your wicking bed to hold water without leaking is a critical success factor.
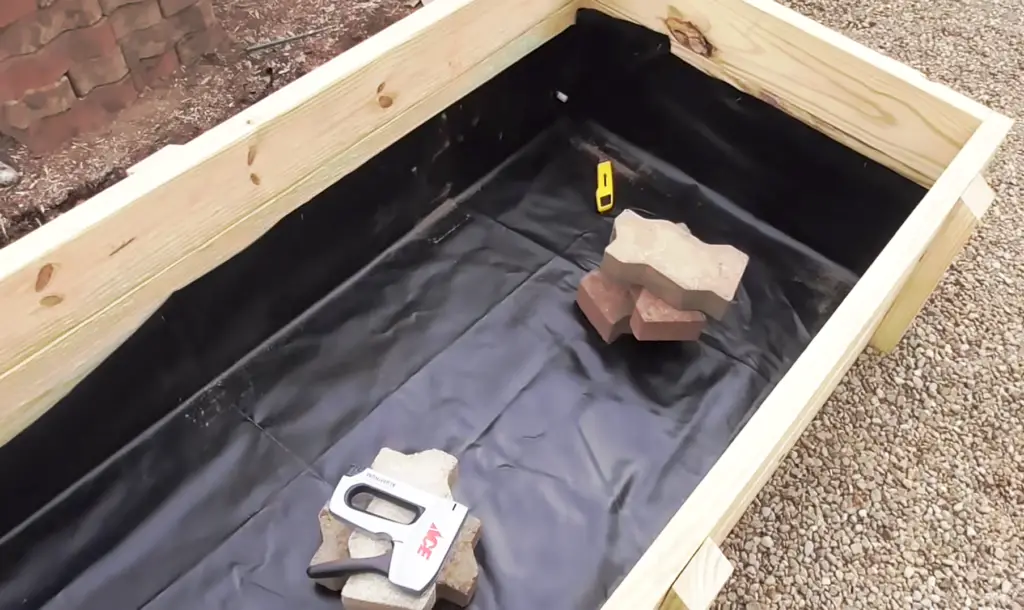
Don’t skimp on your bed liner. You don’t want any leaks. You could even fill your bed with water before adding any other material to make sure it is watertight. That’s up to you.
Another critical component is a drainage tube about 4-inches from the base of the frame.
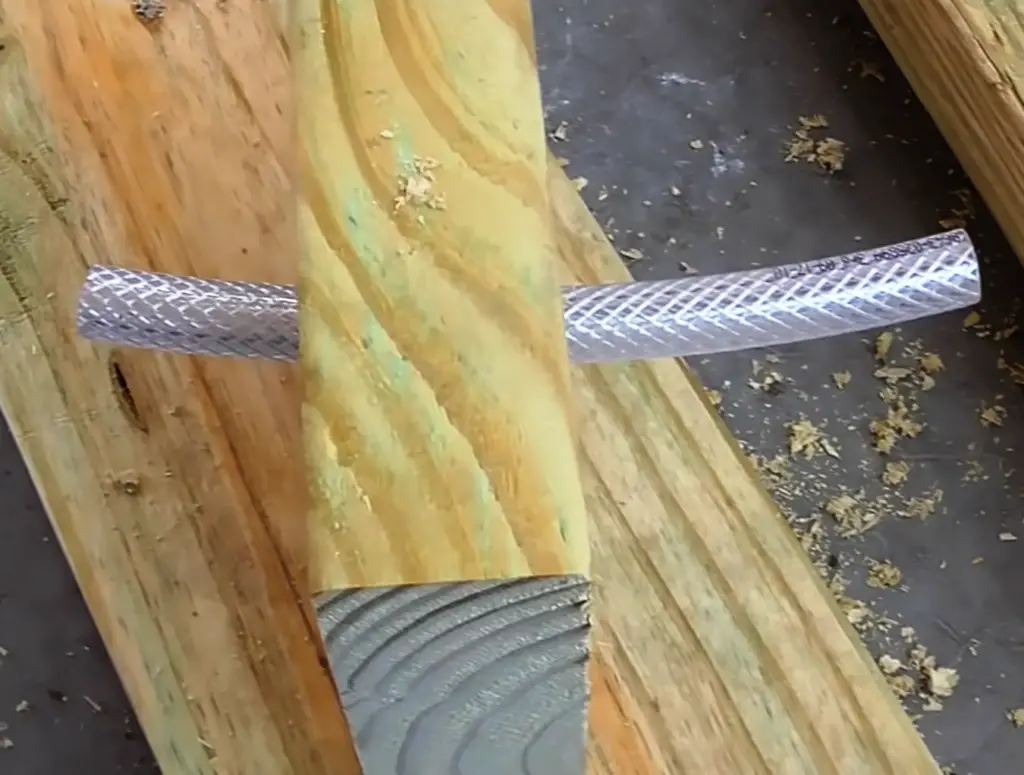
This will prevent the wicking bed from becoming waterlogged but will allow enough water at the bottom to retain the proper amount of moisture.
There are varying schools of thought about any drainage tubes. Some claim they are unnecessary while others say they prevent over-saturating the bed due to rainfall. The rainfall concern makes sense so we’re going to stick with a drain tube. You could always put a stopper in it if you decide you want to hold more water.
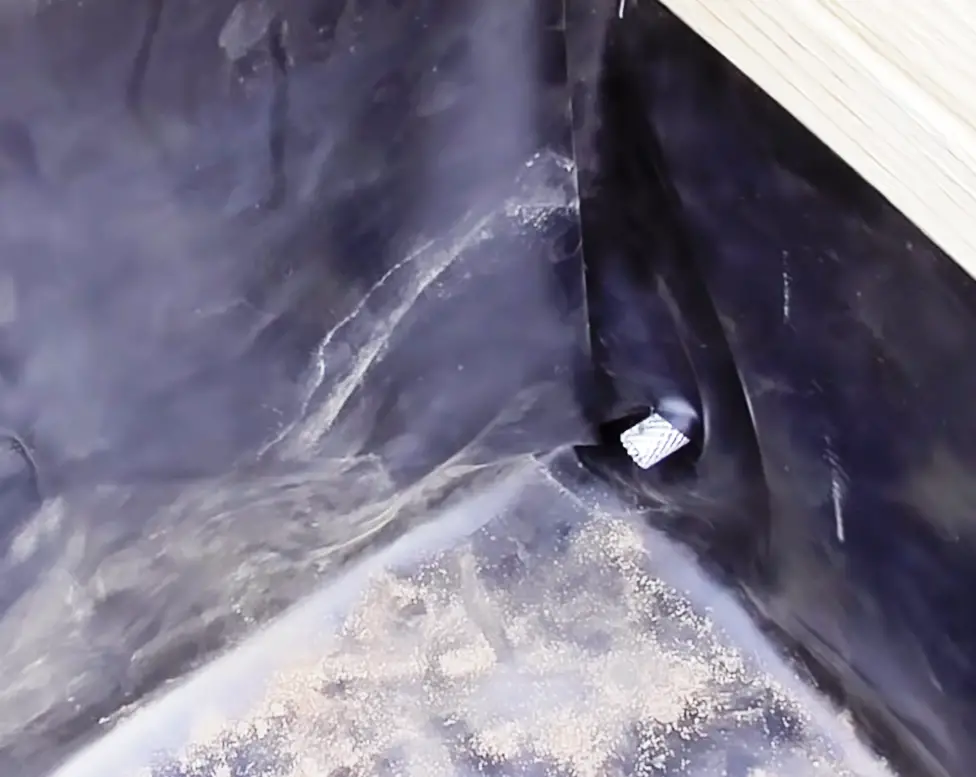
The drainage tube should be in one of the corners of the bed emerging from the liner. Seal around the tube with silicone sealer to prevent unwanted leaks.
The next step involves creating your reservoir. We’ll cover some variations but this approach uses perforated, corrugated drainage pipes. The best are 6-inch in diameter and are sold as long, continuous tubes.
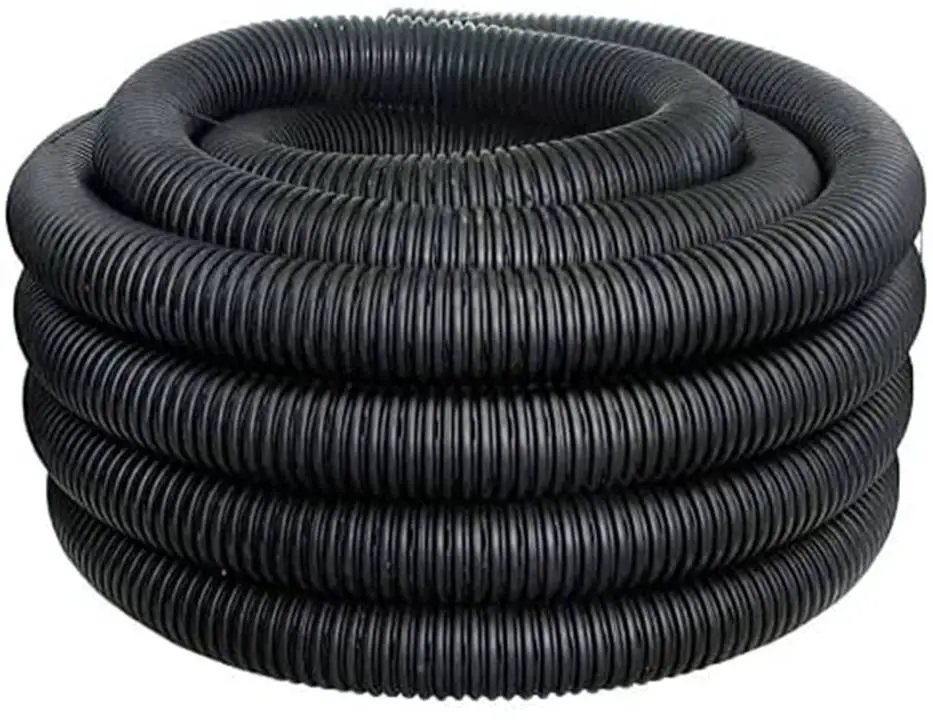
You’ll want enough to line the bottom of your bed with about an inch or two between each tube.
Start by cutting a length of drain pipe to fit into the width of your bed. You’ll want to cut it so it’s 6-inches short of the opposite side of the bed.
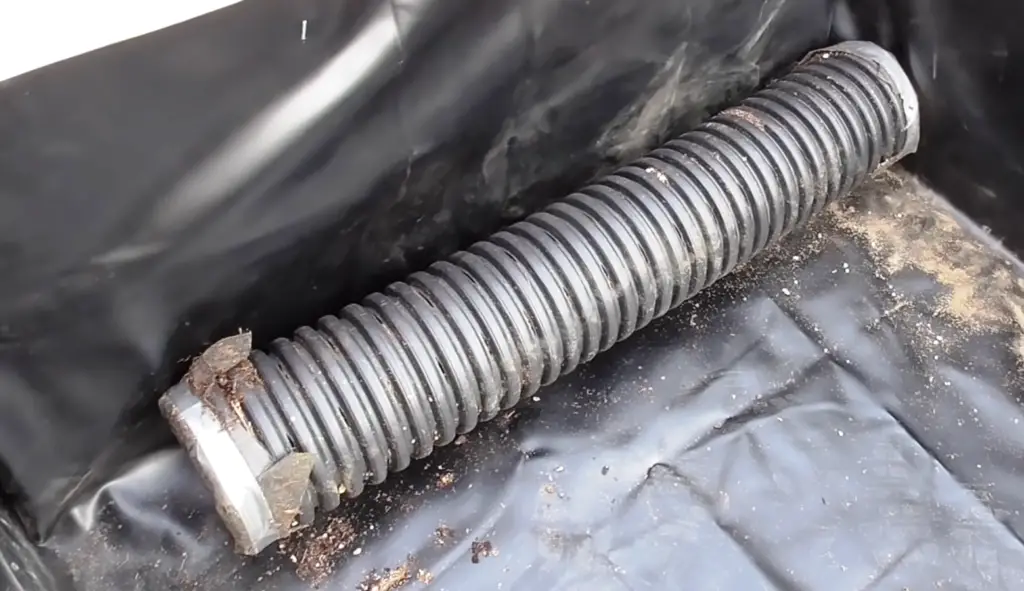
Before placing any of the drainage pipes into the bed frame, cover the edge with filter fabric or geotextile cloth and duct tape it to the end of the pipe. This will help to keep particulate matter from getting into the pipes.
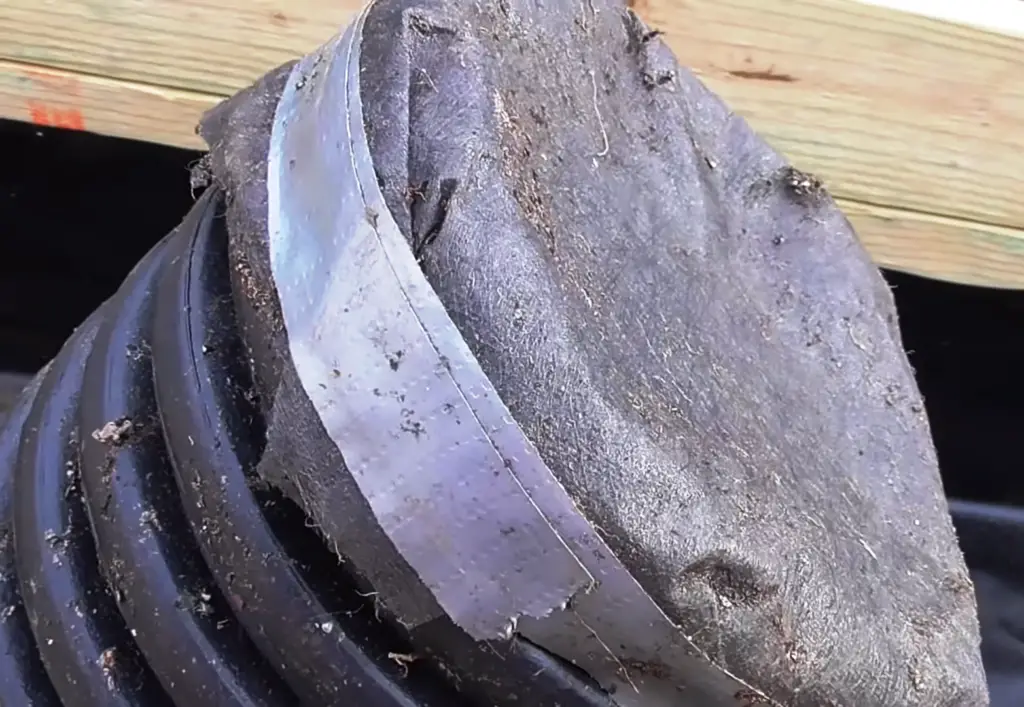
Place the drainage pipe in the raised bed.
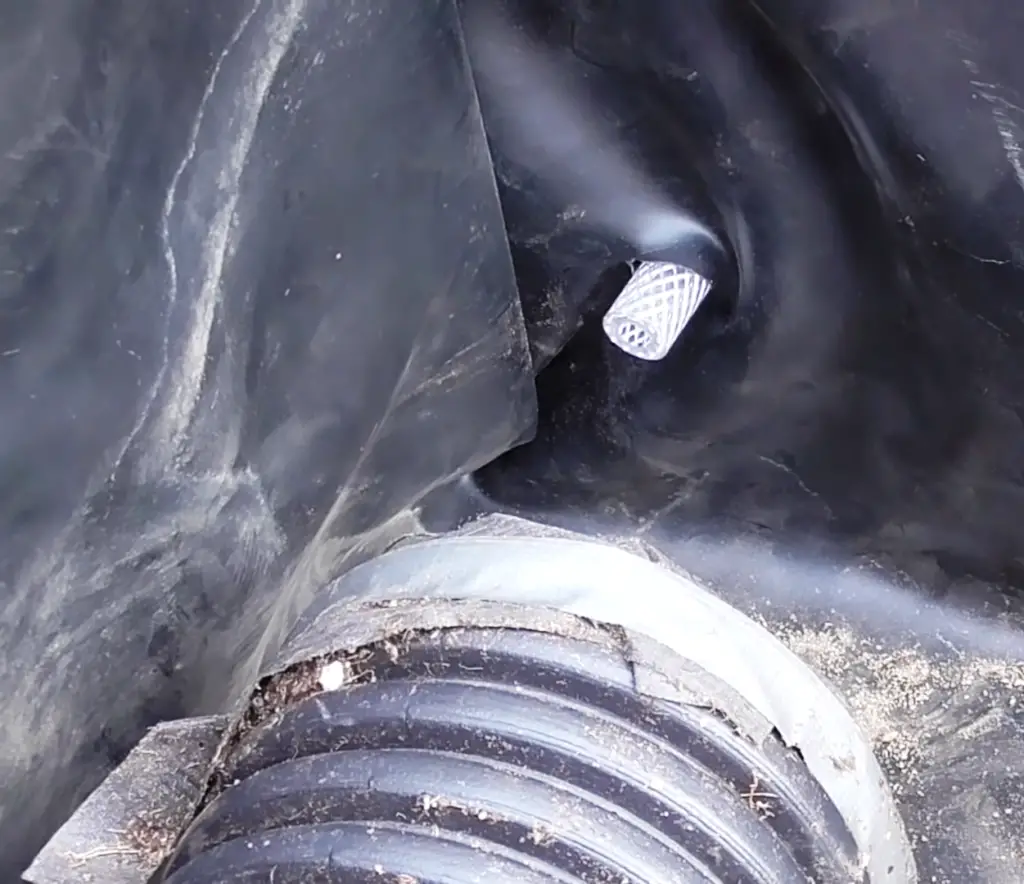
Push the drainage pipe against the drain tube so it penetrates the filter fabric. You may need to cut a small slit in the fabric to make this easier.
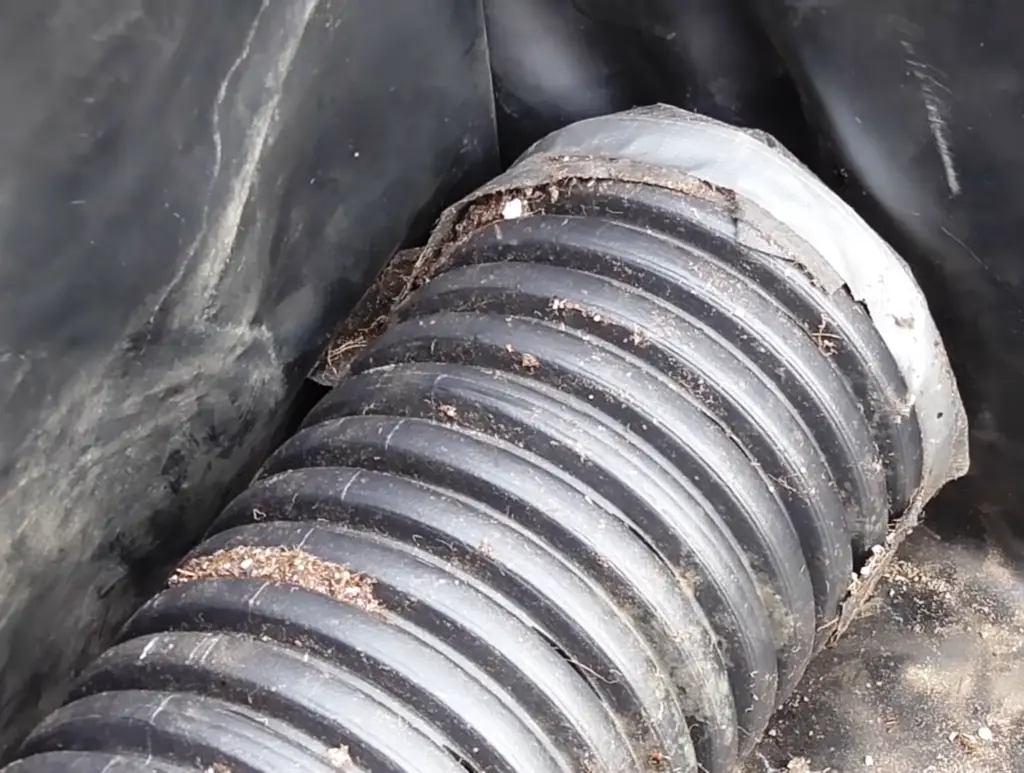
Cover both ends of the rest of the Drainage pipes and lay them next to each other along the length of the raised bed.
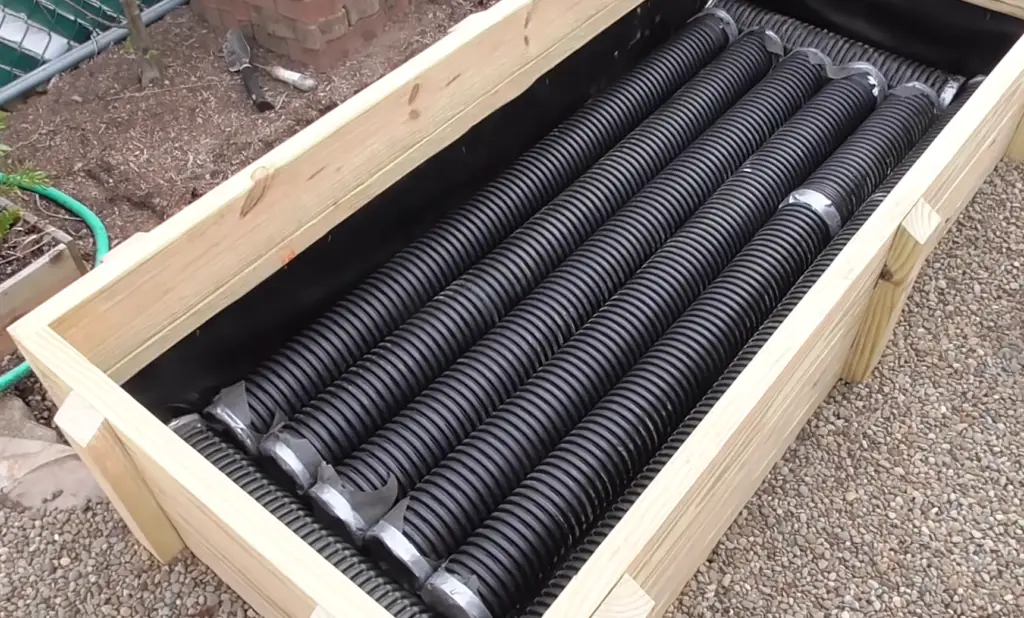
The perforations in the pipes will allow the water to hold in the pipes at the base of the bed.
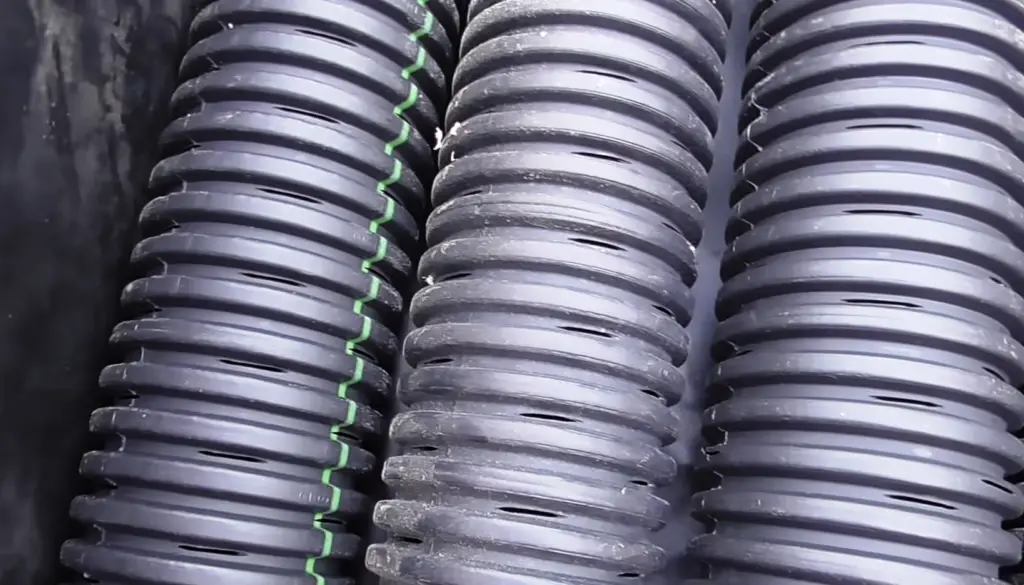
Contrary to what you might think, the soil does not penetrate the perforations to the degree you might think allowing the pipes to remain relatively debris free.
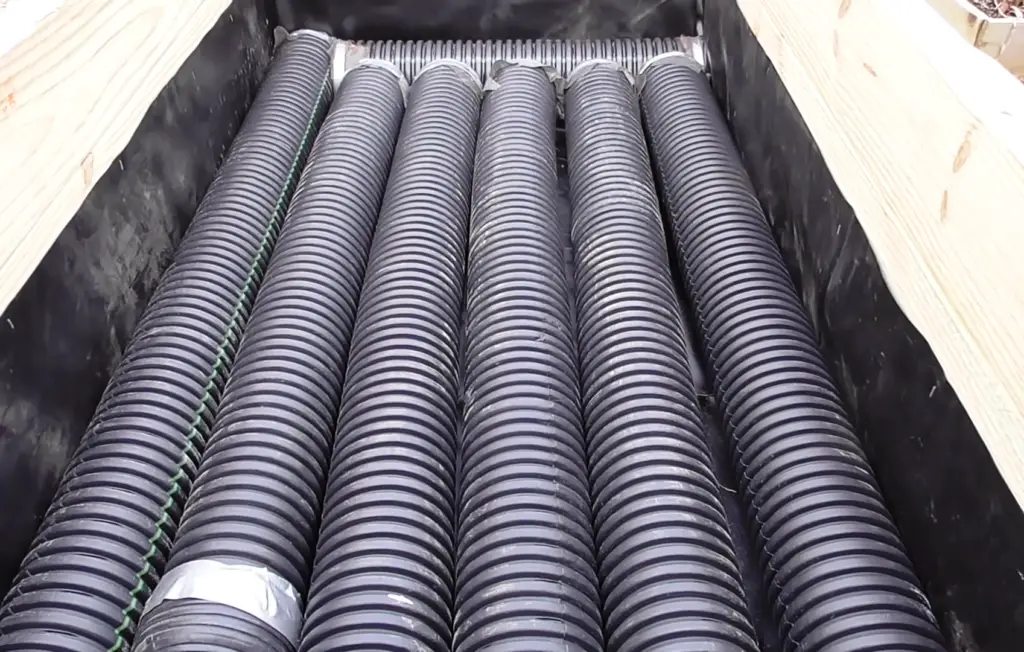
Once all of the pipes are in place you’re ready to start backfilling up to the tops of the pipes.
An additional step is to waterproof the top sides of the bed frame. You can use the same plastic material or any other material that is watertight.
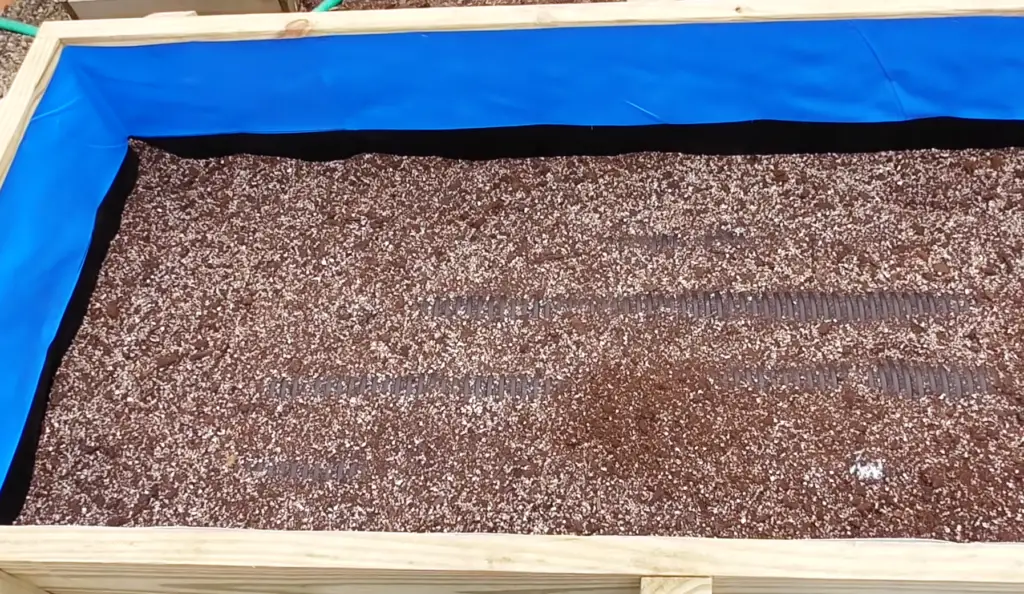
In this instance we’re using some scrap roof flashing.
The soil mix should be spread over the pipes and carefully worked into the gaps between the pipes and along the edges of the bed. However, some designs call for a layer of geotextile cloth over the drain tubes or any other fill material in the reservoir. Geotextile cloth allows the water to run through the material but holds back any particulate matter. That’s up to you.
Before you finish filling the raised bed with your soil mix you’ll need to build in a way to continuously fill the drainage pipes.
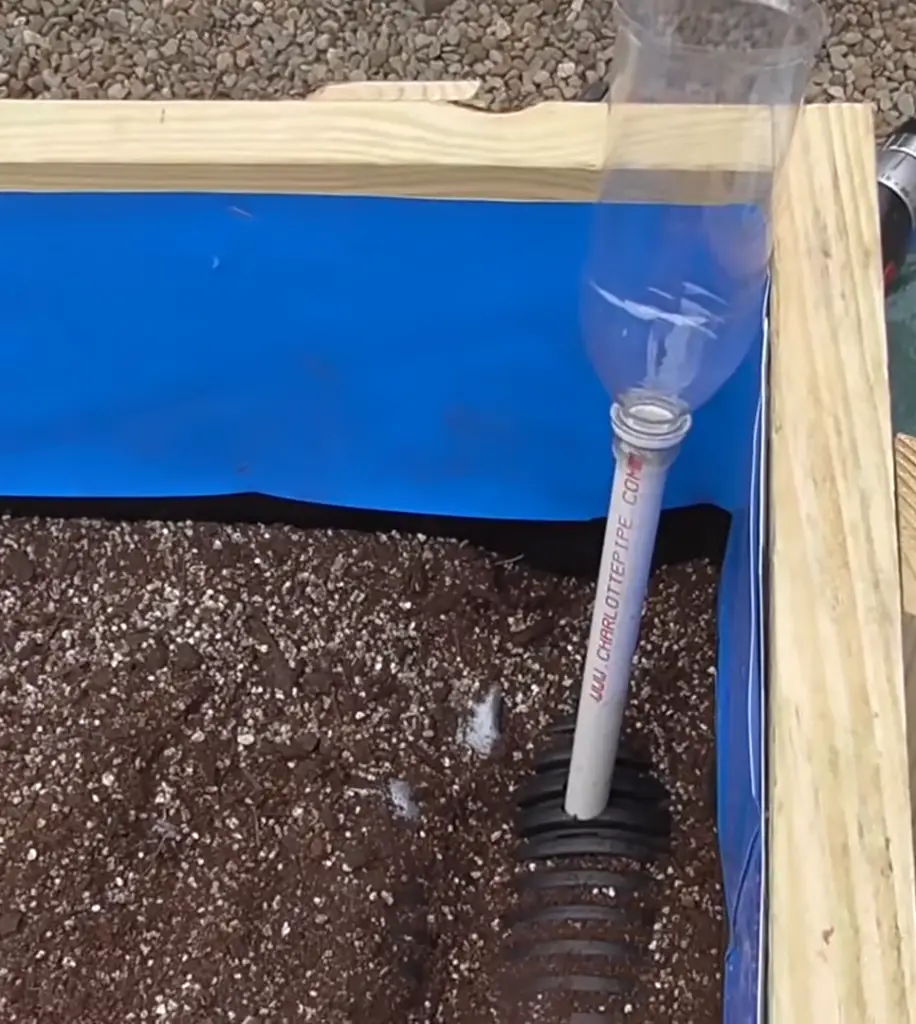
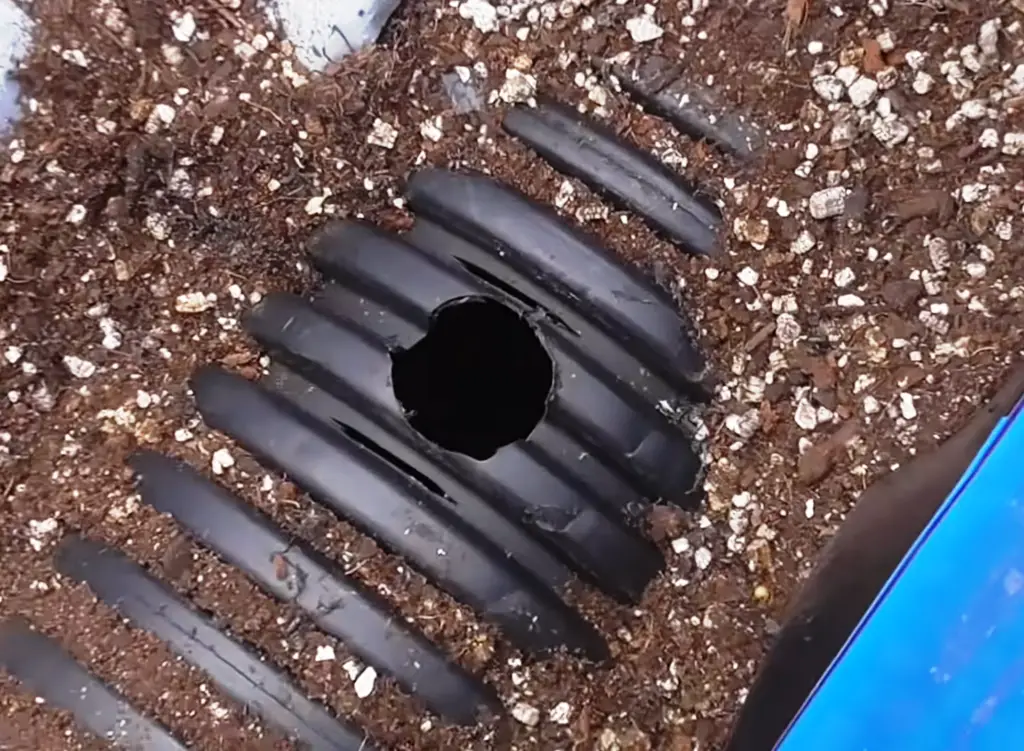
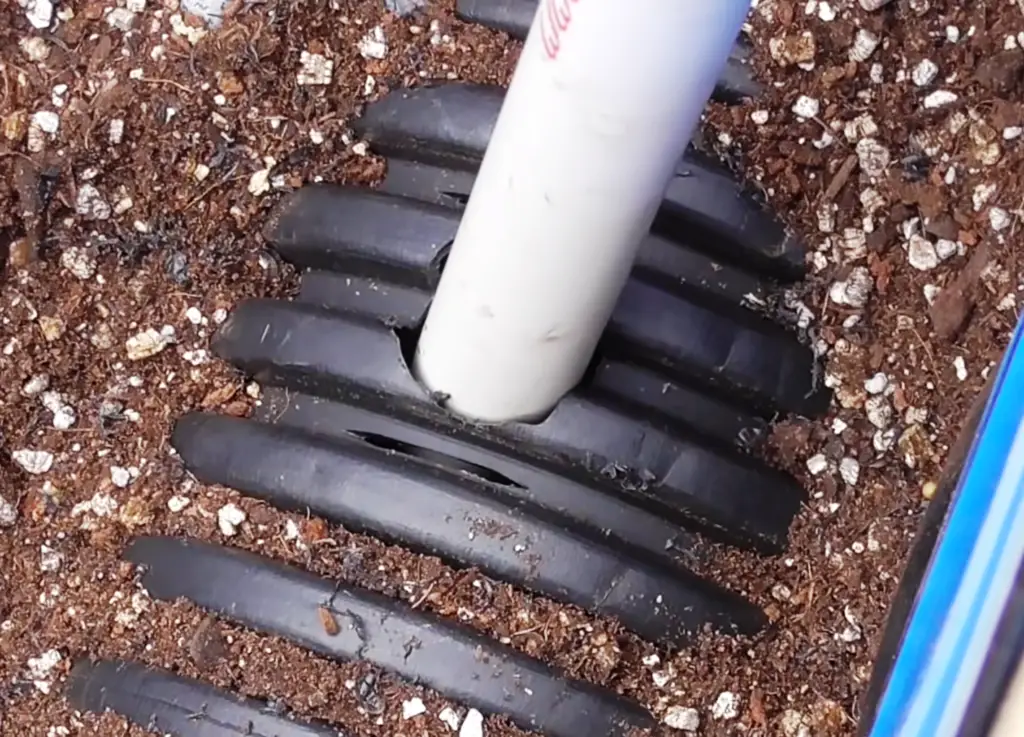
To install the fill tube start by cutting a hole the diameter of the tube pipe in the top of one of the pipes in the corner opposite your drain tube.
Cut the fill tube (1/2-inch PVC) on a slight angle so the water easily drains when filled.
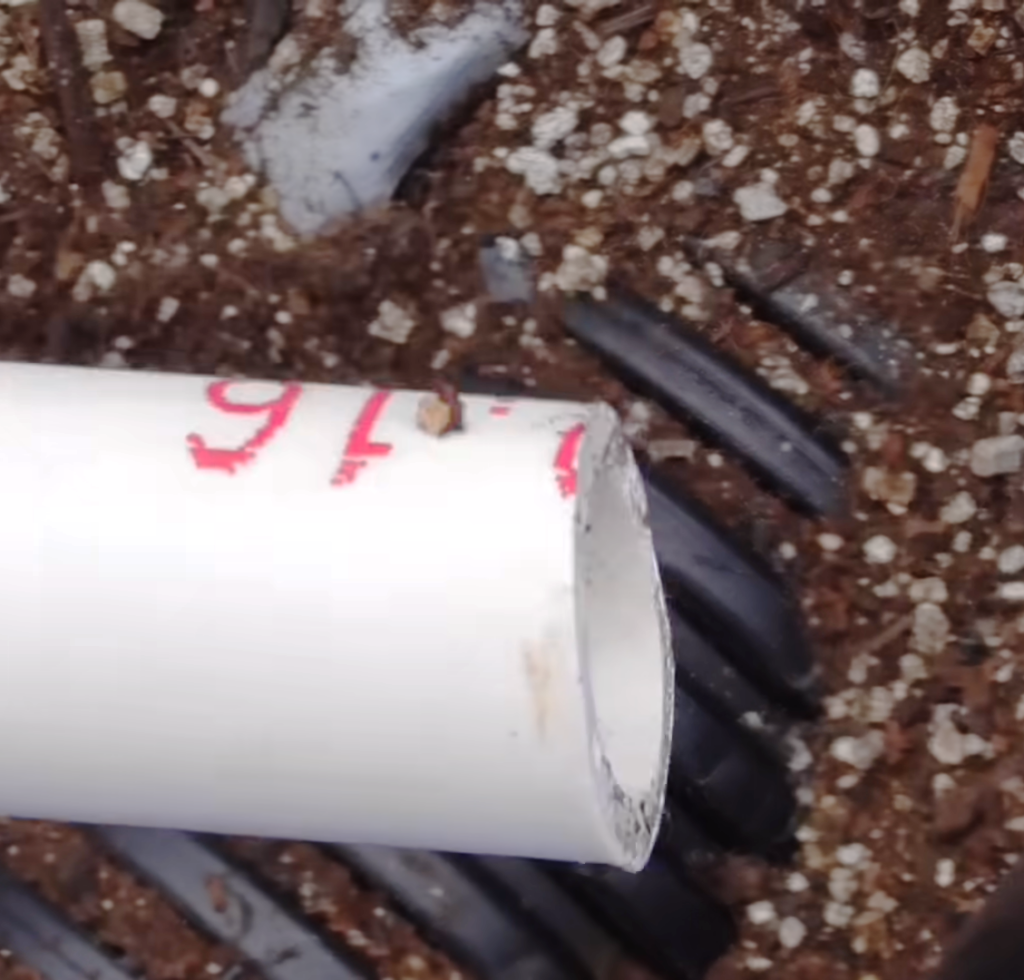
Insert the PVC into the hole and seal the hole with silicone sealer.
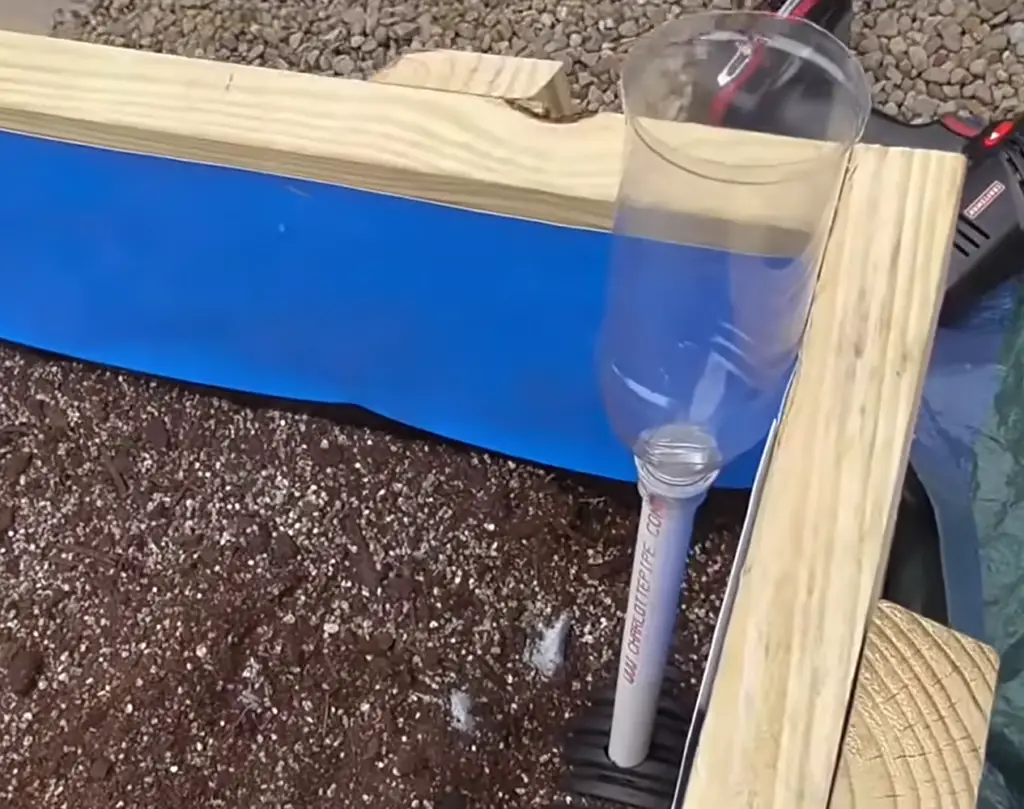
Attach a cut off water bottle to the top or your PVC to act as a funnel or you can insert and glue a standard funnel.
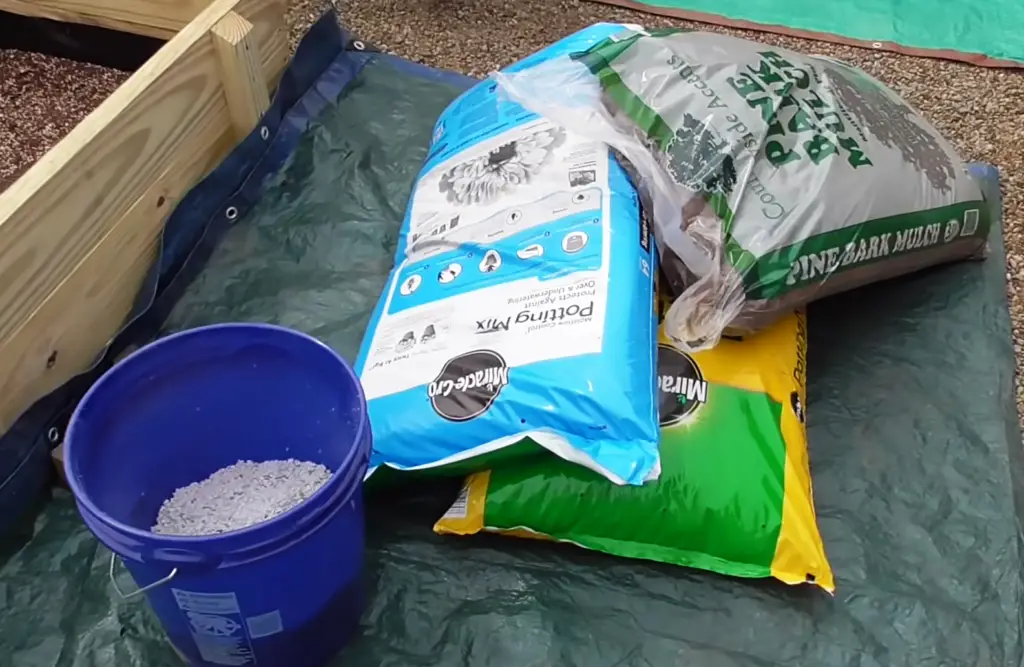
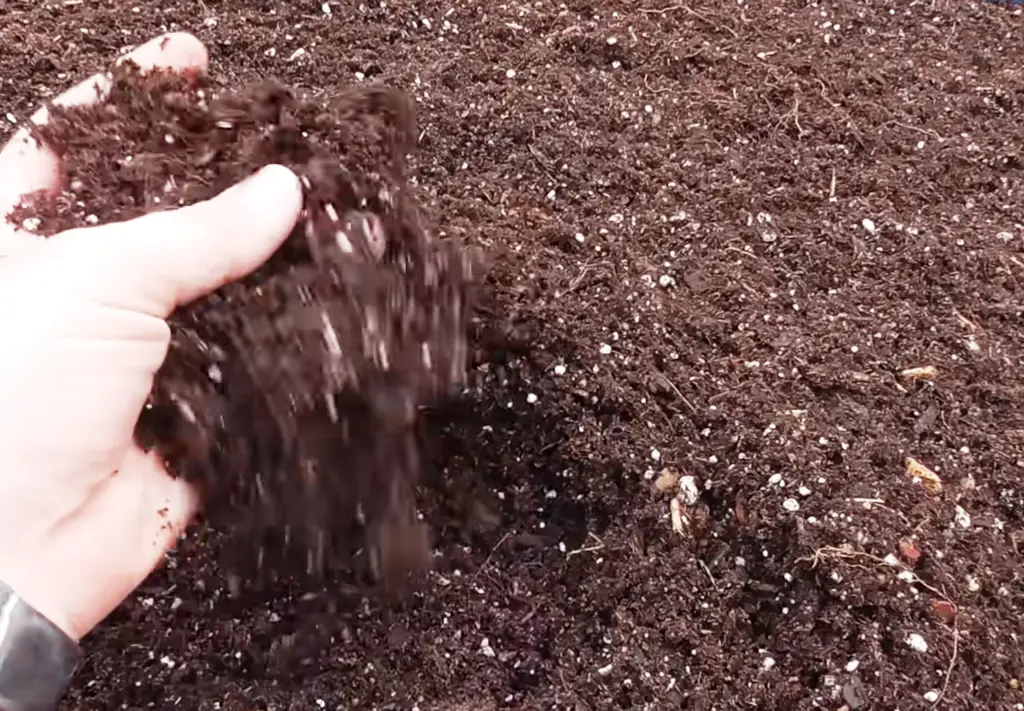
Assemble your soil mix. In this instance we’re using a combination of peat moss, a packaged potting mix, Perlite and wood chips.
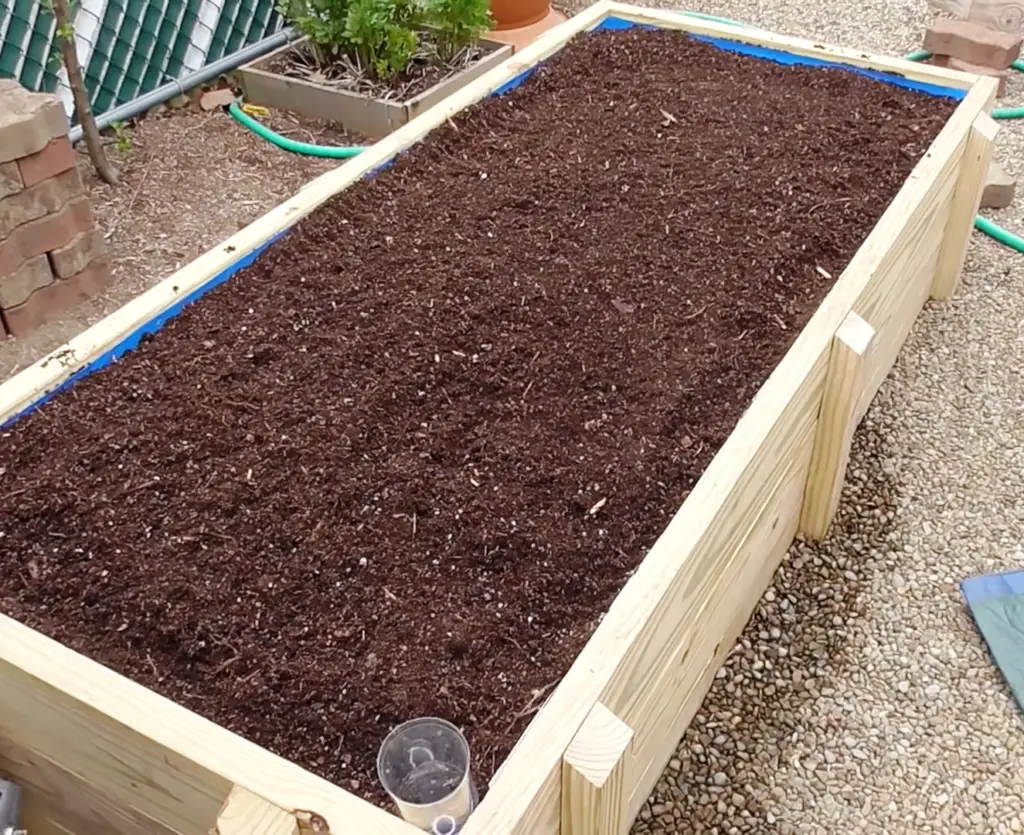
Combine and mix all of the soil ingredients and fill the bed to the within one-inch of the rim.
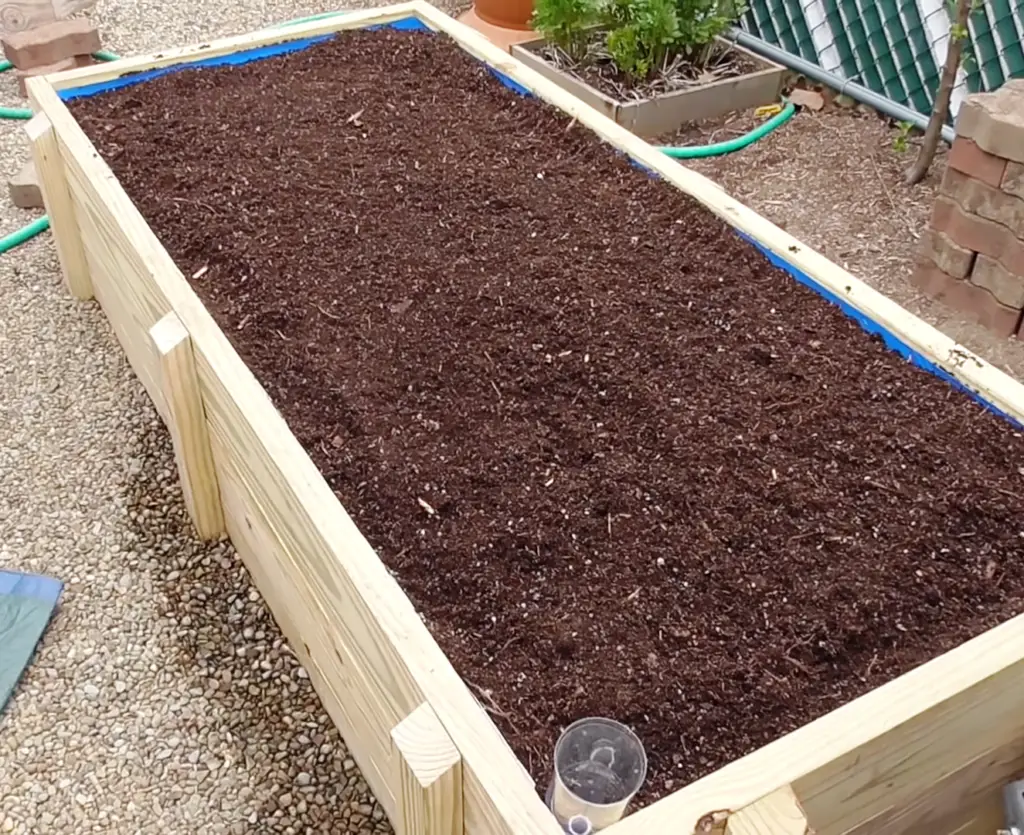
You want a soft, fluffy mix that will both retain water and wick it up from the bottom of the bed.
You are now ready to plant. Once you are done planting, fill the reservoir with water but don’t forget to water the top of the bed as well. The roots of smaller plants are still shallow and until they begin to grow deep into the bed they’ll need some top-watering.
In fact, there are some vegetables like onions that don’t do well in a wicking bed. Vegetables with shallow roots like onions struggle to reach the moisture that often resided deep in the bed. We’ll go over the best and worst plants for wicking beds in a chart towards the conclusion of this article.
Self-Watering Bed Variations
Now that you understand the concept of how a self-watering or wicking bed works you can apply it other variations. One possibility is as simple as using plastic storage tubs to make your wicking beds.
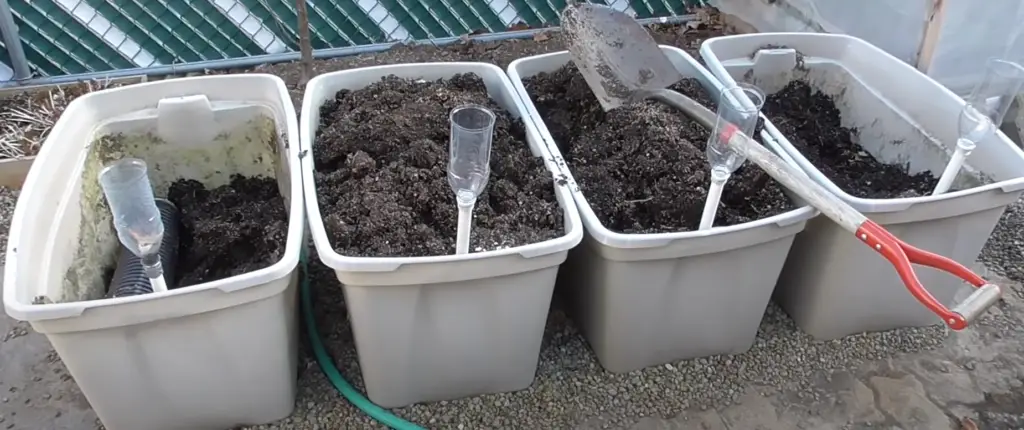
You’ll want to follow the principles of the design concept and instead of placing drainage pipes in the bottom you can simply use lava rock or scoria about 4-inches deep and topped with the geotextile cloth with the same type of soil mix on top. Here’s a cutaway view of a simple setup using rock instead of drainage pipes:
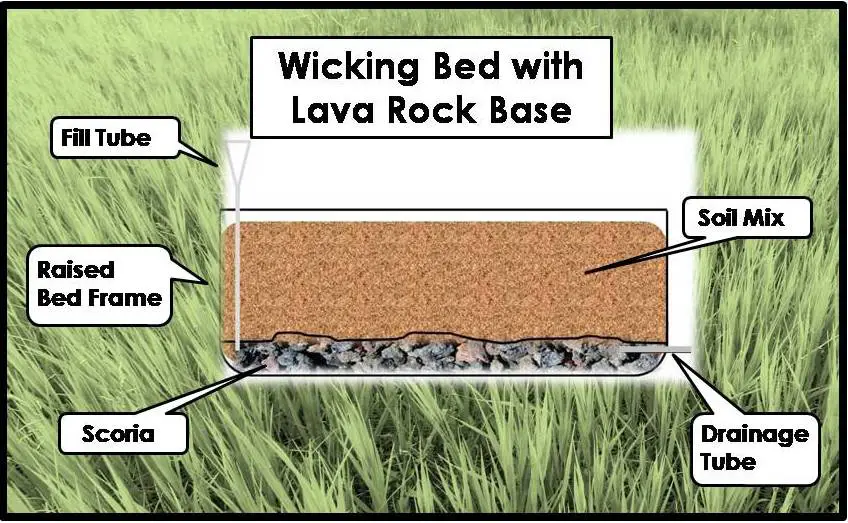
The fill funnel is simply pushed down into the lava rock and a drain tube is added to the opposite side about 3-inches above the base.
Another Variation
If you’re on a tight budget and can’t afford things like perforated drainage pipes you can just use regular rocks in the bottom of your wicking bed. They don’t have to be lava rocks either.
Rounded river rocks or other types of rocks can work as long as there are sufficient spaces between the stones to allow water to fill and hold in the spaces. It’s when the rocks or other material compact too tightly that a wicking bed fails.
Critical Success Factors for a Wicking Bed
Assuming you have properly set up your wicking bed, the first success factor is driven by what you plant. A wicking bed works best with vegetables and flowers that have medium to deep root systems.
Shallow roots plants can’t get down into the soil mix deep enough of take advantage of the steady water supply. Here are some plants to avoid and others to consider for your wicking bed(s).
Vegetables and Plants Not Recommended for a Wicking Bed
Plants with shallow roots struggle in a wicking bed. These plants typically depend on “top-watering” either from frequent rainfall or regular watering with a garden hose or sprinkler. Save these for your traditional garden beds or areas where you water plants in a traditional way with a hose.
- Corn
- Broccoli
- Spinach
- Flowering annuals (the majority of them)
- Leafy greens: lettuce, kale, chard, spinach and baby spinach, arugula, watercress, mustard greens, collards, etc.
- Herbs: basil, parsley, mint, oregano, cilantro, chives, sage, thyme, tarragon, etc.
- Spring onions (green onions)
- Leeks
- Onions
- Garlic
- Cabbage, Chinese cabbage, Bok Choy, Brussels sprouts, cauliflower
- Scarlet globe radishes
- Strawberries (fruits with shallow root system)
- Micro-greens
Vegetables and Plants Recommended for a Wicking Bed
Some plants have a root system defined as “medium rooted.” This root length is sufficient for most wicking beds and often the types of vegetables (like cucumbers and squash) that require a steady source of water.
- Cucumbers
- Turnips
- Beans
- Summer squash
- Carrots
- Peas
- Flowering perennials (a good portion of them)
Long rooted vegetables are also ideal for a wicking bed including:
Beware the Perennial Spreaders
Some plants have roots that are too long and widespread. This is true with some perennial herbs like mint that are notorious for spreading across a garden over time.
Another vegetable plant with spreading roots is asparagus. Any plant that spreads will do just fine in a wicking bed, but their success will be at the expense of anything else growing in the bed as they overwhelm the other plants. This includes chives, horseradish, chamomile and any other perennial herb, plant or vegetable that is known to spread with time. Plant them somewhere else of create a dedicated wicking bed just for those plants.
Wicking Bed Fails
- Newly planted crops need top-watering for the first week or so until the roots get established. Don’t plant it and forget it. Keep an eye on your new plants and water them with a hose until you’re confident their roots are deep enough to reach the available moisture.
- A clogged drainage tube can cause the entire bed to fill with water. This will drown the plants and kill the roots. Keep an eye on your drainage tube and your bed to make sure there is sufficient drainage, especially after a period of heavy rainfall.
- Failing to fill the bottom reservoir with water on a regular basis can cause your plants to wilt and die. On average you should refill the base reservoir once a week but that can vary depending on temperatures and rainfall. Keep an eye on our plants and they will tell you when water is problem.
- A leak in the reservoir will cause a wicking bed to fail. There are two solutions. One is to remove the soil mix and the drainage medium and replace or repair the waterproofing. That’s a lot of work. The other alternative is to simply treat it like a traditional raised bed and water it the way you would water a regular garden.
- An off odor or lingering smell could indicate that the water in the reservoir has become stagnant. This is the result of anaerobic bacteria building up. Usually, a heavy rainfall will flush a bed. If you notice a smell, top-water the bed heavily and overfill the reservoir at the fill tube to flush things out.
- Failing to feed a wicking bed can eventually be a problem. Because of the high moisture level and drainage that occurs, many nutrients will not only be consumed by the plants but washed out. A fertilizer like Miracle grow or worm castings are a great way to keep your wicking bed nutrient rich.
- Failing to mulch can lead to rapid evaporation. A top dressing of any mulch can keep direct rays of the sun from causing excessive evaporation. A wicking bed is always moist and hot, sunny days can accelerate evaporation rates.
- Dead or dying plants could be a sign of root rot. Check the drainage tube and avoid top watering if you have been tempted to add excess water to the bed. If need be, pull the affected plants and consider an antifungal garden treatment.
Do You Need a Wicking Bed?
A wicking bed can be both expensive and labor intensive to assemble. The good news is that once it’s built it should last for some time. A lot depends on where you live and your lifestyle. If we go back to where this story started, a wicking bed was first designed to survive the desert climate of the Australian Outback.
If you live in an arid area like a desert or a part of the country experiencing droughts or inconsistent rainfall, you may want to seriously consider wicking beds as a solution. They also reduce the amount of daily watering many gardens require. Ultimately it’s up to you.
For some of us who are avid gardeners it’s an interesting experiment. With time we may find it’s actually not so hard to construct after all. We’ve also explored some lower cost alternatives using existing containers and other types of rock fills for the reservoir that could save some money for the initial construction.
In the long run it could also save on your water bill due to its efficient use and conservation of water. If you’re intrigued, try it. In time you may find it becomes the only way you garden.
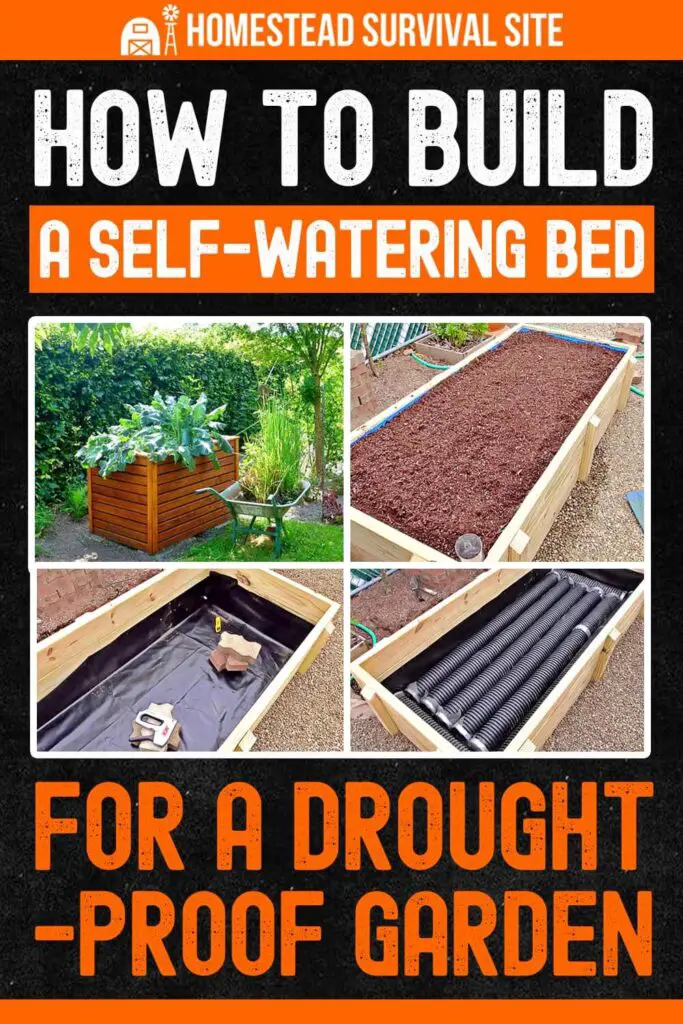
Like this post? Don't Forget to Pin It On Pinterest!
You May Also Like:










Unfortunately my garden is 150 x 50 so there’s no way I could use this system. However, if the day comes and I get raised beds I will keep this in mind. Good idea 💡 👏