Estimated reading time: 19 minutes

Cheesemaking is easy to do once you understand the ingredients, some of which might surprise you. The primary active ingredient that’s usually used to make cheese is “rennet.” It’s an enzyme found in the stomach of young cows, sheep, and goats.
The rennet helps them break down their mother’s milk and it has a curious effect on milk when heated. It causes the milk solids to separate and curdle or quickly ferment into a solid form known as “curds.”
The watery fluid that remains is called “whey.” When you strain the curds from the whey, you have a basic cheese.
Want to save this post for later? Click Here to Pin It On Pinterest!
An Old Wives Tale
The folklore behind the discovery of cheese has to do with a fairly common use of the stomachs of animals in ancient times. Quite often, they were used as storage containers for various liquids from water to primitive wines to milk.
As the story goes, someone put some milk into the stomach of a recently slaughtered lamb and was surprised to see that the milk had transformed into a solid mass.
Desperate times call for desperate measures and they tasted it and decided they liked it. That’s not exactly something most of us would do, but what they had actually discovered was the first mozzarella cheese. We'll cover how to make that in a little bit.
Fortunately, we’re going to make it without a sheep’s stomach, but you’ll still need the rennet or, in some of the other recipes, citric acid.
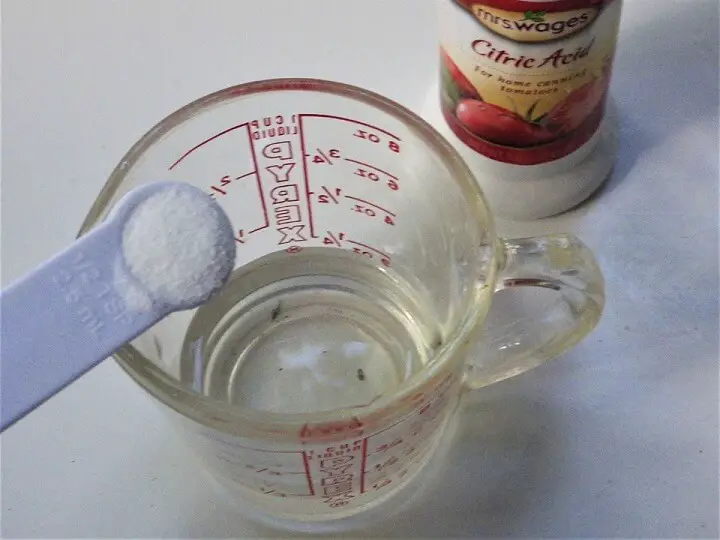
Citric Acid
Some cheese recipes call for the use of citric acid. For some reason, eating something derived from lemon juice sounds more appetizing than the digestive juices of an animal.
The common form of citric acid used for cheese making comes as a liquid, tablet, or powdered form. Citric acid raises the acidity of the milk and creates a curdling effect.
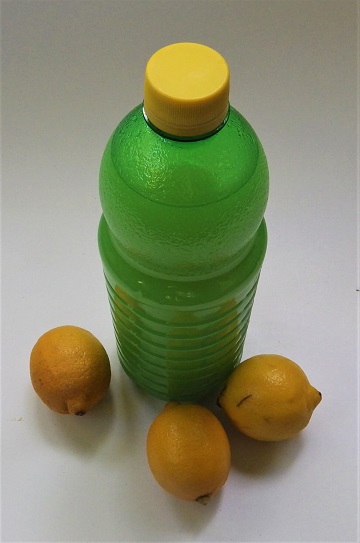
Citric acid for cheese making can be easily found on the Internet.

We’re going to try substituting a powdered citric acid that’s commonly used in tomato canning and shows up in most grocery stores. (It worked.)
There are also plant-based rennet derivatives made from thistle, safflower, caper leaves, and figs, and that’s what we’re going to use.

This particular brand of rennet is sold in the cheese section of Whole Foods. They usually have their cheese expert on duty and he or she can get it for you. You can also find it on the Internet.
Salt is also a common ingredient in all cheeses for both its flavor and preservative qualities.
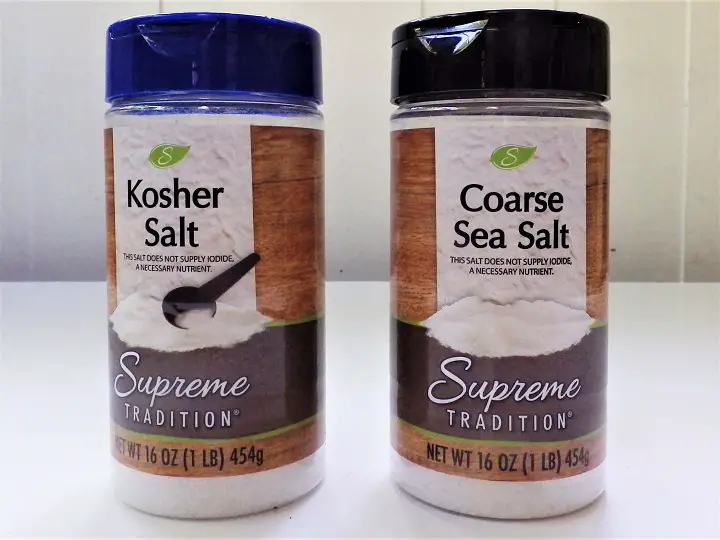
Kosher salt or sea salt are the salts always used.
The Milk Conundrum
The best milk for cheese making is raw, unpasteurized milk. There’s a remote possibility that a local dairy farm will sell it to you, but it’s illegal to sell or buy in most states. It is quite commonly used in cheese made internationally and that may be what makes them so popular. The benefit of raw milk is flavor intensity and a creamier texture.
The good news is that pasteurized milk works fine but avoid ultra-pasteurized milk. It just doesn’t curdle that well. It’s okay if it says homogenized, and you can use either whole milk or low-fat milk, although low-fat milk will result in a drier, less creamy cheese.
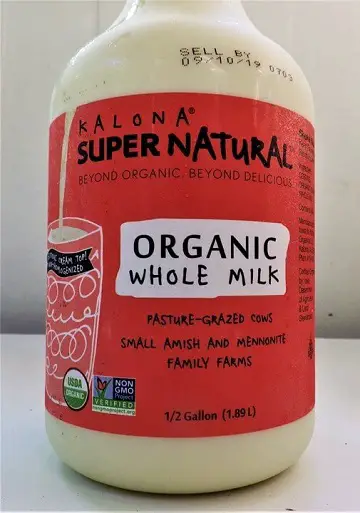
The best milk in a grocery store is organic whole milk. This particular brand was also purchased at Whole Foods. Rennet you can order on the Internet if you want, but milk is another story. It’s best to buy it from the refrigerated section at a grocery store.
The Basic Cheese Making Process in a Nutshell
- Warming the milk
- Adding the rennet and/or citric acid to the milk
- Stirring it and continuing to heat it
- Letting it rest
- Cutting into curds
- Straining the curds through cheesecloth to remove any liquid (whey)
- Salting it and pressing or squeezing it
- You got cheese
It sounds easy, and it is, but one thing you’ll notice with some cheese recipes is that there are numerous, mini steps that get a little fussy. Once you get the hang of it, you’ll think nothing of it, but you’ll probably be referring to the recipe directions quite a bit your first time.
There are also many other cheese variations out there that include the addition of various cultures, benign bacteria, spores, and processes like pressing, wrapping or bandaging, waxing, and aging. We’re going to keep it simple for now with some basic recipes that you can make in an afternoon in your kitchen rather than watching it age for years in a cave.
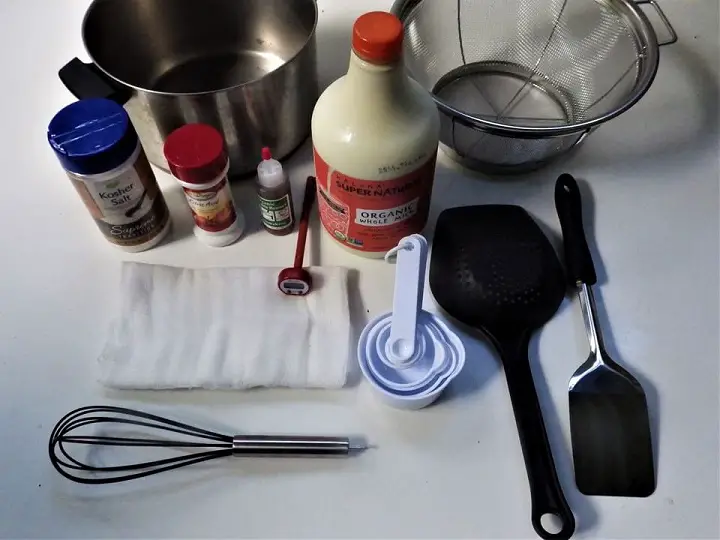
Basic Cheese Making Equipment
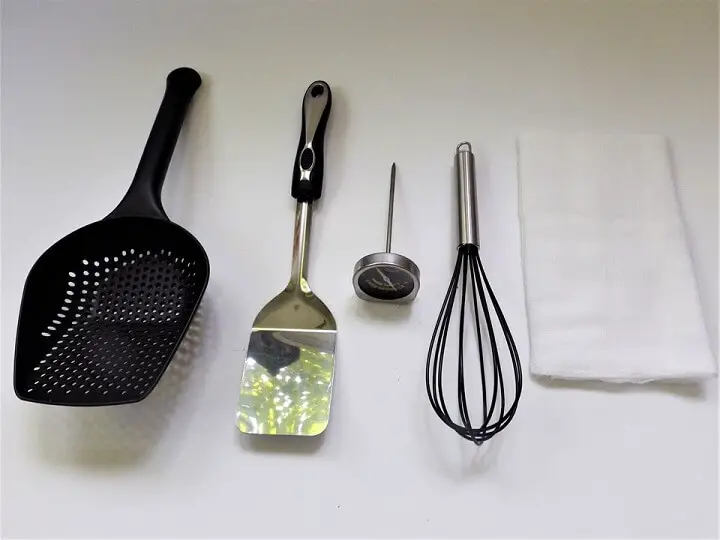
- An instant-read food thermometer (Most temperatures we’ll be reading range from 90° F. to 195° F.)
- Large stainless-steel pot (not aluminum)
- Spatula or something to cut the solidified milk into curds
- Cheesecloth or butter muslin (Butter muslin is a cheesecloth with a finer weave for soft cheeses. You could still use cheesecloth in its place, just use extra folds.)
- A large slotted spoon
- A colander
- A microwave oven (short bursts help further remove the liquids or whey from the curd after it’s strained through the cheesecloth).
- Microwave safe bowl
You don’t have to microwave if you don’t want, it just gives you a little firmer cheese with some recipes. The alternative is to immerse the cheese in a bowl of very hot water for 30 seconds to a minute to keep it soft and pliable for pressing or squeezing, and for a firmer texture.
A Note on Sanitation
Cheese is fussy stuff. The process essentially creates an ideal environment for fermentation. That’s what makes the milk into cheese. It’s also an ideal environment for bacterial growth. Uninvited bacteria can cause the cheese to have an off-flavor or compromise food safety.
Make sure your working area is thoroughly clean and don’t make other foods while you’re making cheese. Any bacteria that find their way into your curds will make themselves right at home. Curiously, some cheese recipes call for the intentional addition of certain food-safe bacteria.
Cross-contamination was probably how this was originally discovered. We’re going to skip the whole bacteria-adding-thing for these recipes.
And a Quick Word on Water
Don’t use well water or chlorinated water. The minerals and chemicals in both will compromise the process. Use either bottled spring water or distilled water.
Many recipes call for mozzarella cheese from pizza to lasagna to a Caprese salad. It’s fun to make and you can even get the kids involved for the final steps.
Mozzarella Cheese Recipe
Ingredients:
- 1 gallon of milk
- 1 ½ teaspoons of citric acid
- ¼ tablet of rennet or ¼ teaspoon of liquid rennet
- 1 teaspoon of Kosher or Sea salt
- Springwater or distilled water as needed
Directions:
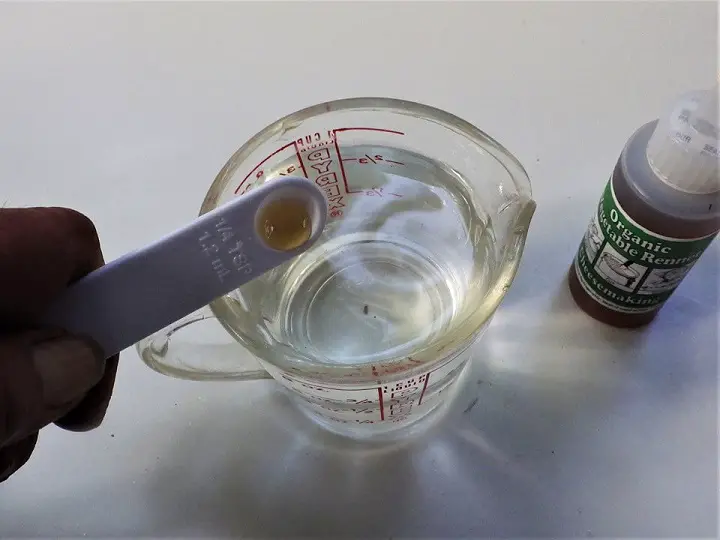
- In a ¼ cup of cool water, either dissolve the ¼ rennet tablet or add the ¼ teaspoon of liquid rennet. Set it aside.
- Mix water with 1 ½ teaspoons of citric acid powder.
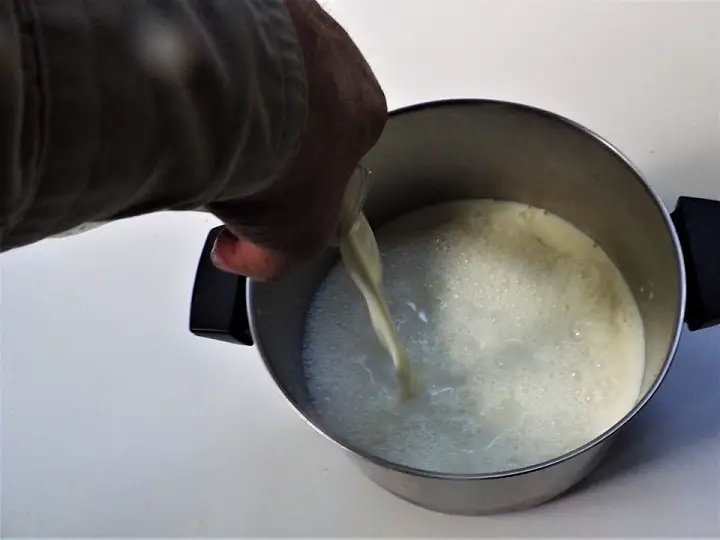
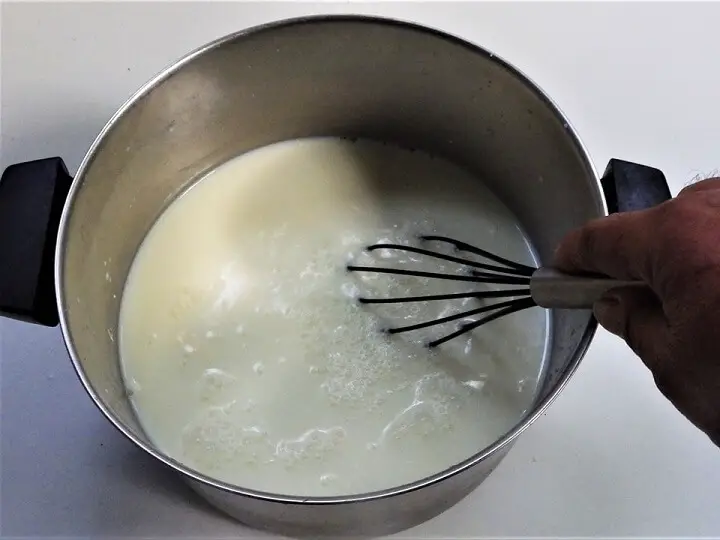
- Put a 2-gallon pot (not aluminum) on the stove. Add the gallon of milk to the pot and then pour in the citric acid solution. Stir with a whisk to blend the citric acid into the milk.
- Gently heat the milk on low heat to 90° F. As you approach the 90° mark you’ll begin to see your milk beginning to curdle.
- If the milk isn’t curdling, continue heating up to 95° or as high as 100°.

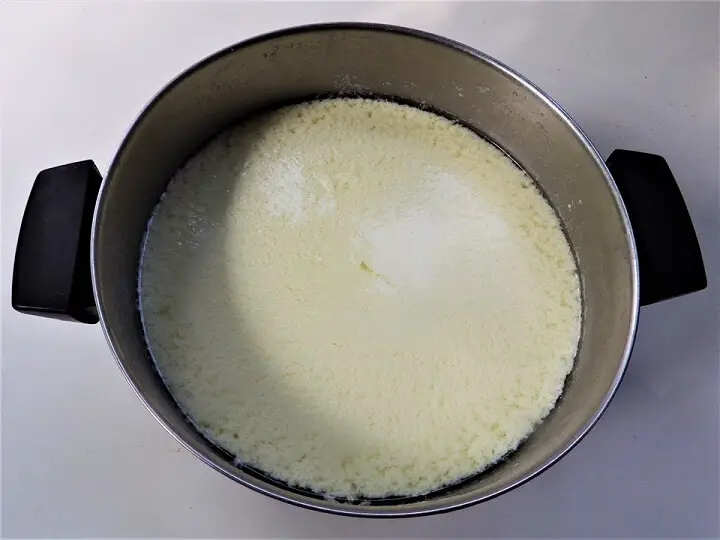
- Once your milk has started to curdle, remove the pot from the heat and add the rennet to the pot. Stir from top to bottom for about 30 seconds and then cover the pot and let it sit for 5 minutes.
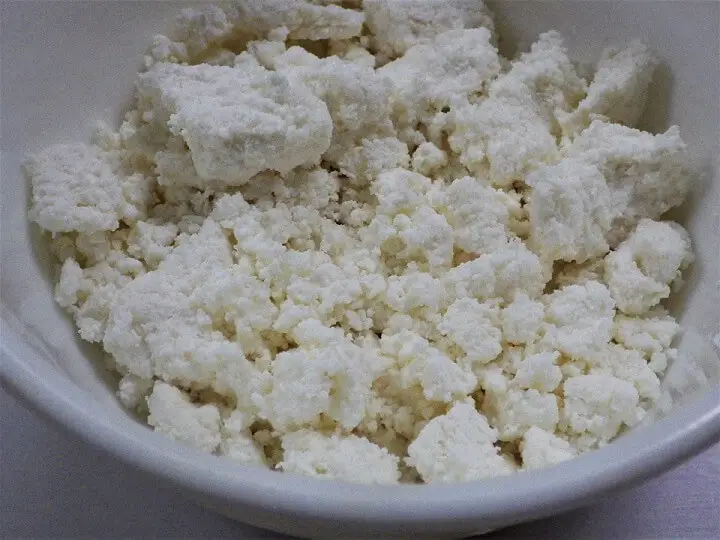
- Check the pot. It should have the appearance of custard and a clear separation between the solid curds and clear water (whey). If the curd is too soft or the whey appears milky, let it sit another 30 minutes or more.
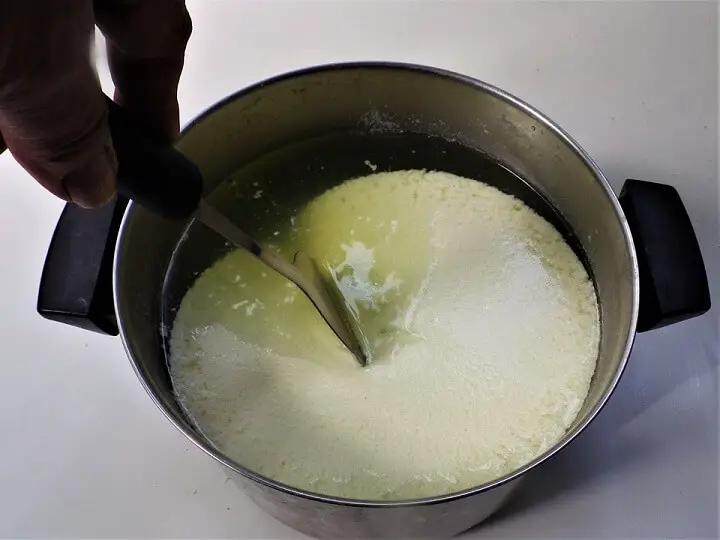
- Cut the curd using your ladle.
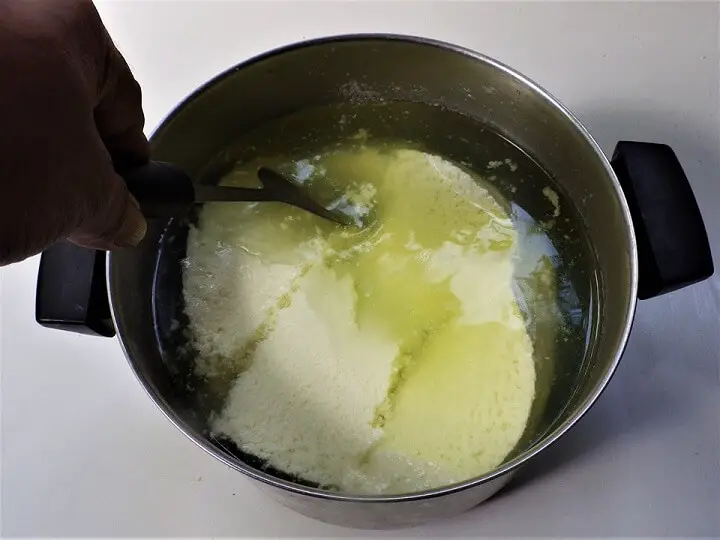
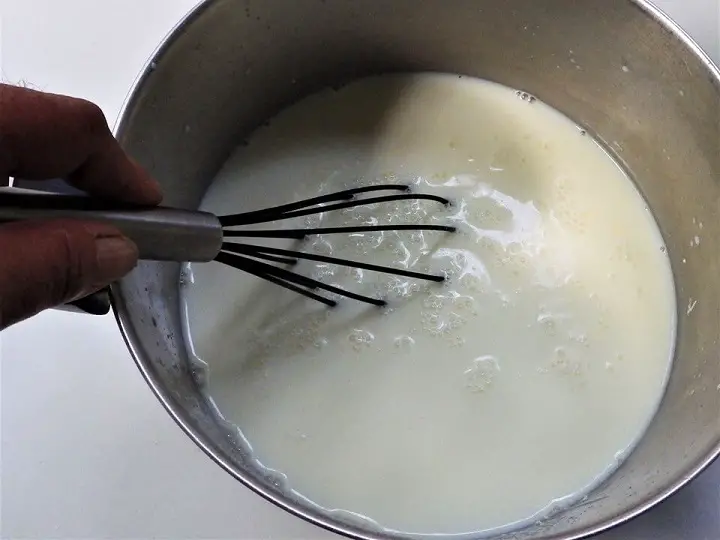
- Put the pot back on the stove and heat to 105 while gently stirring constantly.
- Take the pot off the stove and continue stirring for 2 to 5 minutes. The longer you stir, the firmer the cheese.
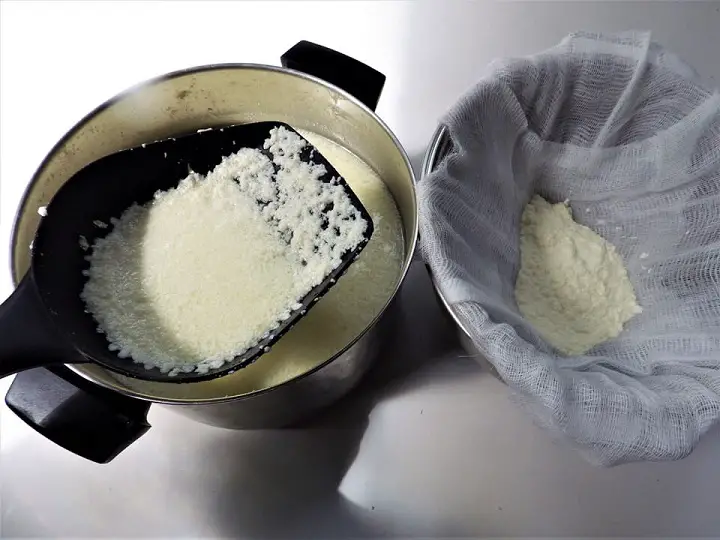
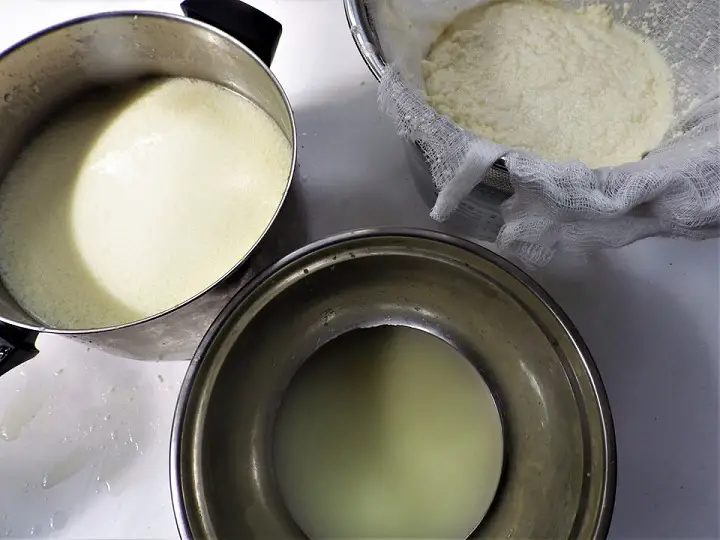
- Scoop the curds out of the pot into a colander lined with cheesecloth with a slotted spoon. If the curd is very soft, let it sit another minute.
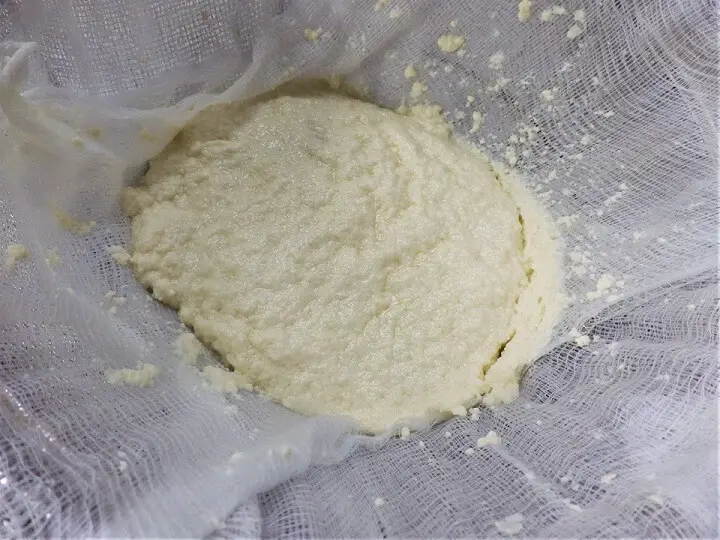
- Once the curd is set, gently press the curd in the colander with your hand or a spoon to force out more of the whey.
- Pour the curds into a bowl and add 1 teaspoon of salt. You’ll probably see some watery whey in the bowl so carefully pour this off as it appears.
- Start working the curds in the bowl into cheese with your hands or a spoon. (The curds will still be somewhat hot).
- Place the cheese into a microwave-safe bowl and microwave for 35 seconds.
- Knead after microwaving and microwave again for 35 seconds. (If you don’t want to use a microwave, you can drop the cheese into a large bowl filled with very hot water for a minute to achieve this heating process.) Regardless, continue to pour off any watery whey as you go.
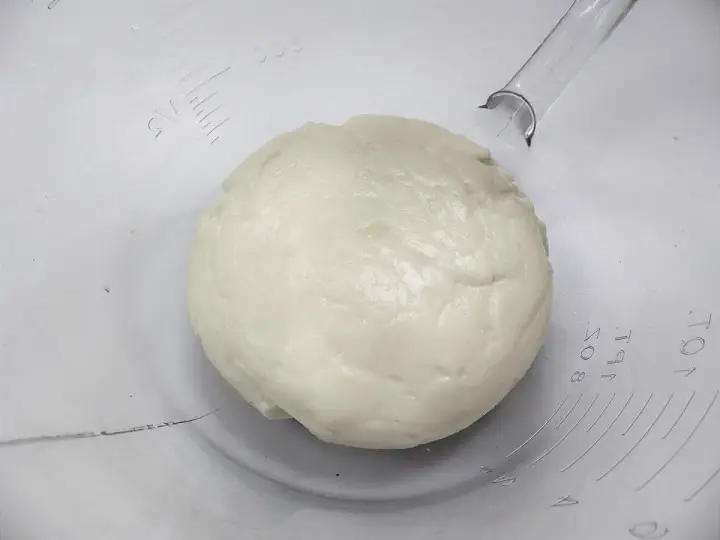
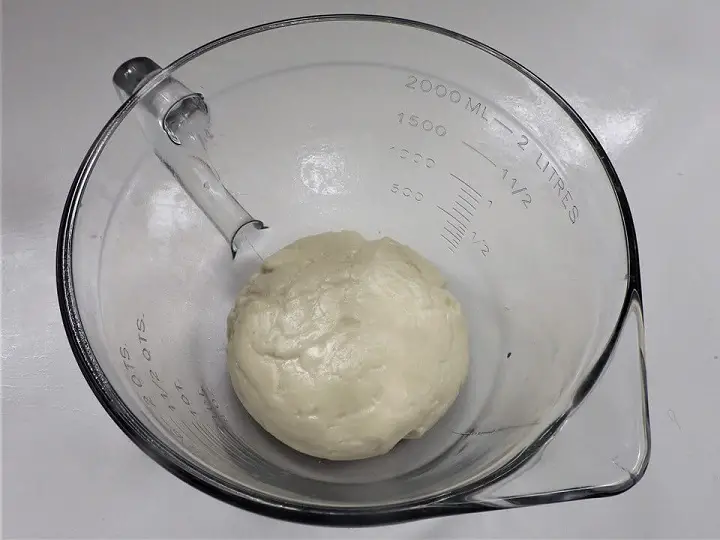
- Pull the cheese out of the bowl and begin to knead on a sanitized surface the same way you would knead bread. Have the kids wash their hands and jump in. If it starts to cool, return it to the microwave or drop it into a bowl of hot water again. Taste a bit and dust with more salt if you like while you continue to knead.
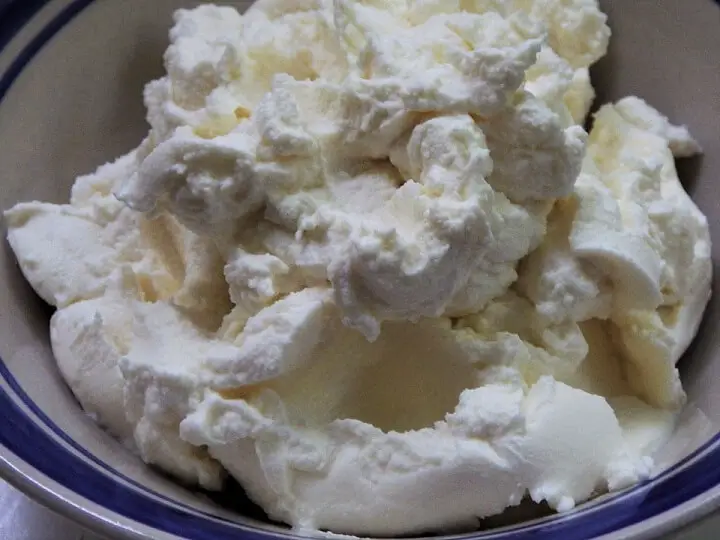
- While kneading, stop and stretch the cheese into a rope-like taffy. Repeat this process of kneading and stretching. This is what will define the texture of mozzarella.
- Make the rope of mozzarella into a loop and twist and knead again.
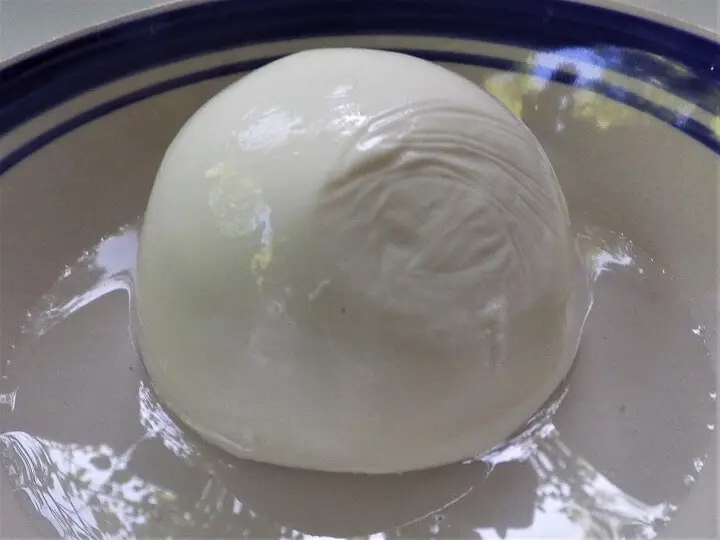
- When done, grab the mozzarella and squeeze the cheese up through your thumb and forefinger to form a ball. You’re done.
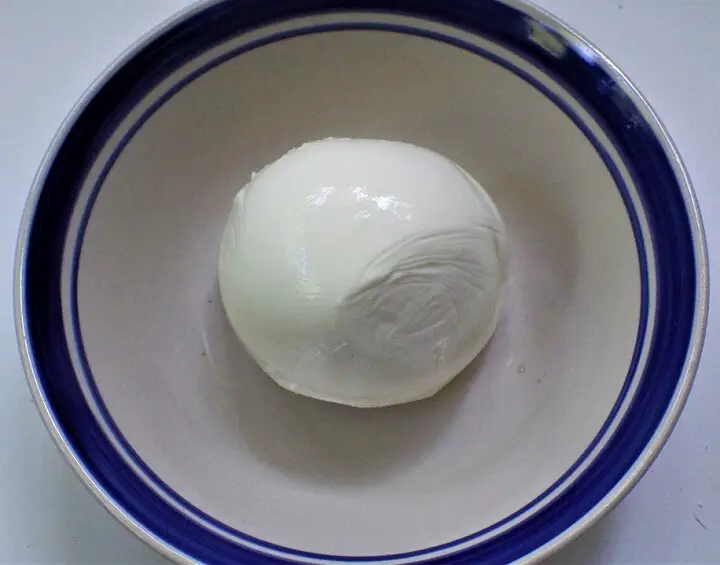
Mozzarella is usually stored in water in a covered, plastic bowl or tightly wrapped in plastic wrap.
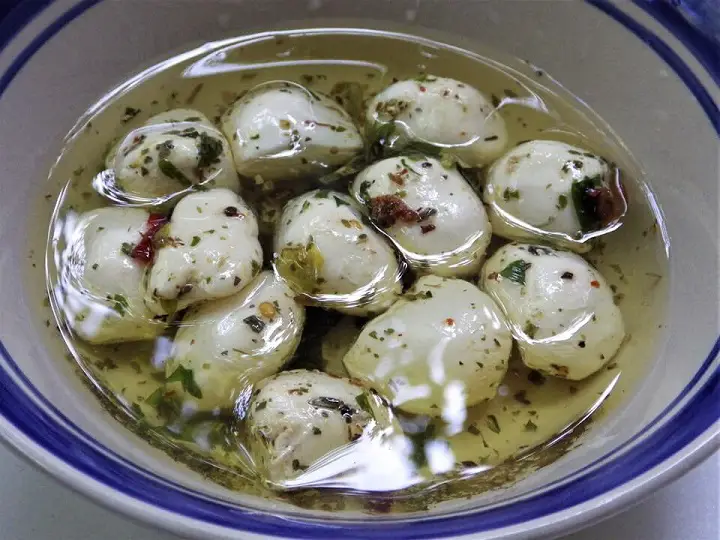
You can also make smaller mozzarella balls and store in olive oil with a blend of your favorite herbs.

Or you can keep it plain and get started on your world’s best pizza.
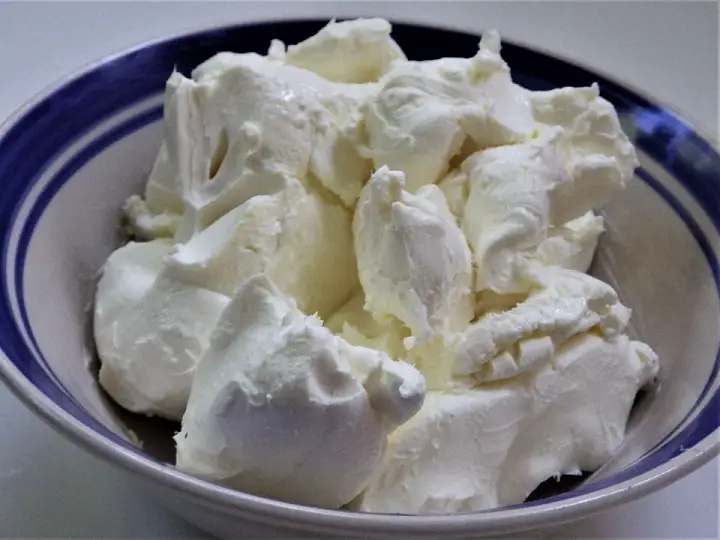
Ricotta Cheese
Ricotta Cheese is a classic white and creamy cheese that is often used in Italian recipes like Lasagna, Stuffed Manicotti, Ravioli and others. It’s one of the easiest cheeses to make and will keep for weeks in the refrigerator stored in a covered bowl.
Ricotta Cheese Recipe
Ingredients:
- 1 gallon of milk
- 1 teaspoon of powdered citric acid dissolved in ¼ cup of cool water or ¼ teaspoon of liquid citric acid concentrate in ¼ cup of cool water
- 1 teaspoon of Kosher or Sea salt
- Water as needed
Directions:
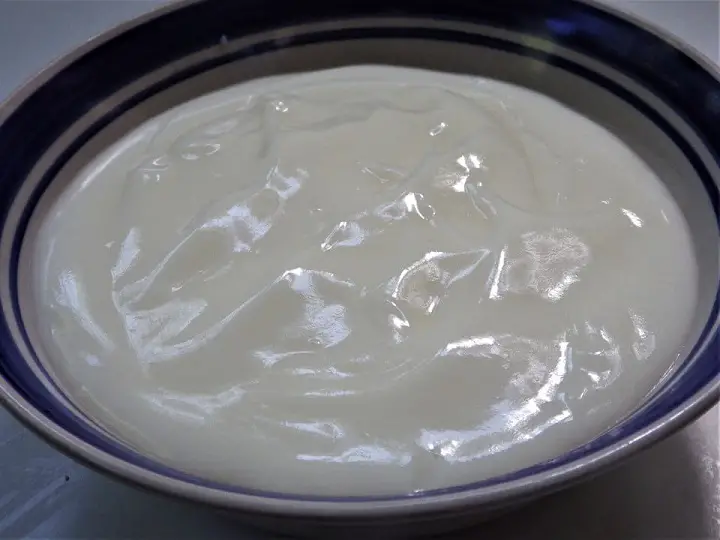
- Add the milk and the citric acid together in a stainless-steel pot and stir occasionally over low heat until the thermometer reads 185° to 195° F.
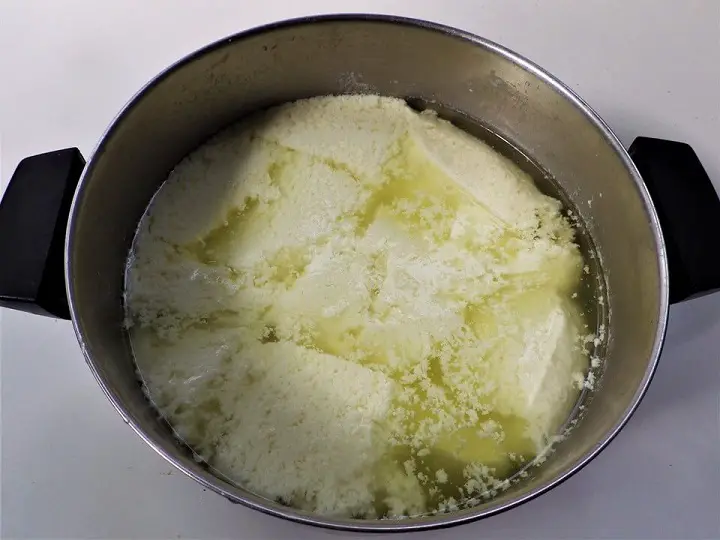
- Eventually, the curds and whey will begin to separate. When this happens, turn off the heat and let the pot rest undisturbed.

- Line a colander with the cheesecloth and ladle the curds into the colander.
- Mix in the salt with a spoon.
- Let the cheese drain for 30 to 45 minutes.

- If you want a firmer cheese, tie the cheesecloth into a bag and hang it from a hook to drain more until it has the firmness and texture you like.
- Store in a plastic container with a cover.

Ricotta is a great addition to your next, and soon to be award-winning lasagna.
And While We’re At It… Yogurt
Yogurt is sort of a cheese wannabe. In fact, if you ever have a fail with a cheese recipe, you’ll probably end up with yogurt. If that happens, just tell everyone you were planning on making yogurt all along.
And guess what? After you’ve made your yogurt, you can actually turn it into cheese. Funny how things work. This recipe is for a traditional Greek yogurt known as Labneh.
Greek Yogurt Recipe
Ingredients:
- 1 quart of milk
- 1 tablespoon of plain Greek yogurt either store-bought or from your last batch. (This will act as a starter culture that will spread throughout your milk to turn it into yogurt.)
Directions:
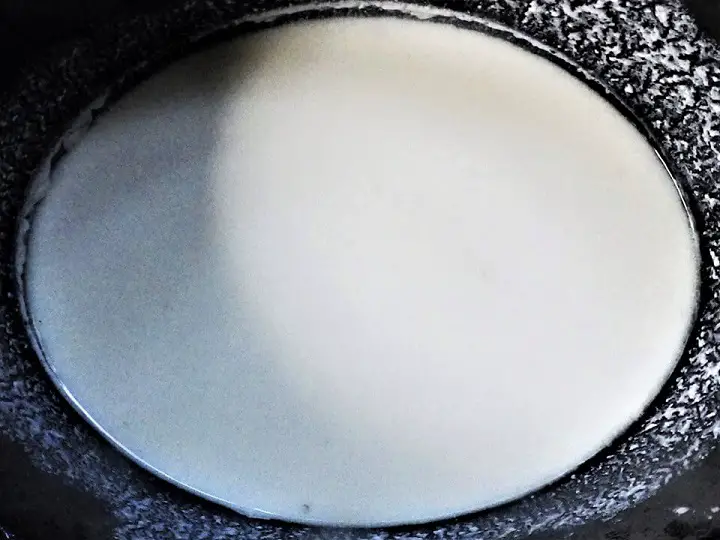
- Add the milk to a stainless-steel pot or a crockpot and slowly heat to 180° F. Stir frequently to prevent the milk from scalding.
- Take the pot off the stove and let cool to 110° and add the tablespoon of yogurt. Mix well with a whisk.
- Keep covered at about 110° for 8 to 12 hours… seriously. And here are five ways to do that.
- Get it to 110° and pour it into a thermos. The thermos will keep it pretty close to 110° for 8 to 12 hours.
- Take the pot with the milk mixture at 110° and put it in an insulated cooler with a hot pad on the bottom of the cooler. Close the lid and it should stay at around 110 for 8 to 12 hours. The smaller the cooler, the better.
- Put it in a crockpot on the “warm” setting and check the temperature from time to time. Shut the crockpot off for a while if it gets above 110° and then recheck later. (This is a pain)
- You can also buy a yogurt maker that keeps the temperature steady or buy a high-end crockpot with a thermostat that does the same thing.
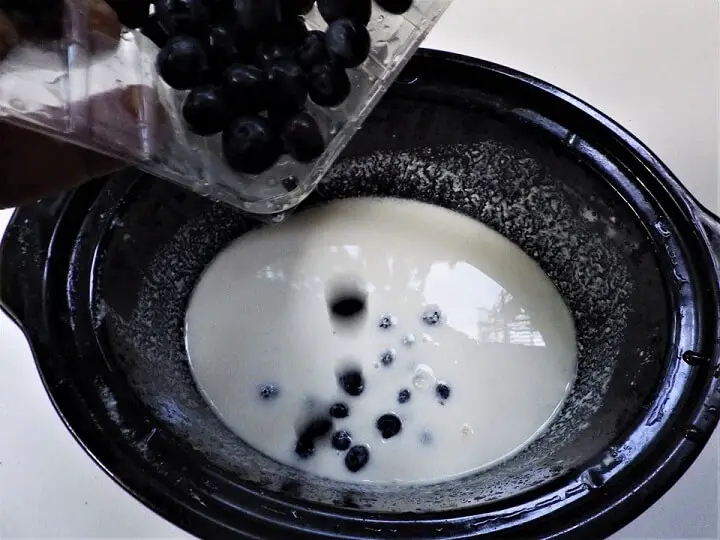
- After 8 to 12 hours, taste the yogurt. If you want to flavor it you can add blueberries, a dash of vanilla, fresh fruit or any other flavoring.
You could also add honey or sugar if you want it a little sweet. You can add savory flavors like herbs, seeds or even bacon bits, but that’s up to you. Remember to reserve some of the plain yogurt in the fridge so you have a little as a starter the next time you make it.
There’s One Other Option with Greek Yogurt
You can strain the yogurt through butter muslin (a finer mesh cheesecloth you can easily buy on the Internet) or multiple layers of cheesecloth (which you can easily buy at most grocery stores) and make a somewhat firm cheese with the taste of yogurt. (Labneh)
The butter muslin or cheesecloth layers allows some of the whey to drain leaving the yogurt curd behind. Place the cloth in a colander and pour in the yogurt. This final straining for Greek cheese takes 12 to 24 hours at room temperature. Store in a covered plastic bowl in the fridge like any other cheese.
What About Colby, Swiss, and Cheddar?
These cheeses fall into the category of “hard” cheese. They are not easy to make. They start simply but often require special equipment and additional processes including pressing and an aging period that can be measured in years. Many of them also require some fairly exotic cultures and starters.
Hopefully, you’ll have success with one or more of the recipes we’ve covered here. They’re a great place to start and who knows… maybe you’ll start to think about finding that cave to age some of the harder to make “hard” cheeses.
Like this post? Don't Forget to Pin It On Pinterest!
You May Also Like: