Estimated reading time: 16 minutes
For thousands of years, long before the Bronze age, tools and weapons were literally fashioned from sticks and stones. It goes without saying that it was known as the Stone Age.
Branches of trees made for fairly effective although somewhat clumsy spears and clubs, but it was the use of stone that brought a sharp edge to arrow points, knifes and spears and a forceful impact from a stone ax, sledge or club.
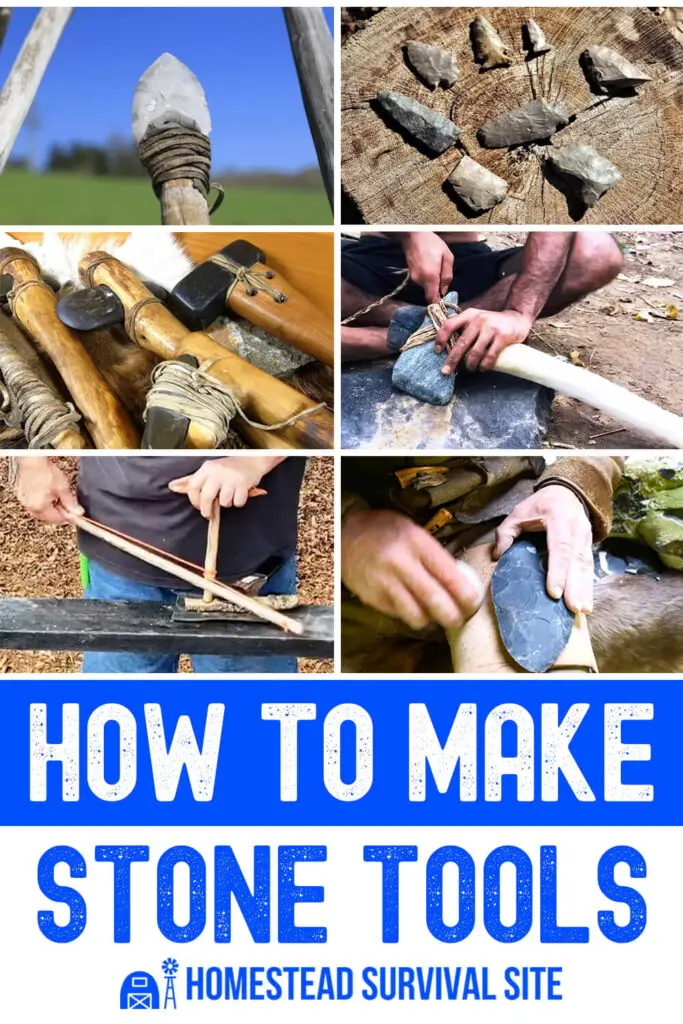
In this article, we’re going to explore how to make many of those tools and weapons using stone. It’s an interesting skill that can allow you to fashion a weapon or tool at any time, whether it’s putting up a tent, hunting in the woods, or making an emergency repair.
Want to save this post for later? Click Here to Pin It On Pinterest!
Understanding the Stones
There are certain types of stones that lend themselves to primitive tools and weapons. Some have naturally sharp edges, and others have a natural shape that has emerged as a result of erosion or an accident of nature.
Finding the right stones is the first step to making tools and weapons from stone, and they’re all around us, if you know what to look for.
Blunt Force Stones
If you’re familiar with some common tools, it’s not too hard to spot a similar shape or configuration in some of the rocks and stones that surround us. Here’s an example. Can you see any potential in the shapes of these stones?
Recognizing the possibilities when you spot a stone or rock on the ground is a big first step to making tools and weapons from stone. There are ways to fashion rock to suit certain kinds of tools, but if the rock is presenting you with a natural or eroded shape that works, grab it and set it aside.
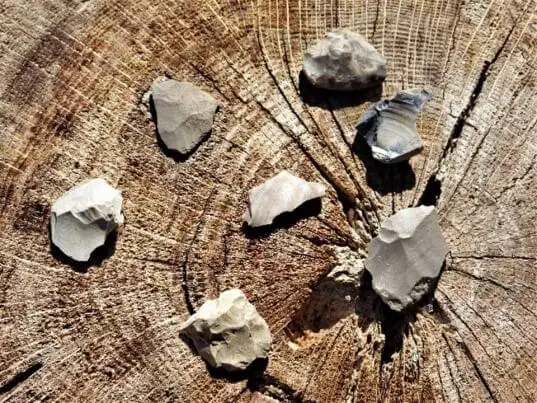
Stones with Sharp Edges
Some stones present naturally sharp edges. Most of these are igneous or volcanic rocks and include flint, chert, and obsidian. However, slate and even shale will sometimes cleave to present a sharp edge even though they are softer, sedimentary rocks. Just remember to leave no stone unturned when you’re looking for natural materials to improvise a tool or weapon.
- How to Find Flint and Chert In Creeks and Rivers
- Making a Slate Arrowhead + Stone Knives and Tools in Action
The Best Edge
Obsidian is a dark, black rock with glassy characteristics. It’s somewhat rare and usually found in areas with a history of volcanic activity. It fractures with something called a “conchoidal” fracture. These fractures have a curved or circular shape and usually lead to a very sharp edge. In fact, obsidian has even been used professionally in surgical tools in operating rooms around the world.
Another volcanic stone with conchoidal characteristics is flint. Flint has also been used to create a spark to start a fire, but it may be the most common stone used for primitive tools and weapons by our ancient ancestors.
It commonly shows up as arrowheads and spear points but was also used to fashion improvised drills, awls, or for anything else that needed to be cut, punctured or drilled.
Chert has also been used for primitive tools and weapons although it’s generally softer than flint and not as sharp as obsidian. When no other stones with a conchoidal fracture were available, chert was often the only option.
The Delicate Edge
There were some tools that needed to cut but with some restraint. These tools were often used for skinning. The stone was held in hand and gently rubbed between the fur and the muscle to separate the fat and skin from an animal.
Basalt was the stone of choice. It’s also an igneous rock with volcanic origins and it took a while to shape, but the smooth and curving edge made it perfect for skinning animals which was a frequent task for people who depended largely on wild game for food, clothing, and shelter.
Let’s Be Blunt
We’re going to start with blunt force tools. These are tools that are used for hammering, pounding, or otherwise crushing or grinding something. One of the most common stone tools that used this blunt force was a grinding stone to convert grains into flour.
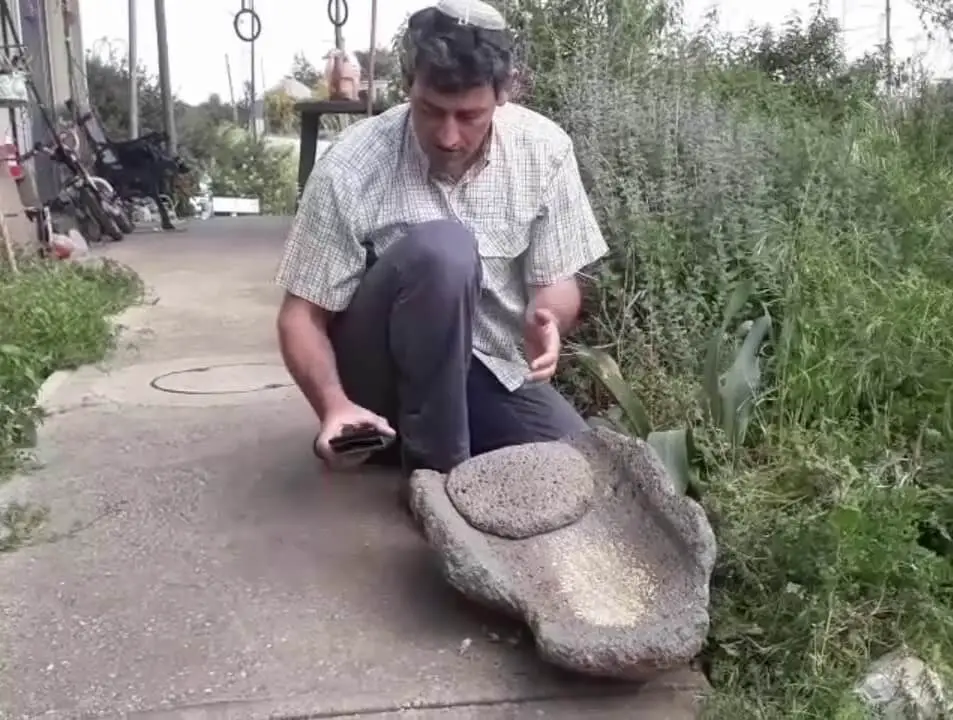
Two stones were usually used with one serving as the base and the other serving as the grinder. What’s critical is that the two stones have a relatively flat or even a concave surface.
Ideally, the stones create little or no space when their two surfaces come together. This allowed someone to push and pull the stones back and forth with the grain underneath. The eventual result was crushed grains that eventually turned into a coarse flour.
A flour grinder is easy to make especially if you’re lucky enough to find two stones with surfaces that can make a consistent contact and fit together tightly when laid upon each other.
Sedimentary stones like sandstone and limestone were often used because they tended to be fine grained stones without a lot of crystallization that’s common in volcanic or igneous rocks. They were also somewhat easier to grind down to flat or curved surfaces, but there was always the possibility that some small pieces of sandstone or limestone would wind up in the flour while it was being used.
In actual fact, the teeth of many ancient Egyptian mummies were severely ground down due to their diet high in grains that were processed on these primitive limestone and sandstone grinders. Unfortunately, smoother sedimentary stones like slate or shale don’t offer the grinding characteristics of limestone and sandstone so once again, they were the only option when used for this style of flour grinding.
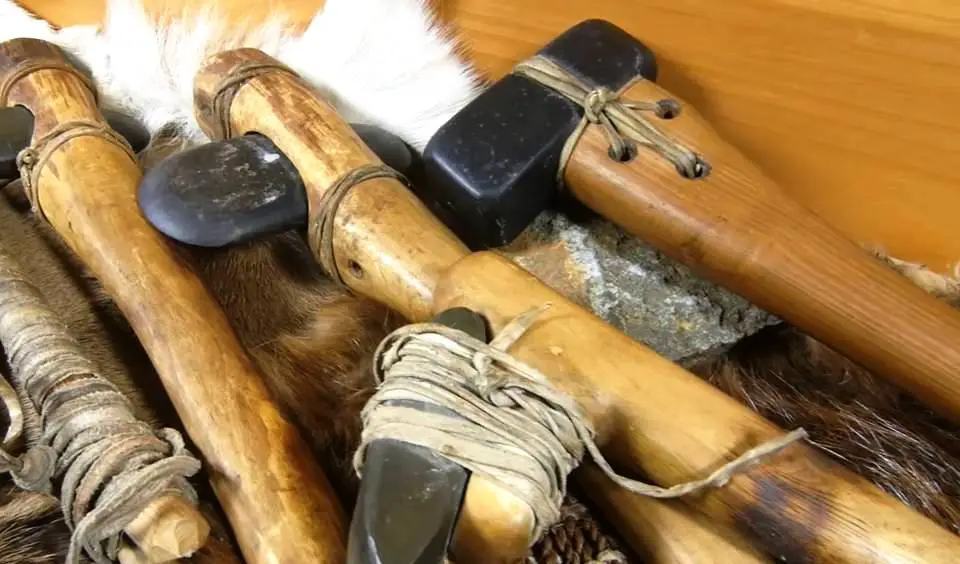
Beyond Stones Alone
So far we’ve talked about tools that use stones alone like the flour grinder and skinning tool. In actual fact, ancient people would often attach their stone tools to various wood shapes to expand and increase the effectiveness of the tool or weapon.
From Hammers to a Sledge
More than a few of us have found ourselves on a camping trip without a hammer to drive in some tent stakes. Some of us have figured out that any rock we hold would make for a reliable substitute, and in the process we’ve taken the first step towards primitive tool making.
To create a primitive hammer or sledge, do yourself a favor and see if you can find a rock that approximates the shape you remember. It’s surprising how many rocks naturally erode or occur in the shape of hammers and sledges. But to give it some good old brute force, it requires a step beyond just finding it on the ground.
Getting a Handle on Things
If you look at any tools in your garage or shed, you’ll see a fair share of wooden handles on many of them. This goes beyond the stones to fashioning and attaching a handle or other wooden reinforcement to your stone tools and weapons.
It’s easy to assume that hardwoods would make the best handles or extensions for stone tools and weapons, but if you’re making stone tools in an emergency, and without any other tools, hardwoods can be difficult to work with. Softwoods make for a good option, but a lot depends on how the tool will be used, and the amount of force exerted on it.
Here are some examples of how and when woods can be added to a tool or weapon to enhance its functionality, and the best wood options:
- Knife Handle – Softwoods like Pine, Poplar, Tulip Tree, Spruce
- Hammer or Hatchet Handle – Softwoods like Pine or Spruce
- Axe or Sledge Hammer – Hardwoods if possible like Oak, Maple, or Elm
- Spear – Softwoods like Pine or Spruce; Hardwoods like Oak, Maple, Elm
- Bow and Arrow – Bows are best if made from Willow or Osage Orange due to their natural springiness; Arrows from hardwoods like Maple and Elm due to the natural straightness and strength of their branches.
- Bow Drill – Similar to the bow drill used for fire-starting but with a sharp point of flint or chert embedded in the tip of the drill to allow for drilling. Bow is best made from a softwood like Pine, Poplar or Cedar to allow for some flex and the drill is best if a straight and sturdy hardwood like Oak or Maple.
The best wood options are directly proportional to the stresses put on the tool or weapon. Softwoods work with fewer stresses and hardwoods are often necessary if high impacts are imparted to the tool.
Putting Together a Primitive Tool Kit
As you collect and assemble various pieces of rocks, minerals, and assorted stones you may see a lot of possibilities. We’re going to cover some of the basics for a primitive, survival tool kit. In some instances there are options with regards to type of stone and we’ll mention that as we go. A lot depends on its intended use and either the sharpness of the edge required or the integrity of the stone itself.
One of the primary skills you’ll need to learn is how to work with and shape stone for tools. Here are some excellent videos that cover some of the basic techniques:
- How to Make Stone Tools in a Survival Situation
- How to Make Simple and Effective Stone Tools
- Levallois Core Technology: An Alternative Way of Making Stone Tools
- 10-Minute Challenge! Flint-Knapping Chert From Start to Finish.
1. Stone Age Knife
The simplest knife is a sharp piece of flint, chert, or obsidian held tightly between the thumb and forefinger. The sharp edge can easily cut cordage, animal skins, small stems and branches, and anything else with a small size of diameter.
A step up is attaching the sharp stone to a handle. The easiest way to do this is to split the end of a piece of softwood or hardwood (hardwood is best) and wedge the sharpened stone into the split. The end of the split is tie tightly with a strip of leather or any other animal skin or cordage.
An added feature is the use of pine sap or pine pitch. It’s nature’s glue. You can see it on the trunks of pine trees and a cut into pine bark on a living tree will eventually produce a few drops of sap. You can use you sharp stone in hand to make these cuts.
Here’s are some videos that takes you through the
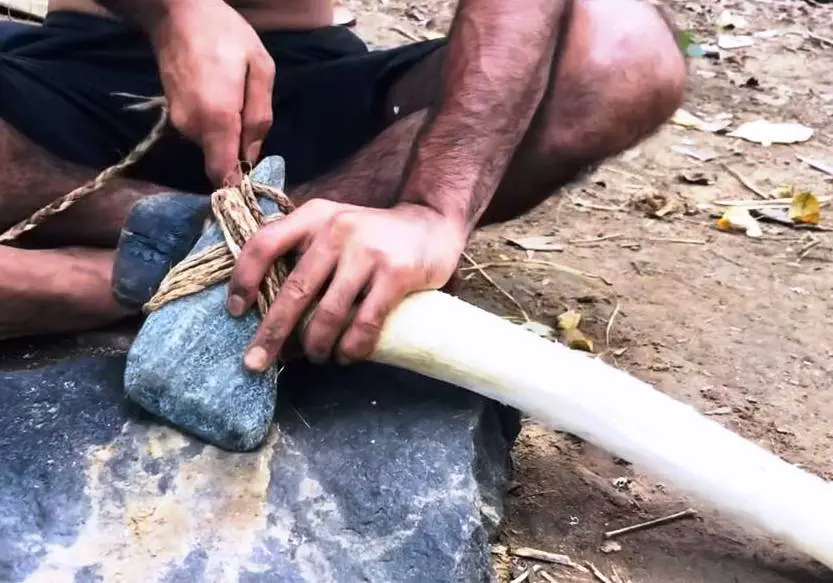
2. Stone Hammer
A stone hammer is a simple tool and pounding tent stakes always comes to mind. Here again you can just hold a large rock in your hand to hammer something like a stake but a handle on the stone gives you more leverage, impact and control.
To begin with, look for those stones lying around that just seem to say “I’m a hammer.” Now all you have to do is find a suitable handle and there are a couple of ways to do it.
One way is the tomahawk approach with a split piece of wood holding the hammer head with strips of leather or cordage holding the head in place.
Another option is to drill into a length of branch about 12 to 28-inches long and carefully inserting the stone hammer head into the hole. Pine pitch can hold it in place along with wedge driven into the hole around the sides of the stone.
Here are some videos that demonstrate these techniques:
3. Stone Axe or Hatchet
To be clear, a stone axe or hatchet will never work as effectively as a steel axe or hatchet. This is especially true if you’re trying to cut through oak or any other hardwoods. Fortunately, they’re fairly effective on softwoods. Regardless it will take time.
You have some interesting options with stone for an axe or hatchet including flint, chert and even slate. On the other hand, obsidian may be too fragile to survive the impacts of an axe or hatchet on wood.
Here’s a video that does a great job of covering the basics:
4. How to Make a Stone Bow Drill
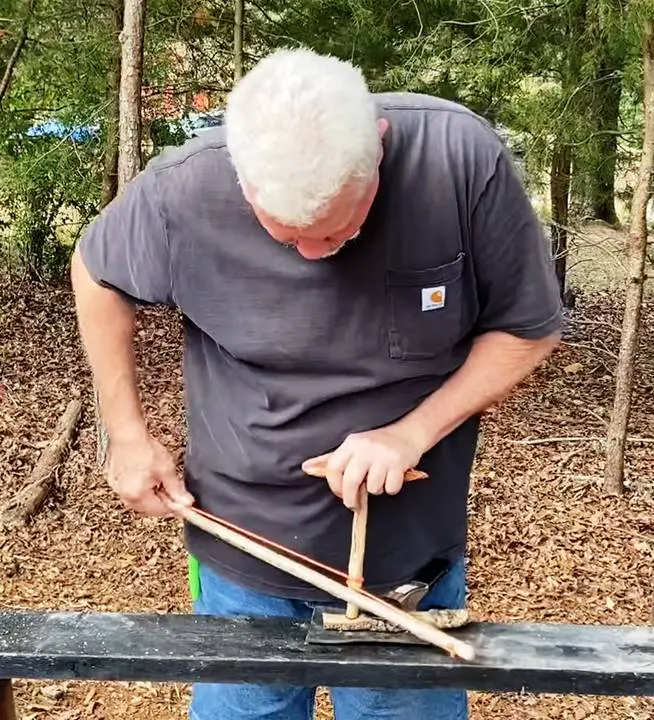
This tool is made with the same principle as the bow drill used for fire making. It consists of a bow made from a curved branch about 14 to 18-inches long with a cord or leather strip tied to either end of the bow with a slight bit of slack to wrap the strip around the drill. The bow is best made from a slightly flexible softwood.
The drill is a straight length of hardwood about a foot in length. A sharp sone is inserted into one end of the drill with the sharp end pointing straight down. The size and diameter of the stone will determine the size of hole or indentation drilled.
Finally, a rock or tree knot is needed to exert pressure on the top of the drill and to allow for the bow to be moved back and forth to spin the drill and create rotation. Charcoal, animal fat or even a fine powder helps to lubricate and prevent friction between the rotating drill and the top knot or rock.
Here’s a video that demonstrates ways to make a bow drill:
Tools as Weapons
Ancient tribes depended on hunting and fishing to satisfy a large part of their diet. The most successful hunters and fishers had the tools or weapons to bring home the wild game.
The traditional stones tools to make an effective weapon consisted of various arrow and spear points fashioned from flint, chert or obsidian although slate could also be used to make an arrow or spear point.
Here are some of the basic weapons that emerged from ancient times fashioned from stone to varying degrees.
5. Arrowheads
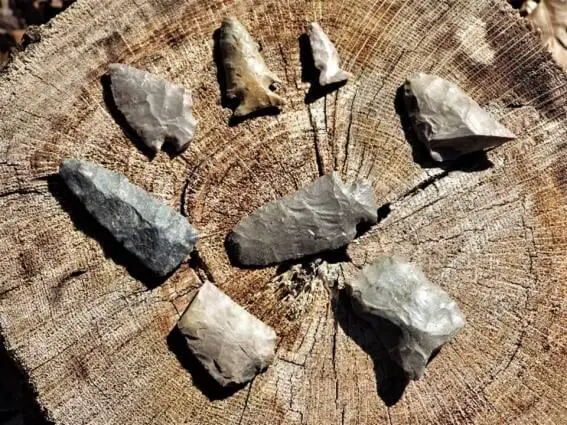
The invention of the bow and arrow was one of the most significant developments in ancient times. It allowed a hunter to track and kill animals at a distance that allowed them to not only stay at a safe distance from dangerous game, but effectively stalk them before the animals fled.
Arrowheads were predominantly made from flint but there are archaeological specimens made from quartz, obsidian, opals and agates in addition to flint. A lot depended on the geology of any area.
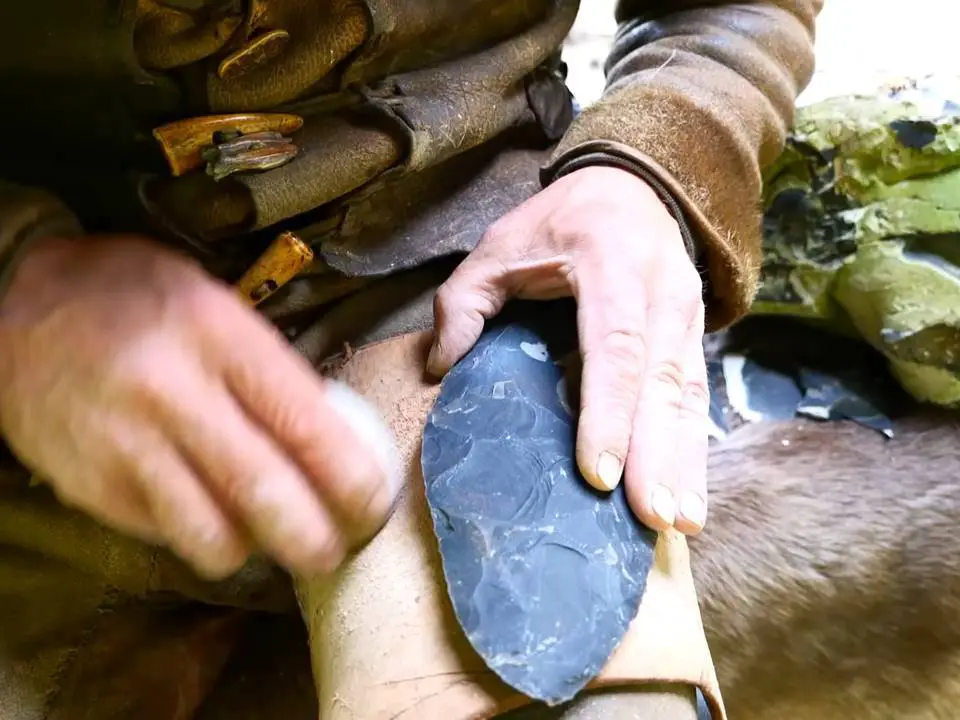
Making an arrowhead is a two step process starting with chipping a large piece of flint to a rough shape using a stone with a tapered point. The second step was knapping small chips off of the edge typically with the tip or an antler while the stone was held against a piece of leather on the stone knapper’s thigh.
Once the arrowheads were chipped and knapped they were affixed to arrows usually made from a straight, stiff hardwood. The arrow end was split and the arrowhead wedged into the split and held in place with cordage made from natural fibers or leather lacing. Pine pitch was often used to help hold the arrow point in place.
There are many articles and videos on the process or making a bow and arrow and here are a few:
- How to make an arrowhead. An intensive breakdown for beginner Flint Knappers
- How to make an obsidian arrowhead for primitive archery hunting
- How To Make A Stone Age Bow
- Stone Age Tools and Weapons (For Kids) | Learning Made Fun
6. Spears
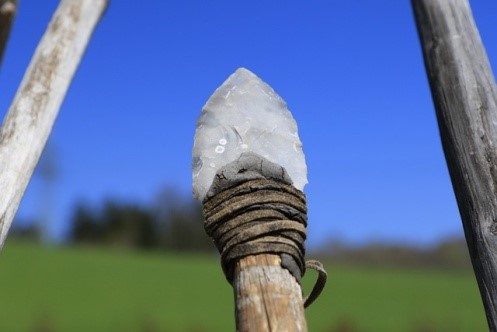
Most spears have a large version of an arrowhead affixed to the end of a long, straight branch. The spear itself can be a hardwood or softwood although hardwoods maintain a straight length better. The key is that any spear shaft be allowed to fully season and dry so any bows or bends can hopefully be corrected. You want your spear shaft to stay straight.
The way a spear point is affixed to the shaft of a spear is similar to the way arrowheads are attached to arrows. A split in the end holds the point and the split and the descending spear point is then wrapped with leather or cordage to hold it in place.
Here are some videos on making both spear points and spears:
- Flint Knapping a spear head
- Flint knapping a spearhead part 1- breaking rock
- Primitive Technology Tools – How To Make Stone Spear
Some Safety Tips
Chipping or knapping sharp stones like flint, chert, and obsidian will ultimately cause a good amount of chips to go flying around you. The worst case scenario is to have a razor sharp chip of flint or obsidian fly into your eye.
For obvious reasons, it’s wise to wear protective eyewear whenever working with stone. Too many of the artisans featured in the videos seem to ignore that advice but it makes sense given that flying chips are part of the process.
Gloves are another good idea. Canvas gloves are best especially for whichever hand is holding the stone for chipping and shaping.
Finally, a large piece of leather or canvas is nice to have to drape over your thigh during the knapping process. A welder’s apron also works.
And remember to be patient. This is a slow and methodical process, but once you have practiced for any length of time your end result will be both satisfying and practical. Just don’t forget to wear that eye protection.
Like this post? Don't Forget to Pin It On Pinterest!
You May Also Like: