

Estimated reading time: 14 minutes
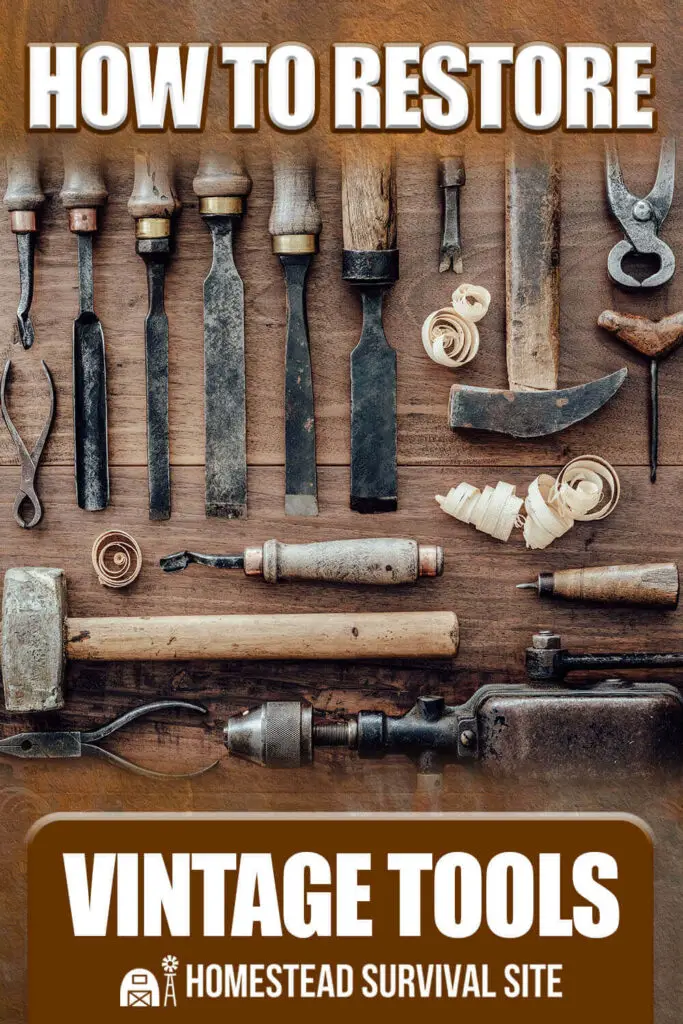
You See Them Hanging on the Walls of Restaurants or in Display Cases in Museums, but They Really Deserve a Place in your Tool Chest.
In a time of chainsaws, power tools, gas powered log splitters, table top electric planers, and drill presses, it’s easy to forget that all lumbering and carpentry was once done by hand. No electricity. No mechanization. Everything was done with the power of muscle, skill, and what are now vintage tools.
It’s a noble concept and worth considering. As a survival skill, the possession and knowledge of these vintage tools can be a critical component of self-reliance.
Many of these tools can be found at garage sales, antique stores, on the Internet, and even tucked away in the corner of a barn, shed, or garage. They can usually be found for a very good price relative to their value as a tool, and some can be found for free. Unfortunately, many of them show up in bad shape or cosmetically restored as a display piece rather than a fully functioning tool.
Want to save this post for later? Click Here to Pin It on Pinterest!
Years of neglect and improper care and storage take their toll on tools encased in rust, compromised by wood rot, and dull as a stone.
We’re going to review some of the key tool categories that built our past, should be valued in the present, and preserved for the future. We’ll also examine their use, factors that affect their condition, techniques for tool restoration, and basic preservation and storage.
Tool Categories
1. Axes and Wedges
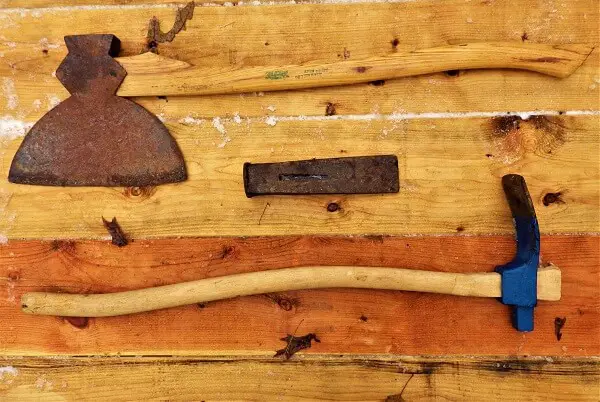
The go-to tool for lumberjacks and used by carpenters in ways long forgotten. Axes came in a variety of shapes and sizes but some of the above demonstrate unique characteristics very different from the usual chopping action to bring down a tree.
The tool at the top of the photo is a “broadax.” A broadax was used to shave one side of a log to create a beam. The timber carpenter, or “Log Butcher” as he was called in lumber camps, would straddle a log held in place to prevent it from rolling, and swing the ax along the side of the log to shave off pieces to create a straight edge. The log was then turned on its flat side and the process repeated until a beam was the result.
The tool in the center of the photo is an iron wedge. It was used to split logs or beams and driven into the wood with a sledgehammer. Wedges came in a variety of sizes, but all were generally true to the same wedge shape.
The tool at the bottom of the photo is called an “Adze.” It’s essentially an ax flipped so its sharp edge is parallel to a surface. An adze was used to put the final finish on the flat surface of a beam. It was used similarly to a broadax with the timber carpenter straddling the beam and swinging the adze down between his legs to slowly chip away at rough edges and smooth out the beam.
2. Saws
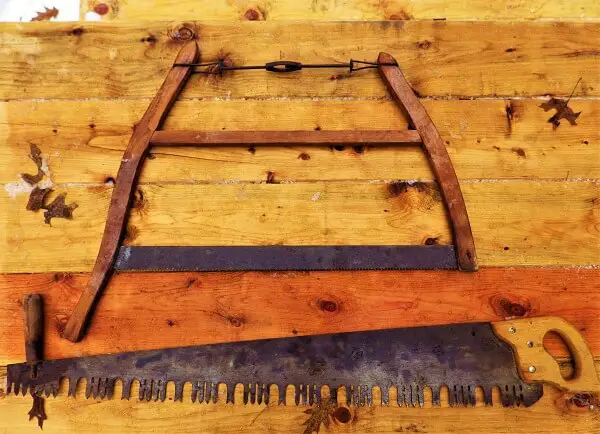
A saw is as ubiquitous in any lumber camp or carpenter woodshop as an ax. Large timber handsaws were used to cut logs into manageable lengths and were carried to the tops of tall trees by high-riggers to cut off the top of a tree. The saw at the bottom of the photo is an example.
Many of these lumber saws were two-man setups. In this example, a handle is attached to the tip so that a man could help his partner make fast work of sawing through thick timber. The man on the handle simply pulled the saw towards him, the man on the other end with the larger hand grip would pull and actually do most of the sawing as the teeth passed through the wood.
The saw pictured at the top of the photo was the carpenter’s choice for sawing milled lumber into measured sizes for construction of everything from framings for walls to furniture. A turnbuckle at the top of the saw tightened the two wooden supports to make the saw band tight and straight.
3. Chisels
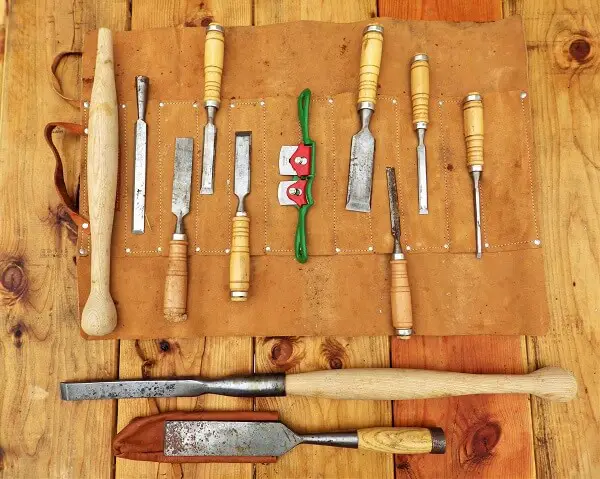
Chisels were used for everything from large-scale post and beam construction to fine, finish work on doors, furniture, and other instances where precision cutting was needed. Often, a wooden mallet was used to drive the chisels home.
4. Mallets
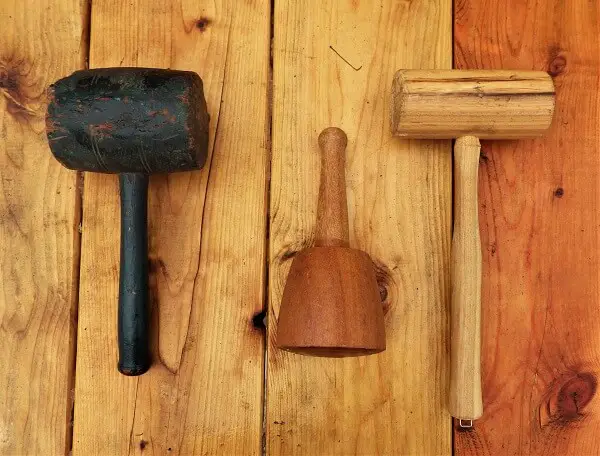
Mallets also varied in shape and size but were always made of wood to protect the wooden handle of chisels.
5. Hand Drills
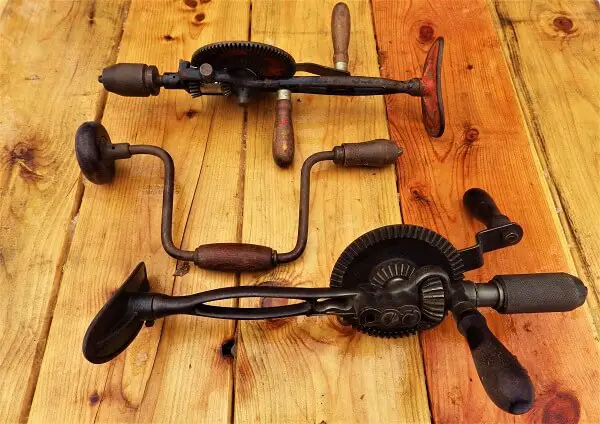
Hand drills also showed up in various sizes and configurations. Some had a body brace on the back handle, so the drill could be braced against a thigh, the chest, or shoulder to add force to the drilling process.
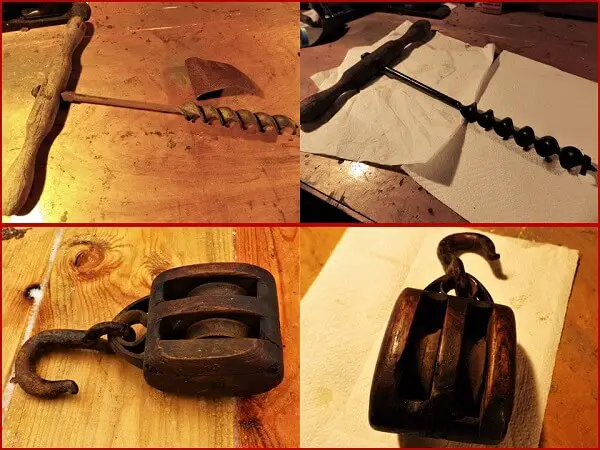
6. Wood Borers
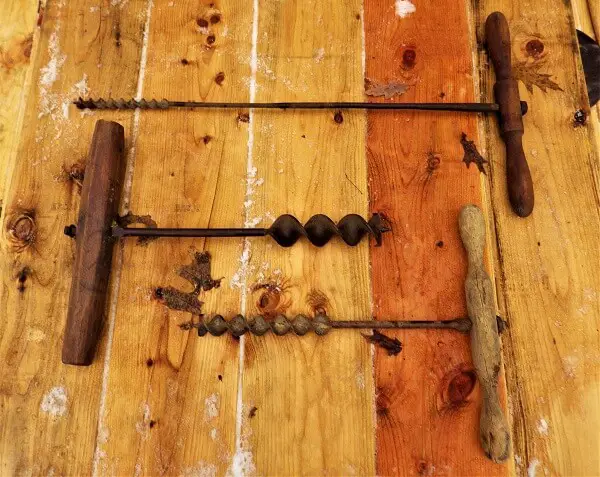
When larger holes were needed, a wood bore was twisted into a log or timber. There was a smaller screw end at the tip and then a spiral of sharp edges that twisted and pulled the bore into the wood. The shaved wood would travel up the spiral to keep the borehole clear as the hole drilled deeper.
Wood Borers were a mainstay of timber frame construction and were used to drill pilot holes for a peg to be driven to join a beam to a post.
7. Drawshaves and Machetes
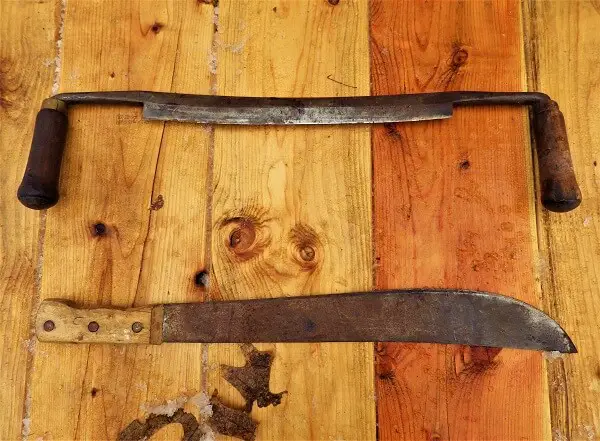
A drawshave was held by two handles and the sharp edge was drawn towards the timberman. Its primary purpose was to strip bark from a tree trunk after it had been felled. You may have seen log homes with the logs presenting a trimmed-wood appearance. This is the result of using a drawshave to shave the bark.
The tool at the bottom of the photo is a standard machete. Its origins were in South America where they were used to cut through jungle brush. They were also used by lumberjacks to cut through the thick brush of Northern deciduous forests.
8. Log Tongs
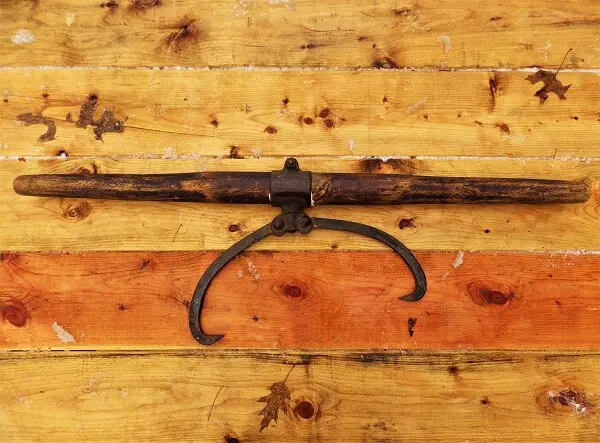
Log tongs featured two hooks that opened and closed freely with sharp, turned-in points forming canthooks. A length of wood about 4 to 6 feet in length allowed two men to hook a large log and combine their strength to lift and carry it. Quite often, 2-man teams would work together to attach their set of tongs to a large trunk and carry the trunk to a work site to be chopped into a beam or split.
9. Planers
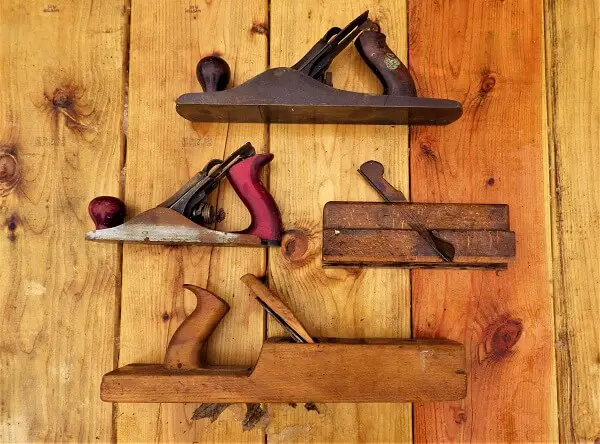
Possibly one of the most sophisticated tools in the timber carpenter’s tool chest. Planers were originally made of wood, but steel versions soon showed up. A sharp blade protruding from the bottom could be adjusted and gentle strokes on wood shaved the surface to make it smooth.
10. Pulleys
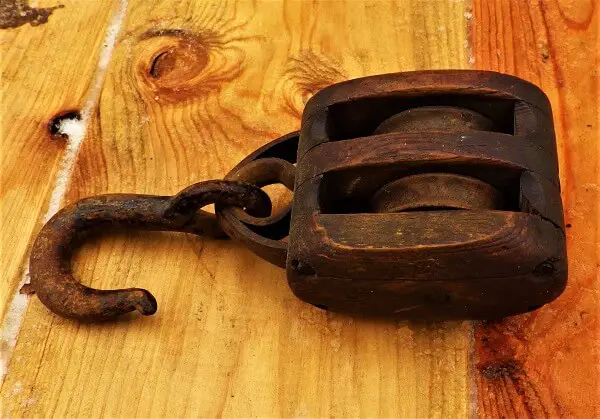
Pulleys were often suspended from a tree or truss to lift heavy timber into position on a building or to move it into position for further cutting and shaping. The body was typically made of hardwood and the pulley wheels were usually iron as well as the hook at the top.
3 Factors That Affect Tool Condition
The majority of old-world tools were made of iron and sometimes combined with wood to form a handle or another component of the tool. Both iron and wood present some problems when improperly cared for.
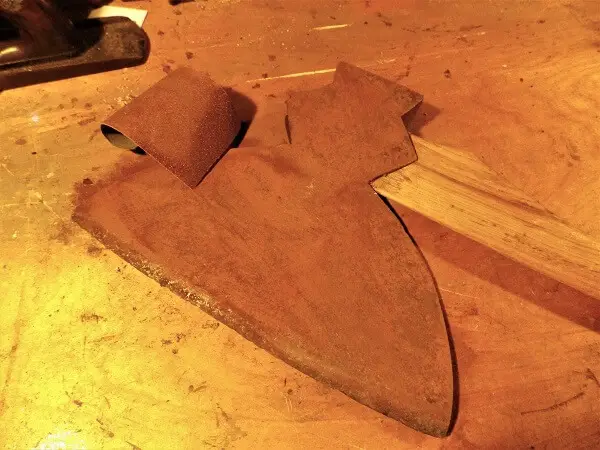
1. Rust
Rust is caused by oxygen molecules interacting with iron molecules and oxidizing. A deep orange color is the result. And over time, the rust will pit and cause the iron to eventually deteriorate. Exposure to water or moisture in general will stimulate the formation of rust. Even something as benign as moist air will lead to rust.
2. Dry Rot and Wet Rot
Wood can last for decades if properly cared for, but unlike iron, wood needs a certain amount of moisture to retain its integrity. Too much moisture and the wood will succumb to wet rot. Too little moisture and the wood becomes brittle and weak as a result of dry rot.
3. Sharpness
Many lumber and carpentry tools require a sharp edge. This includes axes, saws, planers, wood borers and drill bits, machetes, draw shaves, chisels and an adze. Some of these tools require extremely sharp edges like planers, drill bits, and an adze, while others can perform with a maintained edge like an ax, chisel, or saw.
What’s important to remember is that the sharper the edge, the more delicate the iron or the steel becomes. A razor-sharp edge may sound impressive, but with the exception of a planer, don’t over-sharpen most tools.
Restoring Old-World Tools
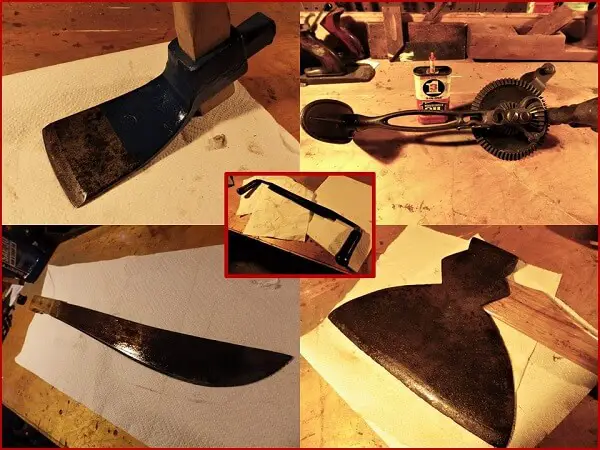
Tool restoration doesn’t require an exotic set of supplies. Most tools can be restored using sandpaper, paper towels, a chisel, a sharpening stone, any oil for iron, and Tung oil for wood.
Some Restoration Supplies
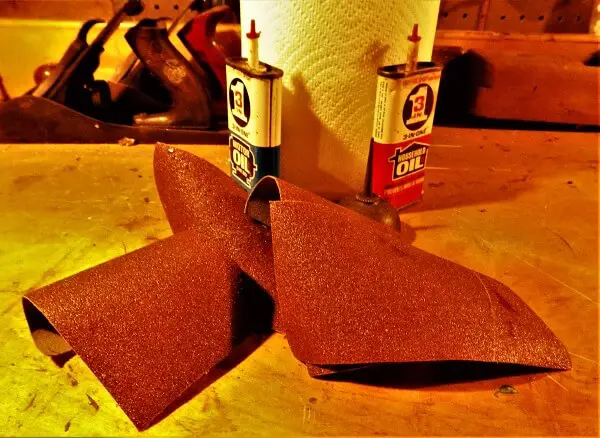
Sandpaper
Sandpaper is the key when it comes to removing rust. The thicker the rust buildup, the heavier the weight of the sandpaper. You might need to use varying grits of sandpaper to get all of the rust off an iron surface. Wear a face mask when sanding rust. There are no clinical studies touting the benefits of inhaling rust dust.
Oil
Once the tool has been sanded, wipe it clean with a paper towel lightly moistened with oil. You can sand again over the lightly oiled surface if you see stubborn rust spots. When you’re satisfied, you can either paint the surface with a rust inhibiting paint or oil it.
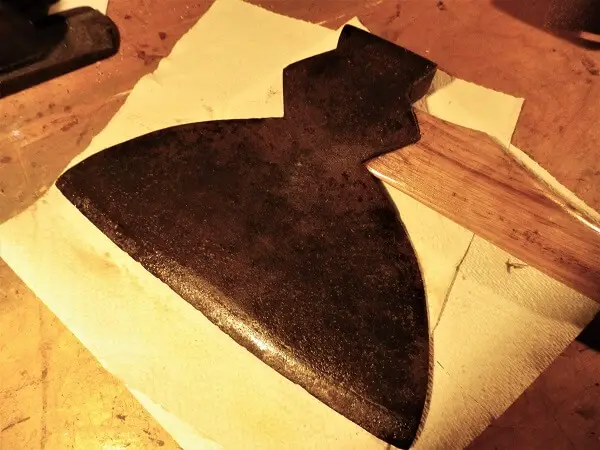
Avoid getting any rust-inhibiting paint on the edge, but oil is fine on any edge. Drills that have gears should be lightly oiled around any gear axle as well.
Treating and Preserving Wood Components
If wet rot has set in, there’s very little you can do but to replace the piece.
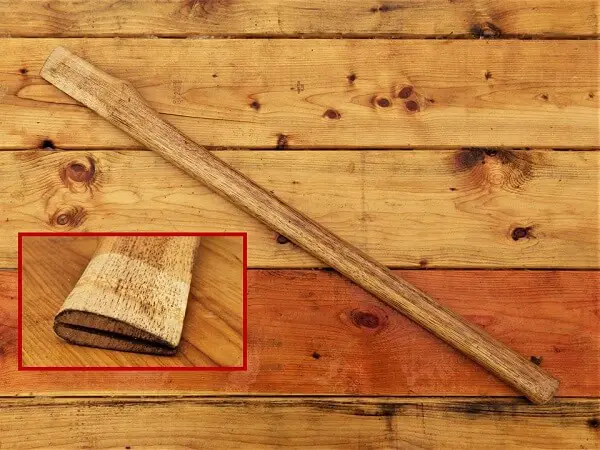
You can buy ax handles and other wooden components for tools or improvise your own.
If the wood on any tool looks dry, you can restore and preserve it. If the wood seems dry and brittle, it should be replaced, but sometimes all it needs is a good dose of Tung Oil. Tung oil was the precursor to polyurethane, but it has another benefit beyond sealing wood: it serves to moisturize it as well.
Tung oil is usually applied to wooden tool components with a shop towel or rag. When dry, it leaves a clean-sheen and resists water. Be careful when you dispose of this rag. Tung oil has been known to spontaneously combust. Burn it outside or soak it in water before discarding.
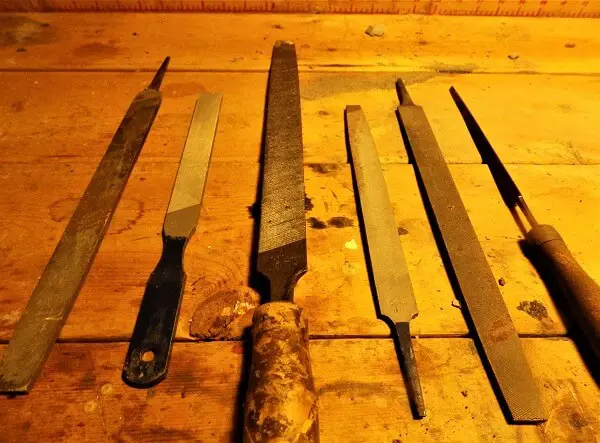
Sharpening
Files are the standard tool for sharpening edges on tools.
But maybe the most important concept to understand about sharpening anything is the concept of sharpness on a microscopic level.
The appearance of a sharp edge looks anything but sharp when examined on an electron microscope, but it does reveal some unique characteristics. We’re going to use a piece of foil to demonstrate these characteristics.

A dull edge presents ragged flanges pointing in various directions.

A truly sharp edge has the flanges somewhat aligned and pointing in the same direction. This is why you should sharpen every tool in two directions.
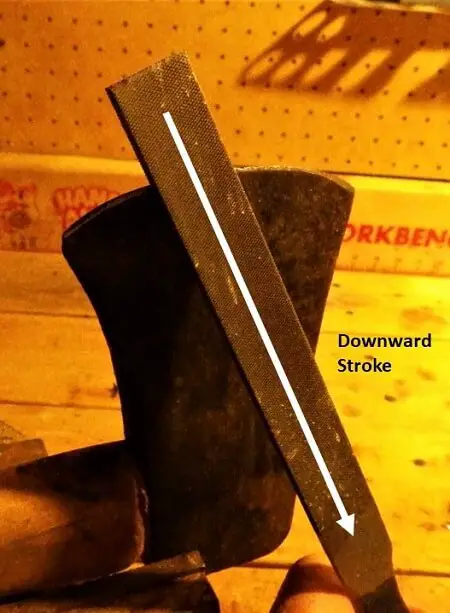
The first direction is downward against the edge using a file. This will sharpen the flanges but leave them ragged.
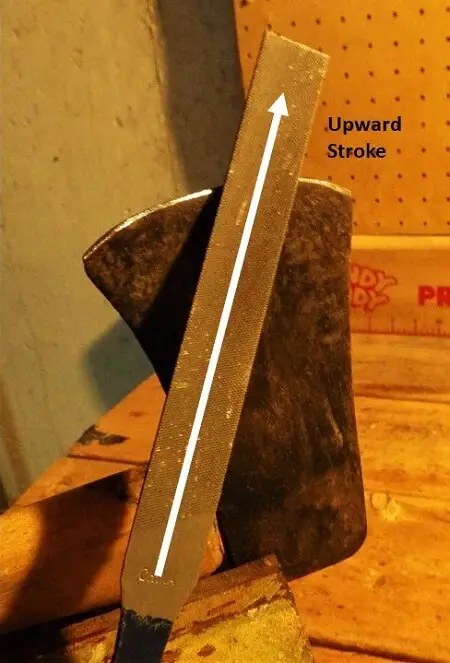
The final sharpening uses an upward stroke. This will align the flanges and give you a sharper edge. You can also follow this with a third step sharpening upward with a sharpening stone. This will give you the final finish on the edge.
Tool Storage and Protection
Sharp tools love leather on their cutting ends.
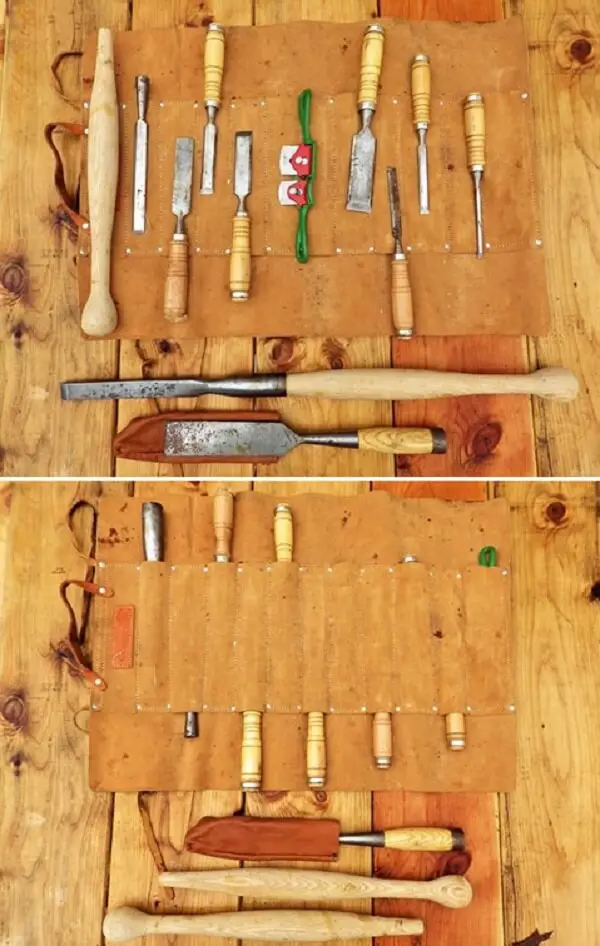
Whenever possible, enclose any exposed edge in leather that fits snugly against the edge but can allow for easy removal of the tool. You should keep metal tool surfaces oiled regularly and treat any wooden parts with Tung oil periodically.
Storage is also important. A dry area is best and hung from a wall rather than floors where water can pool.
Like this post? Don't forget to Pin It on Pinterest!
You May Also Like:


Would be a great deal better if the photos were included. The site I’m at Doesn’t have them! Most unfortunate.🤔😁😇🤗