

Estimated reading time: 24 minutes
Cast iron pots and pans have been around for centuries. They were first used in China in the 6th century and their use and appeal spread across Europe and to the pioneers of early America.
At one point, more than a dozen cast iron manufacturers supplied the growing demand for cast iron cookware in the U.S. That is, until the invention of aluminum and the growing popularity of stainless steel after World War II.
Aluminum delivered a lighter cooking alternative and it was less expensive than cast iron. As a result, manufacturers of cast iron slowly ceased production. Only one manufacturer continued to produce cast iron and that was a company called Lodge.
Today, Lodge is still a dominant manufacturer of cast iron cookware in the U.S. and their products can be purchased at retail stores or on the Internet.
Want to save this post for later? Click Here to Pin It on Pinterest!
The Benefits of Cooking with Cast Iron

Cast Iron is Durable
While most metal pots and pans provide a good amount of durability, cast iron is almost indestructible. Because the handles are usually cast onto the pot or pan, there’s never a problem with a broken or loose handle. It’s also impossible to dent or chip cast iron.
Cast Iron is Non-Stick
When a cast iron pot or pan is properly seasoned and cared for, it provides a natural non-stick coating on par with commercially manufactured, non-stick coatings. Better yet, cast iron does not present some of the suspected carcinogens that have been associated with certain non-stick coatings.
Cast Iron Distributes and Holds Heat
It takes a while to heat up, but once a cast iron pot or pan has heated sufficiently, it will hold the heat and distribute it across the base and the sides. There can be hot spots, but cast iron’s heat retention is its primary benefit.
Cast Iron is Ideal for Cooking with Any Heat Source
Whether it’s an oven, open fire, open coals, an electric or gas range-top, or the top of a wood burning stove, cast iron can not only take the heat but deliver the heat to anything you make or bake. Alaskan Sourdoughs often used cast iron frying pans to make a staple part of their diet called “Bannock Bread.” We’ll cover that recipe and how to make it over an open fire in cast iron.
Cast Iron Lasts and Lasts
Many people use cast iron cookware that is in the category of a family heirloom. They have been passed down through generations and perform just as well today as they did decades ago. This assumes proper care and maintenance, but that’s necessary with most cookware and especially cast iron.
Cast Iron is Inexpensive
Relative to other cookware, cast iron is often the most economical choice for a variety of pots and pans. Given the fact that cast iron cookware can last for so long, it makes the value equation even stronger.
So What’s the Catch?
Cast Iron is Heavy
Cast iron can be 3 to 9 times heavier than a comparable pot or pan made from stainless steel and especially aluminum. The biggest challenge is when a large cast iron pot or pan has a short, cast iron handle. A short handle can compromise leverage, although many larger cast iron pots and pans have a protruding iron lip opposite the handle to let you use two gloved hands to lift it.
You could also look for cast iron pots and pans with longer handles to give you some two-handed leverage. If you can’t lift larger pots or pans made from cast iron, you might want to take a pass on those sizes and opt for stainless steel or aluminum.
There are also lightweight versions of cast iron cookware that have shown up recently, but they tend to cost more and don’t deliver the heat retention properties of traditional cast iron.
Cast Iron Must Be “Seasoned”
This isn’t hard to do, and we’ll go into seasoning cast iron in more detail, but you can’t just buy it off the shelf and start cooking. You have to season it first.
The exception is another new development called “Enameled Cast Iron.” They don’t need seasoning or regular conditioning, but they cost more and can chip if dropped or dinged.
Cast Iron Needs Some Maintenance
Unlike stainless steel, aluminum, and enameled cast iron, traditional cast iron needs some attention after it has been used and especially after it has been washed. We’ll cover some of the basic approaches to cleaning and caring for cast iron after using, and some simple storage tips.
Cast Iron and Acidic Foods
Concerns about cast iron and acidic foods are a bit overstated, but there is something to it. Acidic foods are any foods or recipes with high amounts of natural acids like citric acid (many fruits like tomatoes) or acetic acid (vinegars).
The natural acids have the potential to leach iron molecules from the cast iron and infuse the food with a faint, metallic flavor. There are no significant health risks to this action and it can be easily remedied with proper seasoning of the cast iron.
Once the cast iron is seasoned, any leaching of iron molecules is significantly diminished, although slow cooking will allow some iron into the finished dish. If this concerns you for any reason, you should consider enameled cast iron.
You’re More Likely to Burn Yourself
Standard stainless steel and aluminum pots and pans often have separately attached, insulated handles. Cast iron handles are not attached separately nor insulated. As a result, we sometimes get careless and grab a cast iron handle, expecting it to be cooler than the rest of the pot or pan.
Cast iron is also slow to cool. It takes a while to heat up, but once it's hot, it stays that way for a while. A quick burn can be the result and cold running water will provide some relief as you remind yourself to handle cast iron a bit more carefully.
Cast Iron Types and Size Numbering
As cast iron cookware manufacturers began to expand and diversify their products, they started to assign designations to the types and sizes. Unfortunately, each manufacturer seemed to develop their own system of letters, numbers, or both without any standardization across brands or styles.
However, there are some designations that have emerged largely due to the success and survival of certain manufacturers.
Cast Iron Types or Model Designations
Lodge Manufacturing developed a letter system to designate certain types of pots, pans, and their end-use. If you have cast iron from a different manufacturer like Griswold, Wagner, Birmingham or other sources, these designations may vary or not exist. The Lodge designations can also be a bit cryptic.
These model designations were not only stamped on the product but were used in catalogs and other merchandising materials for ordering.
Lodge Model Designations
| AS – All Star Pan | AT – Ash Tray Skillet | B – Breadstick Pan |
| BE – Bacon & Egg Skillet | C – Cornstick Pan | CAF – Camp Fryer |
| CB – Corn Bread Skillet | CC – Combo Cooker, Indoor/Outdoor | CF – Chicken Fryer |
| CK – Country Kettle | CO – Camp Oven | CP – Fluted Cake Pan (Bundt Pan) |
| CP – Cactus Pan | CS – Chef Skillet | D – Danish Cake Pan |
| DO – Dutch Oven | DOF – Deep Fry Oven w/cover & basket | DOT – Dutch Oven Trivet |
| FB – French Bread (2-loaf Vienna Roll Pan) | FBK – Flat Bottomed Straight Kettle | FF – French Fryer w/basket |
| FP – Fish Pan | FS – Foursome/4-In-1 Skillet Set | GC – Glass Cover |
| IC – Iron Cover for Chicken Fryer and Dutch Oven | LG – Oblong (Long) Griddle | M – Muffin Pan (6-cup Turk Head) |
| MP – Melting Pot | NG – Round Griddle, New Style | NTP – No Trump Card Pan |
| OG – Round Griddle, Old Style | OS – Oval Serving Griddle | P – Popover Pan |
| PP – Perch Pan | RBK – Round Bottomed Straight Kettle | SC – Skillet Cover |
| SK – Skillet | SP – Sauce Pan or Stew Pan | SQSK – Square Skillet |
| TB – Top of Stove Broiler (Axford style skillet) | TK – Tea Kettle |
If you own any cast iron cookware, you may notice a number appearing on the pot or pan.
These often appear at the base of the handle but are sometimes stamped into the bottom. This number indicates the size of the pan based on the bottom diameter, but the number is not related to inches but is more of a relative measure indicating general sizes.
The most prevalent numbering system was developed by the Wagner Manufacturing Company in 1924 indicating the following measurements for the base of a cast iron pot or pan.
| 2 – 4 7/8” | 3 – 5 1/2” | 4 – 5 7/8” |
| 5 – 6 3/4” | 6 – 7 1/2” | 7 – 8 1/4” |
| 8 – 8 7/8” | 9 – 9 3/4″ | 10 – 10 1/4” |
| 11 – 10 7/8” | 12 – 11 3/4” | 13 – 12” |
| 14 – 13” |
These number designations and the sizes can also vary from one brand to another. As a general rule, the Griswold numbers are most commonly recognized.
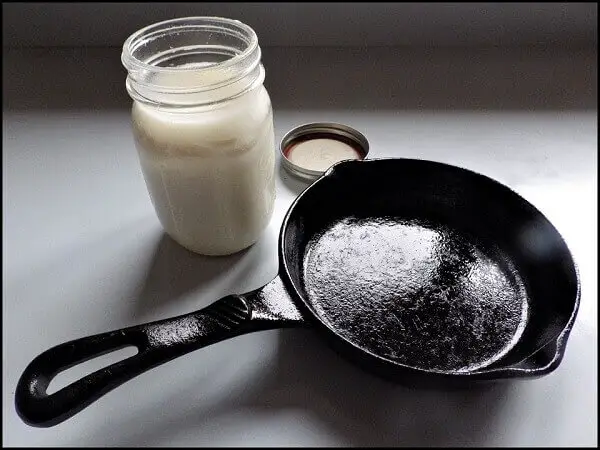
Seasoning or Curing New Cast Iron
A new cast iron pot or pan needs a simple seasoning process. Even a well-seasoned pan can improve with repeated seasoning. This is done for a few reasons.
- Seasoning helps to create a non-stick coating on your cast iron cookware. Over time, this non-stick characteristic will improve with repeated use and proper washing and treatment.
- Seasoning helps to preserve and protect cast iron cookware from rust. Rust is the ultimate enemy of cast iron and without proper treatment, the surface will pit and the pot or pan will eventually deteriorate.
- Seasoning prevents acidic fruits, vegetables, and acidic recipe combinations from leaching iron molecules into food. The result of cooking in an unseasoned cast iron pot or pan can be a slight, metallic aftertaste that is not harmful but an unexpected flavor-note in food.
Cast Iron Seasoning 101
Seasoning cast iron requires two things: oil and heat. This two-step process creates a thin, plastic-like coating on the iron surface which protects the iron from moisture and gives the pot or pan non-stick properties.
This property is the result of polymerization which causes fatty acid to oxidize or polymerize, creating a protective and slick coating. Repeated cooking and seasoning builds-up these layers, resulting in perfectly seasoned cast iron cookware.
Oil Possibilities
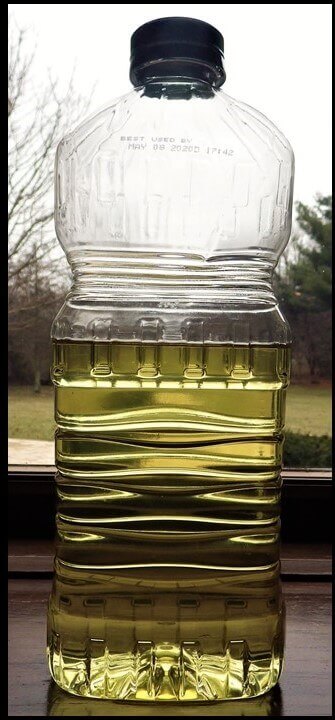
The oils of choice for seasoning cast iron are the oils high in unsaturated fats. These oils have fatty acids that are quicker to polymerize. Examples include Flaxseed oil, Canola oil, Safflower seed oil, Sunflower seed oil, and Olive oil. Other oils can also be used like corn oil and other cooking oils, as long as they fall in the category of edible oils.
Don’t even think about using motor oil or other oils you might use to recondition or preserve a tool like an ax. You’re “cooking” in cast iron and any oil you use to season or treat it should be something that’s safe to eat. Shortening also works.
In an extreme off-grid environment where commercial oils like cooking oil may not be available, animal fats can be substituted.
If you have lard preserved, it does a good job of seasoning, but make sure you buff it dry and expose it to heat for a minute or two or the animal fats in the metal can become rancid. Other animal fats you could use include beef tallow, duck fat, goose fat, and even chicken fat.
In a pinch, you can even use a slice of bacon to season or treat cast iron.
Heat Options
The second step when it comes to seasoning cast iron is heat. The most popular approach is to place the oiled cast iron cookware into an oven preheated to 325 degrees Fahrenheit for one hour. After an hour, carefully remove it using an oven mitt, let it cool and wipe the pot or pan down to absorb any liquified oil and buff dry.
Some sources recommend different seasoning or curing temperatures from as low as 300 degrees to as high as 500 degrees Fahrenheit. Lodge manufacturing recommends 325 degrees, so we’re going to go with that.
A wood-fired oven can give the same result when seasoning. In an off-grid or wilderness situation, you can put the cast iron cookware over open coals until the oil begins to smoke. Remove it from the coals and let it cool down and then wipe off any excess oil or animal fat and buff dry.
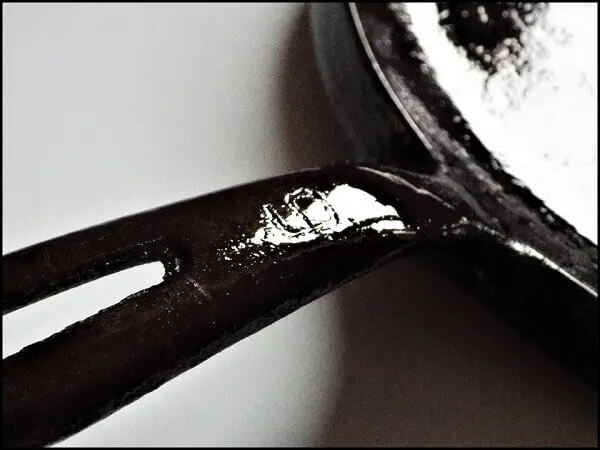
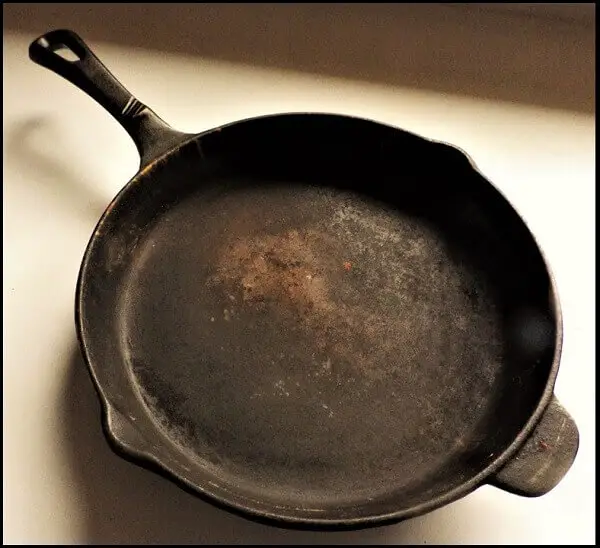
Washing and Preserving Cast Iron
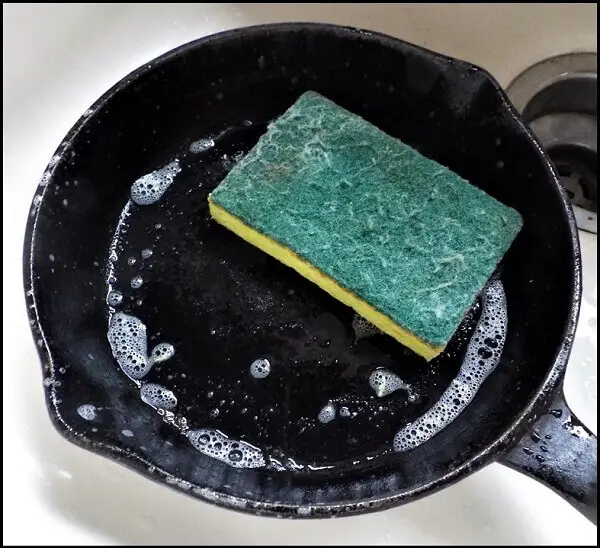
A lot of cast iron aficionados would wince at the picture above. The conventional wisdom is that you never use dish soap or a sponge or scrub pad in cast iron. In a perfect world, that’s good advice. But there are times where food will stick to the bottom of even the most well-seasoned pan.
There are also occasions where a cast iron pan picks up a fishy smell from cooking fish, especially oily fish like salmon or mackerel. At times like that, a little dish soap and some gentle rubbing can make short work of the most burnt-on foods and stubborn odors.
If the buildup is particularly resistant, you can toss a tablespoon of coarse salt into the pan, place over medium heat to carbonize the food buildup, then scrub with a dry cloth or a crumpled piece of aluminum foil. The salt will act as an abrasive that will not compromise the seasoning. When done, rinse under hot water and thoroughly dry.
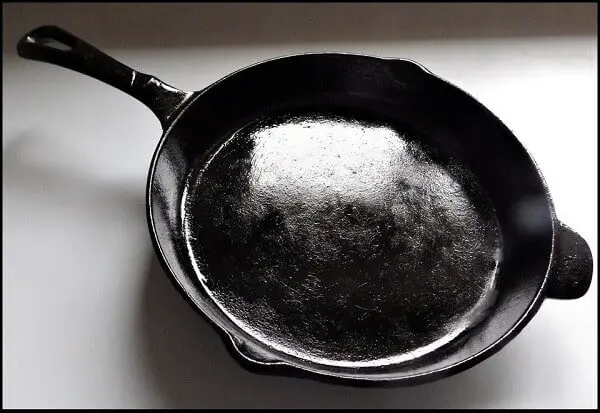
It’s also important to place the cast iron pot or pan over a kitchen range for a couple of minutes to evaporate any residual moisture after drying with a towel. Let cool and then apply some oil to the pot or pan and spread over the top and bottom with a towel.
Buff until shiny and no oil is standing. Reheat again briefly over medium heat on the stovetop for about a minute. If you skip this step, your pan can come out of the pantry sticky and will need to be rinsed under hot water again.
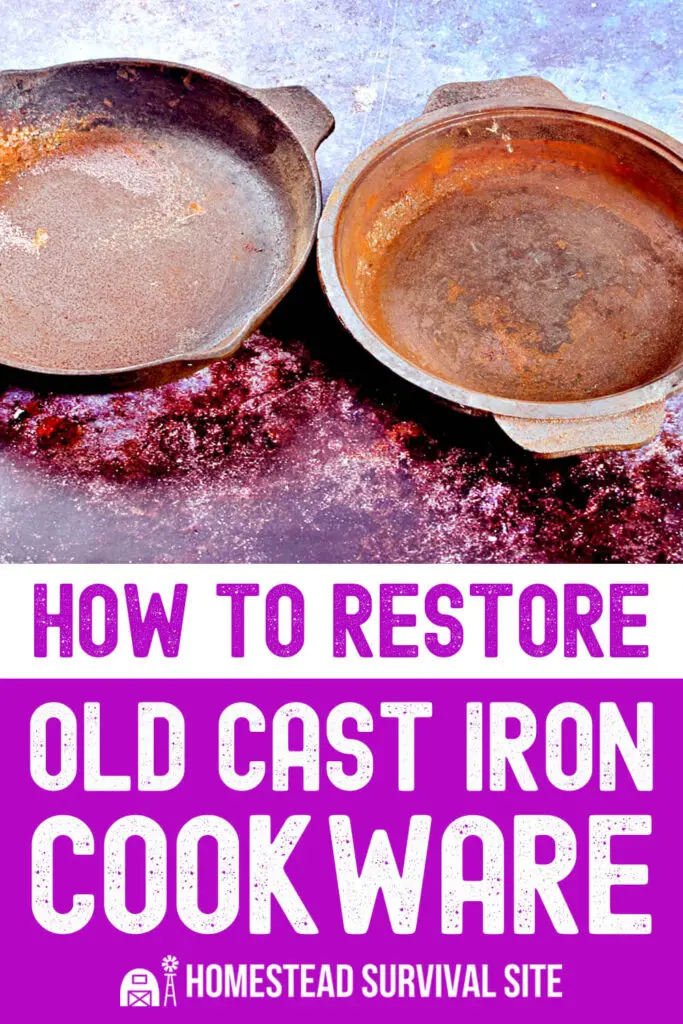
Restoring a Rusty Cast Iron Pan
The typical damage affecting cast iron is rust.
You won’t need any tools, only a few materials:
- Fine grit sandpaper
- Steel wool
- Water
- Cloth dish towels
- Oil
Here's how to treat rust on a cast iron pan:
- It’s possible the sandpaper will be unnecessary, but if the pan is heavily rusted, a light sanding will remove it.
- You can then continue removing the rust with the steel wool.
- Once the rust has been removed, gently rub the pan with a wet dish towel to remove any rust powder and then completely dry.
- Generously oil the pan and rub dry with another towel.
- Repeat the oven treatment at 325 degrees Fahrenheit for one hour.
- Remove from the oven and let cool and buff dry to a gloss.
Care and Storage of Cast Iron
This may seem a bit fussy, but with a little bit of effort, our cast iron cookware might last longer than we do. The whole key is to avoid and prevent the moisture that can cause cast iron to rust and lose its seasoning. Here are some simple tips to protect your cast iron.
- Store your cast iron with the lid off if it has one. You could also toss a crumpled paper towel into the pot or pan to absorb any lingering moisture.
- Store your cast iron in a dry place. A pantry under the range top or over the stove if they’re not too heavy is a good idea. A pantry under the sink is not.
- When heating a cast iron pot or pan, try to use lower heat on your range top. The cast iron can and will get very hot, but it’s best done slowly rather than a rapid burst of high heat that can damage the pan.
- Never dump cold water into a very hot cast iron pan. The cast iron can actually crack or fracture. Let it cool down first.
- Use plastic or wooden utensils. Cast iron is not as delicate as some non-stick cookware, but hard scrapes from metal utensils can give moisture a chance to penetrate the seasoned surface and cause rust or pitting.
- If cooking acidic foods, remove them from the cast iron pot or pan as soon as you’re done cooking.
- Do not use cast iron to store food. All cooked foods have a certain degree of moisture, and this will eventually break down the seasoning.
- Never submerge cast iron in water. A quick rinse with hot water and immediate drying is recommended.
- Never wash cast iron in the dishwasher. It will destroy the seasoning and will begin to rust as the dishwasher goes into the drying cycle.
Cooking with Cast Iron
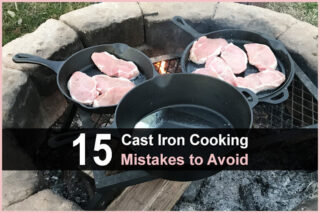
There are many recipes that lend themselves to cast iron cooking as the ideal cooking method. We’re going to cover a few of those, including some recipes that have historical precedent going back a century or more. Some of the recipes are cooked conventionally on a range or in an oven, but all can be cooked off-grid in a wood-fired stove or over an open fire.
One thing to remember when it comes to cooking with cast iron: Avoid using a cast iron pot or pan to boil water. The water will destroy the seasoning and will lead to a rapid crust of rust.
In an emergency, you can use cast iron to boil water, but you’ll need to re-season it again. Liquids like stock or broths can be added with other ingredients as you would do in a cast iron Dutch oven for a pot roast, but using cast iron to boil water for pasta is a bad idea.
If you do use cast iron to braise or simmer food, you should follow up with some quick reconditioning steps like a thorough rinse with hot water, a light scrub, and oil again to preserve the patina and the seasoning of the iron.
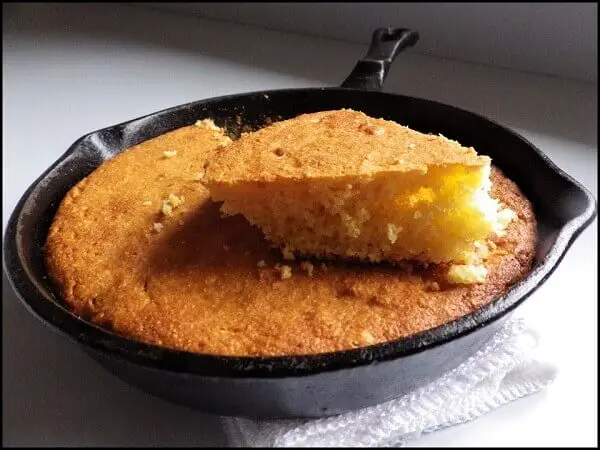
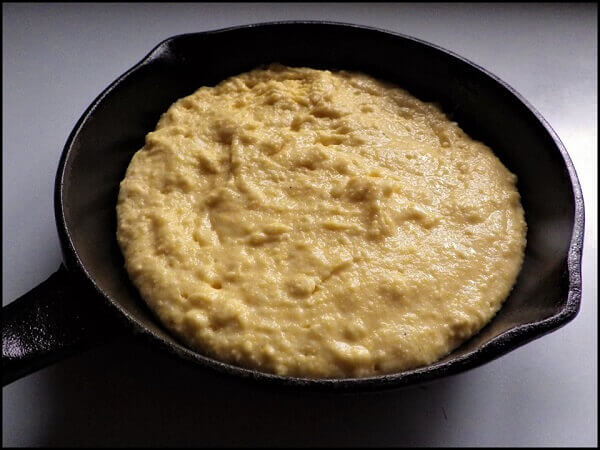
Corn Bread
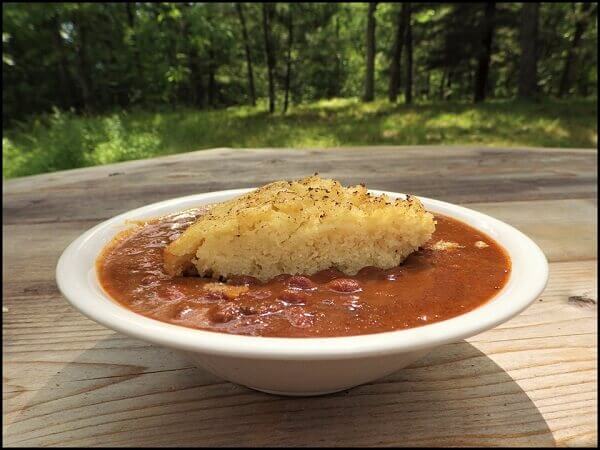
It’s almost like cast iron was made for cornbread. Cooks, moms, and grandmas have been using it for centuries to make a bread that is a distinctive, American staple. We’ll cover a traditional way to bake this in the oven and also an off-grid variation that works in the wild.
There are two types of corn products that often show up in cornbread. One is cornmeal, which is a bit granular, and the other is corn flour or “Masa Harina” which has a powder-like consistency similar to white flour. Either variation works, and you can combine them. The cornmeal gives a little more texture to the cornbread while the corn flour creates a smoother bread.
Corn Bread Recipe:
(Makes a 3/4-pound loaf in a 7” diameter (#5) cast iron pan. To make a larger loaf, double or triple the ingredients and bake in a larger pan depending on ingredient increase. If in doubt, a larger pan is better than smaller).
INGREDIENTS:
- 1 1/2 cups of either corn meal, corn flour, or a combination
- 1 teaspoon of baking soda
- ½ teaspoon of salt
- 1 tablespoon of melted butter (can substitute any fat or oil if off-grid)
- 1/3 cup of milk (or water if off-grid and milk not available)
- 1 egg (optional if off-grid)
DIRECTIONS:
- Preheat oven to 400 degrees Fahrenheit. If cooking over open coals, place the empty pan and its lid (if you have one) on top of the coals to preheat.
- Combine all ingredients except the egg and mix together.
- Once mixed, add the egg. (You’re doing this so the hot, melted butter doesn't scramble the egg in the mix.)
- Grease a #5 cast iron frying pan and pour the batter into the pan. If using a preheated pan from open coals, swirl a little oil or fat around the pan before adding the batter.
- Bake in the oven for 15 to 20 minutes. If cooking outdoors, cover the cast iron pan with the lid and place next to (not on) the hot coals. Turn from time to time to allow each side of the pan to be exposed to the coals. If you want, you can throw some hot coals on the lid to create a Dutch oven effect.

- Check for doneness by inserting a toothpick or knife into the center of the cornbread. If it comes out wet, it needs a few more minutes. Continue to test until toothpick or knife emerges dry.
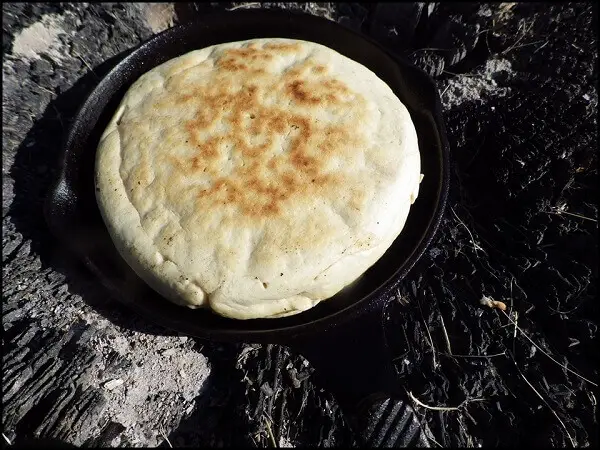
Cast Iron Flatbread
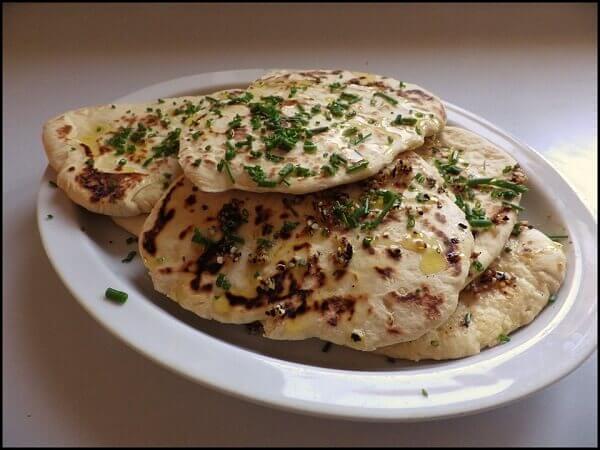
Flatbreads are without a doubt the world’s first form of bread. Cultures around the world have their version ranging from Indian Na’an bread to Greek Pitas to Jewish Matzoh bread to European Lavash. They’re very easy to make and cook quickly.
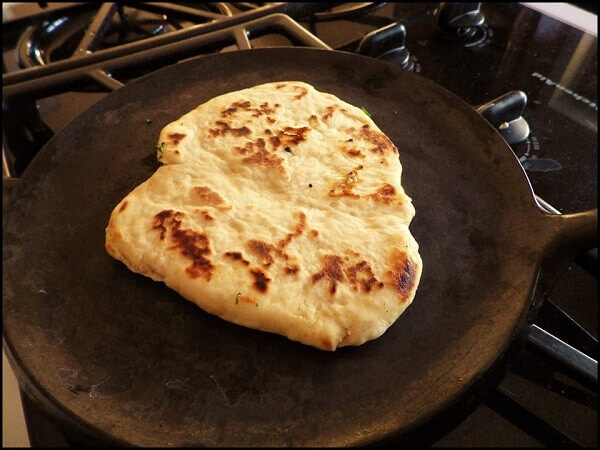
This style of bread is perfectly suited to cast iron because all flatbreads require high heat to quickly bake and brown. They’re typically tossed onto a very hot cast iron skillet and turned once after 1 to 2 minutes.
This particular recipe is for a style of flatbread popular in the Southern and Southwestern United States and was standard fare for everyone from farmers to cowboys. They can be topped with anything that suits your taste to add flavor and nutrition.
Cast Iron Flatbread Recipe:
INGREDIENTS:
- 1 1/2 cups warm water (110° F.)
- 4 teaspoons olive oil (or any oil or rendered animal fat if off-grid)
- 3 1/2 cups of flour, plus more for dusting
- 2 teaspoons of sugar
- 1 teaspoon of salt
- 2 1⁄4 teaspoons of active dry yeast
DIRECTIONS:
- Combine all of the ingredients and knead for 5 minutes either by hand or in a countertop mixer using the dough hook.
- Let the dough rise for 30 minutes.
- When the dough is ready, punch it down and divide it into 8 balls.
- Rest the covered balls for 15 minutes.
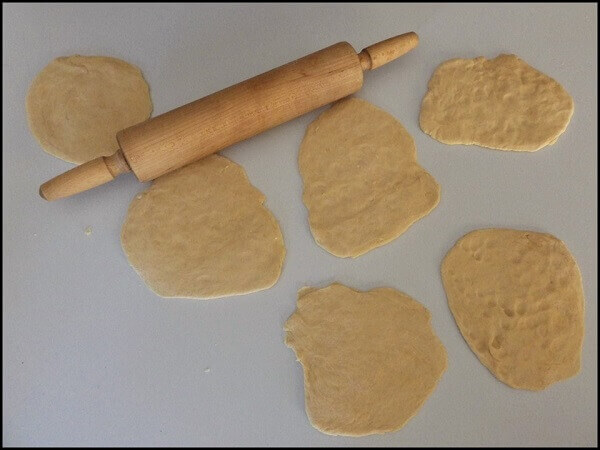
- Roll each ball into an eight-inch circle, one quarter inch thick, making sure circles are totally smooth, with no creases or seams. Do not stack the disks but keep them covered.
- Put a flat of dough on the hot skillet and brown for 1 to 2 minutes a side. Be careful and keep an eye on them. They cook really quick.
- Cool on rack 5 minutes and drizzle with olive oil and your favorite toppings or any other combination you like.
Breakfast skillet
A breakfast skillet is essentially a one-pan meal. It’s everything you might see on a breakfast plate all in a skillet and served in the skillet. The skillet can be large and set on the table for family style serving, or smaller skillets can be used to allow each person to have their own skillet.
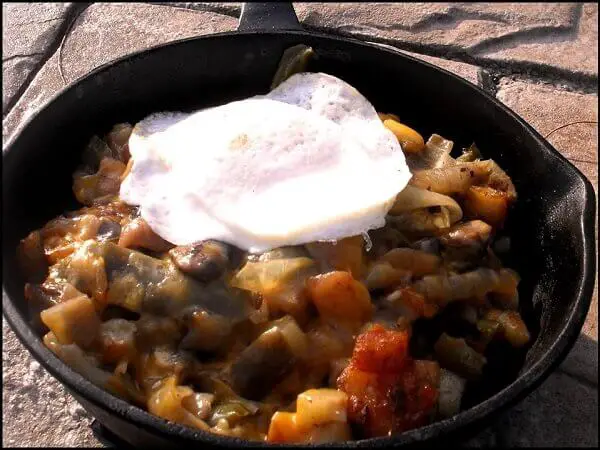
The food combination that usually shows up in a breakfast skillet includes a foundation of fried potatoes and other vegetables, a layer of meat like sausage or bacon, a sprinkle of cheese, and a fried or poached egg garnish.
Breakfast Skillet Recipe:
(Makes one family-sized breakfast skillet in a 10” (# 10) pan or four individual skillets in 5” (#3) pans).
INGREDIENTS:
- 1 pound of fried bacon or sausage
- 1 tablespoon of butter or oil (optional)
- 4 potatoes peeled and diced
- 1 onion diced
- 1 bell pepper diced
- 1 cup of grated cheese of your choice
- 4 to 6 eggs
DIRECTIONS:
- Fry the bacon or sausage in the cast iron skillet over medium heat and drain on paper-towels.
- Reserve the grease and fry the potatoes until browned.
- Add the tablespoon of butter or oil and the onions and peppers and continue to fry until onions are translucent.
- Remove from the heat and stir the potato and vegetable mixture.
- Top with either the bacon or sausage.
- Sprinkle the cheese over the top.
- Top with either fried or poached eggs and serve.
- If you want, you can heat the skillet in the oven to further melt the cheese before topping with the eggs.
- If off-grid and cooking outdoors do the above steps over open coals with the cast iron lid heated separately. Top the skillet with the lid to melt the cheese. You can also invert the lid in the coals to fry the eggs.
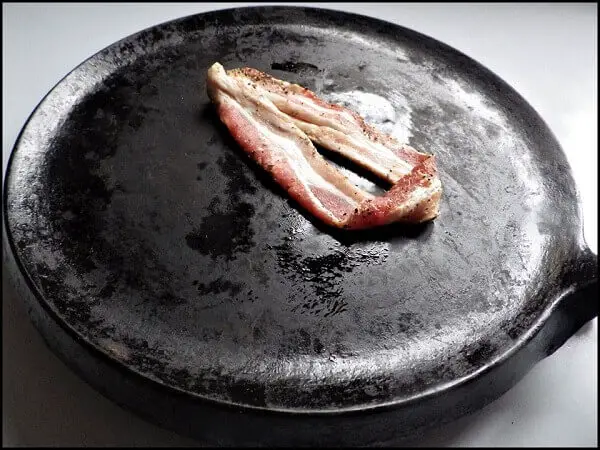
Bannock Bread
Bannock bread was an every-meal mainstay of Alaskan Sourdoughs. It’s also called “Frying Pan Bread” and a cast iron frying pan was always used.
It’s made over open coals in a large cast iron frying pan and was turned once midway through the cooking process.
Bannock Bread Recipe:
INGREDIENTS:
- 2 cups of flour
- 2 teaspoons of baking powder
- ½ teaspoon of salt
- ½ cup of dry milk powder (optional or substitute milk for the water)
- 2 tablespoons of shortening (or butter or lard or tallow)
- Water until you achieve a dough-like batter
DIRECTIONS:
- Pour the flour, salt, baking powder and milk powder into a large bowl.
- Before you add the water, you need to cut-in the shortening with the flour using a couple of knives, a fork or a pastry cutter.
- After the texture appears crumbly, slowly add water until you get a putty-like consistency.

- Oil a cast-iron frying pan. Sourdoughs used bacon, salt pork, or even bear fat. You can use any cooking oil, shortening or butter.
- Pour the mixture into the pan.
- Place the pan over open coals or on the stove top and brown for about 3 to 5 minutes.
- Flip the bread over in the pan and finish the other side.
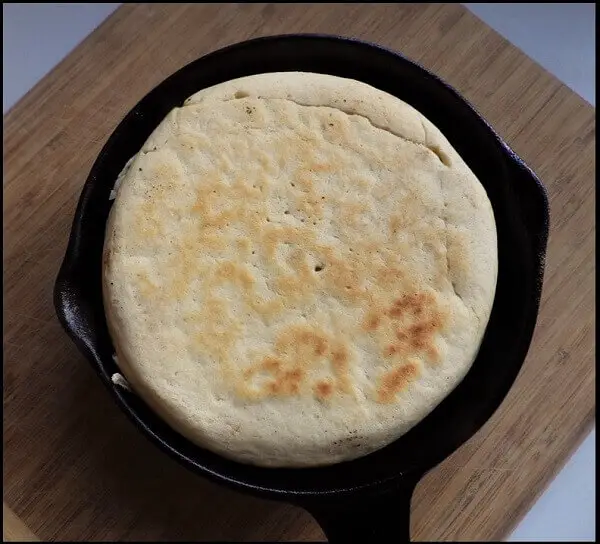
- You might want to flip a few times to cook the bread through and to prevent burning. When you think it’s done, poke a stick into the center of the bread. If it comes out clean and dry, the bread is done. If not, you can let it rest in the pan off the heat until it finishes.
Exploring the World of Cast Iron Cooking
These recipes are the tip of the iceberg for the hundreds of cooked and baked goods that cast iron makes so well. Books on the subject abound on Amazon.com, such as Cook It in Cast Iron (see below). And there are recipes, tips, and videos on cooking with cast iron are all over the Internet.
If you have some old cast iron that you’ve neglected or forgotten, or if you’ve never cooked with cast iron before, it’s worth visiting this classic and historic approach to old and new world cooking.
Like this post? Don't forget to Pin It on Pinterest!
You May Also Like:


What a great post. I think you’ve covered everything. I’m a huge fan of cast iron cookware. My collection has been inherited or bought second-hand.
I recently became aware of blue steel pans. You can buy them from Forge, but be aware, you may find yourself in a rabbit hole when browsing their site. Blue steel is very similar to cast iron but much lighter. It requires seasoning as well. I ordered the 10″ pan to lighten my load when hauling gear into camp.
Bonus for Canadians: In my search for Forge cookware, I discovered Staples.ca has an extensive list of their cookware. Pick up in store & save the shipping.
My husband seasons all the Cast Iron I may get in Yard sales or resale shops. His method works all the time and it is easy to do.
Simply dig a hole and put some rocks on the bottom. Put some wood in the bottom and place the cast iron pot or pan in. You can put it bottom on the fire or you can put the top of the pan in the fire. Either way works. Light the wood and put a piece of metal on top. My husband used to use a a trunk lid of the lid over the engine of a car that was not usable anymore. Do this at about Noon or 1pm. Let the pan sit in the fire overnight and then take out making sure you use a hot pad. My pans are still doing wonderful. He found me a 35 inch skillet that had been use in pioneer days in a old log cabin that was falling down. He brought it home and is still in fantastic shape. I use it for cornbread when I am making my Thanksgiving and Christmas Turkey dressing. It is really fantastic. It would take him a month to eat that much cornbread if I made it in that pan every time I make it.
Heidi:
The way they cure cast Iron in The south where my husband was born is to take and dig a hole in the ground where fire can not spread Place a piece of iron and cover with wood, start the wood and put the pans needing curing on top of the fire. Place a hood or other piece of iron on the top and cover with dirt up to the top. Let it sit all night and dig the pans up take a sandstone and sand out the remnant of the fire. Take into house and wipe out what is left on the pan use bacon fat and only bacon fat and put in oven on low heat for about 2-3 hours and your pans will be like new.