

Estimated reading time: 9 minutes
A Better Way to Grow Potatoes When Space is Limited
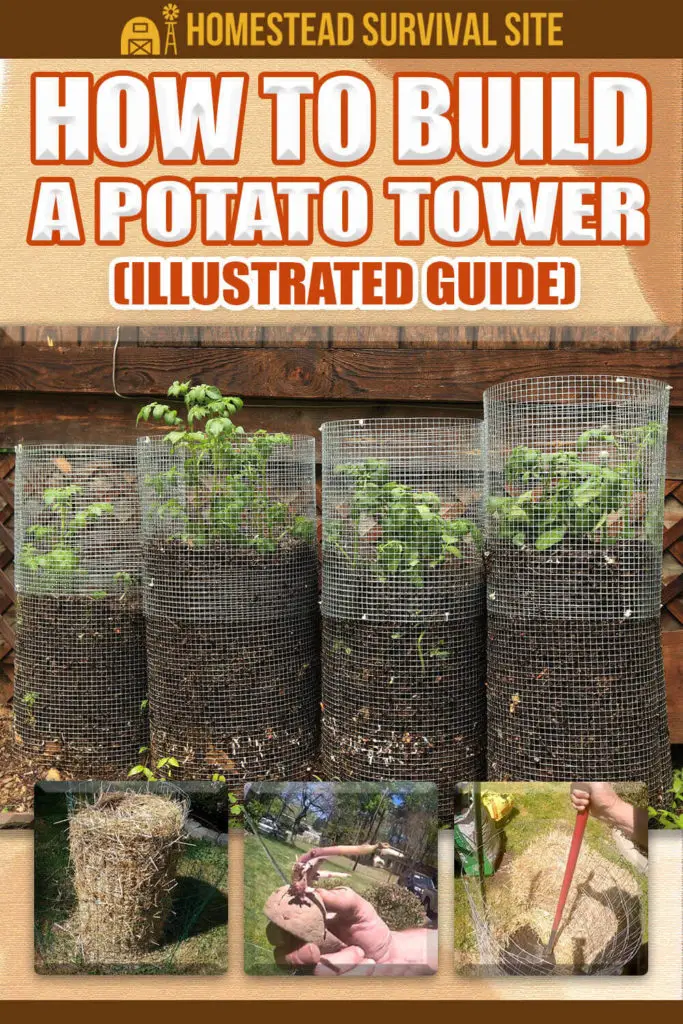
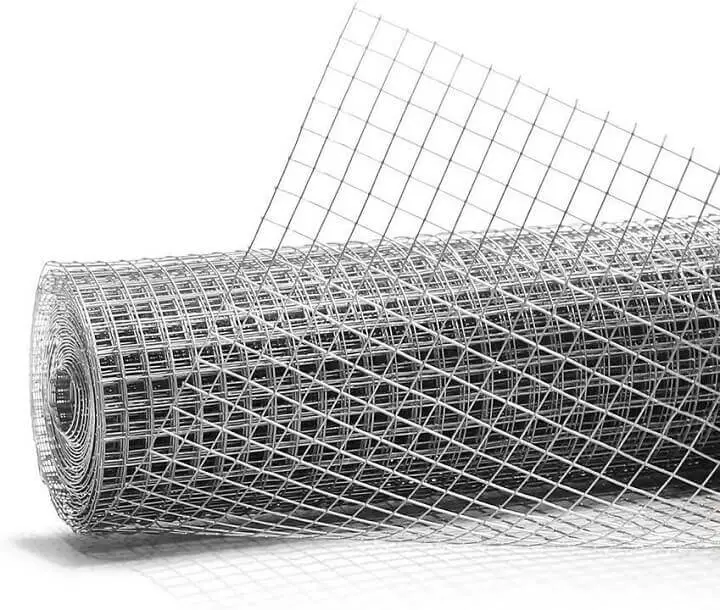
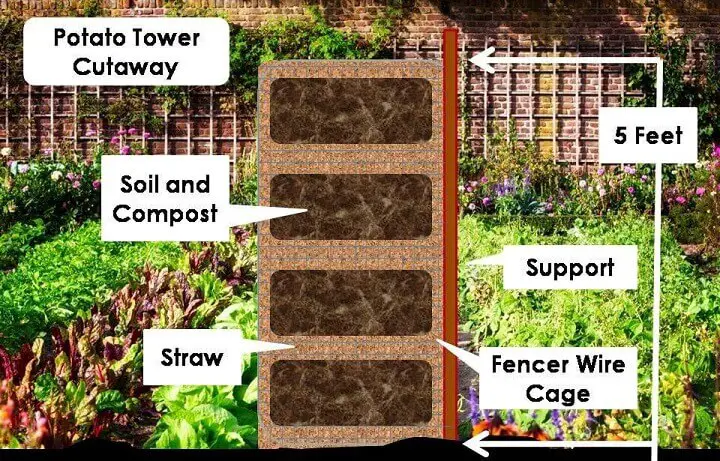
A potato tower is essentially a supported wire cage about 4 to 5 feet high that is layered with straw and compost to grow potatoes vertically. The diameter averages between 2 to 4 feet and the potatoes are planted in layers or tiers of composted soil separated by straw.
Potato Tower Benefits
The primary benefit of a potato tower is that it allows you to grow vertically and save space in your garden. This is a great option for anyone who has limited garden space or wants to maximize the yield from a garden of any size.
Another benefit is ease of harvest. When the potatoes are mature in the fall, you simply remove the wire cage and knock the tower of straw and compost over. You then pull apart the soil and straw and pluck out the potatoes.
There is the potential for a greater yield relative to the space used for the towers but the total yield can vary depending on the average temperature and moisture maintained in the tower. Potatoes like cool, moist soil and a tower sticking up into the air and sun can make temperature and moisture management a challenge.
Want to save this post for later? Click Here to Pin It On Pinterest!
When to Plant Potatoes in Your Tower
Planting season in a potato tower is no different than when you plant potatoes in the ground. Plant after the threat of frost has passed. This is usually in late Spring depending on where you live. As the sprouts emerge they are subject to any frost and that will diminish your yield and the size of your potatoes.
As the potato plants grow, most of them will emerge from the sides of the tower and the layer on top will both grow to the side and straight up.
Building the Tower
You’ll need some basic supplies and tools but a potato tower is an easy build. The hard part is filling it properly with straw and your soil mix.
Tools:
- Shovel
- Wire cutters
- Pliers (for twisting wire)
- Sledge hammer
- Hoe
- Staple gun
Supplies:
- Fencer wire 3 to 4 feet wide and 4 to 6 feet long (similar to chicken wire but has a larger diameter wire although you can use any type of wire fencing if that’s all you have as long as it holds and contains the straw).
- Baling wire (for closing up and attaching the cage to the support pole
- 6 foot metal or wood support pole
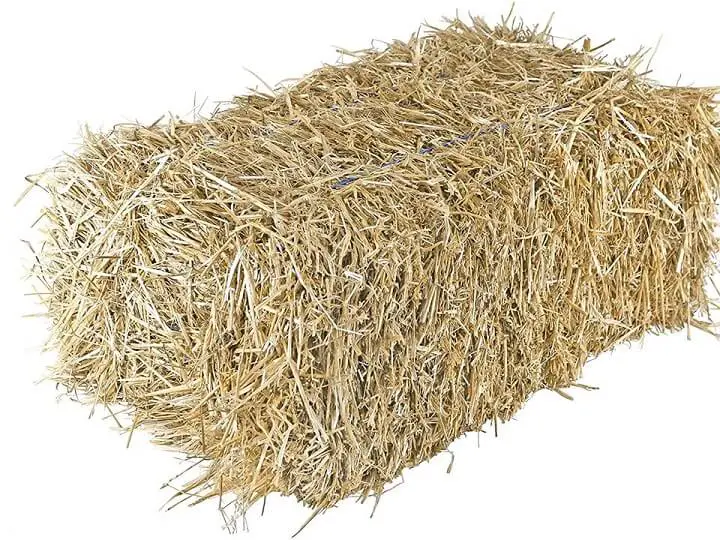
- A bale of hay or collected straw
- A blend of topsoil, compost and peat moss
- 20 to 40 seed potatoes per tower depending on tower size
Assembly:
- Drive the support pole directly into the ground. Determine the height of the tower you want to build (5 foot is about the maximum) and make sure the top of your support pole is about that height.
- Wire or staple your fencer wire to the support pole on one edge of the wire.
- Curve the fencer wire to create a circular cage. You can connect a length of fencer wire with baling wire if you want a larger cage. The finished cage should be 2 to 4 feet in diameter.
- Bring the end of the fencer wire back around to the support pole and wire or staple it to create a secure, circular cage.
Filling the tower with soil and straw:
- Toss some hay into tower and tamp it down with the hoe until you have about 4 inches of compacted hay or straw.
- Use your shovel to reach down and drag some of the straw up towards the side of the tower until you have a circular wall of hay against the edges of the cage about 4 inches high. You want to create a well of straw to hold your soil.
- Shovel your soil mix into the tower filling the cupped well you’ve made with the straw.
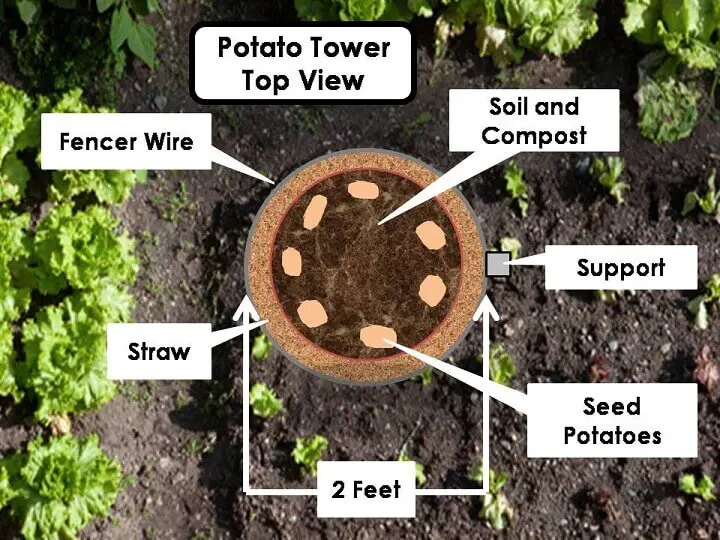
- Plant your first layer of potatoes towards the edge of the tower.
- Reach through the cage with your fingers and push the seed potatoes into the soil and cover with soil.
- Add another 4 inch layer of straw and repeat the process of pulling an additional 4 inches up the side of the tower.
- Plant more seed potatoes and repeat until you get to the final layer of soil at the top of the tower.
- When you reach the final layer of soil at the top of the tower and you plant your seed potatoes across the layer of soil. You don’t need to restrict the planting to the edge of the tower.
- Cover the top layer of soil with a final 4 inches of straw and tamp down.
- Water the tower to setting the straw and the soil and get the potatoes started.
Potato Tower Tips:
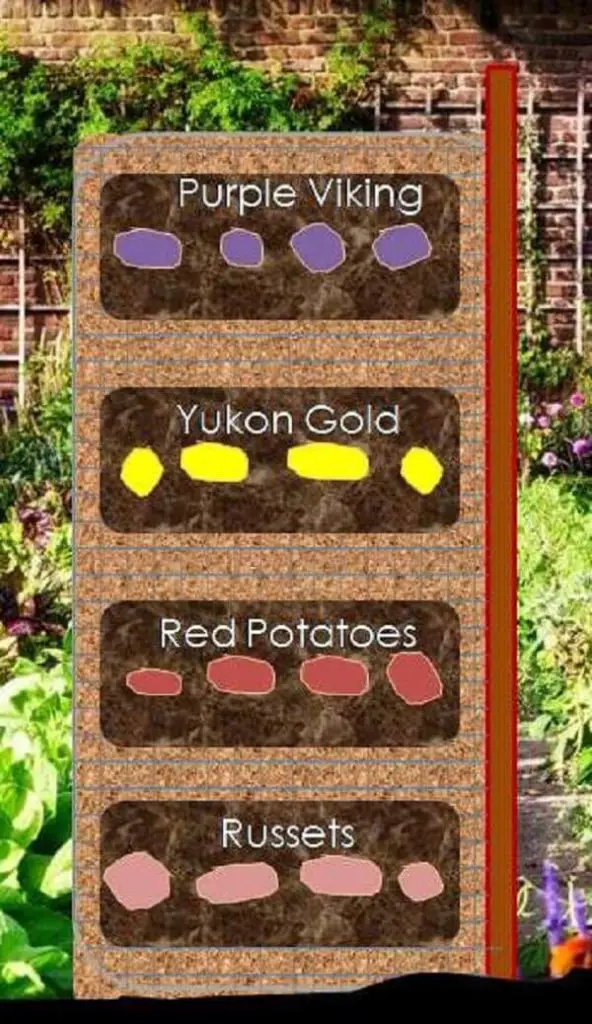
- You can plant any variety of potato in a potato tower. In fact, another benefit is that you can mix and match varieties. Plant Russet potatoes in the first layer, Red potatoes in the second, Yukon gold in the third and so on. It may be worth experimenting that way the first time you build a potato tower to see if a certain variety does better in a tower than others.
- Locate your tower in a place where it will get at least 6 hours of sun a day.
- Keep your tower well watered. A vertical tower exposed to the sun and winds will dry out sooner than anything at ground level. This is especially true at the top of the tower. That’s why you want the entire tower enclosed in straw or hay. It helps to hold in some moisture and protect the soil from direct sunlight. It also why you want a loamy, composted soil mix. That holds moisture better throughout the day and from day to day.
- The straw is critical to success.
The straw or hay you incorporate into your tower will make harvesting easier. Potatoes have no problem growing in a mix of soil and straw and the potatoes are much easier to see in a straw/soil mix. The straw around the sides of the tower is also very important. It’s your best protection against heat and will help retain the moister in the soil. Make sure you are both generous and meticulous with your straw placement between layers and on the sides of your tower.
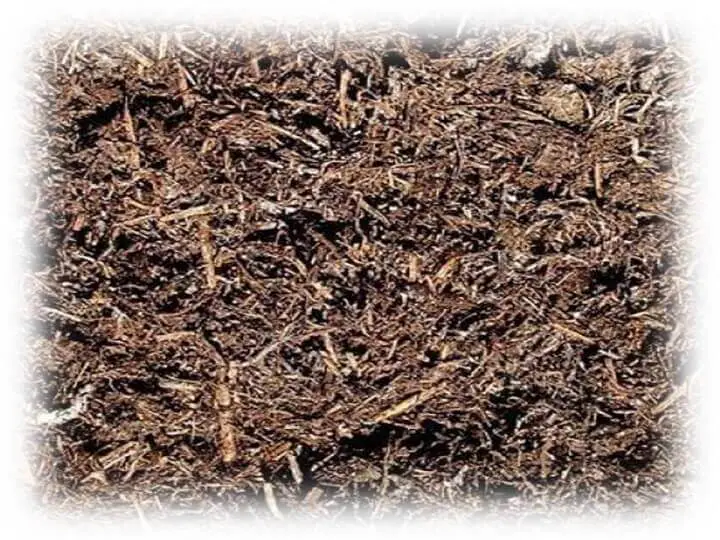
- A good mix for your soil consists of 1/3 part topsoil, 1/3 compost and 1/3 peat moss.
Blend all 3 together and use to grow your potatoes. The topsoil and compost provide nutrients and the peat moss does a great job of holding in moisture in the tower.
Potato Tower Fails
- The most common lament with potato towers is small potatoes. This is largely due to high heat and a lack of moisture. Potatoes grow best in cool, moist soil. If you have a particularly hot summer or warm spell, water more frequently. In fact, water daily if you can just to make sure your soil stays moist.
- Some seed potatoes don’t sprout. This is usually due to a lack of water when the potatoes are first planted. Water heavily on the top but water the sides of the tower as well. The straw will help to wick the water into the tower but it’s a delicate environment because your root system is above ground rising vertically into the air. Water, water, water.
- If a variety doesn’t do well, it’s possible you had a growing season that just wasn’t right for that particular potato or they just don’t like growing in a tower. That’s why planting multiple varieties in your first tower is a good idea. Stick with the varieties that do well and plant the other varieties in the ground in the traditional way.
When and How to Harvest Your Potato Tower
Most farmers will tell you that the best time to harvest potatoes is when the plant stalks have begun to brown and turn dry. That’s when the potatoes are at their largest and the plant is essentially done growing.
To harvest your tower, cut the bailing wire or loosen any fasteners and removed the fencer wire from your tower. The straw and soil construction should still be standing in vertical position but it will be a bit precarious. That’s a good thing because it makes the next step easier.
Push your tower over and onto the ground. Some of the soil and straw tower will come apart. Reach in with your hands and start to tear apart the straw and soil. The potatoes should reveal themselves as your pull the tower apart and all you have to do is pluck them out. Think of it as “potato prospecting.”
Roll up your fencer wire for next year, pull out the support stake and shovel the straw and soil into the compost heap.
You can also harvest any very small potatoes still attached to the roots and either toss them in a soup or plant them in an unused or random part of the garden to overwinter. You might get lucky and get a bonus crop next year.
Like this post? Don't Forget to Pin It On Pinterest!
You May Also Like:


Would it facilitate watering to run a PVC tube, with holes along it’s length, down the middle to assure a universal flow of water to all sections? If so, what circumference of PVC watering tube would you recommend for 2′ versus 4′ wide towers?
I had the same question. Waiting to hear the answer…
You could probably help cool the potato tower by watering it as sunset , or right after dark, so it condensates through the following day.