Estimated reading time: 6 minutes
In a world filled with uncertainties, the importance of preparedness cannot be overstated. While we often stockpile food, water, and first aid supplies, one crucial aspect frequently overlooked is basic sanitation.
Imagine finding yourself in a situation where indoor plumbing is no longer an option. This is where an emergency toilet would come in handy—a simple yet effective solution to ensure cleanliness, hygiene, and a dash of comfort during trying times.
You'd be surprised at how versatile these little portable toilets are. This guide will walk you through the steps to create your emergency toilet using everyday items.
Want to save this post for later? Click Here to Pin It On Pinterest!
Why Would You Need an Emergency Toilet?
First things first, why on earth would you need an emergency toilet? The short answer is that maintaining sanitation is not only crucial for health but also for morale.
In emergencies, clean living conditions can significantly boost your spirit and keep you focused on other survival tasks. Proper waste management reduces the risk of infections and diseases, ensuring that you and your loved ones stay healthy.
Plus, let's face it—having a designated spot for bathroom needs brings a sense of normalcy to otherwise chaotic situations.
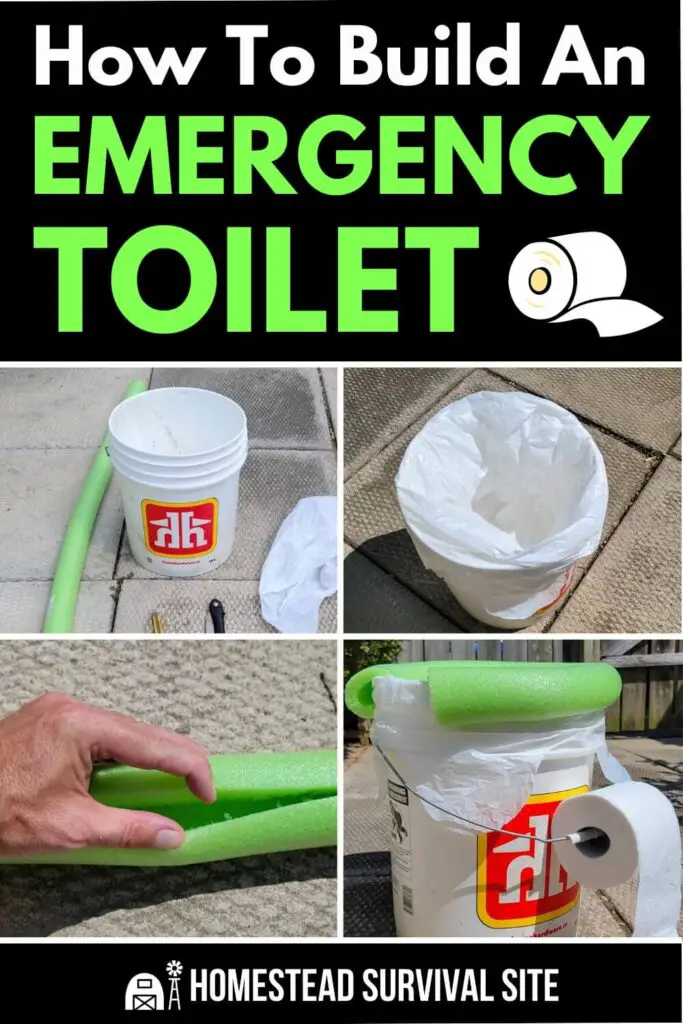
How to Build the Emergency Toilet
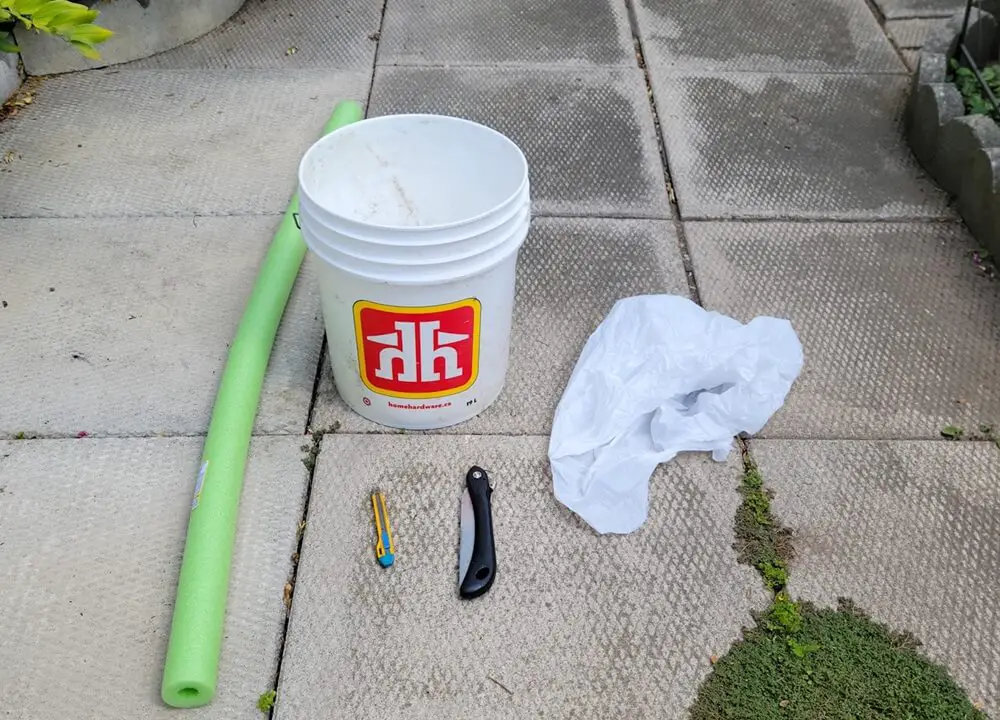
Creating an emergency toilet is easier than you might think. With just a few household items, you can have a functional, sanitary solution ready quickly. Here's what you'll need:
- 5-gallon bucket
- Garbage bag or trash can liner
- Knife/Saw
- Pool noodle
- Toilet paper
With that being said, the building process should only take you a few minutes and you'll be able to use it immediately afterwards.
After you’ve gathered your tools, it’s time to begin building the toilet. Here are the steps to get you started:
Step 1: Prepare the Bucket
Find a sturdy 5-gallon bucket. This will serve as the main structure of your emergency toilet. Make sure it's clean and free of any cracks or damage. If you don't have a bucket at hand, they can be easily found at hardware stores or even repurposed from old paint or cleaning supplies.
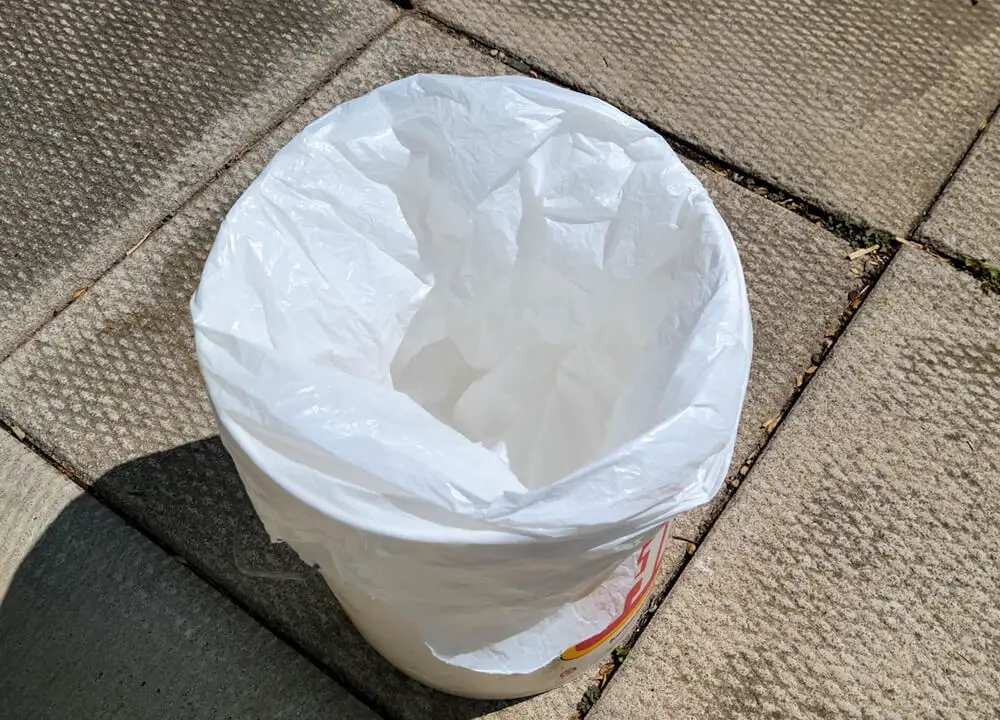
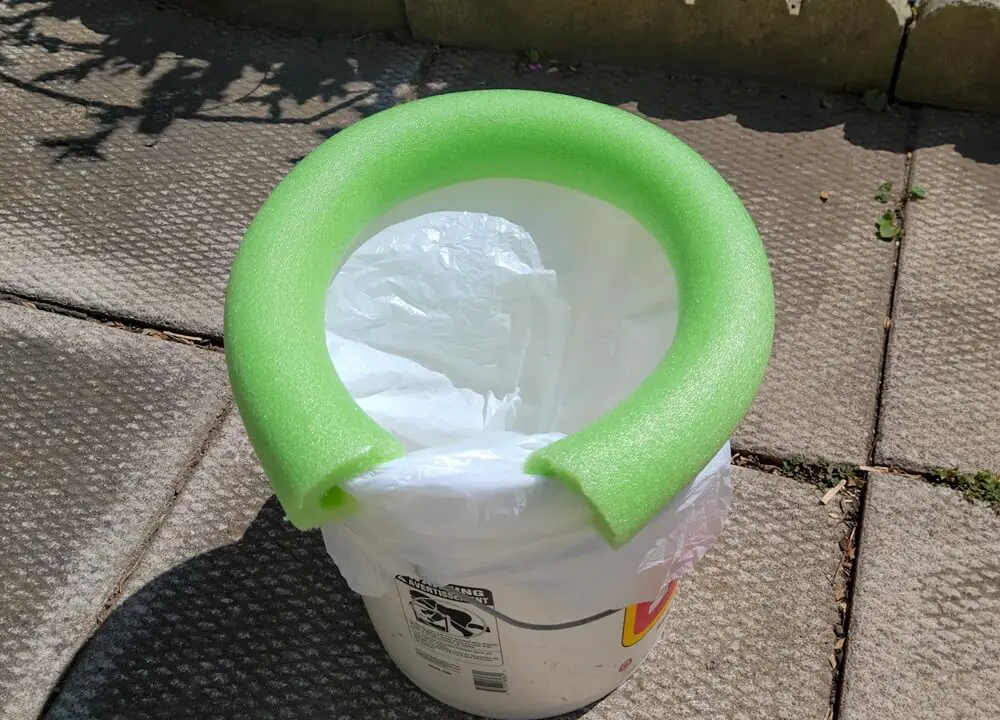
Step 2: Line the Bucket
Take a large garbage bag or trash can liner and place it inside the bucket, ensuring that the edges overlap the rim. This liner will hold the waste and is crucial for making this toilet “reusable”. For added durability, consider using multiple layers of bags or getting thicker material.
Step 3: Create a Comfortable Seat
Here's where the pool noodle comes in. Cut a section of the noodle to fit around the rim of the bucket (usually around 3 feet long).
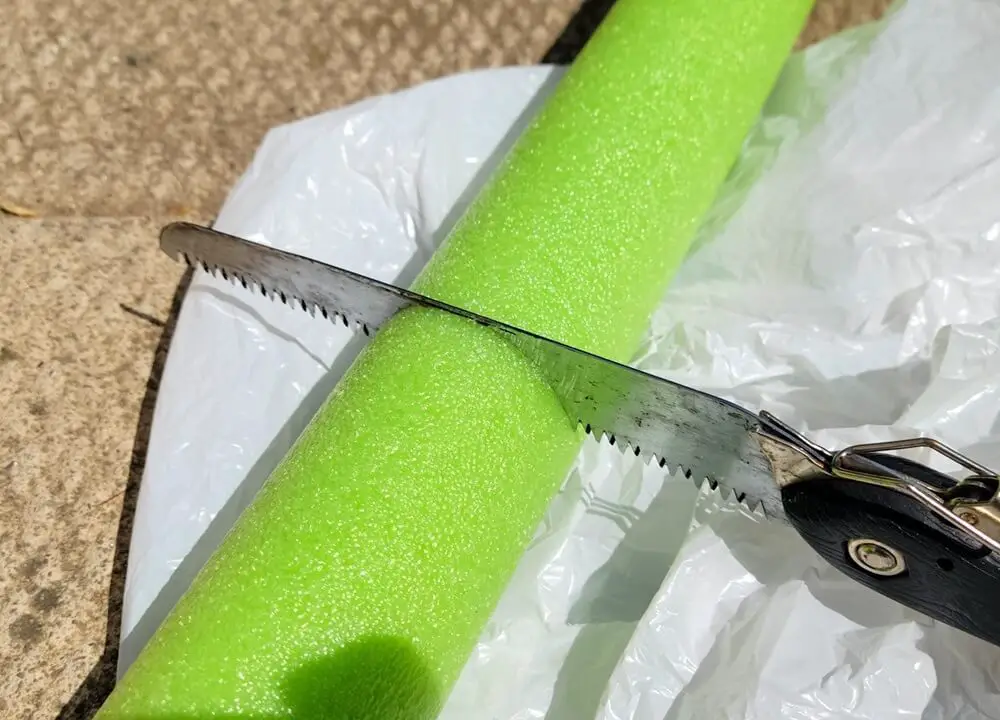
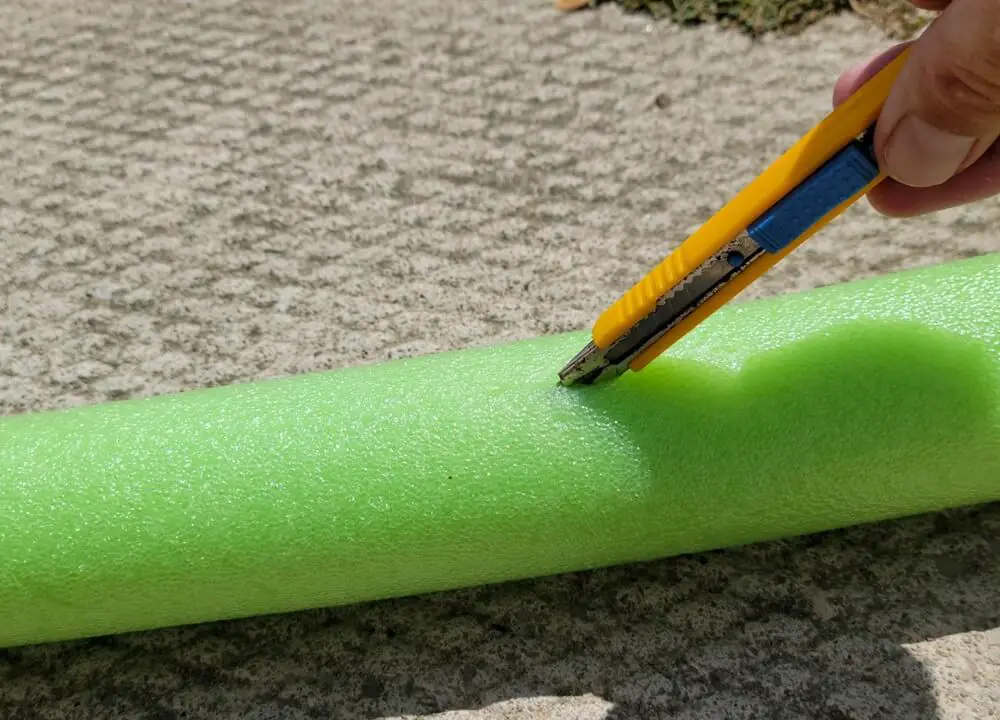
Then, slice it lengthwise to open up the center.
Fit the noodle around the rim of the bucket to create a cushioned seat. Sit on it to help settle the noodle in place so it doesn't move around.
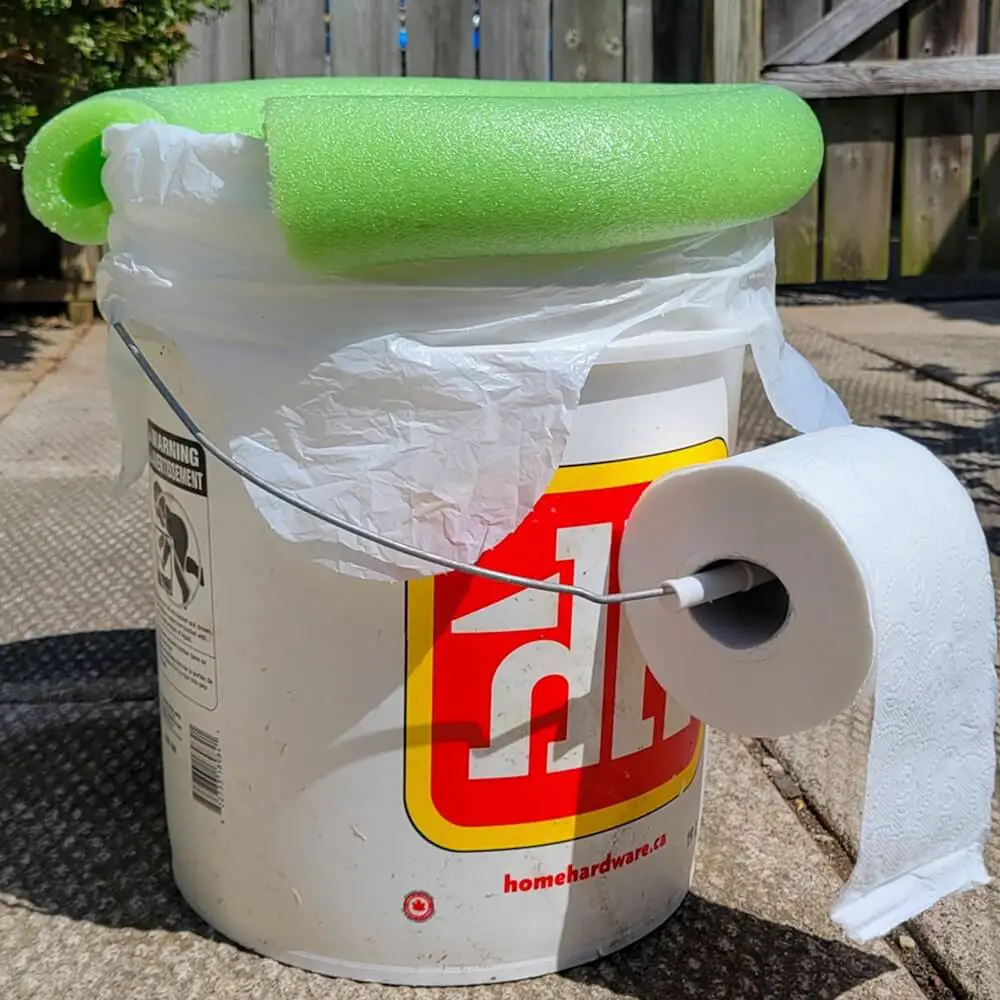
Step 4: Add Toilet Paper
If you take out one side of the bucket handle you can slip a toilet paper roll through it and have it sit on the handle of the bucket. This makes the toilet paper easily accessible and can be left on the handle for convenience.
Managing the Toilet Waste
Now that your emergency toilet is ready to use, let's discuss waste management. Proper disposal is key to maintaining hygiene and reducing unpleasant odors.
Step 1: Cover the Waste
Each time you use the toilet, cover the waste with wood shavings or cat litter. Both materials are excellent for absorbing moisture and controlling odor. If you don't have these on hand, sawdust or even dirt can work as alternatives.
Step 2: Seal the Bag
Once the bag is about halfway full, carefully remove it from the bucket, tie it securely, and place it in a larger garbage bag. This ensures that the waste is double-bagged and minimizes the risk of leakage.
Step 3: Dispose of the Waste
In emergencies, follow local guidelines for waste disposal. If services are disrupted, consider creating a designated waste pit away from living areas. Bury the waste bags to reduce contamination and odor. Be sure to leave a marker in the area so that people don't accidentally dig up your refuse.
Conclusion
In the grand scheme of emergency preparedness, a DIY emergency toilet might seem trivial, but its impact on health, hygiene, and morale is significant. This easy-to-approach project will also help build forward momentum for getting through the crisis scenario at hand.
Like this post? Don't Forget to Pin It On Pinterest!
You May Also Like: