

Estimated reading time: 6 minutes
Mushrooms are easy to grow if you create the right conditions. In this video from the Youtube channel, FreshCap Mushrooms, Tony explains a simple way to grow mushrooms in a 5-gallon bucket using Aspen woodchips and some Oyster mushroom spawn.
What You’ll Need
- A 5-gallon bucket with a lid
- About 5 pounds of oyster mushroom grain spawn
- Enough aspen wood chips to fill the bucket
- A large plastic tote or storage container
- A drill with a quarter-inch bit
- A spray bottle
To start, take a 5-gallon bucket and drill some quarter-inch holes in the bottom spaced about 2 inches apart. Drill some quarter-inch holes on the side of the bucket, also spaced about 2 inches apart.
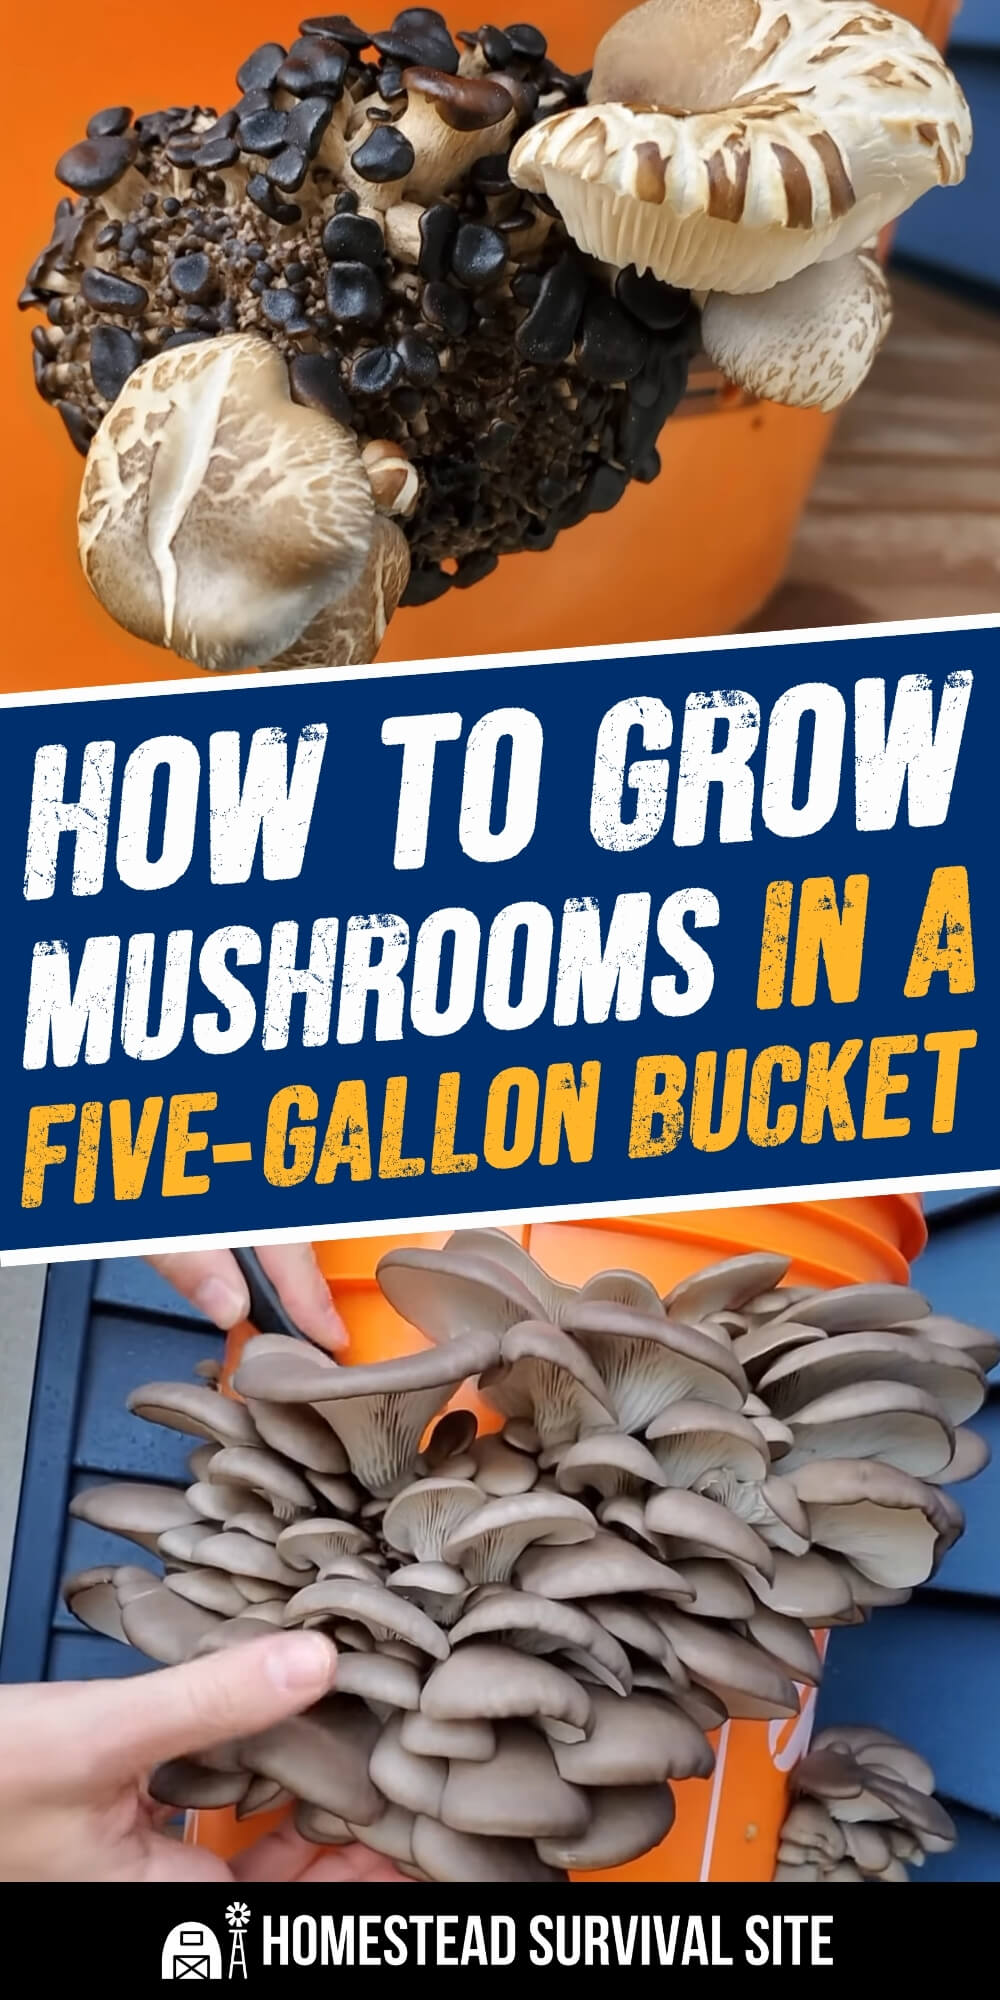
The holes on the bottom let excess moisture drain out, while the holes on the sides let the mycelium breathe and give the mushrooms a place to grow out of the bucket. A quarter-inch hole might not look like much, but it’s plenty of room. In the video, Tony harvests a cluster of oyster mushrooms weighing close to a pound that grew out of a single hole.
Want to save this post for later? Click Here to Pin It On Pinterest!
In a large plastic container, soak aspen woods chips in hot water. You can buy Aspen wood chips at some home centers or on the Internet. You can use hot water from the tap but as the container starts to fill, top it off with a couple of gallons of boiling water to get it to 80 degrees Celsius. That’s 175 degrees Fahrenheit.
Pasteurizing the chips kills off many of the competing organisms that could contaminate your bucket, giving the mushroom mycelium a head start. It also softens the wood chips, which makes it easier for the mycelium to work its way through them.
Tony mentions that plain aspen chips might do fine with just a soak, but pasteurizing gives you a much better chance of success. A kitchen thermometer is handy for checking the water temperature, and putting a lid on the container will help it hold the heat longer.
If you can’t find aspen, other hardwood chips such as oak, maple, or alder will also work. Avoid softwoods like pine and cedar, which oyster mushrooms don’t grow well on.
Let the wood chips soak overnight. Before you add the spawn, make sure the chips have cooled down to room temperature. If they’re still hot, they can kill the mushroom spawn.
The next morning, grab some soaked wood chips from the container and let them drain in your hand for a few seconds and drop them into the bucket. Fill the bottom of the bucket with an initial layer of chips about 2 inches thick and top with crumbled Oyster mushroom spawn.
Break the spawn up as much as you can so you don’t end up with big clumps. That way, it’s spread evenly throughout the bucket and can colonize the chips faster.
Don’t worry if your spawn has been sitting a while and has turned into a solid block or even has a few tiny mushrooms growing in the bag. As Tony shows in the video, it’ll still work fine as long as it smells fresh and mushroomy. If it smells sour or you see green or black mold, don’t use it.
Oyster mushrooms are a great choice for beginners because they grow quickly, they’re very forgiving, and they can outcompete a lot of the molds and bacteria that might otherwise ruin your crop.
Top this first layer of spawn with another layer of wood chips and sprinkle some more spawn on top. Make sure you gently compress the wood chip layers as you go.
Pressing the chips down helps the mycelium spread from chip to chip and colonize the whole bucket. If your chips are dripping wet, squeeze some of the water out before adding them. A good test is to squeeze a handful of chips. If just a few drops of water come out, the moisture level is about right.
Repeat the process in layers until you have filled the bucket to the top. Make sure the very last layer is wood chips rather than spawn. For reference, Tony used about 5 pounds of grain spawn to fill his bucket.
Cover the bucket with a lid and place it either in the garage if the weather is cold, or if the weather is warmer -outdoors in the shade. Try to put the bucket in an area protected from the wind as well. The mushrooms will need some air circulating but they thrive on high humidity and you don’t want the wood chips to dry out.
After a week, lift the lid and check the wood chips. They should feel compact and you should notice the mycelium or young mushroom growth starting to spread into the chips. If the weather is particularly dry, cover the bucket with a plastic garbage bag but lift it from day to day to let air circulate.
Try not to open the lid too often during this stage, since the mycelium does best when it’s left alone. It usually takes about 10 to 14 days for the bucket to become fully colonized. When it is, the chips will be bound together with white mycelium and the whole thing will feel solid. At that point, if the bucket has been sitting in your garage, it’s time to move it outside where it can get plenty of fresh air.
After two weeks, check the bucket again. You may notice some mushroom sprouts emerging from the holes in the side of the bucket. As these buttons continue to grow you can mist them with water from a sprayer. Continue to do this as the mushrooms grow and mature.
Humidity is most important when the mushrooms are first starting to appear. If the tiny mushrooms, called pins, dry out, they’ll stop growing. Once they’ve grown past that initial stage, they’re much less fussy about humidity.
Fresh air matters too. Oyster mushrooms, especially blue oysters, are sensitive to carbon dioxide, so plenty of fresh air helps them grow into big clusters with large caps. If your mushrooms have long stems and small caps, they probably need more fresh air.
As the mushrooms mature you can begin to harvest and make sure you pick them before their caps start to turn up. That’s a sign that they are about to quickly dry out and release spores.
To harvest, just take a sharp knife and cut the entire cluster off right where it comes out of the hole. Store your fresh mushrooms in a paper bag in the refrigerator, where they’ll keep for about a week. Oyster mushrooms should be cooked before eating rather than eaten raw.
After harvesting your mushrooms, you can leave the bucket to see if you get a second harvest. If little or nothing shows up, dump the wood chips in the yard and cover with straw. You should get a second or third crop this way and they may continue to grow in that area over the years.
Of course, this is much easier to understand if you can see it done, so be sure to watch the video below to learn more.
Like this post? Don't Forget to Pin It On Pinterest!
You May Also Like: