

Estimated reading time: 18 minutes

Vinegar has been around a long, long time. Its history goes back 8,000 years to civilizations ranging from the Babylonians to the Egyptians. The word itself is derived from Latin: vin aigre or sour wine. That’s because vinegar was made from wine that was old or stale and had soured.
And that leads to a curious part of the vinegar making process. You have to ferment something to alcohol and then let it sour to get vinegar, including apple cider. As a result, you’re going to need to make hard cider first and then allow it to sour to get apple cider vinegar.
Want to save this post for later? Click Here to Pin It On Pinterest!
Why Apple Cider Vinegar?
The easiest answer to why people make apple cider vinegar is the widespread availability of apples and a common practice of making apple juice or cider from the apples. It was inevitable that ancient people who made apple cider would find that an improperly stored cider would eventually ferment to alcohol and, in time, would continue to ferment and sour to vinegar.
This process was a happy accident to some degree as the first cocktail of hard cider or applejack emerged from apple cider, and it didn‘t take long for us to figure out that the resulting vinegar had some unique properties and benefits as well.
The Recipes Vary
Any review of apple cider vinegar recipes will present you with a wide range of opinions of how to do this. Some recipes call for just chopping apples and immersing them in water to begin fermentation. Others encourage you to make apple cider from the apples and ferment the pure juice.
Still others recommend the addition of sugar and wine-making yeast to the juice to accelerate and ensure fermentation. We’re going to go with the last approach as it offers the best chance for a good result in a short period of time.
Apple Cider Vinegar Benefits
The list of health benefits and uses for apple cider vinegar is very long. Some of the benefits extend to food preservation, antiseptic and cleaning properties, and other uses that are somewhat surprising.
It’s recorded that Hannibal’s army used vinegar to dissolve rocks that had been heated by bonfires to break his way through the Alps to attack Rome in 218 B.C. It’s unlikely that most of us will be dissolving cliffs with vinegar anytime soon, but it’s worth understanding some of the unique properties of vinegar in general.
Vinegar is an Acid
Acetic acid to be precise. It’s one of the reasons vinegar has unique cleaning and antiseptic properties and why it will actually dissolve carbonate rocks, especially when they’re heated. But apple cider vinegar has some additional unique qualities and components compared to conventional white vinegar.
What Makes Apple Cider Vinegar Unique?
This all gets down to a debate contrasting white vinegar, which is the most common vinegar, and apple cider vinegar. Most of the qualities uniquely associated with apple cider vinegar are health related, but it should be noted that many of these claims are based on folklore and ancient cures.
There’s a good argument that if something has been effective for thousands of years, there must be something to it. Here, in no particular order, are the various health benefits often associated with apple cider vinegar:
- Aiding weight loss
- Reduces blood sugar levels
- Keeps insulin levels in check
- Lowers cholesterol
- Improves your gut health
- Antioxidant boost
- Helps control appetite
- Kills germs
- Treats acne
- Is good for hair
Beyond the general health benefits, apple cider vinegar is an excellent preservative for canning and pickling. It’s often used in recipes and cooking, and it shares the cleaning properties of white vinegar as a household cleaner and disinfectant.
Maybe the greatest benefit is that it’s easy to make, assuming you have a good supply of apples and some basic equipment and supplies.
The Apple Cider Vinegar Making Process: In a Nutshell
Apple cider vinegar is made from fermenting apple juice or whole apples. The apples are juiced and then combined with yeast to induce fermentation. During the fermentation process, the sugars in the apple are converted to alcohol. After the initial fermentation, acetic-acid bacteria develop to convert it to vinegar. The resulting liquid contains malic acid and acetic acid.
About Acetic Acid
The percentage of acetic acid in any home-brewed vinegar can vary. Commercially sold vinegars have a dilution of water to vinegar resulting in an acetic acid solution ranging from 4% to 30%.
The proportion of acetic acid typically recommended for canning and pickling is 5%. The proportion for industrial cleaning and disinfecting is 30%. As a general rule, concentrations of 4% to 7% are recommended for consumption. Any concentration over that percentage can cause intestinal distress or worse, depending on your health.
Determining Acidity in Homemade Apple Cider Vinegar

Most grocery store vinegars including apple cider vinegar typically present an acetic concentration of 5%. If you’re not sure about your homemade apple cider vinegar, you can do a quick test with a pH strip. They’re available at pharmacies or online and measure pH on a scale of 0 to 14. At the 0 end of the scale are the most acidic substances while 14 represents the most alkaline.
Apple cider vinegar usually presents a pH of 3 which indicates a 5% concentration of acetic acid. Use your test kit to assess the acidity of your apple cider vinegar, and if the strip indicates any moves towards a pH of 2, you should add a cup of water and mix, retest, and repeat, adding water until your test strip indicates a clear measure of 3 on the pH scale.
If the pH test strip indicates a move up towards a 4 or 5 on the pH scale, that means there is less acidity moving into the 1 to 3% range and you should continue the fermenting process.
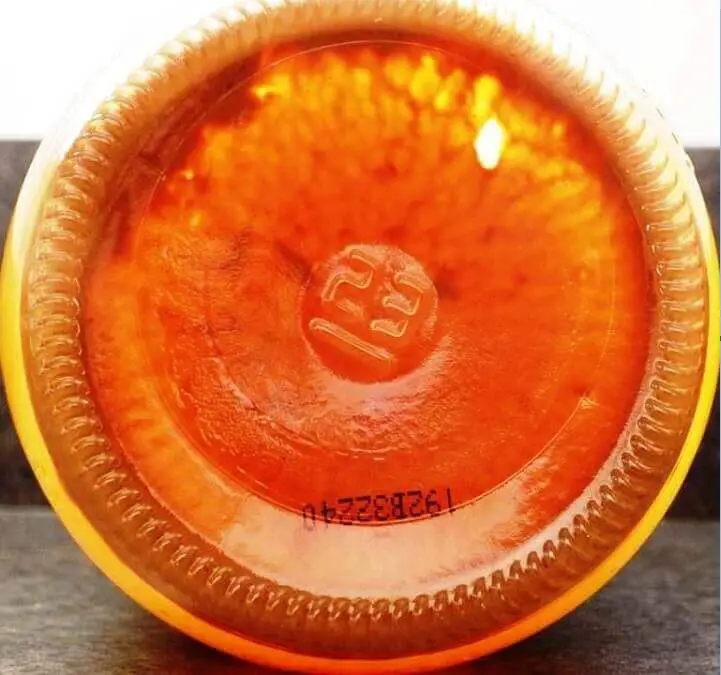
What’s Up with “The Mother?”

You may have spotted a curious phrase on bottles of natural apple cider vinegar in the grocery store. The label proudly proclaims “With the Mother.”
It’s an odd expression, but it’s connected to a purported benefit of the natural fermentation process that leads to apple cider vinegar.
The “mother” consists of dozens of strains of good bacteria, which are often referred to as probiotics. These help keep your digestive system running smoothly so that you can get the most out of the food that you consume. Many organic apple cider vinegars proudly proclaim that they are “raw, unfiltered, and unpasteurized.” That’s reassurance to many that the mother is intact and the probiotics are present and available.
Probiotics are also great for the immune system, the majority of which is located in your digestive tract. The good bacteria in your digestive system compete for resources with the bad bacteria, and maintaining a healthy balance can help prevent you from getting sick.
The mother also contains enzymes, which are essential for breaking down foods so your body can make use of the nutrients you consume. Most raw foods contain enzymes, but the enzymes are often destroyed by cooking; adding in a supplementary source like apple cider vinegar is a great way to make up for this.
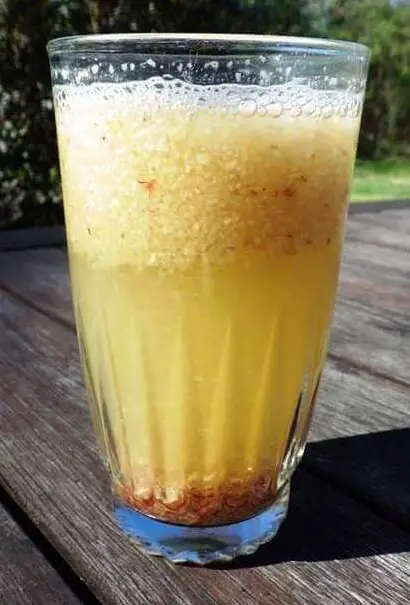
The mother usually appears as a thin layer of sediment in the bottom of the jar of raw, unpasteurized apple cider vinegar.
It can also appear as webbed and murky stuff floating around inside your homemade apple cider vinegar or as a gelatinous blob floating on the top of the fermenting vinegar. Embrace the blob and enjoy the webs. Their appearance means your cider is turning to vinegar and the mother is in the house. But don’t be alarmed if it doesn’t show up. It’s there. It just might not be as apparent.
Some people filter out the mother through coffee filters so they don’t get a cloudy vinegar. Don't this won't affect the taste or quality of the vinegar, you’ll just sacrifice some of the health benefits.
The point is simple: you can filter your apple cider vinegar if you want it to look clear and translucent, but you’ll lose the good probiotics and enzymes. Filter through a coffee filter if you must, but don’t tell your mother.
Making Apple Cider Vinegar
There are two ways to make apple cider vinegar: the easy way and the hard way. The hard way can take months. The easy way takes days to a week or more. There is no difference in quality. The only difference is the addition of a specialized yeast that accelerates the process of converting the cider to hard cider and finally to vinegar.
Our pioneer ancestors weren’t able to buy these additives, but the yeast is available online or at some high-end grocers and health food stores. We’re going to go into detail about how to make this the easy way, but we'll also cover the long-term process briefly just in case you don’t have access to the short-cuts.
Regardless of the approach you take, temperature is always an important factor. The temperature must always be maintained at 60° to 80° F. A pantry or cabinet around a steady 70° F. is ideal. This will maintain the optimum environment for fermentation and the eventual vinegar. There are also some things you’ll need, regardless of your approach.
Equipment:
- Knife
- Cutting board
- A large, 1-gallon glass jar with a lid that can be tightened or kept loose. You could also use a 1 or 2-gallon crock with a lid or plastic, wood, or enamel containers. Do not use any type of metal container or they will be corroded by the vinegar. Some say stainless steel is okay to use, others say it’s not. Best just to avoid any metal container, especially if you’re fermenting for a long time.
- A food processor or blender (to chop and pulverize the apples). If you have an apple chopper and a cider press, all the better.
- A colander to strain out larger bits and chunks of apple either before or after fermentation when the whole process is complete.
- Cheese-cloth to cover your jar for the fermentation process.
- Coffee filters if you want a translucent vinegar (but you’ll lose the mother)
Ingredients:
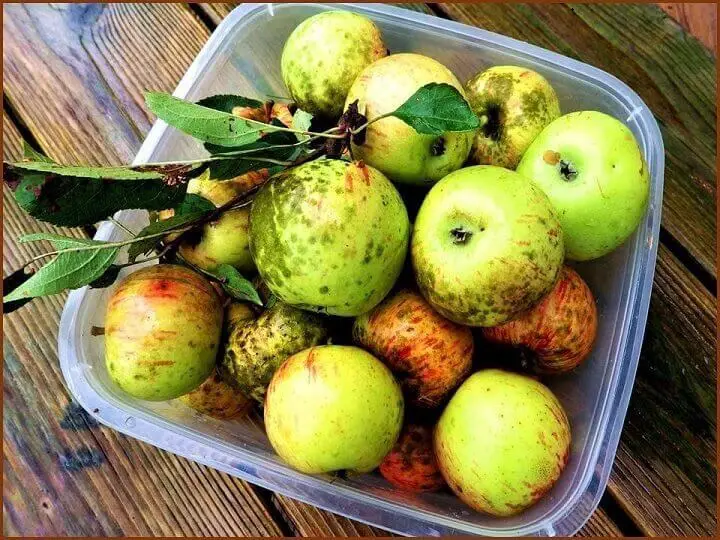
- Fresh, ripe apples picked in Fall or Winter. You can combine varieties and even mix in crab apples. What’s important is that they are mature, ripe, and picked later in the year when their fructose or sugar levels are highest. Figure a bushel to capture a gallon of juice, but the volume of juice varies depending on the species of apple, so crush your apples until you have a gallon. If you don’t have enough apples to make a gallon, make what you can. The yeast won’t mind.
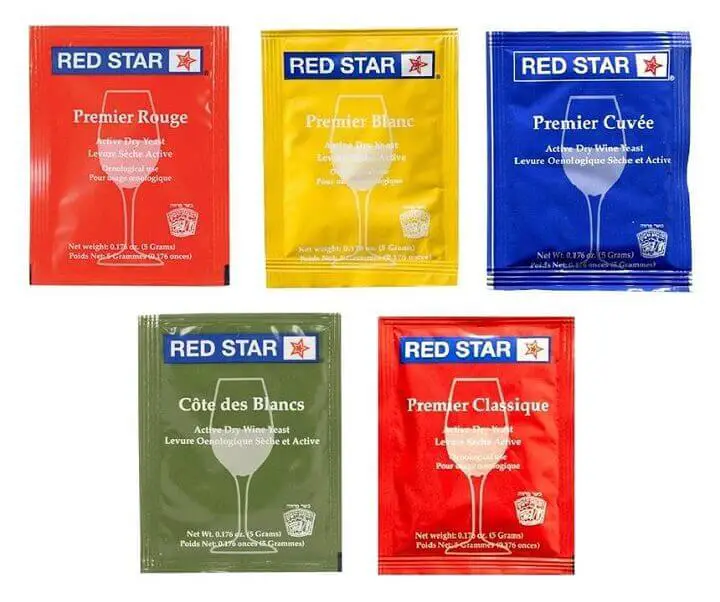
- Yeast. You’ll need a special yeast used for winemaking, not bread yeast. If you have no access to a store or any type of yeast, you can harvest and nurture wild yeast from wild grapes and other natural sources. Yeast is not totally necessary, and the cider can ferment without it, but that’s doing it the hard way and it could take months. Adding your own yeast speeds up the process.
- Sugar. You could also use honey or maple syrup, but sugar is the fuel for the fermentation process. Some recipes recommend a teaspoon of sugar for each apple you juice, but that depends so much on the size and type of apple that you’re probably better off starting with 1 cup of sugar to every gallon of juice. You can ferment without adding sugar due to the natural sugars in apples, but this starts to move you towards a longer term process that takes weeks and months instead of days and weeks. If you want to do this the easy way, add sugar and a winemaking yeast.
- Water. The only reason you would add water is to reduce the acidity of your cider vinegar. This is when you use your pH test strips to measure acidity and the addition of water simply helps you adjust the acidity to 5%.
Process:
There are 5 fundamental steps that we’ll detail. Here’s the telegram:
- Start by making a clean cider from ripe apples.
- Ferment all of the fruit sugar to alcohol through “yeast fermentation.”
- Ferment all of the alcohol to acetic acid. Through “acetic acid fermentation.” (This happens by itself – no need to add anything.)
- Clarify the acetic acid through cheesecloth to slow further fermentation and decomposition.
- Process your cider vinegar to totally stop fermentation and preserve if you want to keep it for long-term storage.
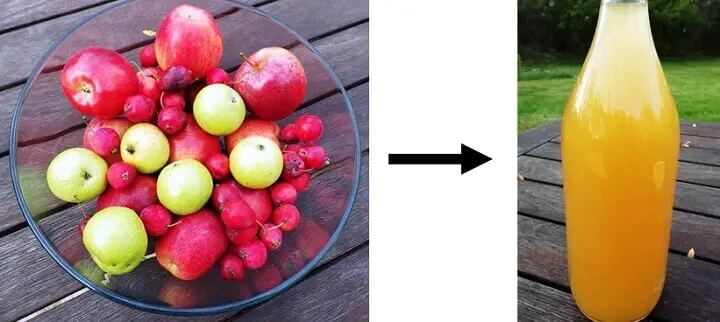
1. Making the Cider
Making cider from apples is easy. All you need to do is cut up and crush the apples and find a way to press out and strain the juice. You don’t have to peel them, but you might want to get the seeds out. Apple seeds have traces of cyanide, so get rid of them by casting them around the neighborhood like Johnny Appleseed.
There are also approaches that involve letting sliced apples brown in the jar and then covering with water and simply letting them ferment naturally. That’s the old-world way and it takes months, so we’re going to focus on the faster way.
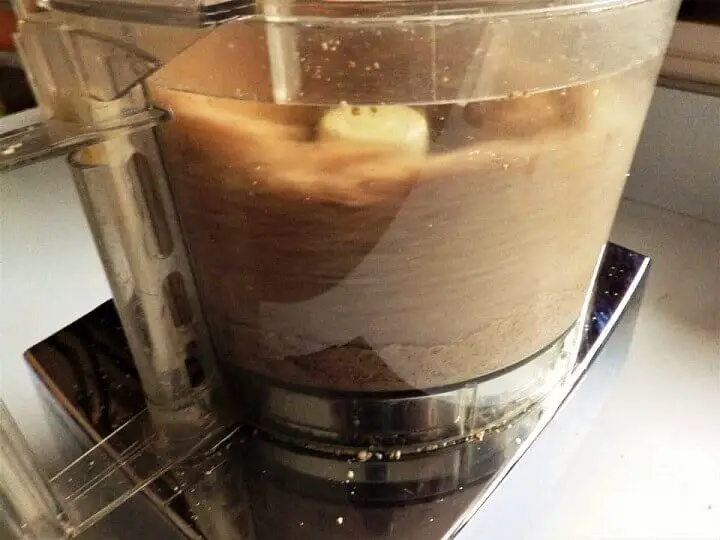
One way to make the juice is to core and cut up the apples into large chunks and process in a food processor.
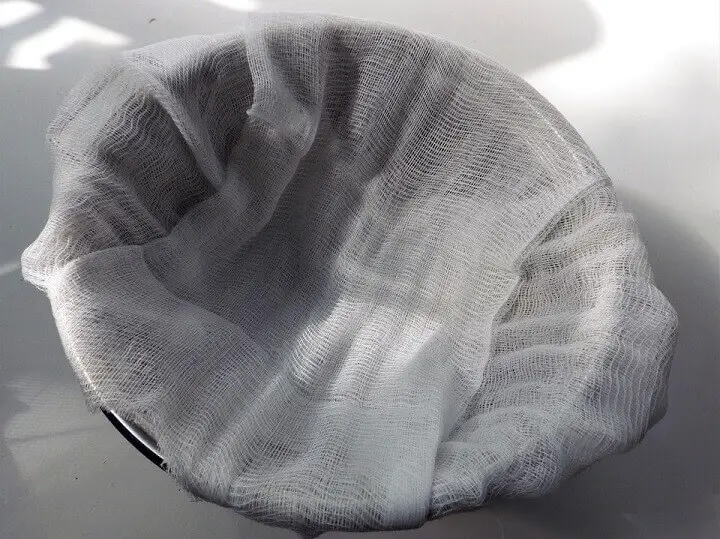
You then line a large bowl with layers of cheesecloth or a linen cloth and pour the mash into the cloth in the bowl.
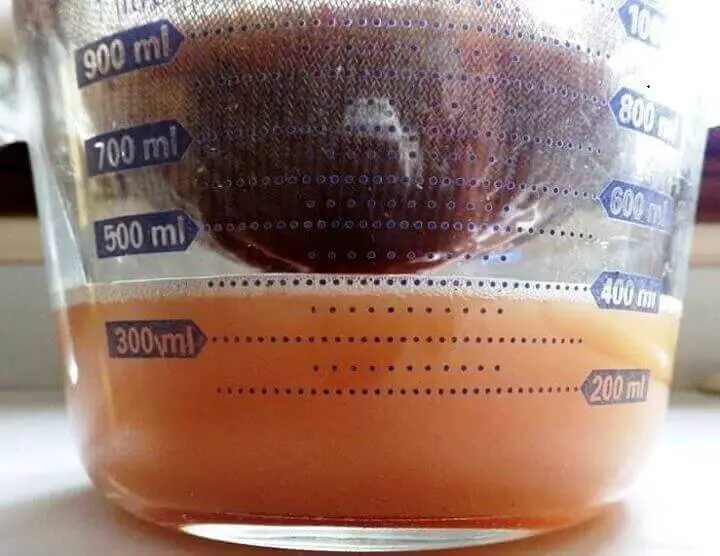
After that, carefully lift the cloth and apple mash over the bowl and gently turn and squeeze the mash ball to release as much juice as possible.
Some people pour the juice and the mash into their fermentation jars or jugs and let the whole thing go through the fermentation process and then strain it through cheesecloth later. That’s up to you.
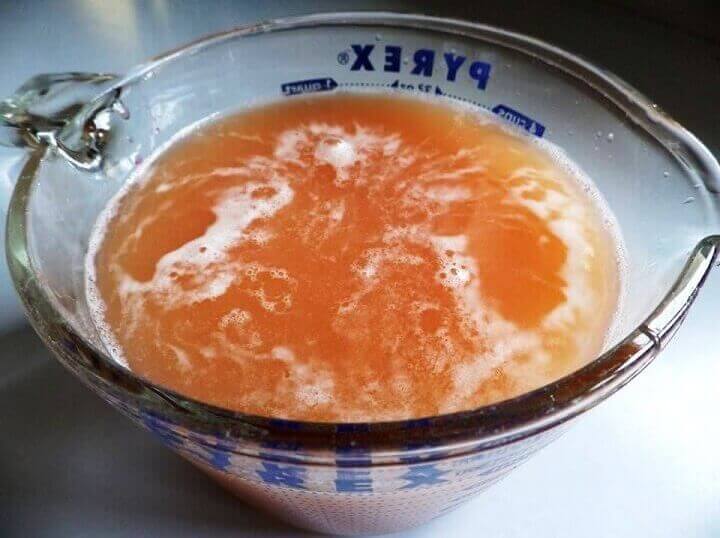
Purists strain the pulp and mash mixture in a strainer or colander to get to a cider resulting in a pulpy, rough cider with bits of apple. Professionals use an apple crusher and a cider press.
Repeat this process until your apples are juiced and then add a cup of sugar per gallon to the cider. Mix it well with a wooden spoon to dissolve the sugar. Another school of thought is to skip the sugar, but that will take you back into months of fermentation instead of days and weeks.
2. First Fermentation
Add a packet of wine makers yeast to the cider. One packet will do for most amounts of cider, although a packet per gallon is a general guideline, but a packet in a half gallon will do no harm. Yeast is a living culture and will survive, multiply, and thrive in the right environment over a period of time.
It’s not like bread yeast which calls for fairly precise measures because bread rises quickly and must be baked relatively soon so it doesn’t lose the “rise.” Yeast in cider will catch up to the volume over a day or two and continue to grow and multiply while it ferments the cider.
Cover your jar with a few layers of cheesecloth and seal around the rim with a rubber band.
Store in a dark place out of the sunlight that maintains a temperature around 70° F. but no lower than 60° and no higher than 80º.
3. From Hard Cider to Apple Cider Vinegar
Stir your cider once or twice a day and always smell the aroma to assess progress. Initially, your cider will turn to alcohol or hard cider, but eventually it will develop a sour aroma. That’s the signal that fermentation is turning your cider into vinegar and the mother is kicking into high gear.
4. Clarify Your Vinegar
Skim the scum. You may get a bit of scum on the surface of your fermenting cider from time to time. No worries. That’s the result of the fermentation process and the bubbling activity of the yeast. Skim it off when it shows.
Test with a pH test strip if you want some reassurance that vinegar is happening. When the test strip indicates around a 3 on the pH scale, you’re done. That means you have an acidity level of 5%. Otherwise you can just taste it. If it tastes like vinegar, it is.
Filter through two layers of cheesecloth. You want to remove large particles and some of the yeast, but don’t overdo it. You want to retain some of the “mother.”
5. Package and Process Your Cider Vinegar
Process your apple cider vinegar, but be forewarned. Processing or “pasteurizing” the cider vinegar will kill the mother and all of its benefits. If you choose not to process, keep your vinegar refrigerated and it should keep for about 6 months to a year. This isn’t so much about preserving your cider as much as it’s about stopping the fermentation process.
Vinegar is a natural preservative and resists most bacteria, but the yeast won’t quit until you stop it. Pouring the cider into mason jars and processing in a hot water bath for 15 minutes will kill the yeast and stop the fermentation, but you will lose some of the health benefits often associated with apple cider vinegar.
Store your cider wherever you store other vinegars. If processed, it should keep for years. If not processed, keep it in the fridge or a root cellar and use within 6 months to a year.
Tips, Cautions and General Musings on Apple Cider Vinegar
Natural unprocessed apple cider vinegar never stops fermenting. As a result, you may need to add water to keep it from becoming too acidic. Use pH test strips to assess acidity if your vinegar has not been used for a while or if it tastes particularly tart. And always remember to keep unprocessed apple cider vinegar refrigerated. Otherwise, process it in a hot water bath for 15 minutes and the fermentation will cease.
There is such a thing as ingesting too much cider vinegar. Many people become enamored with the health benefits of apple cider vinegar, but like so many other instances, there can be too much of a good thing. Moderate your usage and pay attention to how much apple cider vinegar you can or should ingest. This varies by person and their personal health profile.
If you are planning to use your cider vinegar for cleaning, you can use it as is or you can encourage it to ferment more to raise the acidity. Your home-brewed cider vinegar is probably at about a 5% acidity level, but commercial cleaning vinegars have acidity levels up to 30% which would move a pH measure towards a “2.” You may not get that high, but if you are using a batch solely for cleaning, the higher the acidity the better as a cleaner and disinfectant. Just don’t drink it.
If At First You Don’t Succeed…
In spite of our best efforts, a lot can wrong when fermenting anything. If your first attempt is a fail, just toss it and try again. Apples are relatively cheap and you could even buy a jug of cider if you want to simplify some of the early steps of the process.
If you grow your own apples, you most likely make cider already and figuring out how to make vinegar from your cider just makes sense. Besides, there’s always that interim step where the cider turns to hard cider, so you could always sit and sip some of your applejack while you ponder all of the coming benefits of your homemade apple cider vinegar.
Like this post? Don't Forget to Pin It On Pinterest!
You may Also Like:


–
Hard cider is the fermented apple cider. Applejack is the fracted extraction of alcohol from hard cider. That fracting is done by freezing the hard cider, the water in it will freeze and the applejack will remain on the surface unfrozen. It is close to 100% alcohol. Tasty but WOW! it’s got serious kick.
`*