Estimated reading time: 20 minutes
It’s quite possible that you’ve never heard of meat powder. In that case you may have assumed that you’ve never tasted it either. In actual fact, you have probably tasted meat powder multiple times without knowing it. It is often added to packaged foods as an ingredient
The primary reason food processors use meat powder is to enhance the nutrition of various products from a protein standpoint; add flavor and on a basic level it gives them permission to put the word “meat” on the package. There’s nothing legally wrong with that because meat powder is in fact made from meat.
Want to save this post for later? Click Here to Pin It On Pinterest!
Meat Powder is a Traditional Survival Food
More than a hundred years ago Arctic and Antarctic explorers survived largely on a type of food called “Pemmican.” On a fundamental level it’s a mix of animal fat and meat powder. Sometimes nuts, oats and raisins were added.
If you look at any pemmican recipe you’ll see meat powder as a primary ingredient next to animal fat. Long before food processors, pemmican was made with powdered beef jerky that was dried until desiccated and then pounded into a powder.
It was easy for polar explorers to keep their food from spoiling largely due to the cold weather, but also due to the long-shelf life of meat powder and the preservative properties of animal fats. The cold temperatures prevented the fat from becoming rancid and the meat powder presented few problems from a food spoilage standpoint. However, we’re going to try to limit the amount of fat that ends up in our meat powder.
Why Would You Need Meat Powder?
There are a few reasons that we’ve hinted at. The biggest reason is for emergency food storage. Meat powder lasts and lasts and can not only bring added flavor in desperate times but a good boost of protein. Another reason is to use it every day for quick and easy meals that taste great and have good nutrition.
What Exactly is Meat Powder?
Meat powder is made from any type of meat that has been cooked and dried either in a low and slow oven or dehydrated. It can also be freeze-dried. The dried meat is then pulverized in a blender, food-processor or even a grain mill.
It’s then packaged and either refrigerated or further processed for pantry storage. Its shelf-life is dependent on the level of processing, the packaging and how it’s stored but it’s reported that most meat powders last for up to 30 years.
Which Meat is Best?
The best meat for making meat powder is all a matter of taste. You can use beef, pork, chicken, lamb, venison, buffalo, or any other meat you would typically eat. A benefit of meat powder is that coarse cuts of meat make an excellent meat powder. Better yet, you can use the hearts, liver, even something as exotic as beef tongue.
Once it’s cooked and pulverized no one will see a cow’s tongue on their plate and the resulting flavor and nutrition is the same as a prime cut of steak.
Remember the Vegetables
It’s common to add vegetables to the mix when making meat powder. The vegetables are typically the standard additions you would put into a stew including carrots, celery, onion and if you prefer; garlic, herbs or any other additions you might throw into a stew.
You’ll want to chop the vegetables coarsely before cooking but you can use chunks because you’re eventually going to pulverize the carrots and onions with the meat. Vegetables are always an option and you can omit them if you want a straight meat powder.
How is the Combination Cooked?
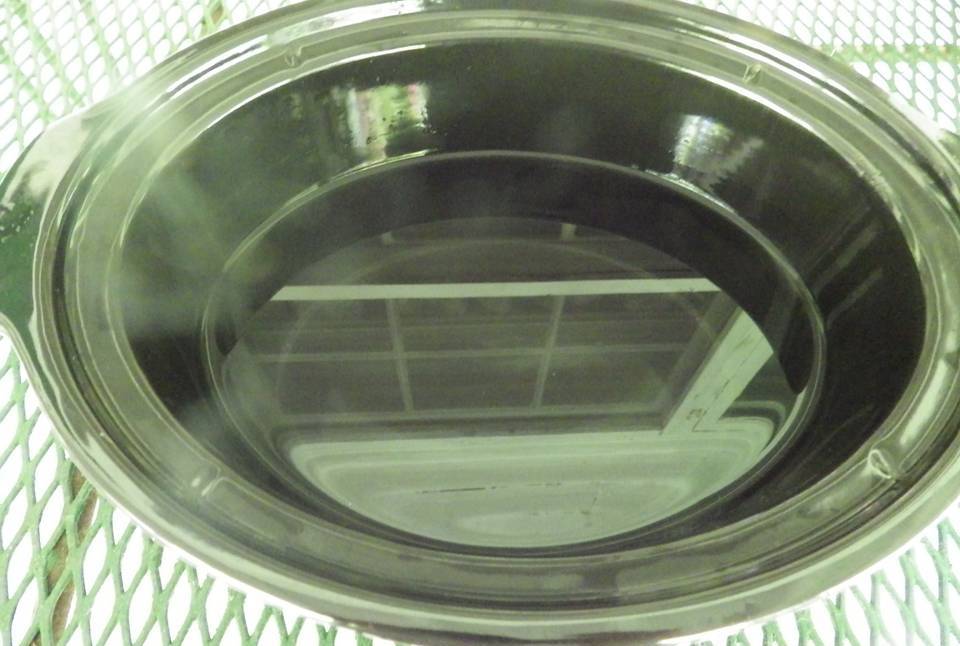
You have a lot of options when it comes to cooking your meat and vegetables. The key is to get the meat tender so it will breakdown in a food processor or blender after cooking. A crockpot is a good option.
If you’re in a hurry you could use a pressure cooker. If your resources are limited a pot on the stove or over an open fire will work. As long as you can slow-cook the meat to get it as tender as possible the cooking style is your choice.
What About Seasonings?
This is where meat powder gets interesting and where you can get very creative. When we first started talking about meat powder we mentioned packaged goods food processors. It’s the ability of large-scale food processors to add a flavored or seasoned meat powder that makes it such a valuable commodity for their products.
If you want to make chili and only have cans of tomatoes and dried beans your meat powder can save the day. Just add some chili powder to your meat and vegetable blend and you’ll end up with a chili flavored meat powder. We’ll cover a range of combinations for meat powders with suggestions for how to use it in meals.
Let’s Make Some Meat Powder
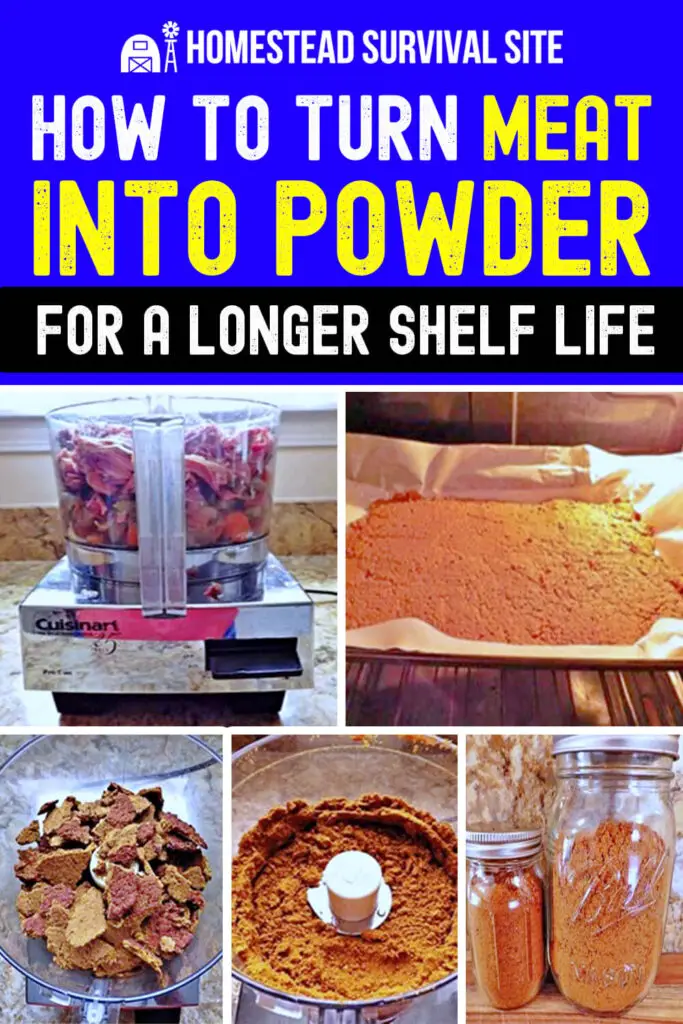
There are 4 primary steps to making meat powder.
1. Cooking the meat and optional vegetables
Equipment possibilities:
2. Processing the meat and vegetables to a puree
Equipment possibilities:
- A food processor
- Or a blender
- Or a hand-cranked meat grinder
3. Slow cooking or dehydrating the meat and vegetable puree spread across a baking sheet
Equipment possibilities:
- An oven
- Or a dehydrator
- Or a kettle grill
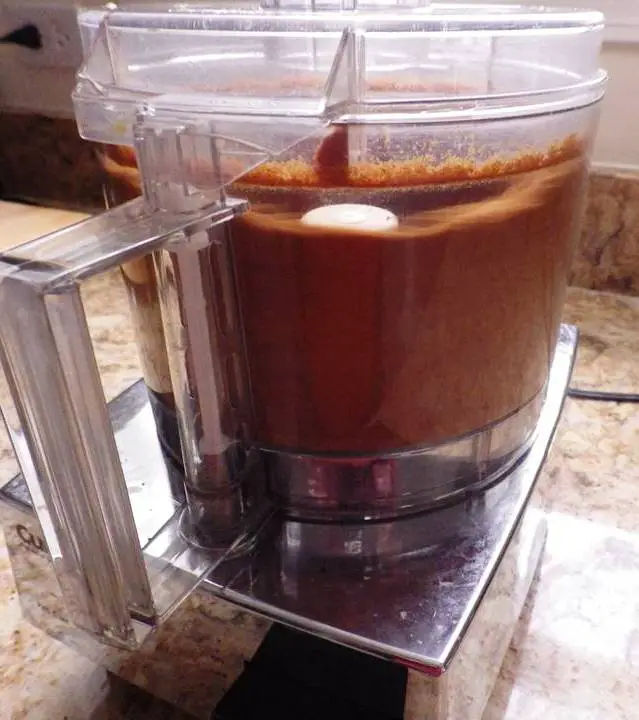
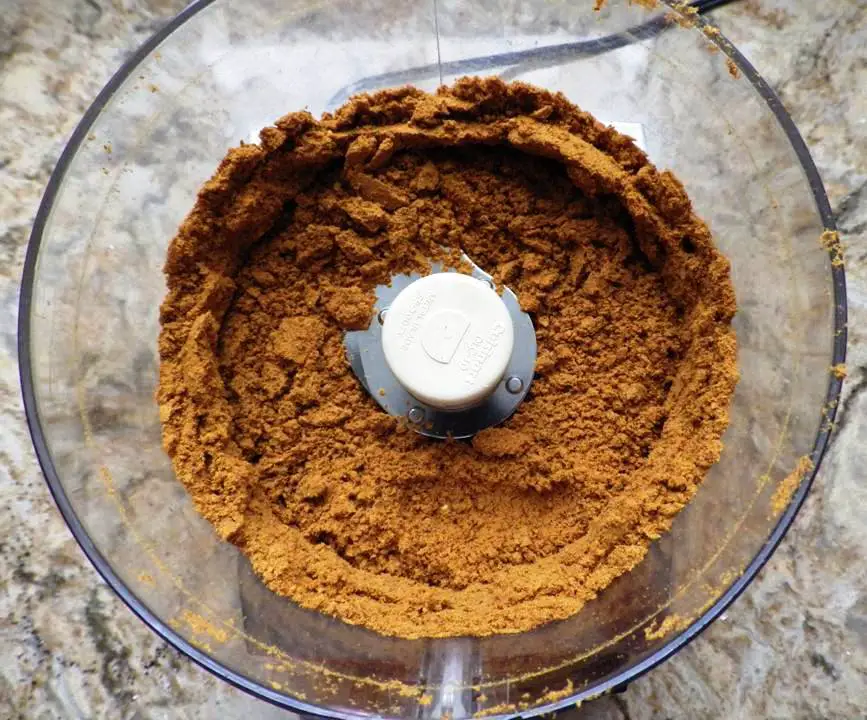
4. Pulverizing the dried and dehydrated meat and vegetables into a powder
Equipment possibilities
- A food processor
- Or a blender
- Or a robust blender like a Vita-Mix
- Or a grain mill with both coarse-grind/steel plates and fine grind stones
We covered a range of equipment possibilities because we all have varying types of equipment available. We also may find ourselves in a situation when the grid is down or we are simply living off-the-grid and those manual options like meat grinders and grain mills will be our only options.
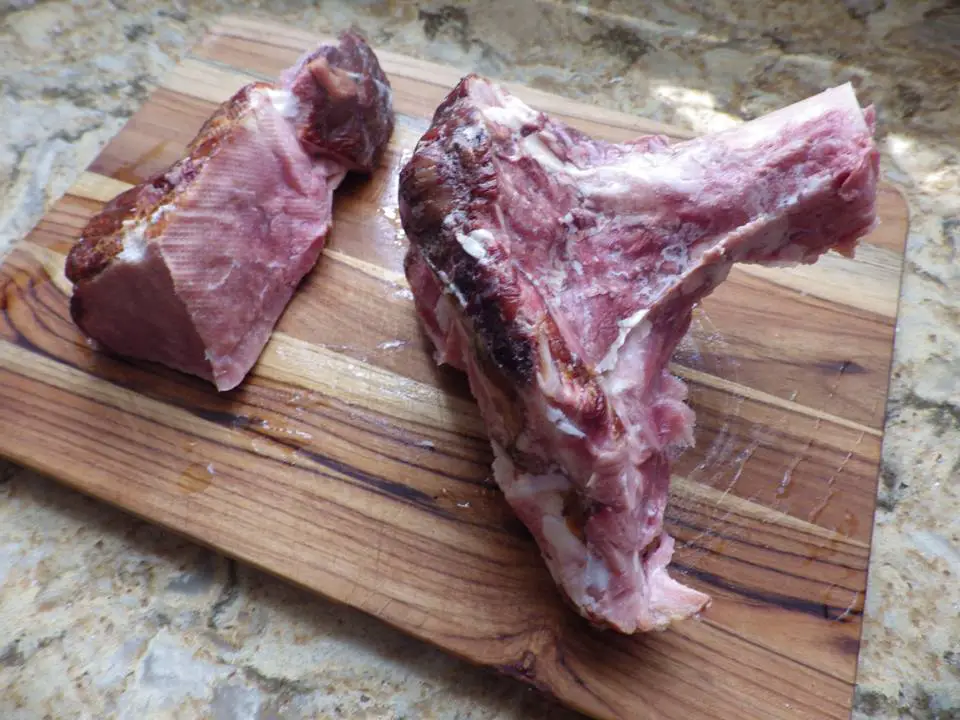
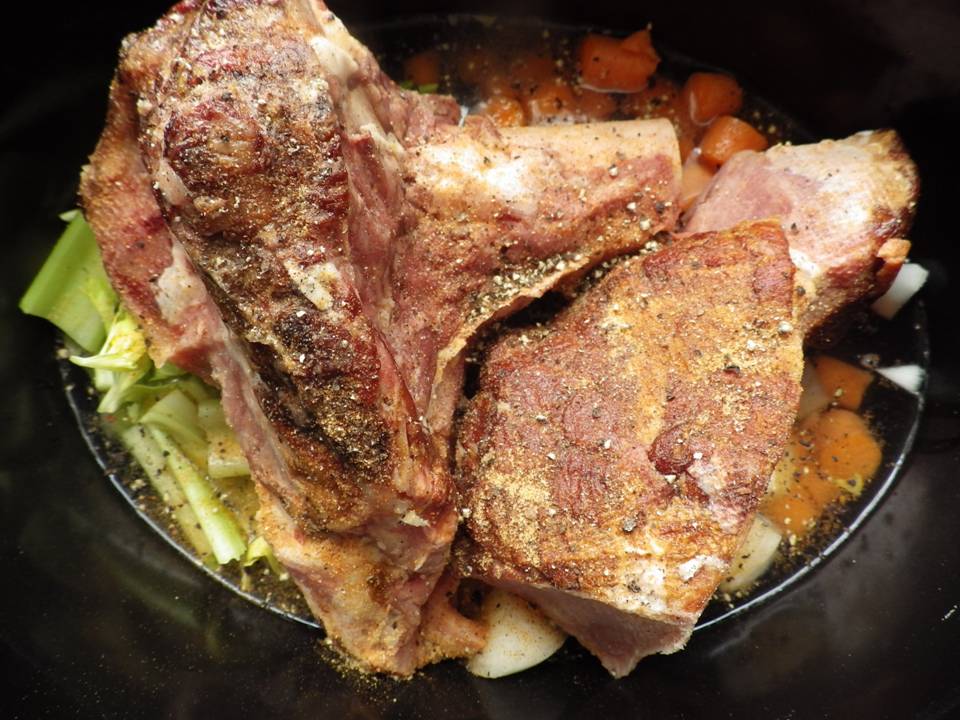
For this first, basic recipe we’re going to use pork and a mix of vegetables with some basic seasonings. The pork includes a ham bone and a thick piece of the ham. Adding bones to your simmering pot is a good idea and gives your meat powder the characteristics of a bone broth. Just remember to take them out after everything is cooked.
Recipe #1: Meat Powder from Pork
Ingredients:
- About 2 pounds of pork including the shank bone
Optional Vegetables (Vegetables will enhance the overall flavor of your meat powder but you can make it without any vegetables if you like)
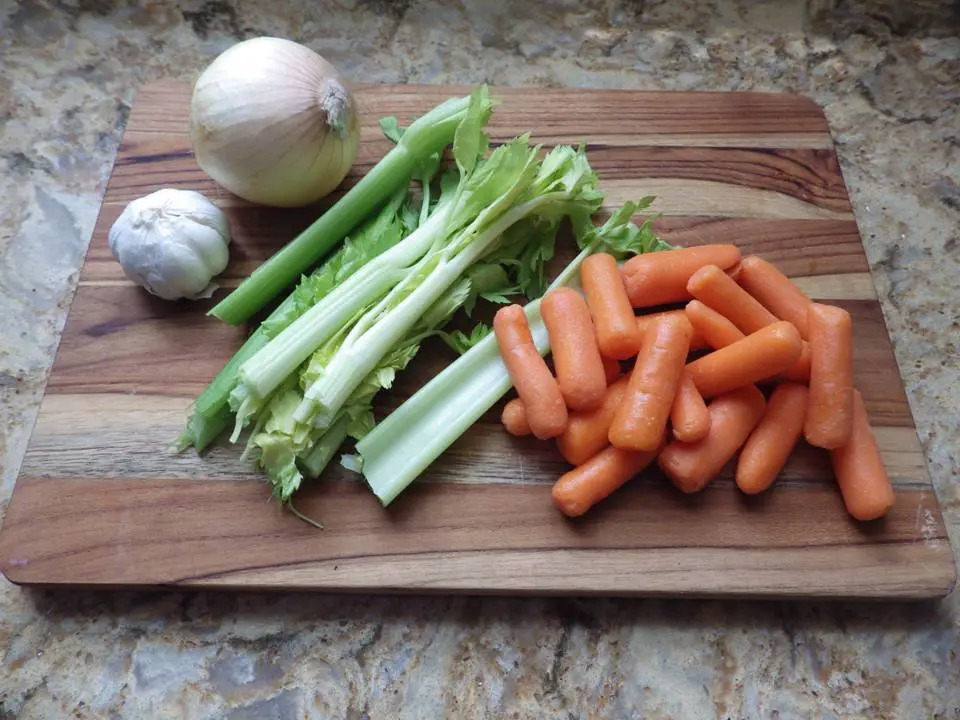
- 4 carrots chopped coarsely
- 6 celery stalks chopped
- 1 medium onion chopped
- 1 clove of garlic
- You can also add any other vegetables that suit your taste but don’t overdo the vegetables. Your meat to vegetable ratio should be about 4 to 1, so for 2 pounds of pork we don’t want to add more than a half pound of vegetables total. If you want more variety in your vegetables just add a smaller amount of each.
- 1 tbsp Seasoned salt
- 1 tsp coarse ground black pepper
- Enough water to cover all ingredients in your pot
Directions:
STEP 1
- Trim any visible fat from the pork
- Coarsely chop vegetables
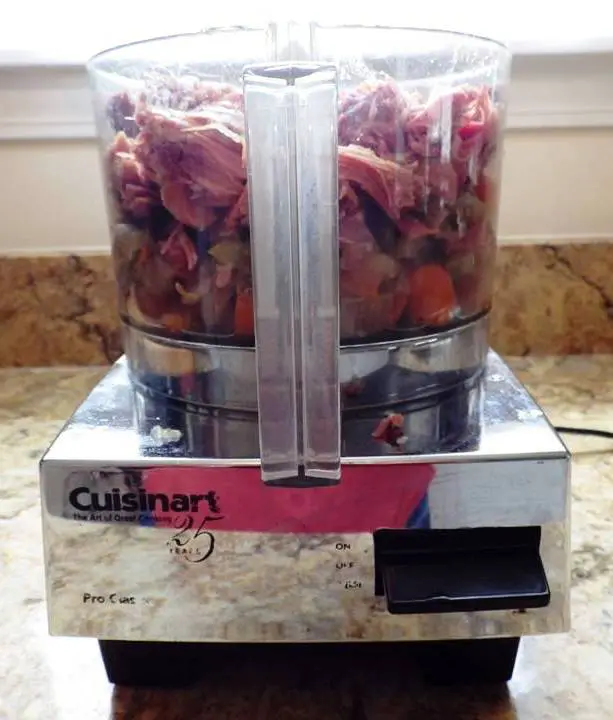
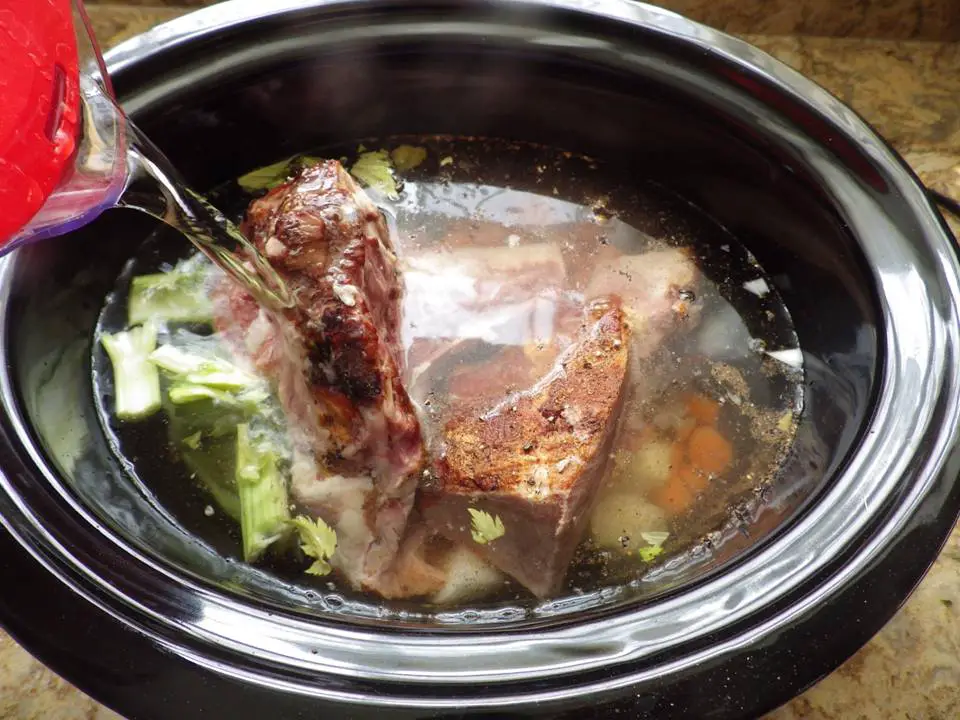
3. Add the vegetables and pork to your cooking pot and season
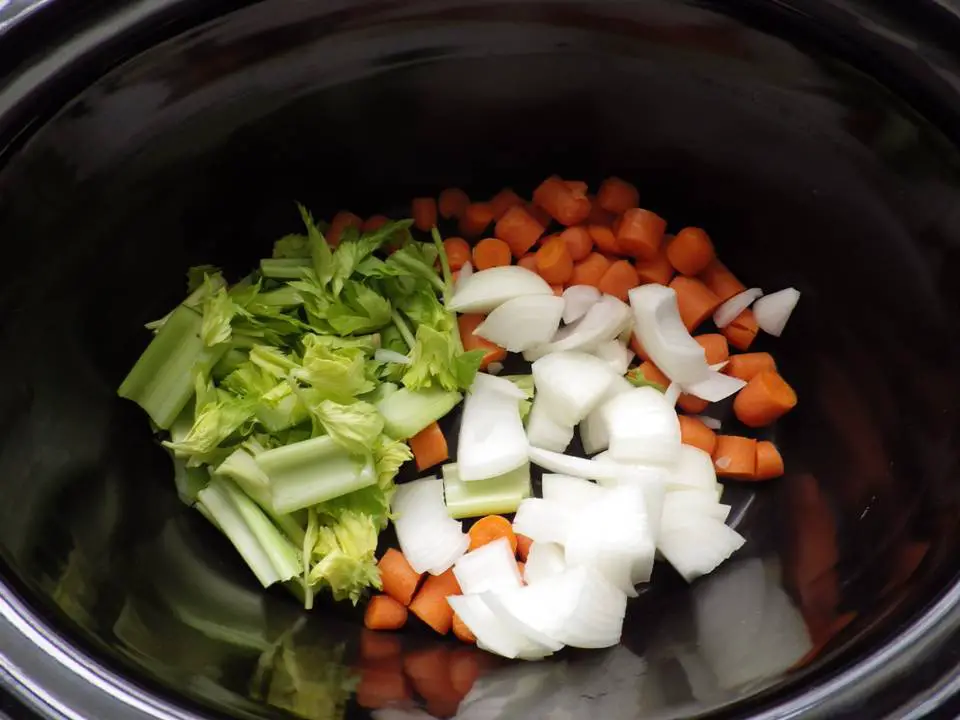
4. Add enough water to cover the top of pork and vegetables
5. Bring to a boil and continue to cook with a constant gentle boil until the meat falls off the bone or easily shreds with a fork
STEP 2
6. Place all of the meat and vegetables into a fine-mesh strainer. Remove any bones.
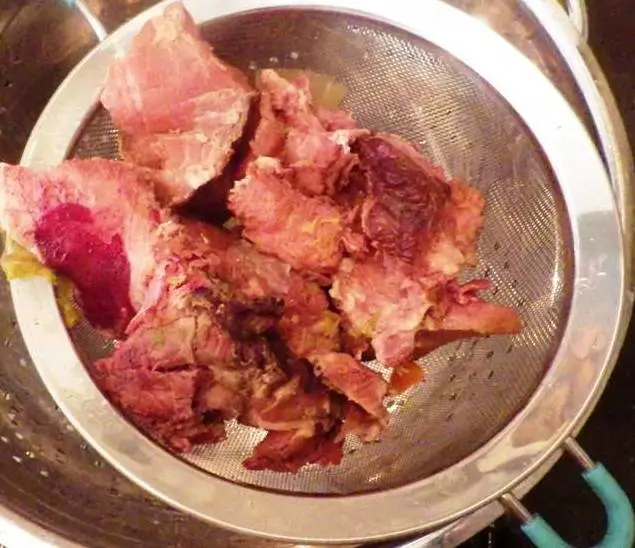
7. Rinse under hot water in the sink (you’re trying to rinse away any fat that is adhering to the meat and vegetables)
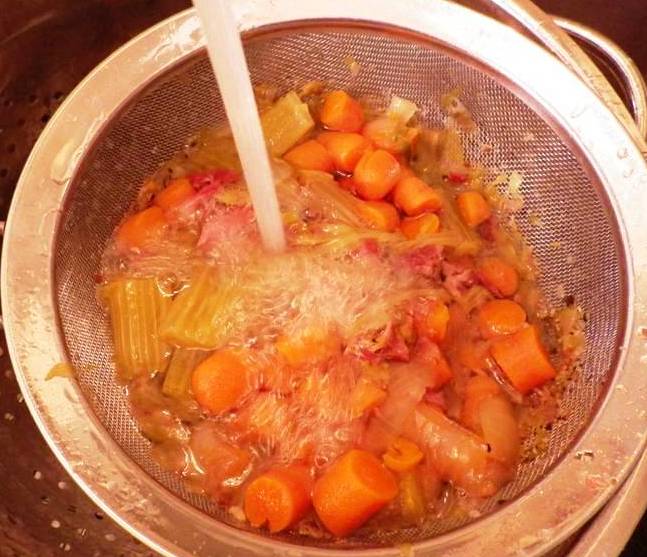
8. Trim any remaining fat.
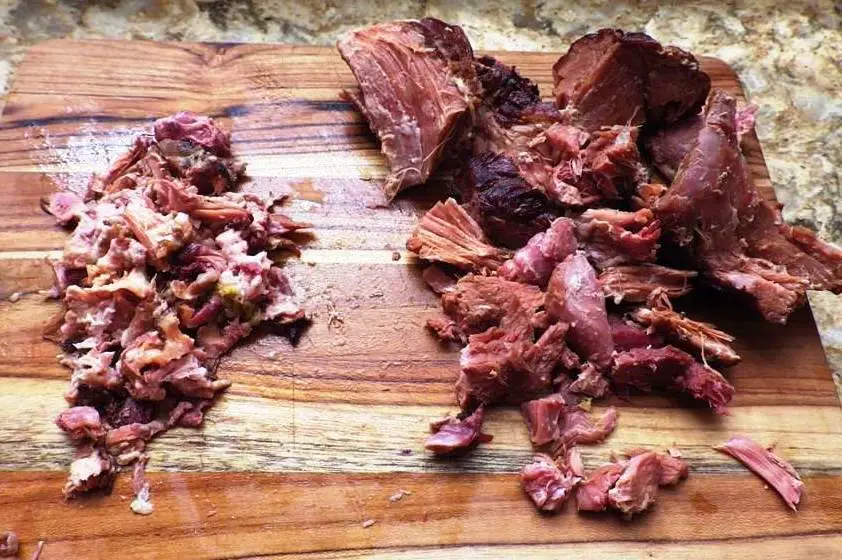
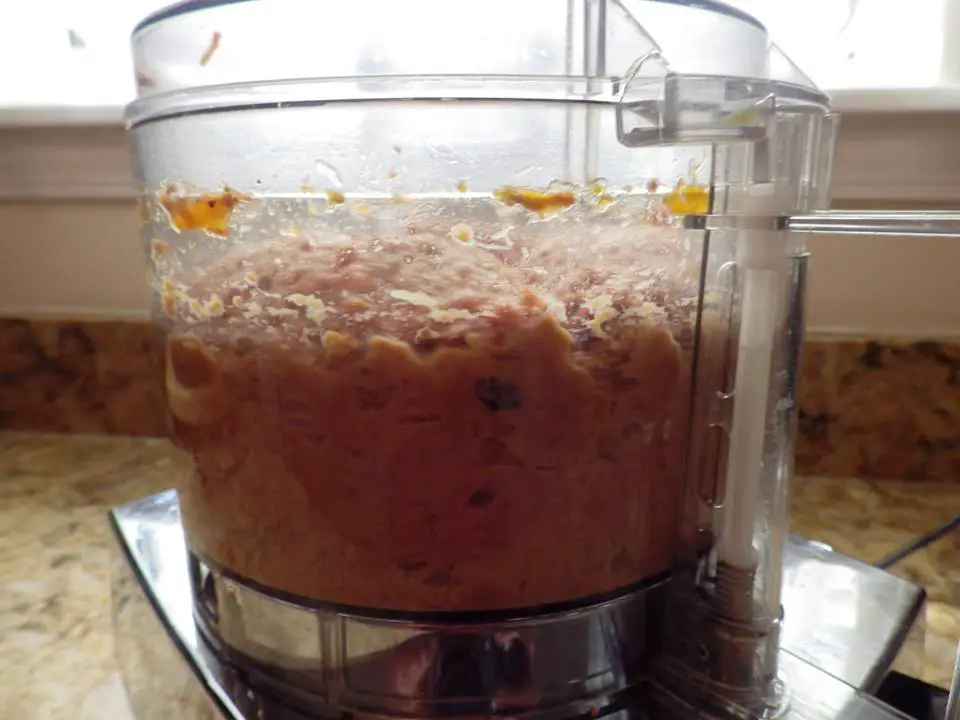
9. Add the meat and vegetables to your food processor or blender
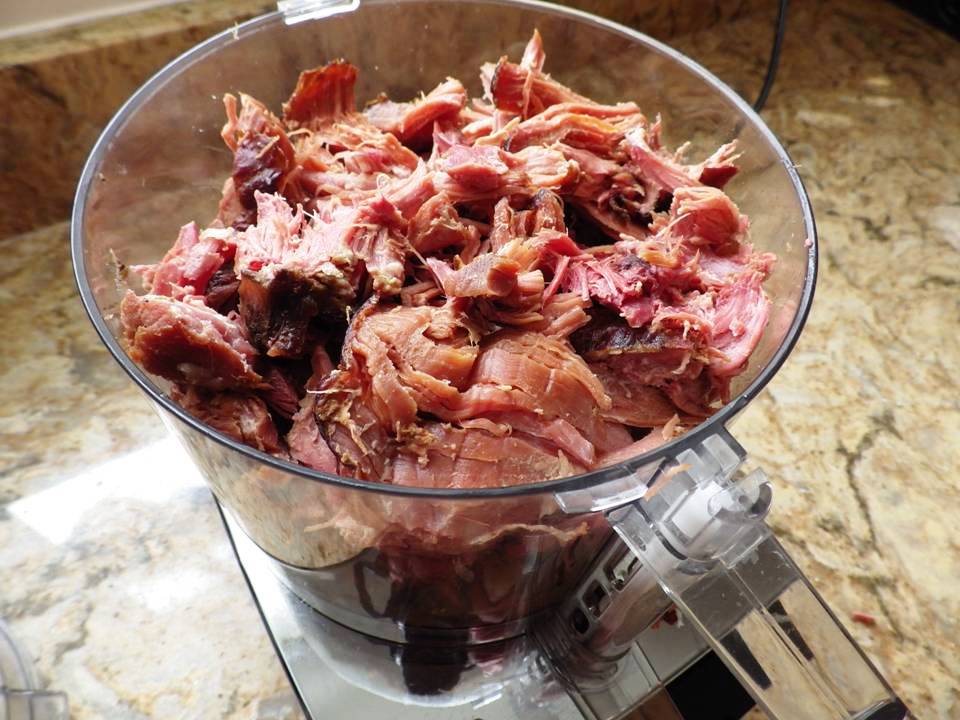
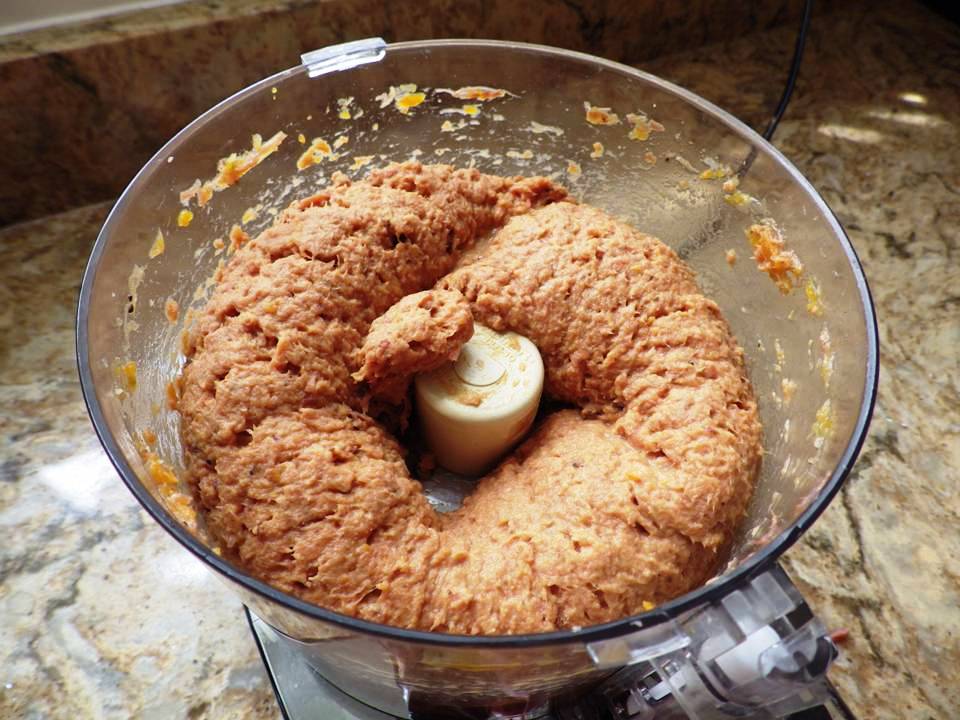
10. Process until it turns into a paste with no lumps or chunks. If you need to loosen up the mix, add some water a tablespoon at a time.
STEP 3
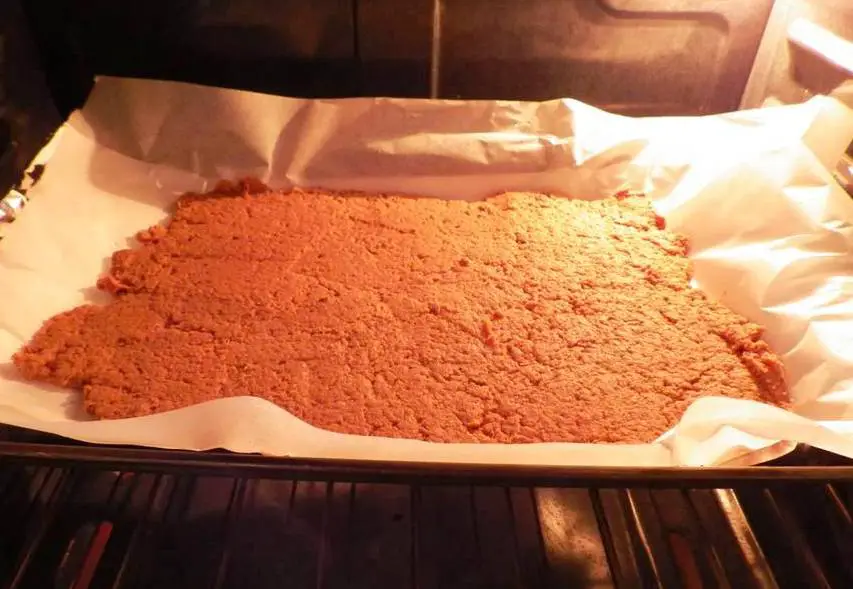
11. Cover a baking sheet with parchment paper.
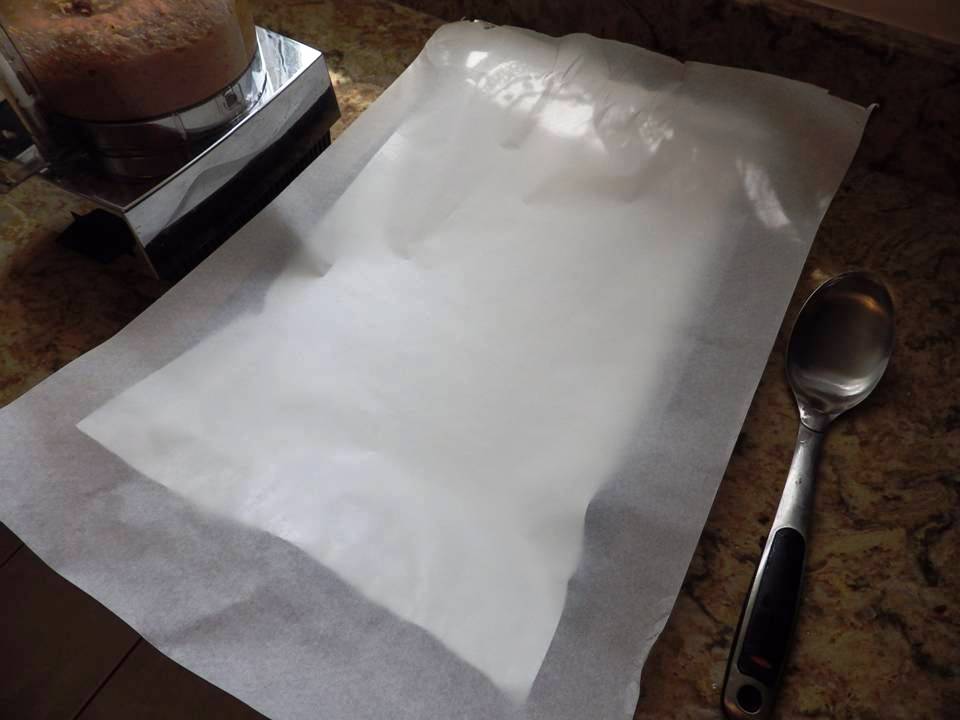
12. Spread the meat and vegetable paste across the parchment covered baking sheet.
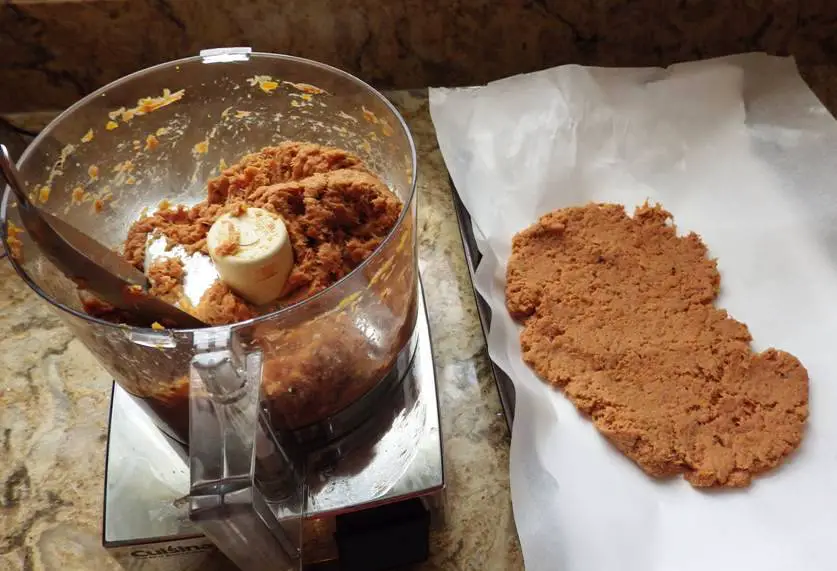
13. Make sure you have a level and even spread of the meat paste across the baking sheet.
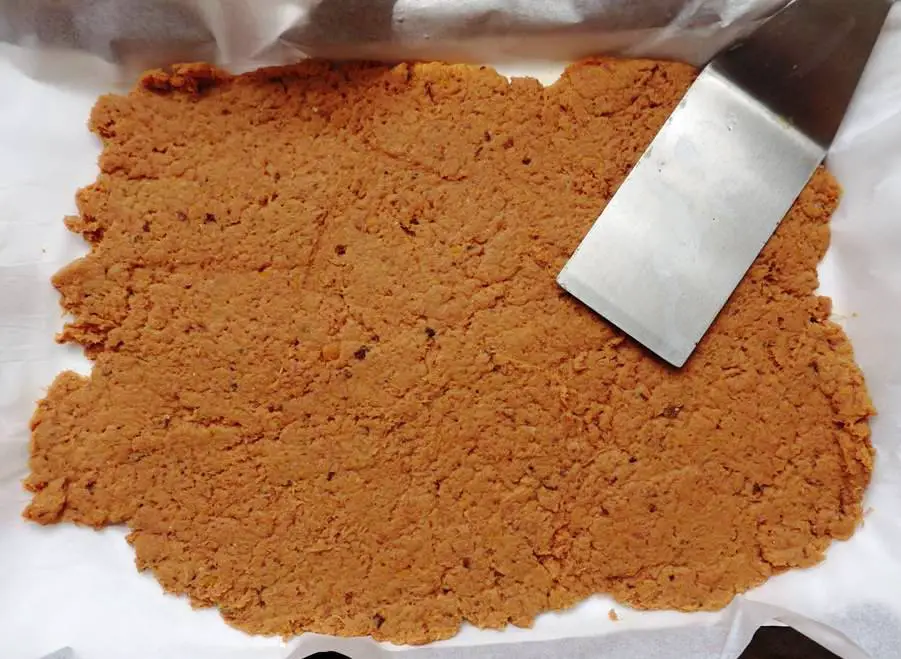
14. Place the baking sheet in a 250 degree F. oven for 2 hours.

15. After 2 hours, gently lift the meat sheet and see how it’s doing. Break the meat sheet into pieces and return to the oven for another 2 hours.
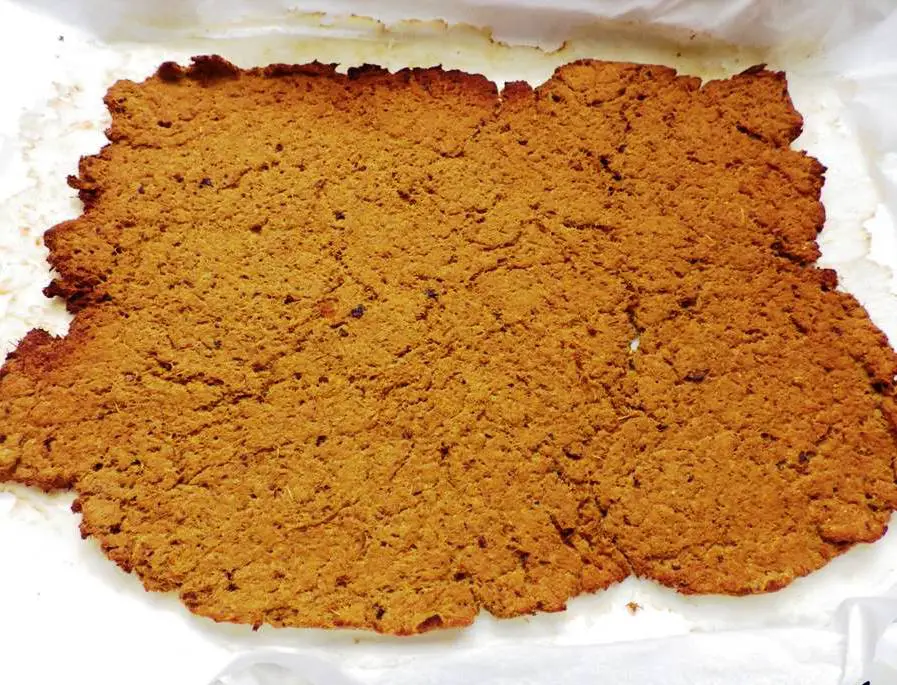
16. Continue to do this until your paste is completely dry.

STEP 4
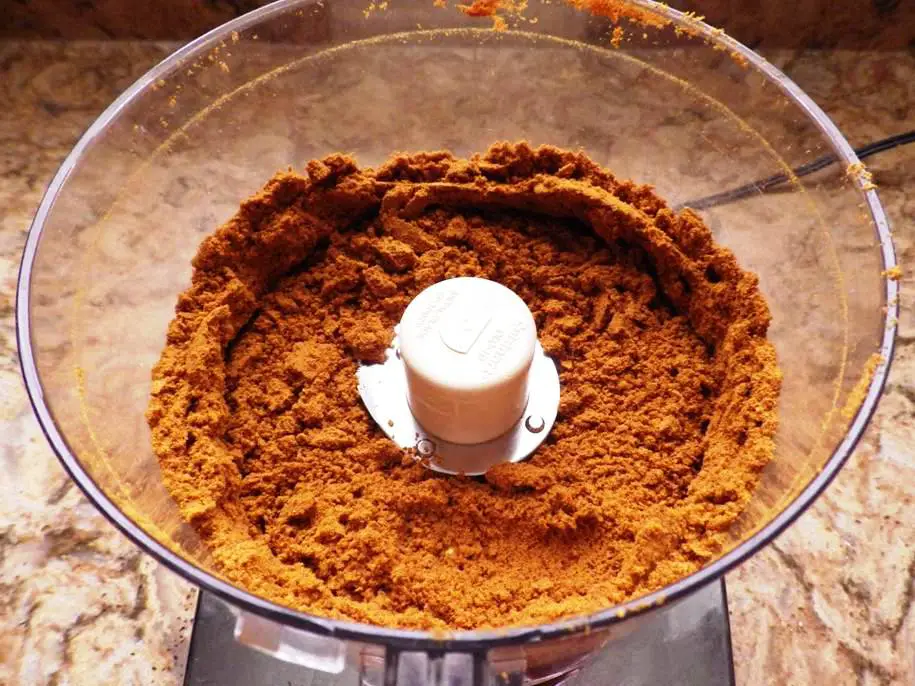
17. Carefully remove the dried paste and break it into pieces as you place it in your food processor or any other device you are using to make your powder.
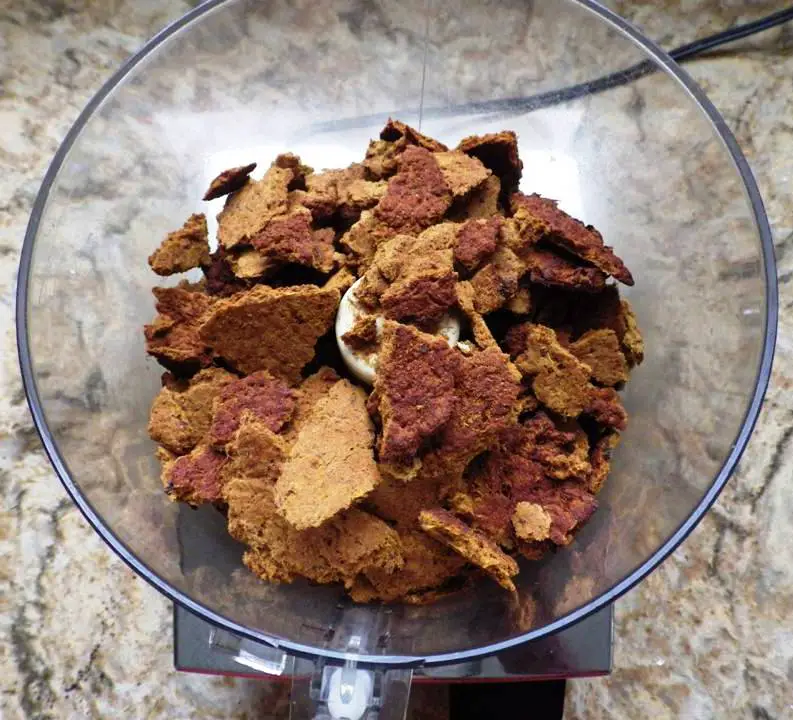
18. Pulse and run your processor until all of the ingredients have turned into a powder. If you find you have chunks that are still moist, return everything to the oven on the baking sheet and heat through until totally dry.
If using a dehydrator or other method, follow the directions for that device or process until you have a completely dry product.
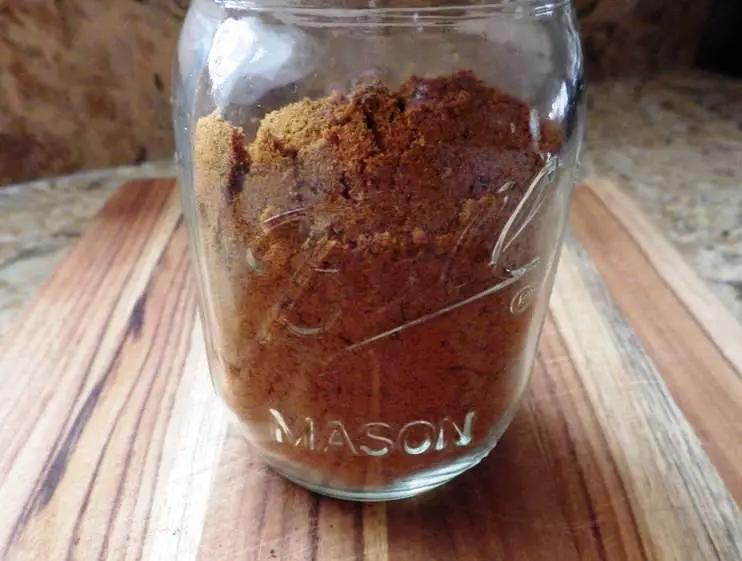
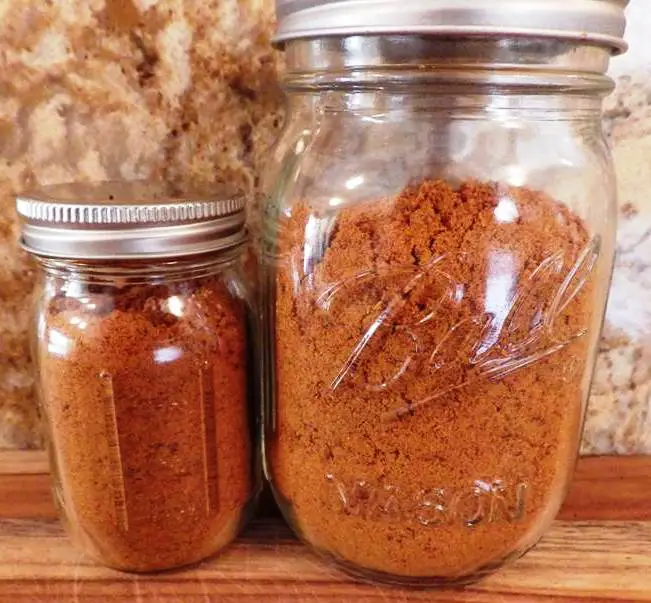
Meat Powder Packaging and Storage
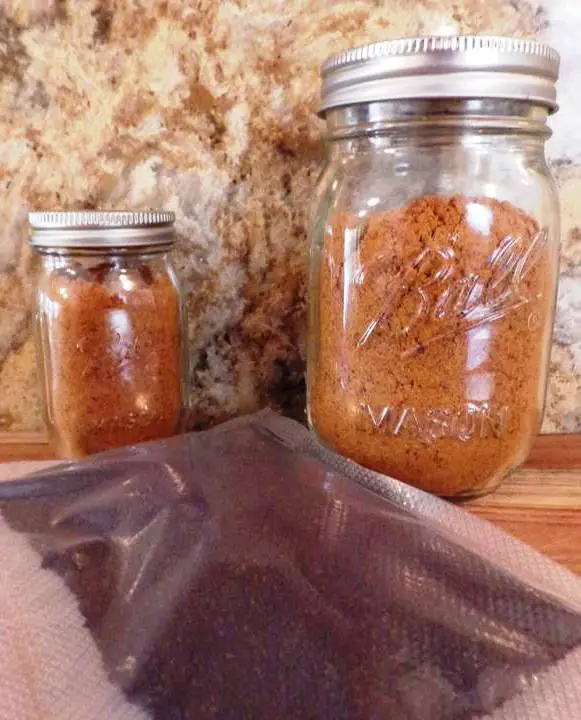
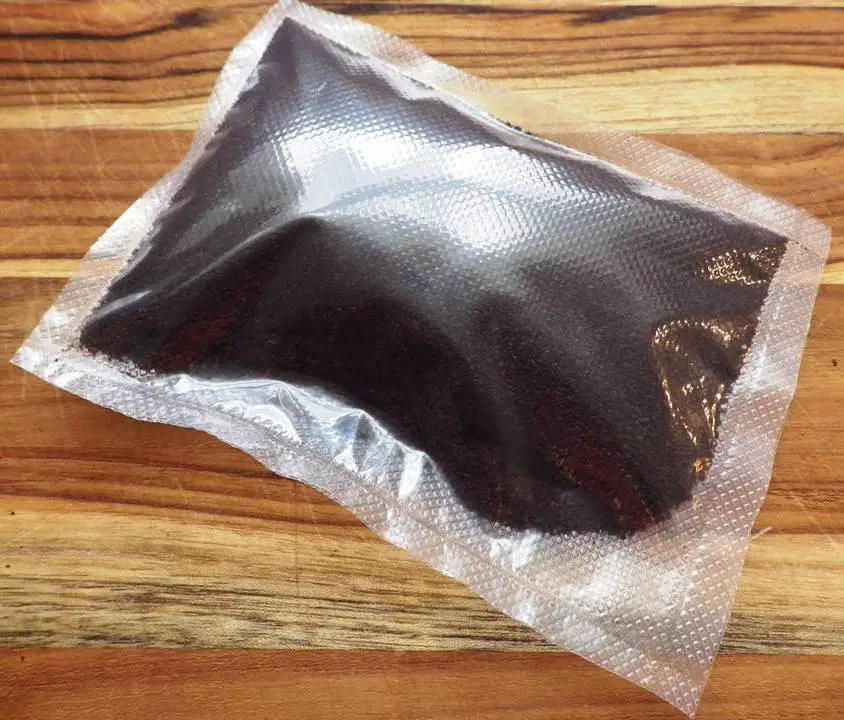
There are a variety of ways to package and store your meat powder. A lot depends on how and when you’re going to use it. For long-term storage it’s best to either can or vacuum seal in plastic bags or Mylar bags.
A second step like pressure-processing the canning jars will give you added protection for long-term storage. This extra “hurdling” step will make it easier and safer to store your meat powder in a pantry.
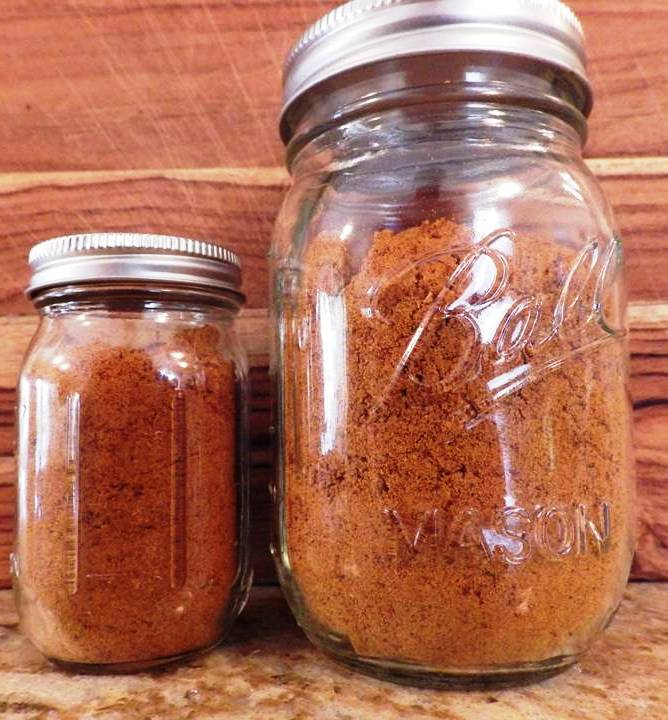
If you plan on using your meat powder on a regular or at least an occasional basis you can simply place it in a canning jar and store in the refrigerator.
Storage Tips
If you have the room and the electricity, refrigeration or freezing is always best. If you are storing in a pantry or other area, make sure it is the proverbial cool, dark place. A root cellar or basement is a good place to start but a pantry works as well.
Do the standard test for food safety.
- Look at it and determine if the color has changed or it shows any signs of mold or other visible spoilage indications.
- Smell it. If it has an odor that is off or not what you expected it may have gone bad. In fact, smell your meat powder before you package it so you have a benchmark for how it should smell.
- Taste it. Put a bit on your finger and give it a taste. If anything is unexpected about the taste there may be a problem.
As always with any long-term food storage –when in doubt, throw it out. The shelf life assigned to homemade meat powder varies from 1 to 30 years. A lot has to do with any further processing you do like pressure-canning jars, the integrity of the packaging, and how it’s stored.
Any meat powder variations we cover here are usually nothing more than the addition of specific spices, herbs or key ingredients to the original meat stew in step 1. When the meat mix is dried and powdered the flavor notes will be incorporated into the powder.
Meat Powder Flavor Variations

What’s important to remember is the 4 to 1 proportion of meat to vegetables and not to exceed a total of 2 tablespoons of spices and herbs. The specific ingredients are the common combinations found for various types of cuisine and recipes.
Chili con Meat Powder
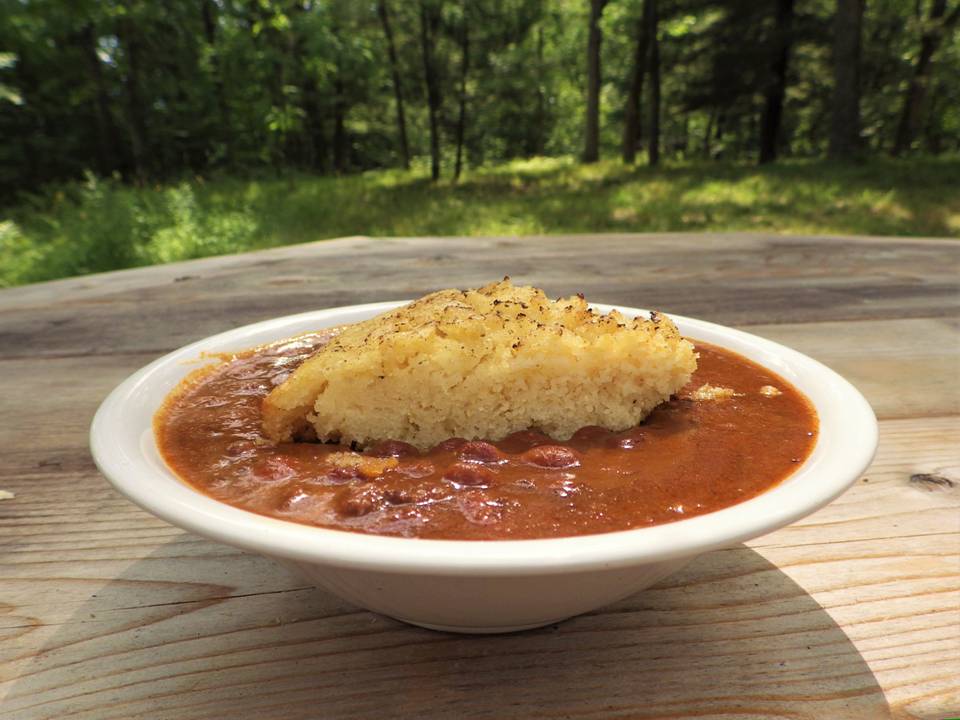
This meat powder flavor can be used in chili or any other type of Tex-Mex recipe.
- Beef or pork
- Chili powder with the possible addition of cumin, paprika, seasoned salt, cayenne pepper, onion powder, or garlic powder.
- Standard chili vegetables including peppers, tomatoes, onions and garlic
Follow the standard directions for making a meat powder and add to beans and tomatoes.
Meat Powder Bolognese
This meat powder blend is great in any Italian dish
- Beef, pork or chicken
- Oregano, rosemary, basil, parsley, seasoned salt, garlic powder and/or onion powder, white pepper
- Standard spaghetti sauce vegetables including tomatoes, onions, celery, garlic or any other vegetable you traditionally use in Italian dishes
Same as before, follow the standard directions for making meat powder and add to your tomato based spaghetti sauce.
Meat Powder Miso
A blend of traditional Asian spices, meat and vegetables
- Beef, pork or chicken
- 5-spice powder, black or white pepper, ground ginger, sea salt
- Traditional Asian vegetables like bok choy, celery, Napa cabbage and carrots
Add to ramen noodle soup with your vegetables for an Asian flavor note.
Indian Meat Powder
A combination of classic Indian spices and meats
- Beef, chicken, lamb
- Coriander, cumin, green cardamom, cloves, black pepper, cinnamon, bay leaf, fennel seeds and black cardamom.
- Traditional Indian vegetables like cauliflower, cabbage, chili pepper, eggplant, garlic, carrot, lemon, okra, onion, and tomatoes
Now you can make a chicken Masala with vegetables and without the chicken. Just toss your vegetables in the chicken powder add some oil or butter and serve.
Meat Powder Europa
A basic combination often used in European peasant dishes like stuffed cabbage
- Beef, pork or veal
- Salt and pepper
- Old-world vegetables like tomatoes, celery and onions with tomatoes as the dominant vegetable
We’re going to use this meat powder variation in the stuffed cabbage recipe at the end of the article.
Meat Powder Fails
Like anything else, things can go wrong. For the most part any fails with meat powder show up in long-term storage but other things can happen.
- It’s Flavorless
It’s possible it was cooked too long. You want the meat tender but overdoing it will cause you to lose flavor. This is also one of the reasons the addition of vegetables and spices can help with the final flavor.
- It spoiled
This could be a result of packaging problems, improper storage or just the affects of time. It’s one of the reasons the addition of salt is a good idea. Salt not only adds flavor but has preservative properties.
- It tastes “off”
This could be a result of spoilage, too many spices and seasonings, or some residual fat has gone rancid. If you’re storing in a refrigerator you may avoid this problem, but if stored in a pantry the rancidity from fats is a potential problem. That’s why we recommend you trim the fat and rinse the mixture in a fine mesh strainer after cooking.
Another factor can be the spices. Don’t overdo the spices. You can always add seasoning to a dish later. If you have a spice overload, reduce the spice amount in the next batch. This is particularly true with pungent spices like cayenne pepper and turmeric but also salt.
Everyday Cooking with Meat Powder
After you try your meat powder you may find you like it for your everyday cooking. It certainly makes adding flavor to meals easier and its good practice for the day you may have to depend on something like meat powder as a primary source of meat and protein.
This is a classic recipe called stuffed cabbage. The traditional ingredients include rice, cabbage leaves and meat. In this case we’re going to substitute our meat powder for the meat. We’re going to use the basic “Europa” meat powder blend because it has a high tomato content.
Stuffed Cabbage with Meat Powder

Serves 8 people
Prep time: 1 hour
Cook time: 1 hour
Ingredients:
- 8 Cabbage leaves boiled and shocked
- 4 cups of white rice
- 1 cup of meat powder
- 6 potatoes peeled and chopped into large chunks
- 2 cups of water or broth
Directions:
- Cook the rice
- Drop the cabbage leaves into boiling water for a minute or two to tenderize them and then drop them into a bowl of ice water to shock them and stop the cooking.
- Blend the meat powder into the cooked rice until well mixed.
- Preheat the oven to 325 degrees F.
- Divide the rice across the 8 cabbage leaves and carefully roll up. If you want you can seal the end of the cabbage leaf with a toothpick.
- Peel and cut the potatoes into large chunks.
- Place the potatoes into the bottom of an oven-proof pot with a lid
- Carefully arrange the stuffed cabbage rolls over the potatoes in the pot.
- Add the water until they just come to the top of the potatoes but do not reach the bottom of the cabbage rolls. The potatoes are there to protect the cabbage leaves from the hot bottom of the pot and to keep the water from weakening the integrity of the leaves.
- Put the pot in the oven for 1-hour
- Carefully remove the cabbage rolls to a platter and surround with the potatoes.
- Serve.
Experiment
If you decide you like the idea of meat powder and especially if you start to use it for everyday cooking, experiment a bit. You could try doing meat combinations of beef and pork; varying spices and vegetables and amounts.
Better yet, keep any trims or pieces of meat that you don’t get around to cooking and especially those turkey gizzards nobody likes, and combine them to make a big batch of meat powder. It’s a good cooking skill to know and someday it may be the only meat source you have in an emergency.

HOMEMADE MEAT POWDER
Equipment
- 1 Crockpot or pressure cooker
- 1 Strainer and food processor or blender or manual meat grinder
- Dehydrator or conventional oven
- Food processor or grain mill
Ingredients
- 2 lbs. beef or pork including bones
- Optional Vegetables (Vegetables will enhance the overall flavor of your meat powder but you can make it without any vegetables if you like)
- 4 carrots chopped coarsely
- 6 celery stalks chopped
- 1 medium onion chopped
- 1 clove garlic chopped optional
- You can also add any other vegetables that suit your taste but don’t overdo the vegetables. Your meat to vegetable ratio should be about 4 to 1, so for 2 pounds of meat we don’t want to add more than a half pound of vegetables total. If you want more variety in your vegetables just add a smaller amount of each.
- 1 tbsp. seasoned salt
- 1 tsp. coarse ground black pepper
- Enough water to cover allingredients in your pot
Instructions
STEP 1: Tenderizing the meat and the vegetables
- Trim any visible fat from the meat
- Coarsely chop the vegetables
- Add the vegetables and meat to your cooking pot and season
- Add enough water to cover the top of the pork and vegetables
- Bring to a boil and continue to cookwith a constant, gentle boil until the meat falls off the bone or easily shreds with a fork.
STEP 2: Making a puree from the meat and vegetables
- Place all of the meat and vegetables into a fine-mesh strainer. Remove any bones.
- Rinse under hot water in the sink (you're trying to rinse away any fat that is adhering to the meat and vegetables)
- Trim any remaining fat.
- Add the meat and vegetables to your food processor or blender and process until it turns into a paster with no lumps or chunks. If you need to loosen up the mix, add some water a tablespoon at a time.
STEP 3: Dehydrating the meat and vegetable puree
- Cover a baking sheet with parchment paper.
- Spread the meat and vegetable puree across the parchment covered baking sheet.
- Make sure you have a level and even spread of the meat puree across the baking sheet.
- Place the baking sheet in a 250 degree F. oven for 2 hours.
- After 2 hours, gently life the meat sheet and see how it's doing. Break the meat sheet into pieces and return to the oven for another 2 hours.
- Continue to do this until your puree is completely dry.
STEP 4: Pulverizing into powder
- Carefully remove the dried paste and break it into pieces as you place it in your food processor or any other device you are using to make your powder.
- Pulse and run your processor until all of the ingredients have turned into a powder. If you find you have chunks that are still moist, return everything to the oven on the baking sheet and heat through until totally dry. If using a dehydrator or other method, follow the directions for that device or process until you have a completely dry product.
Packaging
- Package either in canning jars or vacuum sealed bags. You could also pressure can the canning jars to ensure very long shelf-life but that is optiona.
Like this post? Don't Forget to Pin It On Pinterest!
You May Also Like: