

Estimated reading time: 6 minutes
The days are short, the weather is cold, and your garden may seem like a distant memory. However, winter is the time to get started if you’d like a bountiful garden when warm weather arrives.
You can get started today, and the best part is, you don’t even have to leave your comfy chair for many of them. Here is our spring garden preparation checklist.
Want to save this post for later? Click Here to Pin It On Pinterest!
1. Take Stock of What Worked and What Didn't Work Last Year
If you don’t keep a gardening journal. It’s time to start one. A gardening journal is where you keep your sketches, your notes, and your plans. You can keep track of your successful harvests, new plants, rainfall and watering, fertilization, and tips you learn along the way. Keep a record of pests, bulbs you want to plant, and perennials you wish to relocate.
Your journals can be as simple as a spiral notebook or as fancy as a leather-bound book. It’s up to your tastes and budget. Here’s one that is good for yourself or as a gift for your favorite gardener.
2. Order Seeds
Seed catalogs are a must for garden planning. They give you great ideas for new plants and new ways of livening up your garden. A few of our favorites are Park Seed, Burpee, and Seeds of Change.

Use your journal to develop and follow a timeline for the following tasks:
- Starting seedlings
- Direct sowing
- Purchasing and planting starter plants
- Preparing beds
- Turning compost
- Dividing perennials and bulbs
- Cleaning up beds
- Checking and cleaning tools
3. Inspect Your Garden and Landscaping
Winter weather can play havoc with our planters, fences, and pathways. Check for damage and take note of what needs to be repaired or replaced. Also, examine your perennials for any damage and cover or move them as needed.
4. Clean and Repair Tools
Make sure your garden tools are clean and ready for work when spring arrives. This process involves cleaning, sharpening and perhaps adding oil to prevent corrosion.
Is there a tool you need and have been doing without? Winter is a good time to get off-season prices on tools and garden accessories.
5. Replenish Your Supplies
Don’t wait for beautiful weather to arrive to do your shopping. You’ll waste time standing in line at the garden center instead of being outside in the dirt. Make a list now of what you need, including plant markers, tomato cages, fertilizer, hoses, sprinkler,s and plant supports.
6. Prune
Late winter is a good time to prune and shape many trees and plants. Cut out any dead or damaged branches in your fruit trees and deciduous shrubs before spring life begins to show.
Be sure to clean and sharpen your pruners before you begin. Adding a little fertilizer to the soil to help the pruned heal its wounds quickly is a good idea.
7. Clear Away Debris
Even if you did a thorough fall clean-up, leaves, branches, and other debris probably have found their way into your beds again. Before you do any spring planting, integrate well-composted mulch into the soil. Remove any living weeds.
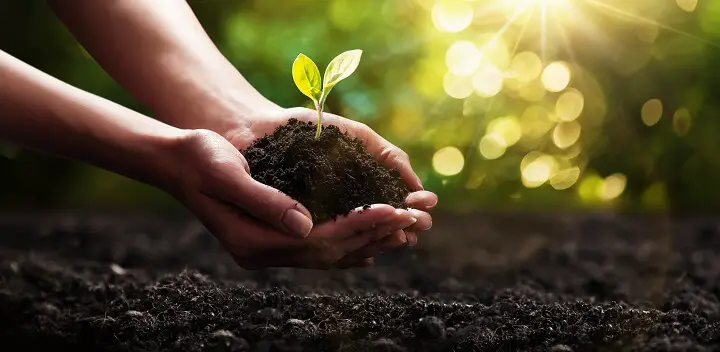
8. Prepare The Soil
When the threat of frost has passed, you can begin preparing your garden soil. First, loosen it with tilling or turning. Remember that you can work in any well-composted leaf debris. Move any fresh debris to your compost pile.
Get your soil tested to see if you need to raise or lower the pH or add any nutrients. You can bring a soil sample to your local university extension office, or here is a soil tester you can purchase. For more information on soil testing, visit here.
9. Plan Raised Beds or Planters
Now is the time to build raised beds or purchase new planters or hanging baskets. You also can install window boxes so that you are ready with some new garden locations.
10. Divide Perennials
Give plants like daylilies, hostas, and Shasta daisies more vigor and health by dividing them before the growing season begins. Here are the simple steps to take.
- Dig widely around the perimeter of the plant clump, allowing plenty of room, so you do not damage the roots.
- Now, gently dig under the root ball and lift it up and out of the ground. (If the clump is too large or difficult to pull out, you can try dividing it while it is still in the ground and lifting out the separated pieces.)
- Try to untangle the roots by carefully pulling apart the rootstocks (tubers). If necessary, you can use a knife to separate the parts of the clump.
- Now, evenly space the new plants and replant them as soon as possible.
One more tip for your spring garden checklist is to exercise patience. It can be normal to get a few spring-like days in February or March and then feel the urge to get planting. Mother Nature can fool us, and when she does, we can lose valuable time and money.
Be sure to consider your gardening region’s average last frost dates and hold off on planting accordingly. North America has 11 separate planting zones. Each zone is 10°F warmer (or colder) over the course of an average winter than its adjacent zone. Look for these zones when you are ordering seeds or buying plants.
To find your zone, visit the USDA Hardiness Zone Finder.
Like this post? Don't Forget to Pin It On Pinterest!
You May Also Like:


I’m getting to the age where I no longer feel like struggling with a tiller plow so I’m using the “no till garden”.
I place cardboard on the ground and then a layer of compost, leaves, and table scraps.
I continue this layering process until its around a foot or so thick.
After the winter rain and snow has mashed it all down its ready in the spring time.
I take a sharpened stick and poke a hole then drop in a seed and cover with a little dirt.
If I want to keep the rows straight I’ll put stakes at the end of the garden bed and put a line down.
After the garden is done producing for the year just start the layering process all over again, no need to pull anything up.