


Estimated reading time: 9 minutes
Long before the modern conveniences of refrigeration, people were storing their food using time-tested methods. Many modern homesteaders are learning and honing these skills as a way to preserve their harvest and continue to serve their families home-grown, home-raised food throughout the year.
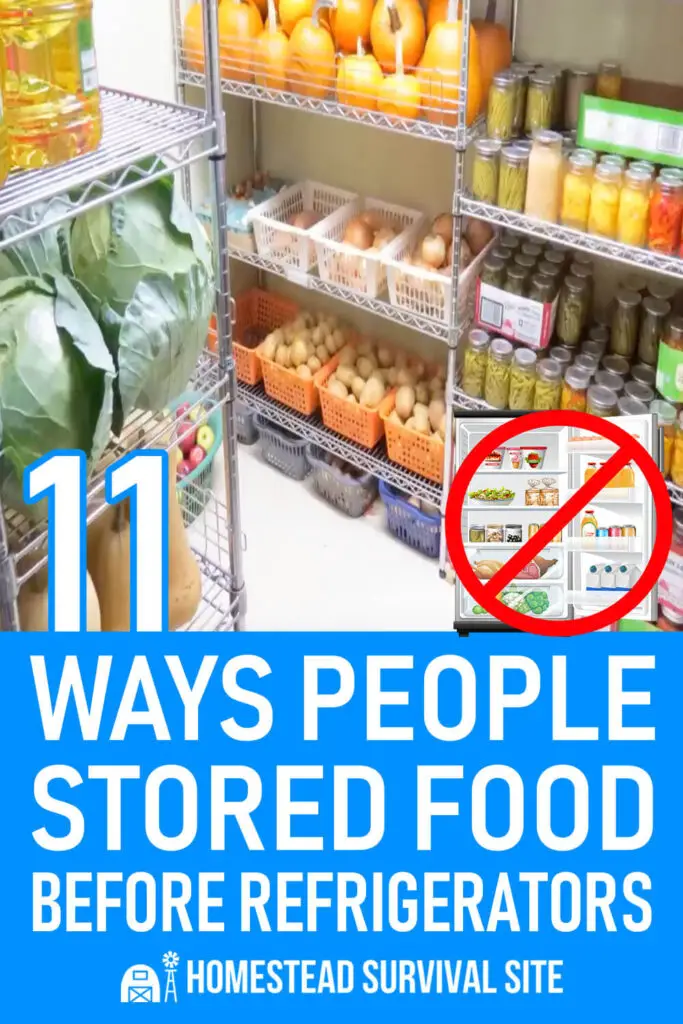
Here are 11 ways people stored food before refrigerators that can help you extend the life of your food supply.
Want to save this post for later? Click Here to Pin It On Pinterest!
Biltong
Biltong is the process of marinating pieces of meat in vinegar for twenty-four hours. Proceed to flavor your meat with whichever seasonings you prefer, such as salt and pepper, sugar, cloves, barbeque spices, or whatever else you desire.
Afterwards, you can remove the meat from the marinade and hang it up to dry for at least a week. This is a very similar process to making jerky, and like jerky, the meat can last for many months without requiring freezing or refrigeration.
Here's how to make biltong with a 5-year shelf life.
Canning
A wonderful way to preserve the bounty of your garden is with canning. By preserving food in sealed, airtight containers, canning offers a shelf life of one to five years or even longer.
Although there are many canning methods, the basics of each one are essentially the same. You fill a clean and dry jar with your prepared food. Then, you place a flat lid and a threaded ring on the jar before placing the filled jar into boiling water. The amount of time varies, depending on what you are canning.
When you remove the hot jar from the water, the steam inside the jar condenses as the jar cools, creating a vacuum that sucks the lid down into a tight seal. A sealing compound that is embedded into the lid helps the seal stay secure.
Here is a helpful video for the novice canner. It offers a comprehensive view of the canning supplies you’ll need.
Cold Pantry
Just a century ago, cold pantries (also known as larders) were commonplace in homes. These cupboards, cabinets, or closets were used to store everyday items such as bread, butter, cheese, eggs, and pastries, as well as fruits and vegetables brought up from the root cellar in small amounts.
Cold pantries use metal or wood grates to draw up cold air from below the house. As the air in the pantry warms, it rises and escapes through an upper vent. This ventilation process helps keep stored food cool and dry.
During the summer, temperatures in a cold pantry are at least several degrees lower than a home’s indoor temperature. In the winter, the temperature in the cold pantry is consistently lower than inside the house.
Drying
Another way to preserve fruits and vegetables is by drying them. Dried foods retain more of their nutrients than foods preserved by other natural methods.
For this method, you must first prepare the food by either mashing it into a pulp and cutting it into small pieces or stringing it on a string.
You can spread the pieces across a flat, clean surface, allowing them to dry. Any warm, dry place will work, but drying in sun works the best. Occasional turning helps speed up the process.
Another idea is to string whole or chopped produce and then hang the strings up to dry. You can also dry food in a dehydrator, oven, or microwave.
Be sure to store dried foods in air-tight containers as they will deteriorate rapidly if exposed to air after the drying process is complete.
Fermenting
Fermentation is a food preservation method that uses microorganisms — including bacteria or yeast — to convert carbohydrates to alcohol or organic acids.
Fermented foods are filled with beneficial bacteria that help the good bacteria thrive in the digestive system, helping you have the proper balance of gut flora.
Just about any can be fermented, and you can create a mix of different kinds if you like.
More info: Fermentation 101: How to Make Yogurt, Sauerkraut, Apple Cider Vinegar, and More.
Larding
Lard is a white fat produced from pigs. The term ‘lard’ is commonly mixed up with the term ‘tallow,’ which refers to a similar product made from sheep and cattle. You can render lard by boiling or steaming; when complete, it will be tasteless, odorless, and contain no trans-fats. You can then allow the lard to cool into a block shape, then wrap it up in food-grade paper.
Lard is commonly used by restaurants for the purposes of shortening or cooking fat. However, another use for it is to help extend the life of your meat without freezing or refrigeration. Take note that you will need a lot of lard on hand for this method to work, but it’s very reliable.
Start by placing your meat in a crockpot. Melt down a block of lard, and cover the entire surface of the meat with the resulting liquid. Allow everything to cool, and the lard will harden again and create a protecting barrier between the meat and air. This effectively stops bacteria from growing on the meat.
Proceed to store your meat in a cool, dry location, and you’ll be set for up to six months.
Mineral Oil
This is a technique you can use to preserve eggs. Eggs bought from the store have to be stored in the refrigerator to be preserved, but this method can be used for eggs that you raise on your homestead.
Don’t wash your eggs after collecting them, as this takes away the protective bloom present over the eggs that can prevent bacteria from getting inside the shell. Instead, gently wipe the eggs down with a towel, then coat them with mineral oil. Make sure you coat the entire surface of the shell.
Gently set the egg in an egg carton, repeat with your other eggs, and store the carton at normal room temperature outside of direct sunlight. Once a week for a month, flip each egg over on the carton. This does not need to be repeated after the first month.
This strategy can keep your eggs preserved for nine months to a year. Just to confirm the eggs are safe to eat, place each egg into a bowl with cold water. The eggs that float to the top are no longer safe to eat, but the ones that sink are safe.
Root Cellar
You may be wondering about the difference between a root cellar and a cold pantry. The main distinction is humidity. Whereas a cold pantry keeps food dry, a root cellar allows some moisture to help preserve the produce stored there.
By definition, a root cellar is a storage area that uses the natural cooling properties of the earth.
You can attach a root cellar to your home or build one in a separate area. Aim to maintain high humidity (about 80 percent) and temperatures just above freezing (around 34 degrees F) for the storage of potatoes, onions, carrots, leeks, radishes, beets, turnips, winter squash, cabbage, jarred preserves, and other foods that store well in root cellars.
Use wire or wooden storage bins that allow air to circulate around the clean, dry veggies. You can also gather bunches of onions or carrots together by their tops and hang them in the cellar. Another option is to spread fruits and vegetables out on shelves or benches in the root cellar.
You may stack certain fruits and vegetables together, but be sure to select firm, hard produce for best results.
Here is how to build a root cellar.
Salt Curing
Salt curing is an age-old method that has been used for centuries to preserve meat and fish. By drawing moisture out of the food, salt curing not only inhibits the growth of bacteria but also imparts a unique flavor.
To salt cure, first, choose a high-quality salt—sea salt or Himalayan pink salt are excellent choices. Cover your meat or fish thoroughly with salt, ensuring that every surface is coated. For a more complex flavor, you can also add herbs and spices.
Once coated, place the food in a cool, dry place. The length of time required for curing will depend on the size and type of meat or fish you are preserving.
After curing, the food should be stored in a cool, dry place, wrapped in a breathable cloth to allow air circulation and prevent moisture buildup.
Smoking
Another way to preserve the food you raise on your homestead is through smoking. Smoking is the process of preserving food — usually meat or fish — by exposing it to smoke from a wood-burning fire.
Typically combined with salt-curing or drying, smoking involves hanging meat or placing it on racks in a chamber that contains smoke.
Hot smoking is done in the smokehouse (or with electric kilns) over a short period of time. However, cold smoking over a smoldering fire takes 12-24 hours.
Here's a video that demonstrates the cold smoking process:
Zeer Pot
The pot-in-pot refrigeration method, also known as a Zeer pot, is a simple and effective way to keep perishable food cool without electricity. This method uses the principle of evaporative cooling.
To create a Zeer pot, you need two terracotta pots, one larger than the other. Place the smaller pot inside the larger one, and fill the space in between with wet sand. Place your perishable food items inside the smaller pot, cover it with a wet cloth, and place the setup in a dry, ventilated space.
Ensure the sand remains moist by adding water regularly. As the water evaporates, it draws heat away from the inner pot, keeping its contents cool. This method is particularly effective in hot, dry climates and can significantly extend the shelf life of fruits and vegetables.
Final Thoughts
You probably will find that you prefer certain food preservation methods over others. For example, some people enjoy the social aspects of canning and get extended family and neighbors involved in the process. Just like other aspects of homesteading, you will learn best by trial and error and by learning from other, more experienced homesteaders.
Before long, you will find that food preservation becomes a natural part of your lifestyle. Not only will you save money by extending the freshness of your food, but you will appreciate being able to serve your family summer and autumn goodness all year round.
Like this post? Don't Forget to Pin It On Pinterest!
You May Also Like:

Related Posts:
 20 Foods That Can Last 20 Years (When Stored Properly)
 Home Preserved Foods that Should NOT Be Stored Long-Term
 3 Ways To Make Your Food Stockpile Last As Long As Possible
 6 Mistakes People Make When Buying Emergency Food
 Food Dehydration 101: Things to Know Before You Start
 10 Ways People Kept Cool Before Air Conditioning Existed


Regarding canning, your article says it is the escaping oxygen from the hot jars that causes the lid to seal. That’s not correct. It is the condensation of the steam inside the jar as the jar cools, creating a vacuum and sucking the lids down into a tight seal.
I think what she meant is that the heat escapes, not the oxygen. But you’re right, it’s a little confusing and still not entirely accurate. Thanks for pointing this out. I updated the article.
Not just the steam, but all contents of the jar expand when heated and contract when cooled. The excess air
“leaks” out as ilthe content expands, and then as it contracts the seal stops air getting back in.
All I know is when I screw an empty ball lid on and try to take it off it has created a seal that needs releasing.
I wish somebody would show how to build a spring house.
I did a search for building spring house and it is here: ecosia.org/search?q=how+to+build+a+spring+house&addon=chrome&addonversion=4.0.7&method=topbar
There seem to be several good ones.
You forgot to mention using lime to water glass fresh laid eggs. I use hydrated lime from our hardware store added to water and the fresh unwashed clean eggs are placed in this solution pointy end down in a food grade plastic bucket. Keeps our glut of spring eggs for 8 to 12 months
You store your farm eggs in plastic buckets ? I thought you could only use glass jars ? How much lime do you use per gallon? And is picking lime the same thing ?
I’ve used hydrated lime from the hardware store along with water to preserve 2 dozen fresh eggs as an experiment. I believe the ratio is 1 oz of lime to 1 Qt of water, check the video on YouTube by Homesteading Family to check me. I just tested the eggs for September (month 4) and noticed that the yolks both broke this time (last month one broke and the other didn’t). Both eggs were still good though, and made yummy scrambled eggs. I do use a 3 gallon plastic bucket with a lid from Home Depot – seems to work fine, and since light is usually the enemy of food preservation it probably does a better job in that respect than glass.
Pickling lime is the same thing as hydrated or slaked lime, but it costs a lot more in those small bags. I think a small bag was almost as much as a 50lb sack of it from Home Depot.
Eggs can also be preserved in a solution of pickling lime and water. Look on pintrest for egg preserving articles to get amount of lime to add to water
?????? The best way of preserving eggs is to leave them in the chooks. No?
By coincidence eggs I’ve bought at the supermarket lately (VERY cheap because past ‘due-date’) have been lasting for several months, with only about 1-in-12 going off. (but you need to break them into a glass jar one at a time to find any that HAVE gone off.)
I once lived in a home built in 1930. It had a wonderful cold pantry. 105 degrees summer days and butter stayed hard. Fruit stayed fresh and beautiful for a good time. I loved it and used it every day.
I’d love another one right now!
I can, ferment, dry in sun and a dehydrator, and have stored meat in fats, and more. It’s not hard. It’s just a matter of learning and trying.