

Estimated reading time: 6 minutes
When the power goes out, one of the first problems you run into is what to do about food. You can eat out of the pantry or eat cold leftovers, but what if you want to cook something? You can buy a camp stove, but there's an option that costs next to nothing: a DIY stove from cinder blocks.
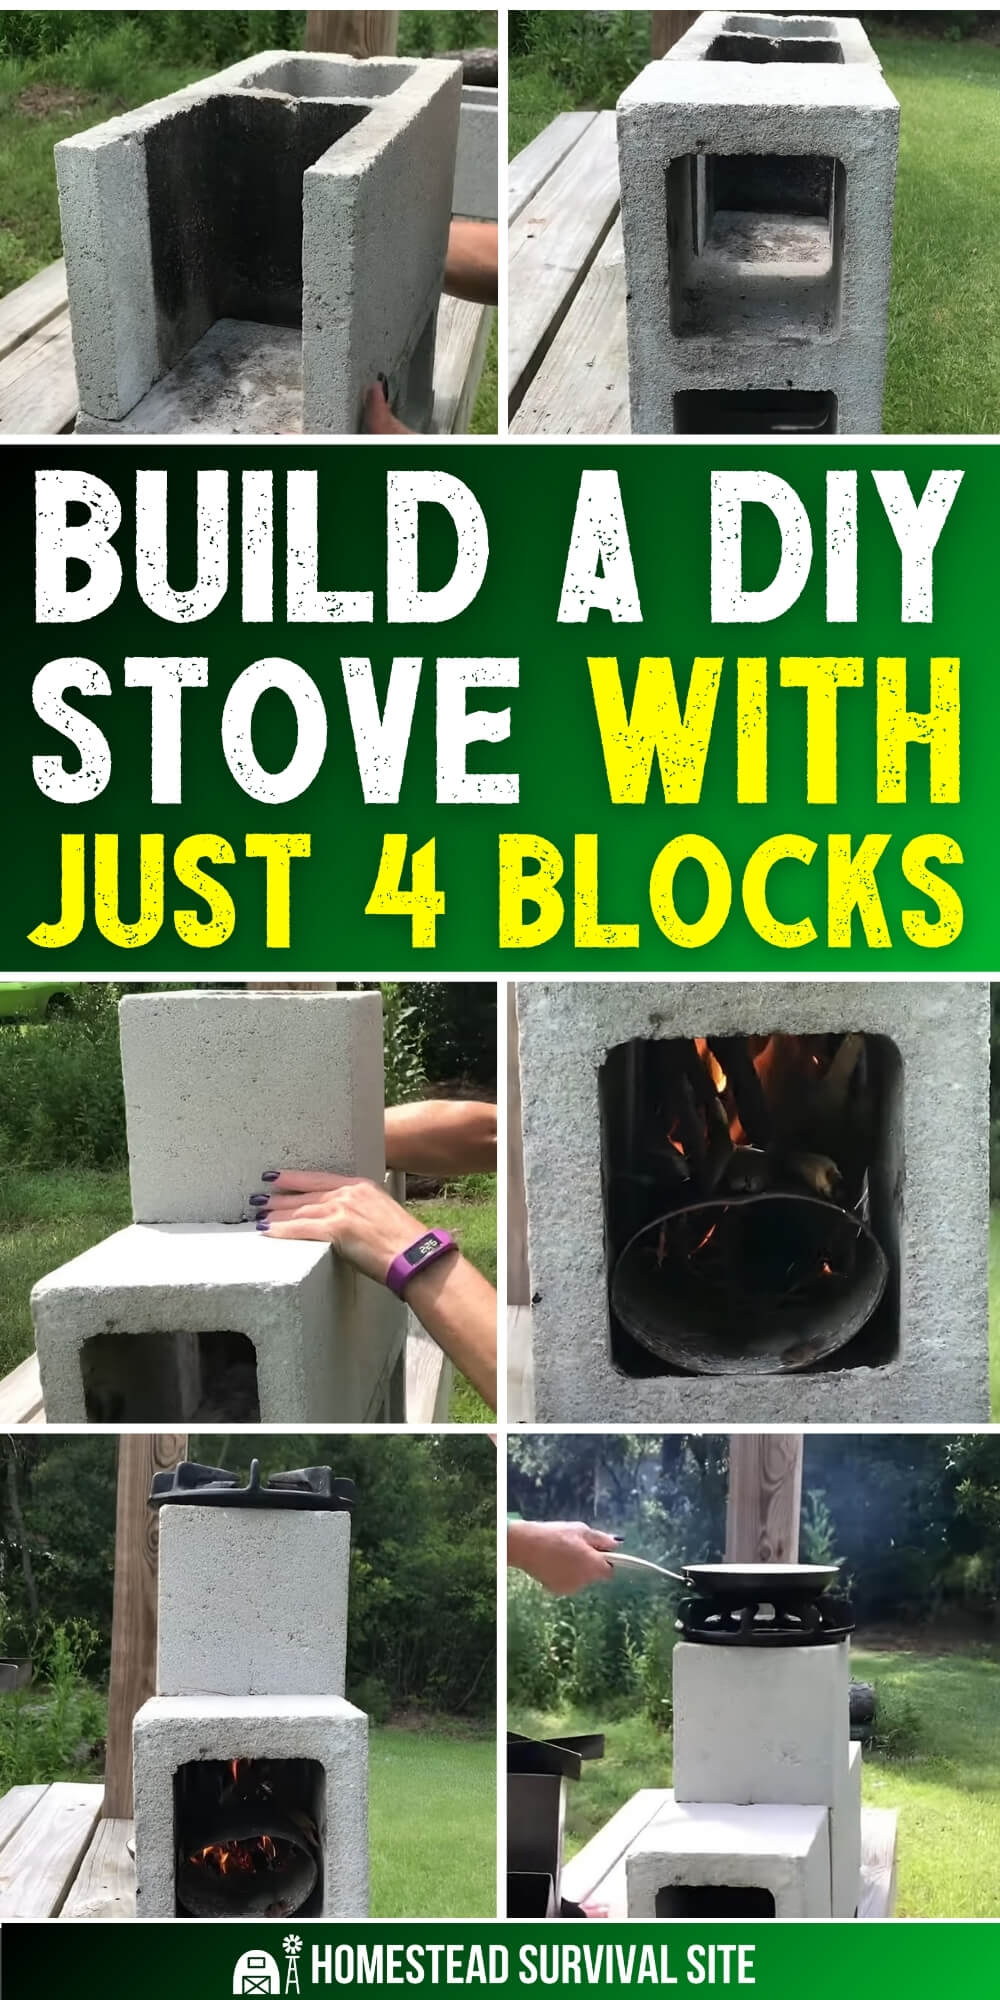
This tutorial is about as simple as it gets: four cinder blocks + twigs + a flame = an incredibly effective outdoor cooking stove. If you already have some cinder blocks, you're set. If not, you can usually get 4 for less than 10 bucks. Other than that, just make sure you have some dry wood for fuel.
This stove works very much like a rocket stove (L-shaped feed/burn path, strong draft, efficient twig fuel). But technically, it's not a rocket stove because it doesn't have an insulated burn tunnel and heat riser. That's why the woman in the video below calls it a “Banshee Stove”.
Want to save this post for later? Click Here to Pin It On Pinterest!
The video is from the Youtube channel, Banshee Moon. She explains how to make it, but I also typed up the instructions for those who prefer to read.
Materials You’ll Need
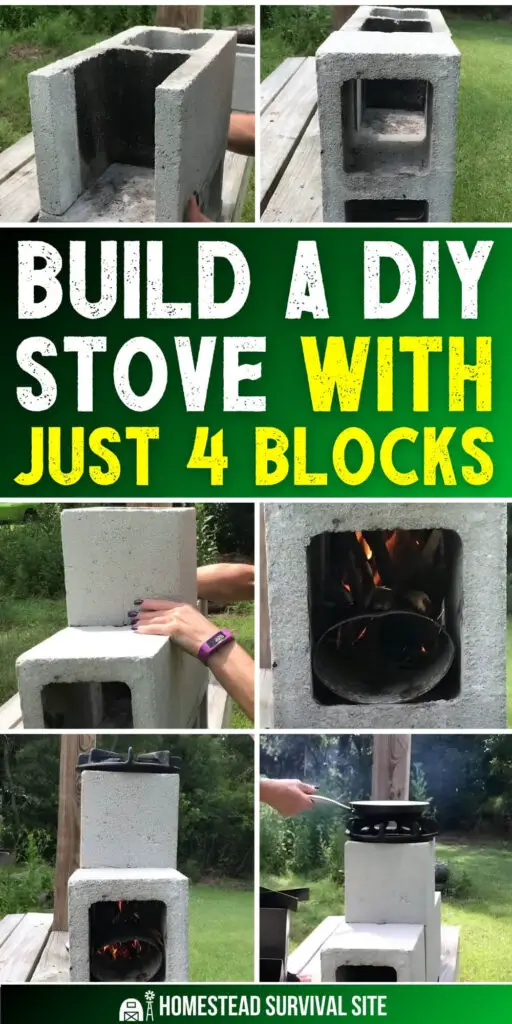
- 4 cinder blocks – One block needs to have an end cut out to form the side feed opening. You can do this with a cement blade on a circular saw.
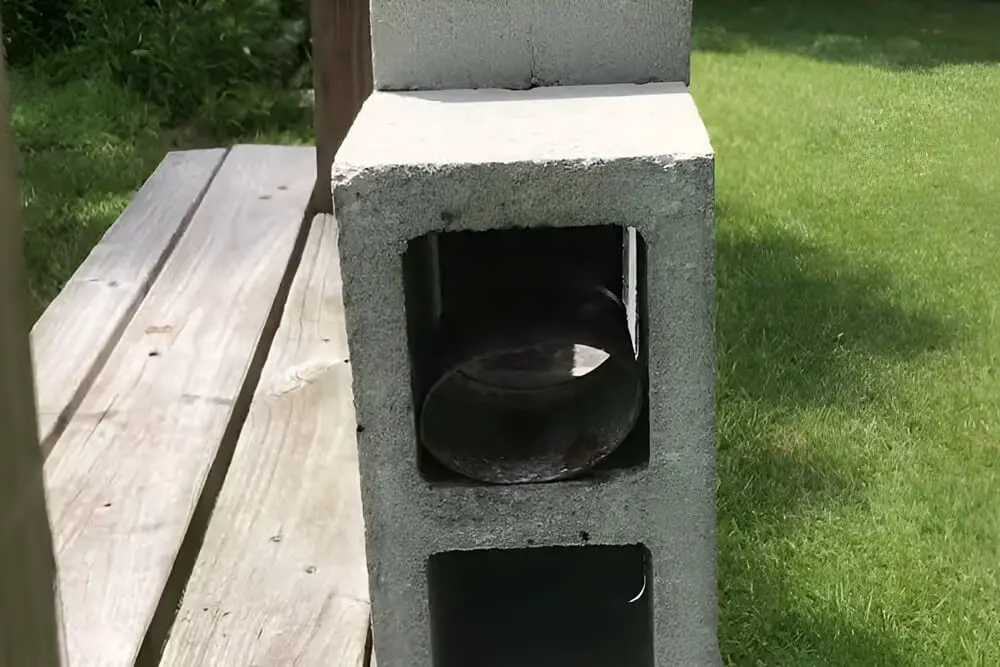
- Metal coffee can – Cut the bottom out of the can and crush it slightly into an oval shape, that way it will fit inside a cinder block.
For lighting and cooking:
- Tinder (paper, dry leaves, dryer lint, etc.)
- Kindling (wood shavings, small twigs)
- A handful of dry twigs/sticks
- A pan or small skillet
Optional but helpful:
- A small metal grate/vent piece to improve airflow and support sticks
- A safe base (bare dirt, gravel, pavers)
- Fire safety gear: water hose, bucket of water, extinguisher
How to Build the Cinder Block “Banshee Stove”
Step 1: Make the “elevator” base
Place a cinder block on its side. This keeps heat off your surface (dirt, porch, etc.) while providing a stable platform.
Step 2: Add the burn chamber
Now place a second block on its side on top of the first one. Use your modified block (end cut out) for this one. Doing this creates the burn chamber.
Step 3: Add the feed tube
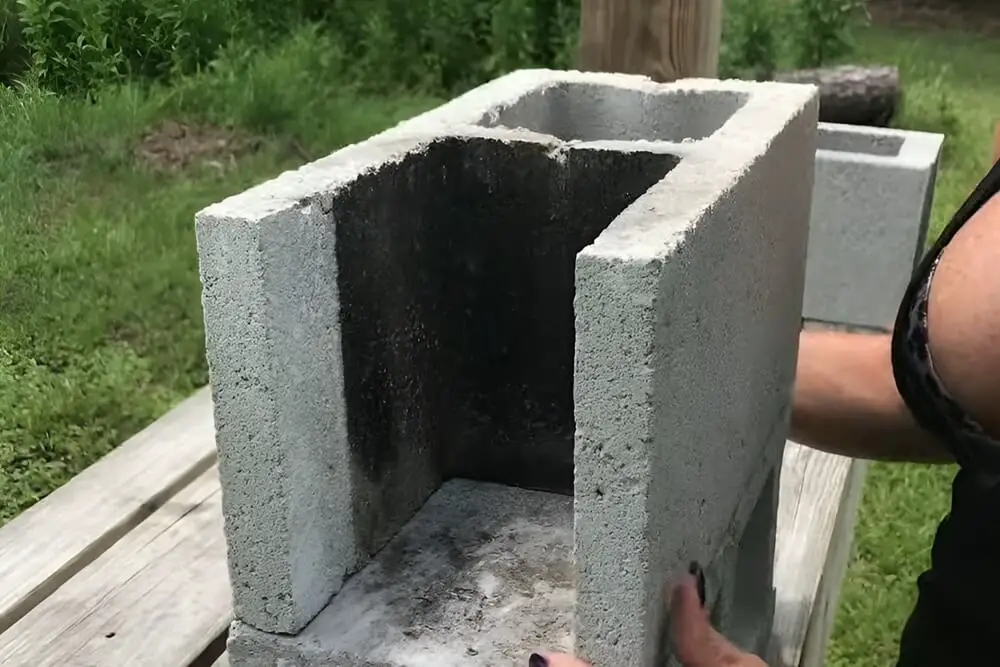
Stand up a cinder block next to the other two. The top hole acts as a tunnel or feed tube into the burn chamber.
Conceptually, you want an “L” path:
- Sticks feed in from the side
- Fire burns in the center
- Heat travels up to the top cooking surface
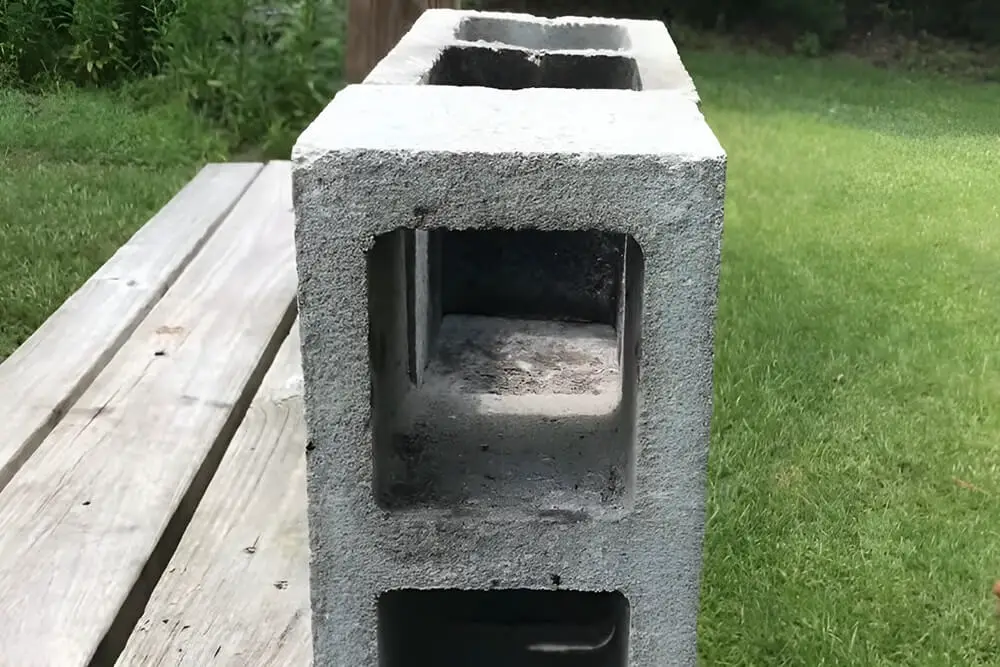
Step 4: Add the cooking surface
Place the fourth block on its side on top of the first two that you stacked. This will allow the hot air/flame to rise up to the top opening.
Place a metal grate over the opening. This is where you'll set your pan.
Step 5: Add the vent
Place the coffee can into the feed tube. This will create a vent that allows more air to get in, making it more efficient.
How to Light It and Get It Cooking Hot
Step 6: Load tinder and kindling in the burn chamber
Put wood shavings/kindling into the burn area, with tinder ready to catch.

Step 7: Light it
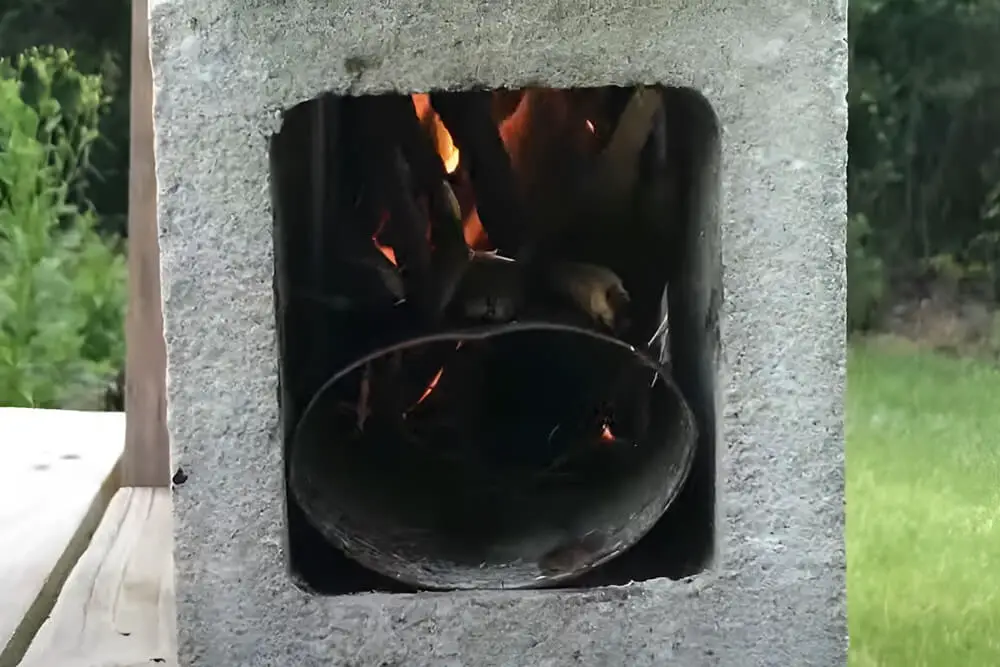
Light a piece of paper (or your tinder source) and feed it into the chamber to start the burn.
You should see smoke first, then the flame catches and starts drafting.
Step 8: Feed small twigs to build a strong coal bed
Start with small twigs and feed them steadily until it’s burning well.
Get it burning hot before adding anything bigger, and keep pushing partially-burning sticks inward as they ignite.
Step-by-Step: Cooking on It
Step 9: Wait for strong embers and steady heat
Once you’ve got a nice bed of coals/embers, the heat becomes more controllable and consistent.
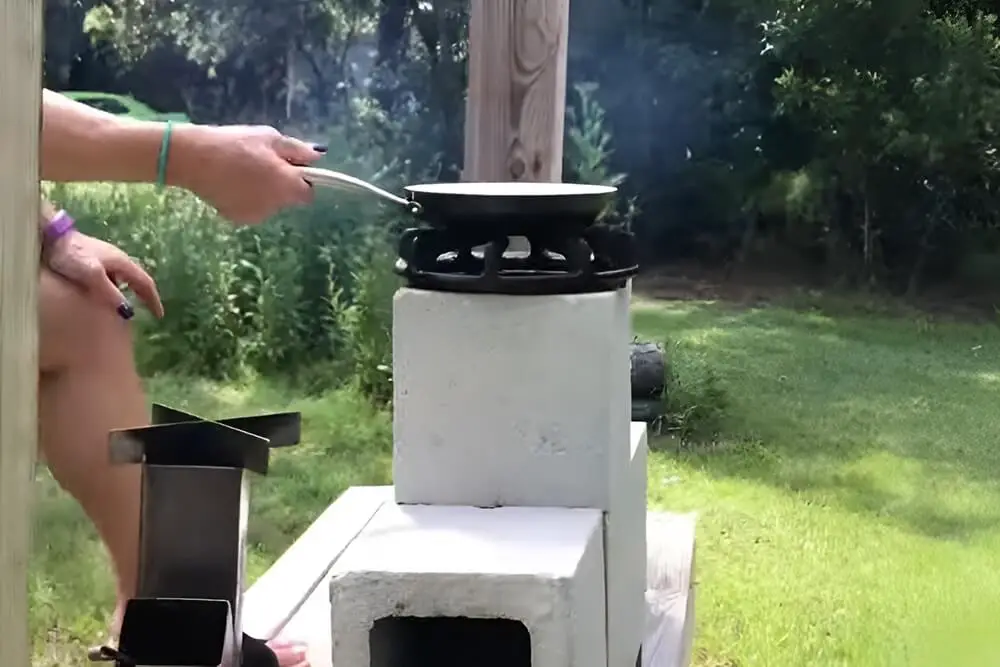
Step 10: Put your pan on top and cook
Set your pan on the top opening and start cooking.
It heats up quickly and cooks with minimal fuel. Just a few twigs can keep it going.
Step 11: Control heat by how you feed it
- More sticks / faster feed = more heat
- Less feed = lower heat
- Keep the sticks moving inward as they catch
Like this post? Don't Forget to Pin It On Pinterest!
You May Also Like: