

Estimated reading time: 8 minutes
Clay is one of those resources that's way more useful than most people realize. With it, you can make pots and bowls for cooking, build an earthen oven, patch walls, seal gaps, and even make simple tools. People have relied on clay for thousands of years, and it's still one of the most practical materials you can have on hand when living off the grid.
The best part is that making your own clay isn't as complicated as you might think. Clay is really just a certain kind of dirt, and there's a good chance there's plenty of it right in your backyard. You just need to know how to recognize it and how to clean it up so it's usable.
I came across a great video on the YouTube channel, Andy Ward's Ancient Pottery, that walks through three different methods for turning dirt into clay, along with when to use each one. You can watch is video and learn about the three methods below.
Want to save this post for later? Click Here to Pin It On Pinterest!
What Clay Actually Is
Technically speaking, clay is sediment made of super fine particles, even smaller than silt. We're talking less than 0.00016 of an inch. That means not all dirt is going to work equally well. Some dirt is loaded with clay, while other dirt has hardly any in it at all.
That's why some people try making clay from dirt and end up frustrated. If you start with a whole bucket of dirt that doesn't have much clay in it, you might end up with only a handful of usable clay after all that work. Picking the right dirt from the start makes a huge difference.
How to Spot Dirt That's High in Clay
Clay-rich dirt has a few telltale signs you can look for. When it's wet, dirt with a lot of clay in it feels sticky and moldable, kind of like the clay you'd buy at a store. When it's dry, look for tire tracks or footprints that hold their shape for a long time. That's the clay holding everything in place.
Another big clue is a cracked, crackled texture on the surface of the ground. Clay expands when it gets wet and shrinks when it dries out, so when you see that cracked pattern, it usually means there's a good amount of clay in that soil.
Testing Your Dirt Samples
It's a good idea to collect dirt from a few different spots and test each one. Andy grabbed three samples from different places around town.
To test them, crumble each sample into a powder with your hands, then add some water. Once it's wet, you can feel how clay-like it is. Pay attention to how well it sticks to itself, how moldable it is, and how gritty it feels. That tells you how much work it'll take to turn it into usable clay.
Here's what Andy found with his three samples:
- Sample 1 was high in clay and felt nice and moldable, but since it came from an area where people parked their cars, it had bits of plant material and gravel mixed in. It just needed to be screened to get the bigger debris out.
- Sample 2 was nearly pure clay with no rocks or plant material, so it barely needed any processing at all.
- Sample 3 was really gritty and full of gravel, sand, and probably silt. It didn't stick together well, so it needed a lot more work to separate the clay out.
Each of these samples called for a different method, which brings us to the three ways to turn dirt into clay.
Method 1: Screening
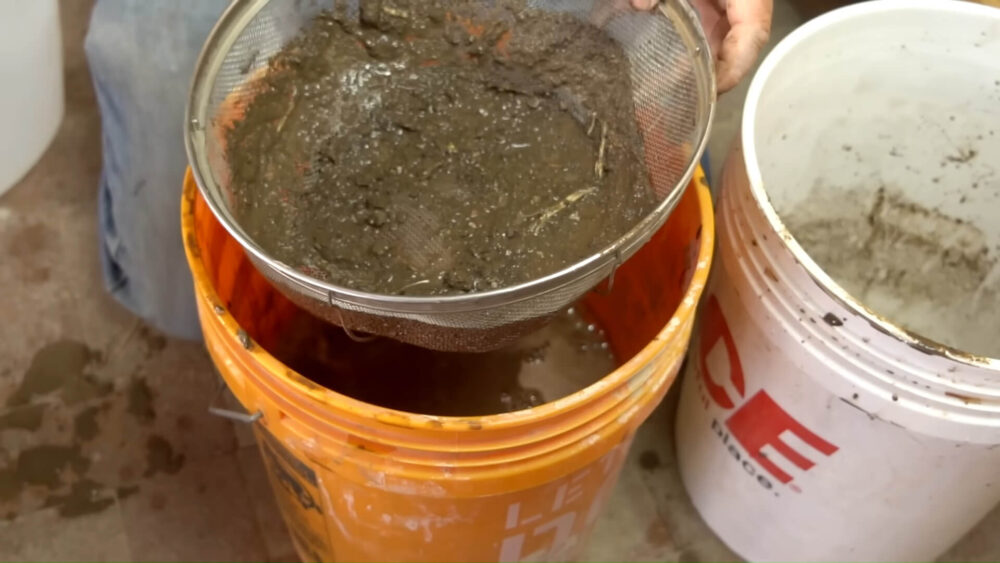
Screening is the way to go when your dirt has plenty of clay in it but also has some larger junk mixed in, like rocks, gravel, or bits of plants.
Start by putting the dirt in a bucket and adding water. Mix it up until it's nice and thin, with no lumps. Then pour it through a screen. A strainer works great, but an old piece of window screen or a chunk of screen from the hardware store works just fine, too. If the screen gets gummed up, add a little extra water to help rinse it through.
Now you've got liquid clay, and you'll need to get a lot of that water out. Let the bucket sit for about an hour so the clay settles to the bottom, then pour off the clear water from the top. The clay will still be too wet to work with at this point, so pour it into an old pillowcase and set it out in the sun. Let it dry until it reaches the right consistency.
Method 2: Dry Processing
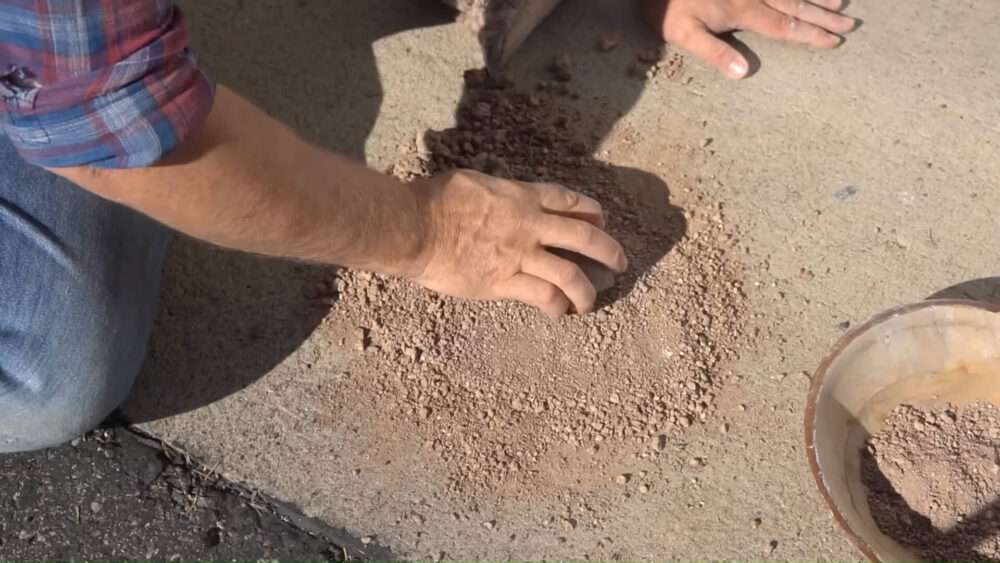
If you're lucky enough to find dirt that's pretty much pure clay, dry processing is the easiest, fastest, and most efficient method. You don't really have to remove anything from it.
All you have to do is pound it into a powder. Andy just used his concrete driveway and a rock, but you can do this pretty much anywhere. If you'd rather work on a countertop, put down a piece of plywood, a flagstone, or a paver so you're not smashing it directly on the counter. Then use a brick or a rock to gently pound the dirt into powder.
Most clay isn't very hard, so this goes pretty quickly, and it doesn't need to be as fine as flour. If your clay is too wet to grind, set it out somewhere covered (so it doesn't get rained on) and let it dry for a couple of weeks first.
Method 3: Levigation
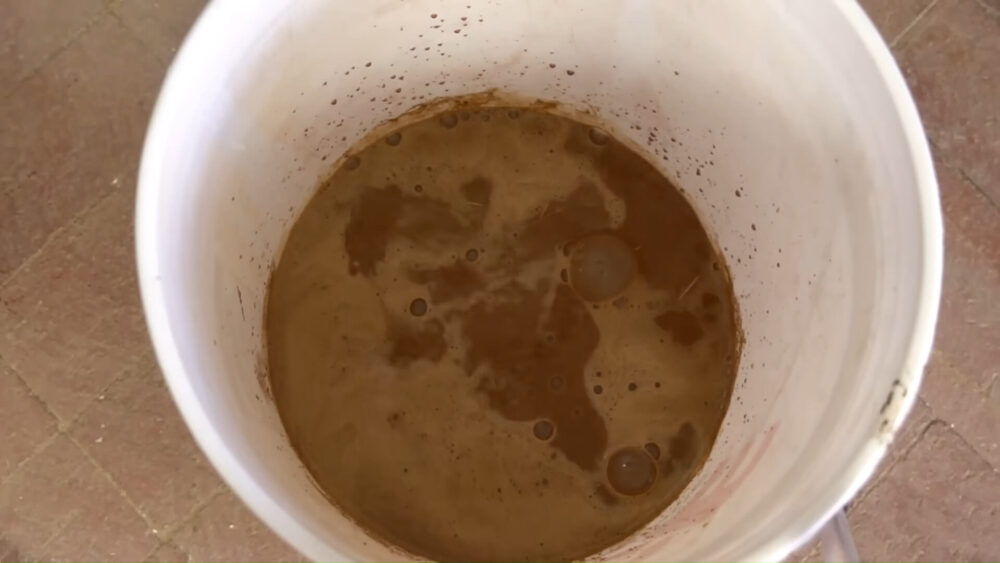
Levigation is the method to use when your dirt is really gritty and full of sand and silt. It sounds fancy, but it just means using gravity to separate particles by size.
Put the dirt in a bucket, cover it with water, and mix it up well. Reach in with your hands and break up any lumps so everything's mixed in with the water. Then let it sit for just a minute or two. The heavier sand and silt will sink to the bottom, and you can pour the liquid clay off the top into a second bucket.
Repeat this process three, four, or five times, adding more water, mixing, letting it sit for a minute, and pouring off the liquid clay. Keep going until there's mostly just grit left in the first bucket.
At that point, your second bucket is basically pure liquid clay. Let it sit for at least an hour, or even overnight, so the clay settles to the bottom. Then pour off the layer of clear water on top.
The clay will still be way too watery to use, so here's a handy trick to dry it out. Set a few bricks on your patio to form a little trough, lay a piece of cotton cloth over them, and pour the clay in. Moisture will drain out through the bottom of the cloth and evaporate off the top, and by the end of the day, it should be ready to go.
Tempering Clay So It Won't Crack
Once you've made your clay, there's still one more step before you can use it to make pottery. All clay shrinks as it dries, and if it dries unevenly, it'll crack and break. To help it dry more evenly, you need to add something called temper.
Temper is any non-moldable material that you mix into the clay. In store-bought clay, it's usually grog, which is just clay that's been fired and ground up into a powder. You can buy grog or make your own, but sand is often the easiest option since you can find it just about anywhere. Volcanic ash and diatomaceous earth also work well because they're fine and don't react when the clay is fired.
A good ballpark is to add about 20% temper to your clay. One tip: It's a lot easier to mix the temper into dry clay than wet clay. With wet clay, it's harder to measure and you have to knead it in, but with dry clay, you can just stir it around until the sand is mixed throughout. That's why it makes sense to add temper to dry-processed clay before you add water.
Final Thoughts
Making your own clay really is as simple as finding the right dirt and picking the right method to clean it up. If your dirt is mostly clay with some debris, screen it. If it's nearly pure clay, dry process it. And if it's gritty and sandy, levigate it. Add some temper, and you've got clay that's ready for pottery and all kinds of other projects, without spending a dime at the store.
Like this post? Don't Forget to Pin It On Pinterest!
You May Also Like: