

Estimated reading time: 7 minutes
Sand storage sounds like something out of a sci-fi movie, but it's actually a common farmer’s method of storing root vegetables during the winter. It allows folks to eat their homegrown veggies throughout winter without a root cellar or refrigerator. Preppers and homesteaders use this method frequently to keep fresh their summer crops fresh all winter long.
But how on earth could burying vegetables in the ground keep them fresh? Let’s dive into how to use sand to preserve your vegetables during the winter. This method is easier than you think and its origin dates back centuries. Plus, you can save tons of money by lessening your food waste.
Want to save this post for later? Click Here to Pin It On Pinterest!
Basics of Sand Preservation
Now that you know you can store fresh vegetables in sand, you’ll need to learn the fundamentals of storing veggies over the winter. It’s not as easy as burying any excess produce in landscaping sand and calling it a day. You will need to know which vegetables and fruits can be stored this way, and how exactly to store them.
Vegetables and Fruits to Preserve in Sand
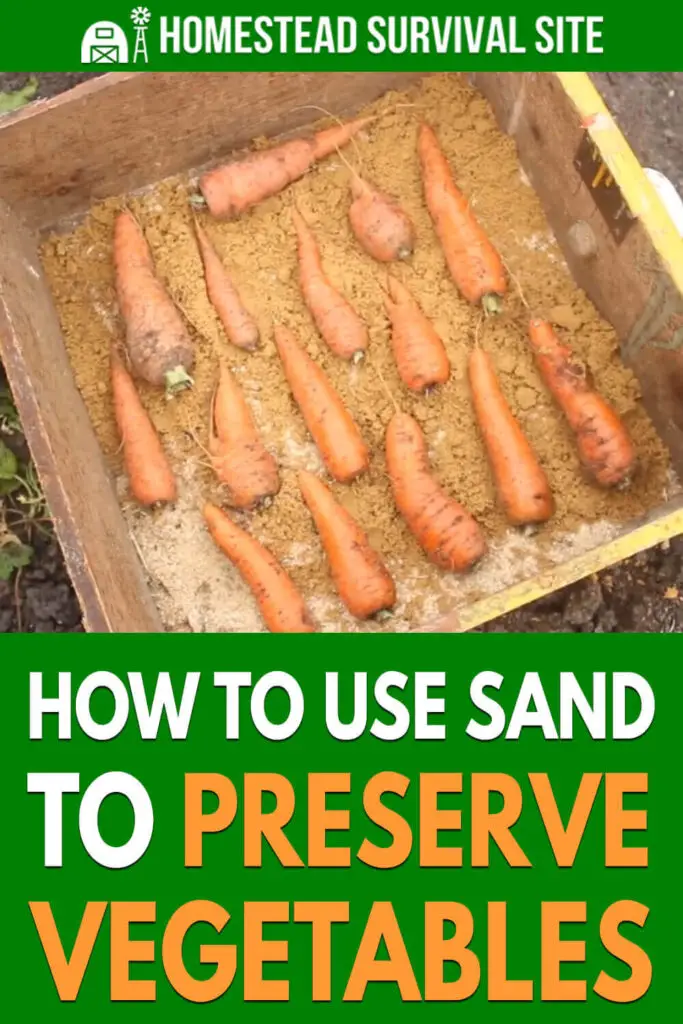
Specifically, root vegetables keep best when storing them in sand. If you have a large summer crop, there is no need to waste them. Save food and money by storing these foods in the sand:
- Beets
- Carrots
- Ginger
- Onions
- Parsnips
- Radishes
- Rutabega
- Turnips
Firm-fleshed fruits can also be stored in sand. This includes apples and pears. This is perfect for folks with apple and pear trees on their property.
Root vegetables can stay fresh for 2-5 months when stored this way, but fruits won't last as long as that. Check your crops every week or so to check for signs of rot or deterioration.
If you plan on keeping fruits as well as root vegetables, you will need to keep them in separate containers away from one another. Apples emit ethylene which causes other produce to ripen. Apples and pears will need their own container, so plan for that in your storage space.
Materials Needed
Just a few materials are needed before you can start preserving your vegetables in sand. Be sure to grab the following:
- Storage container – I like to use a 3-gallon storage container, but you can use the crisper drawer from the refrigerator if nothing else. Choose something that is BPA-free and water-tight. I have also seen people use wooden boxes, but you will need two; one that fits inside the other for extra moisture protection.
- Sand – Sand storage is all about the type of sand used. Play sand is the only type of sand to use, as it is fine-graded that has been washed, dried, and inspected. It should come damp, and if it is too dry, you may need to spray lightly with distilled water to moisten.
- Enclosed, unheated space – The space and temperature where your vegetables are kept is most essential. You will need a dark, unheated, well-insulated, covered space that is free of critters. Basements, closets, garages, and root cellars are all common choices.
Storage Environment for Sand Preservation
Without question, the space in which you are storing your veggies is the most important factor. For successful winter storage, the temperature must always be between 32-40 degrees Fahrenheit with 90-95% humidity.
High humidity helps to keep root vegetables from shriveling during this process. With any warmer temperature, the veggies would grow. Any cooler and they will freeze.
If needed, you can insulate the storage area with sheet insulation to keep the temperature above freezing. Otherwise, sheds and garages can absorb heat and maintain it, even during the colder months. Be very aware of the constant room temperature before choosing your location.
To add humidity, you can purchase a small humidifier for the room in which you are storing the veggies. You also may want a room thermostat to keep track of temperature and humidity easily and efficiently. This will depend on the area of the world that you live in. Some places have high humidity frequently, so you will not need an additional humidifier.
If your sand looks dry upon filling your storage container, you can spritz it using a spray bottle filled with distilled water. You want damp sand, but not completely wet. Moisture causes rot, but dry sand will dehydrate the root vegetables. Distribute the moisture through the sand with your fingers.
Once you have the right materials and the temperature under control, you are ready to start storing your vegetables in sand. It is not as easy and layering veggies on top of one another. There is a precise method to keep your vegetables super fresh all winter long.
How to Use Sand to Preserve Root Vegetables – Step by Step
- “Cure” the veggies for a few days out on the counter. This causes them to develop a thicker skin, which is perfect for our purposes.
- Control the temperature of the room and create the optimal space for root veggies to thrive.
- Line your container with a layer of play sand, adding moisture if needed using a spray bottle and distilled water. Aerate with your fingers to distribute the moisture. You want to keep the sand just barely damp.
- Select the best-looking produce from your summer harvest to save. The healthiest produce will have the best chance of making it through winter. You want veggies that are not overripe but still mature.
- Then, slice off the green tops of your root vegetables. Do not cut any of the vegetable skin or flesh, only the tops. Shake or rub off any dirt with your hands, but do not wash the vegetables before burying them in the sand. This will add moisture, which will cause rot.
- Nestle your vegetables root-side-down into the first layer of sand. All veggies must have the root facing down, just as it grew in the earth. Allow a few inches between the veggies. Layer another layer of sand on top and continue layering the vegetables in the sand, being sure that they are not touching.
- Pour a final layer of sand over the top, covering all of the vegetables.
Sand Storage Tips
To keep critters away, be sure your storage area is clean and free of veggie remnants or anything else that may entice them into your situation. If needed, set some homemade traps around the outside of the structure for extra insurance.
When harvesting your root veggies initially, save ones that are free of blemishes for burying in sand. The roots should be not too wet, but not dry. Wet roots can cause rot and dry roots can cause the veggie to shrivel, so the moisture level has to be just right. Blemishes may also produce rot where the damage occurred.
Check the veggies about once per week to see if there is any visible rot. This also helps you to maintain the perfect environment for these veggies, since you will also be checking the thermostat and humidifier if using. Also, give the veggies a good smell. Rot will always have an unusual odor.
To reduce waste, be sure to eat all your veggies before any signs of rot. Keep checking on them throughout winter and eat them before they turn for the worse. Save the best-looking veggies for last, as they will likely last the longest.
In Conclusion
We have learned how to properly store root veggies in sand throughout the winter. By doing this, you can enjoy fresh summer produce during colder months. It saves money and creates less waste, two things that preppers and homesteaders love. All you need are a few simple tools and techniques before burying your produce for the winter.
Preparing for the future is something that can greatly benefit you in times of need, so start storing your veggies in sand this winter.
Like this post? Don't Forget to Pin It On Pinterest!
You May Also Like:


I only want the $22.00 dollar book
I only want the book on water only I have already paid for website