

Estimated reading time: 26 minutes
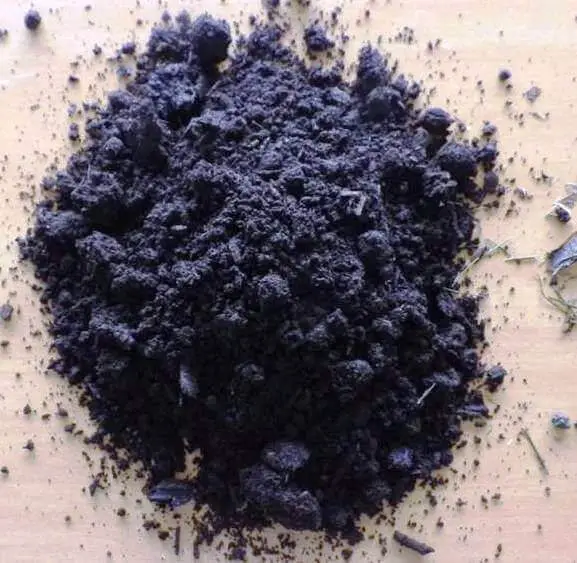
Vermicomposting involves the use of earthworms to accelerate the decomposition of vegetation to produce a super-rich fertilizer commonly referred to as “worm castings.” The castings are carefully removed from the vermicomposting bin and added to gardens and potted plants. The value of vermicomposting is higher yields from any garden and healthier plants.
Some people use vermicomposting to enhance the health and appearance of potted flowers but in a survival/grid-down scenario they’re an easy and potentially necessary way to manufacture exceptional fertilizer at home or homestead for use in any vegetable garden setup with the help of worms.
Vermicomposting also accelerates the composting process. A traditional compost heap can take months if not longer to allow vegetation to decompose. Worms make it all happen faster and the result is one of the best organic fertilizers you could use.
Considering the rising price of fertilizer these days, it makes a lot of sense to make your own… or at least let the worms do it.
Want to save this post for later? Click Here to Pin It On Pinterest!
It’s Not About Night crawlers
It’s easy to assume that large night crawlers would be the best choice for vermicomposting, but in actual fact, the true workhorses in vermiculture are the smaller earthworms sometimes referred to as red wigglers (Eisenia fetida) and redworms (Lumbricus rubellus).
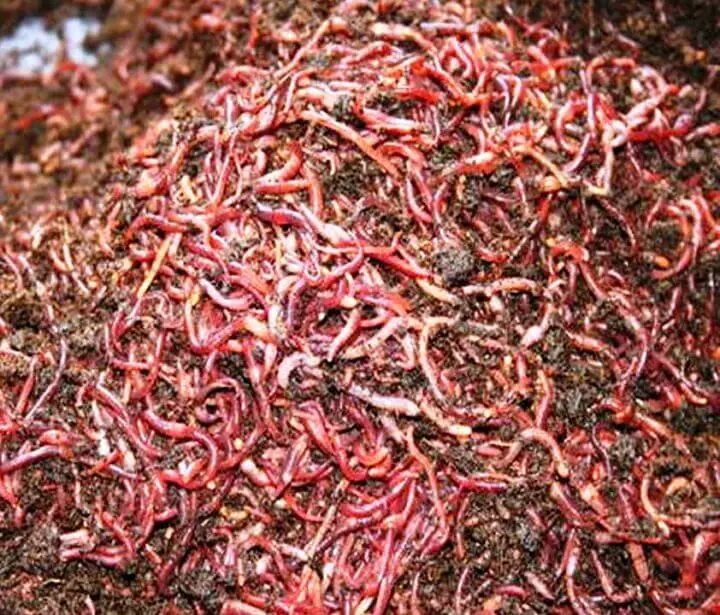
Night crawlers pretty much live on a diet of soil and that’s what they produce: dirt in – dirt out. Red wigglers and red worms are different. These two species make great worms for vermicomposting because they prefer a compost environment to plain soil, and they are very easy to keep.
Worms that feed on vegetable waste, compost, and organic bedding produce richer castings than those that feed on plain soil like night crawlers. Crawlers do a great job of aerating the soil but don’t add much nutrient value to fertilizer.
Night crawlers or “European earthworms” can still work but redworms and red wigglers are best. They also tend to stay closer to the surface of soil making them the perfect choice for a vermicomposting bin as you add kitchen vegetable scraps or other materials for composting towards the top of the bin.
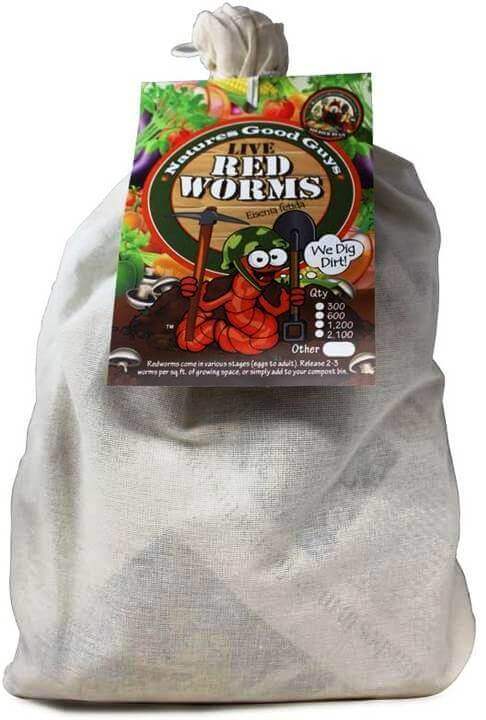
You can buy them in bulk (up to a thousand+ worms at a time) on Amazon. Or if you must, you can slowly and methodically harvest them yourself from the soil surrounding your location. You’ll also have to be very patient if you harvest your own.
They’ll eventually reproduce, but buying them in bulk online will get you off to the fastest start. They survive shipment rather well, but you really should add them to your vermicomposter soon after they arrive.
What Vermicomposters Look Like
There are variety of shapes and materials you can use for vermicomposting. It’s a simple setup as a concept and how you assemble your vermicomposter is up to you. Here are some of the standard designs:
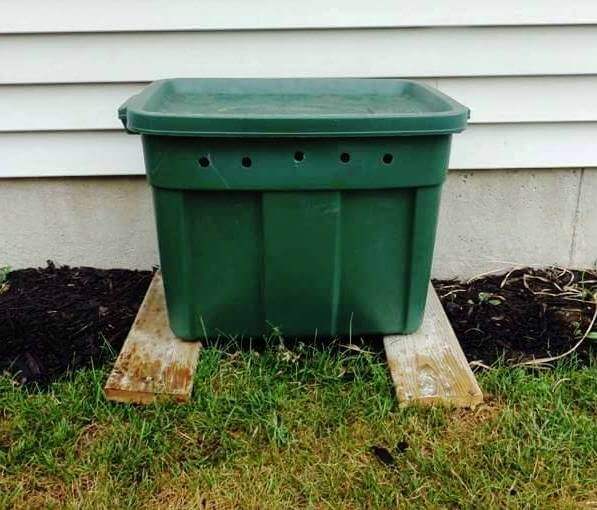
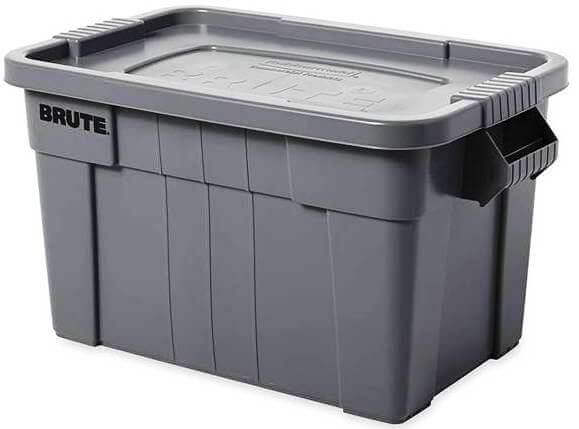
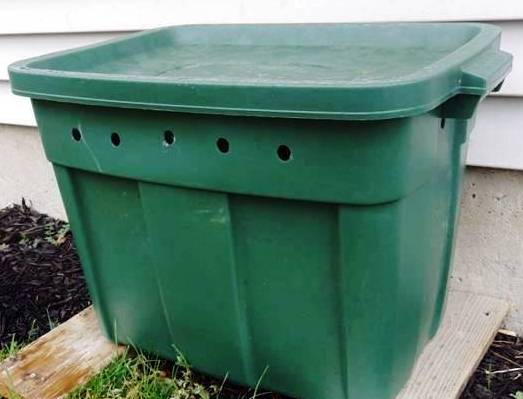
- A Plastic Bin with a Lid (easiest to do but make sure it’s opaque, not clear)
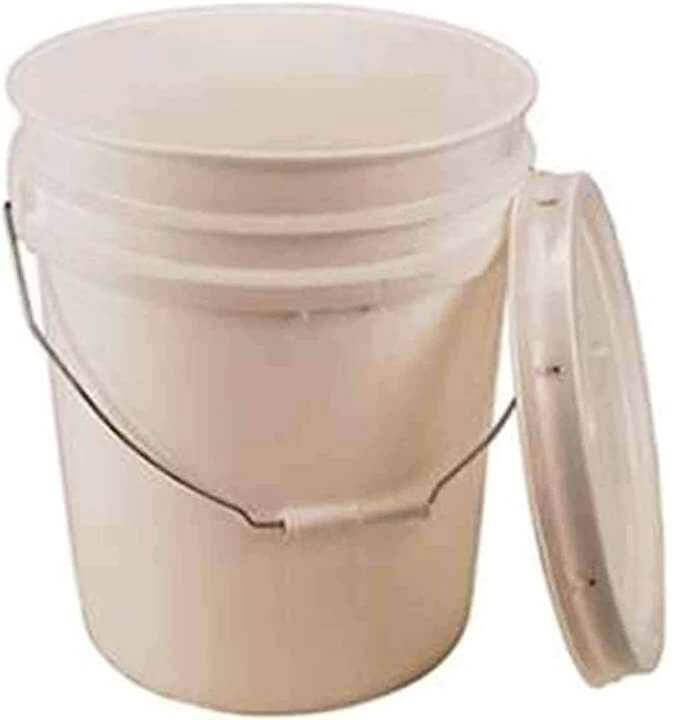
- A 5-Gallon Bucket with a Lid (Also easy and ideal under a sink or on a patio)
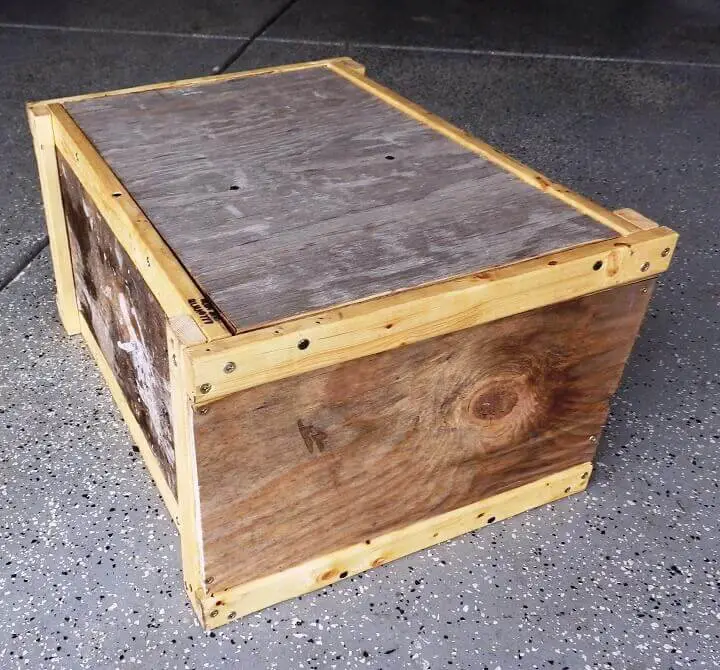
- A Wooden Box with a Lid (allows you to customize the size)
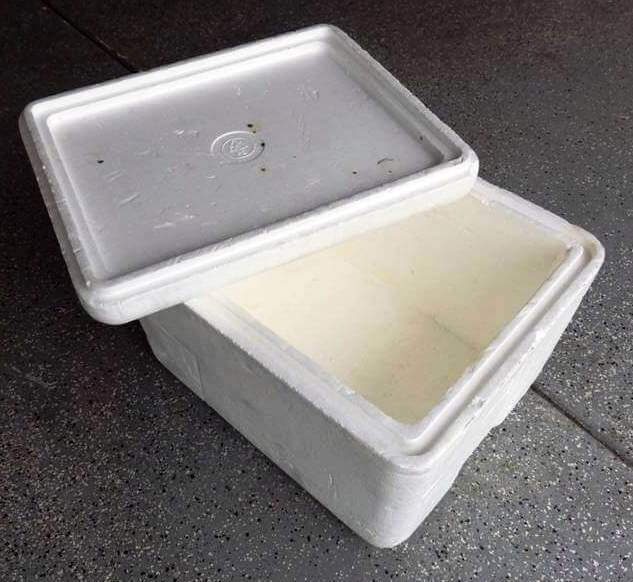
- A Styrofoam box from grocers, pet supply stores or online (great for temperature management)
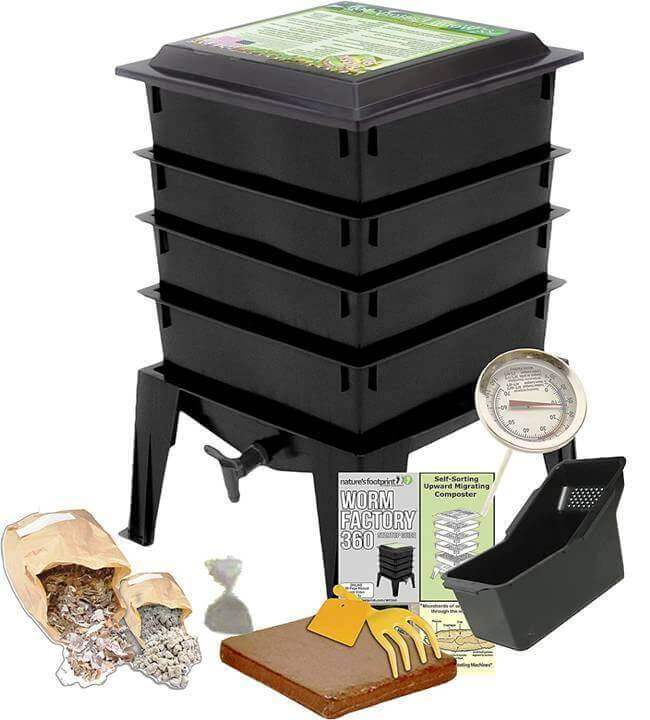
- A Specially Manufactured Vermicomposter you can buy (Pricey but well designed and often comes in a kit for vermicomposting)
All of these variations work for vermicomposting as long as they stay true to the basic design concept. A standard bin size often recommended is 18 inches wide, 24 inches long and 18 inches deep. Larger and smaller sizes will also work depending on your available space.
Vermicomposter Design Concept
There are 5 critical success factors for vermicomposter design.
1. A container that can hold your worm bedding and composted material
2. A lid or other cover (burlap) to maintain moisture and prevent fruit flies or other insects from invading the vermicomposter

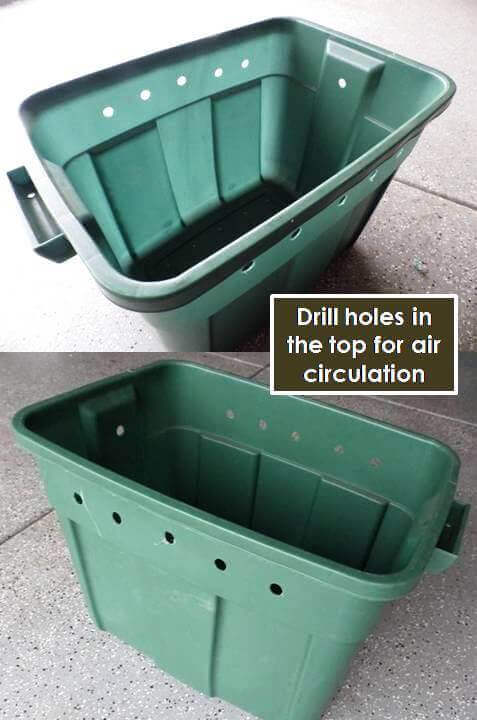
3. Properly placed holes to allow for excess water drainage and air circulation
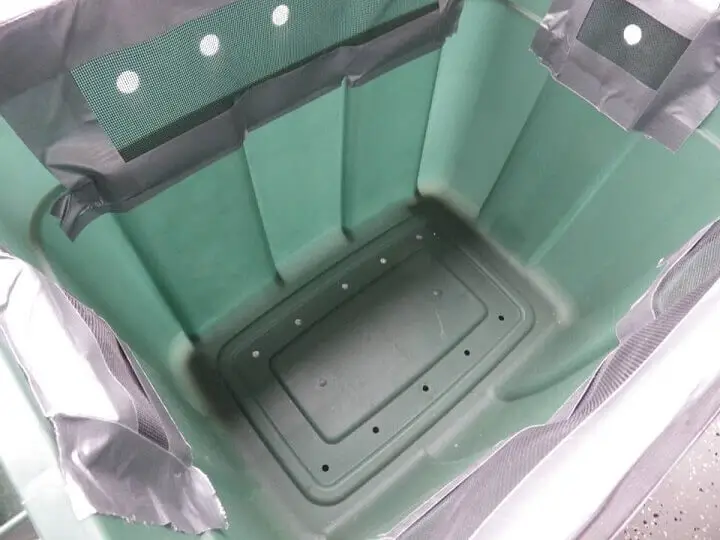
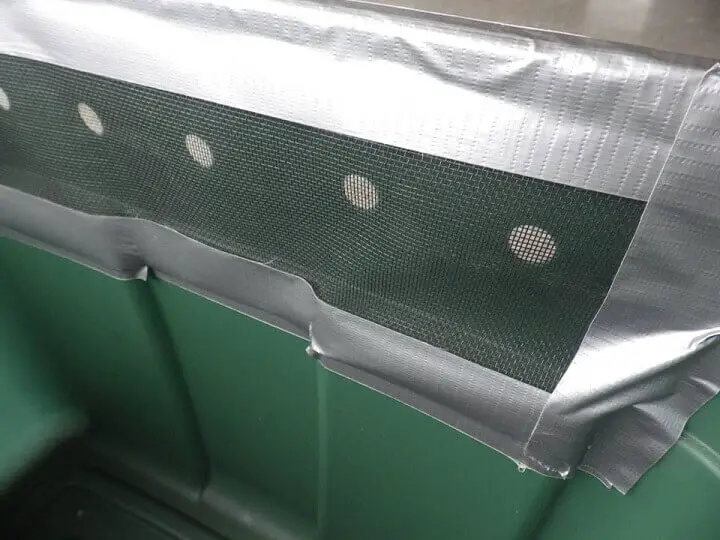
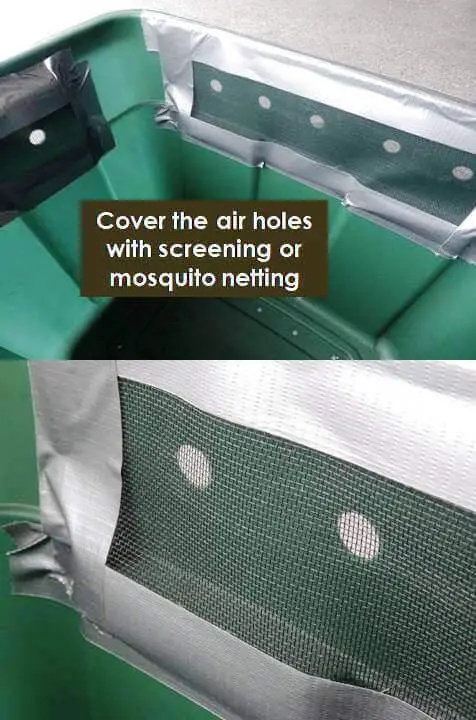
4. Pieces or sections of screening material over any air-circulation holes to prevent fruit flies or other insects from entering and compromising the vermicomposter
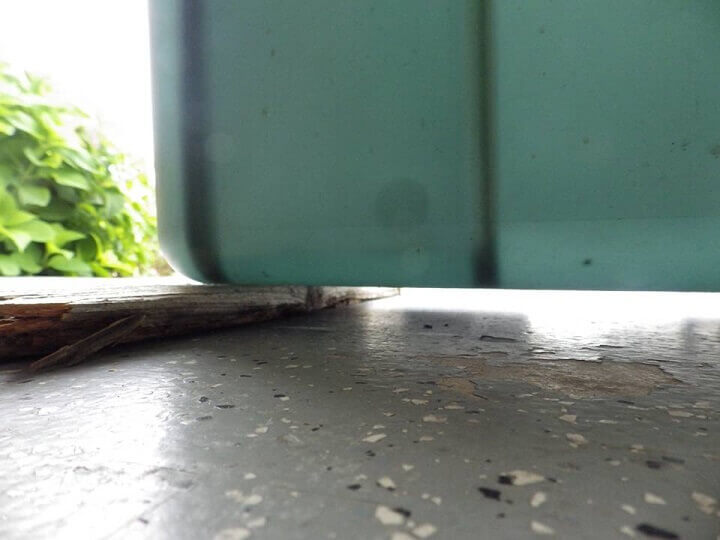
5. Air-space under the container to allow for effective drainage and air-circulation. This also discourages the worms from sneaking through the drainage holes and abandoning ship.
If your container can accomplish these design parameters, you should have consistent success regardless of what materials you choose to make it out of.
Bedding Materials for a DIY Vermicomposter
Here’s a quick step-by-step for making a vermicomposter from a plastic storage bin:
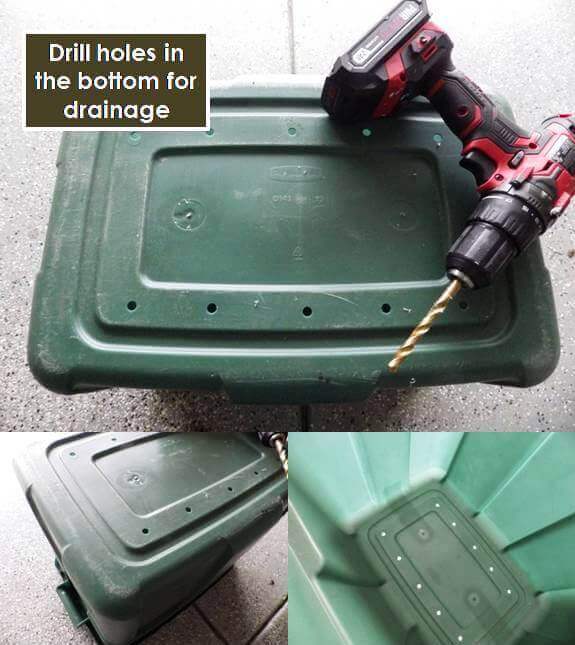
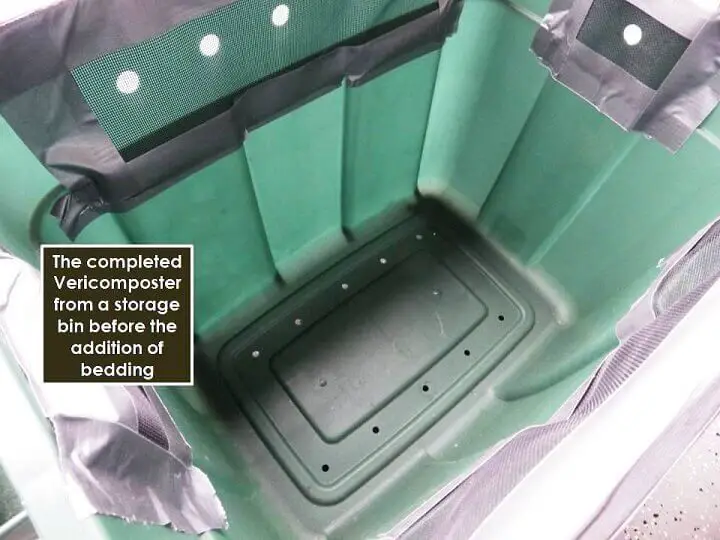
You can and should apply these design concepts to any shape or size vermicomposter you make. The materials can vary but the design concept needs to stay the same.
How Vermicomposting Works
The whole idea here is to create a comfortable and healthy environment for a worm population that is fed compost materials (vegetation) on a regular basis.
On average, a pound of worms will be able to convert a pound of vegetation into a pound of composted worm castings every day. That means you have to consistently add vegetation to the vermicomposter.
The Best Worm Food for Vermicomposting
Kitchen scraps are a good place to start. Consider the following:
- Trimmings from any leafy vegetables.
- Root ends and leaves from cabbage, cauliflower, broccoli or other large stemmed vegetables.
- Banana peels or the peelings from any other non-citrus fruits like apples, melons, squash, cucumbers, and carrots.
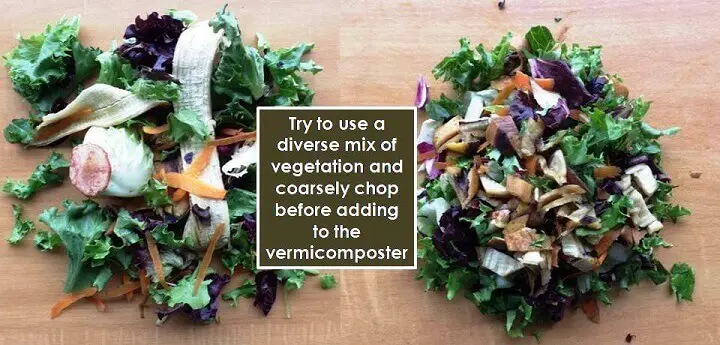
It’s important to chop up the vegetable trimmings to a coarse dice before adding to the vermicomposter. This makes it easier for the worms to eat and digest them and accelerates the overall composting process.
But not all kitchen scraps will work in a vermicomposter. In fact, some will inhibit the overall composting process or could lead to off-odors or even kill the worms. Here’s the bad stuff:
- Avoid adding all meats, seafood, bones or any other animal proteins. They will lead to off-odors.
- Avoid adding all dairy products. They also create odors.
- Avoid oily or fermented products. Same odor problem and worms don’t like them.
- Avoid citrus fruits trimmings from oranges, lemons, limes, grapefruit or any other fruits that are acidic. Acidic materials in a compost heap inhibit decomposition including food additives like vinegar often found in pickled vegetables. You want an alkaline pH in your vermicomposter.
And it’s not just about kitchen scraps. Leaves and vegetation from your yard and garden can also be fed to your worms, but you’ll need to cut them up a bit and don’t add any vegetation that has been treated with any kind of lawn chemicals, pesticides, herbicides or other chemicals. They can also inhibit the overall composting process and kill your worms.
And mix it up. Try to create a diverse combination of vegetable, fruit and vegetation trimmings.
Creating the Ideal Vermicomposting Environment
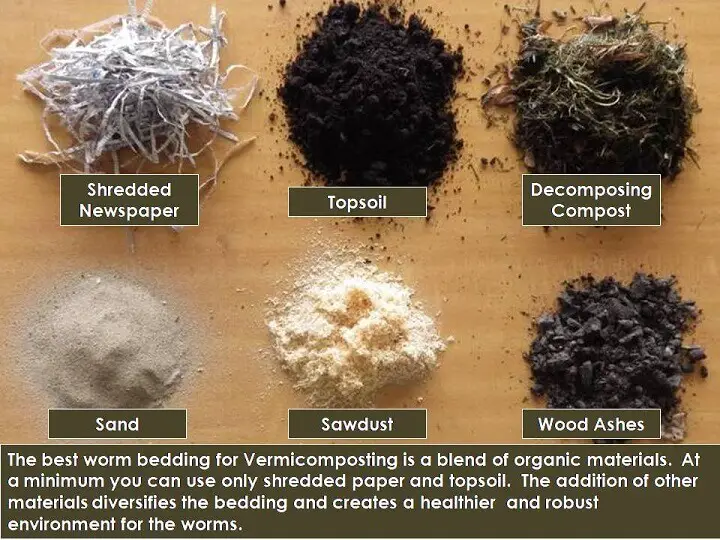
Bedding materials create the best environment for your worms. It’s the foundation and habitat for them. They’re easy to find around your home and yard or you can actually buy some of these materials.
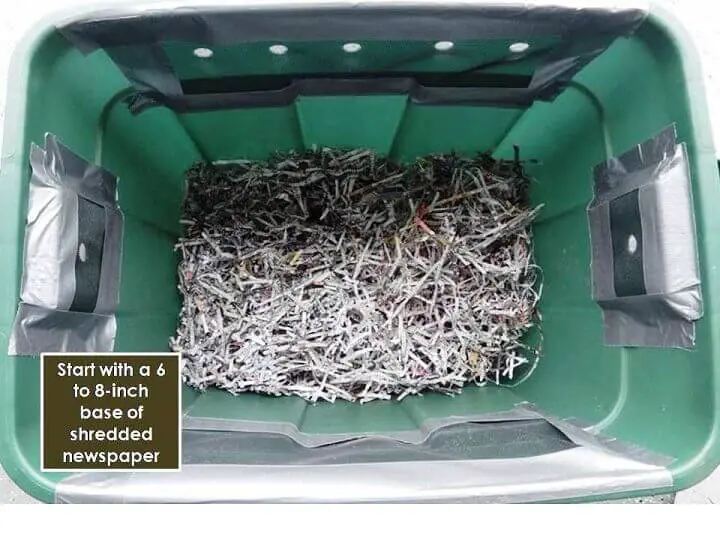
- Newspaper that has been either shredded or torn into pieces.
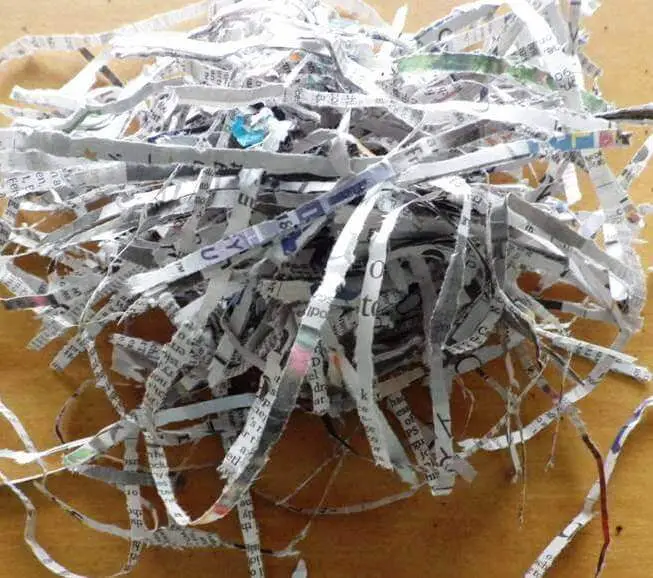
There are also arguments for using whole sheets of newspaper as a cover over all of the materials to prevent fruit fly invasions and to block any light from alarming the worms. Worms don’t like light. Remember too that a large cover sheet of newspaper is in addition to your shredded newspaper in your bedding.
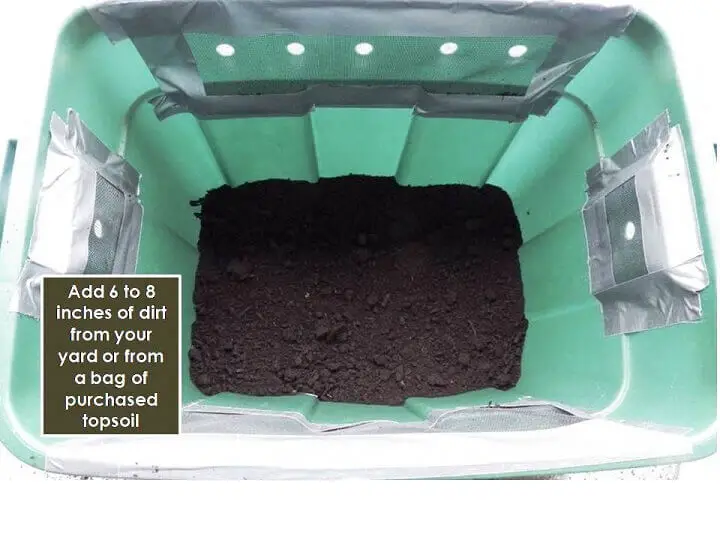
- Soil from your yard or a purchased bag of topsoil is the next addition.
Soil has micro-organisms that will aid in the overall composting process and is a well known and welcome environment for worms. It also gives their gut a head start for digestion and the production of castings.
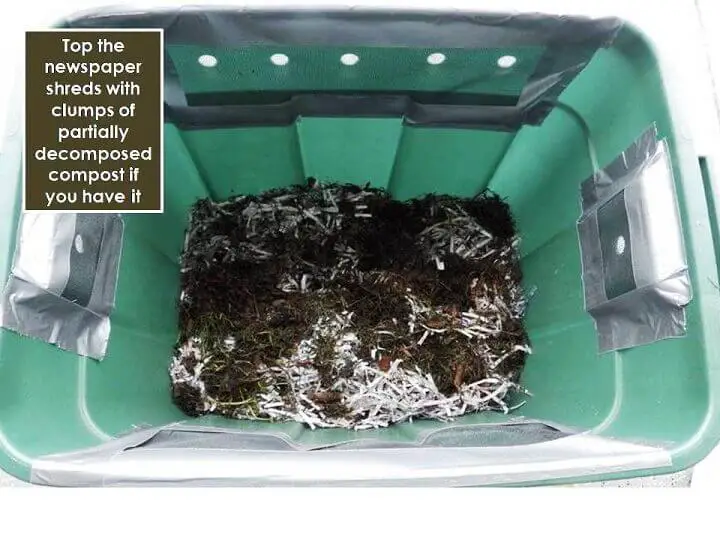
- Partially composted materials from a standard compost heap spread around in your vermicomposter are a good addition.

Add an inch or two. If you don’t have partially composted materials you can use coconut fibers (available on Amazon or at some home centers), or you can buy commercial worm bedding online or at a sports store. Peat moss is another possibility. These aren’t absolutely necessary but help.
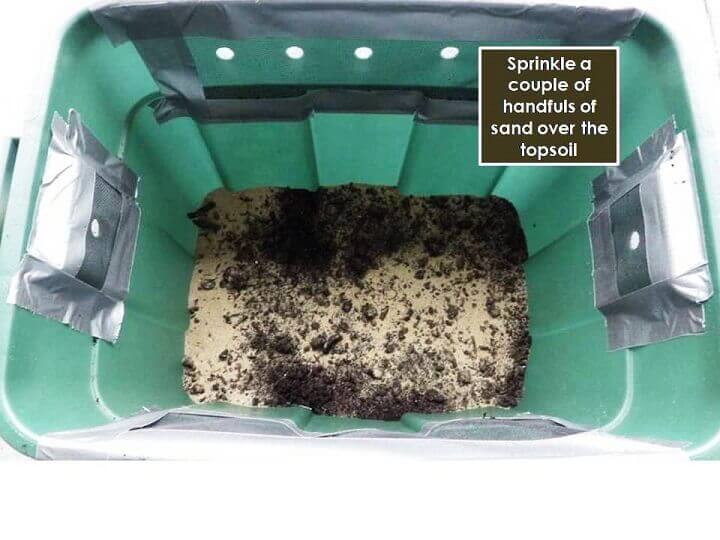
- A little sand will help the worms to digest anything they eat.
They use a gizzard similar to birds to crush and digest food. Sprinkle some over the top before you start blending things together.
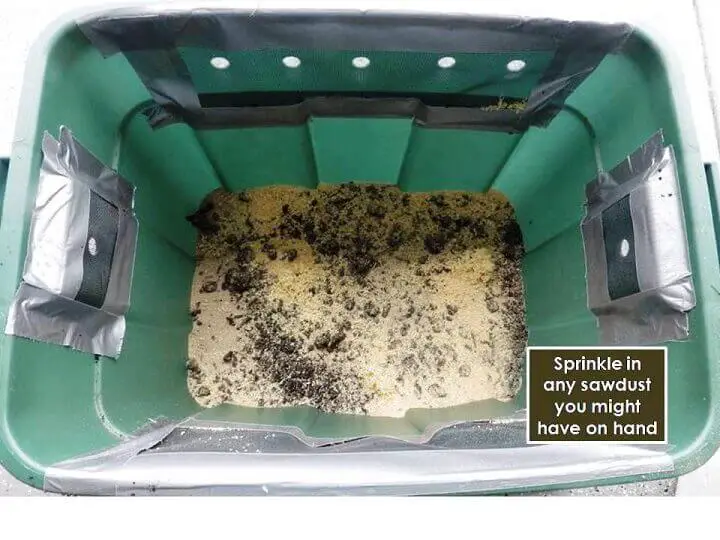
- Sawdust shows up as another addition to a vermicomposter.
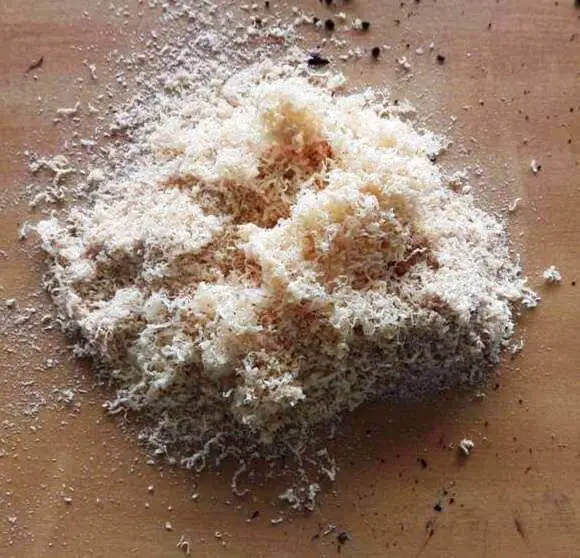
Just make sure it’s sawdust from natural wood or untreated lumber. The chemicals in any treated lumber will also inhibit composting and most likely kill your worms.
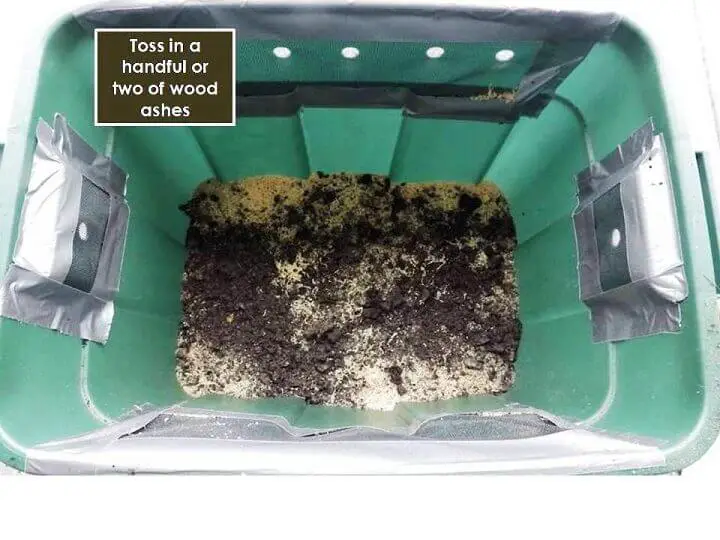
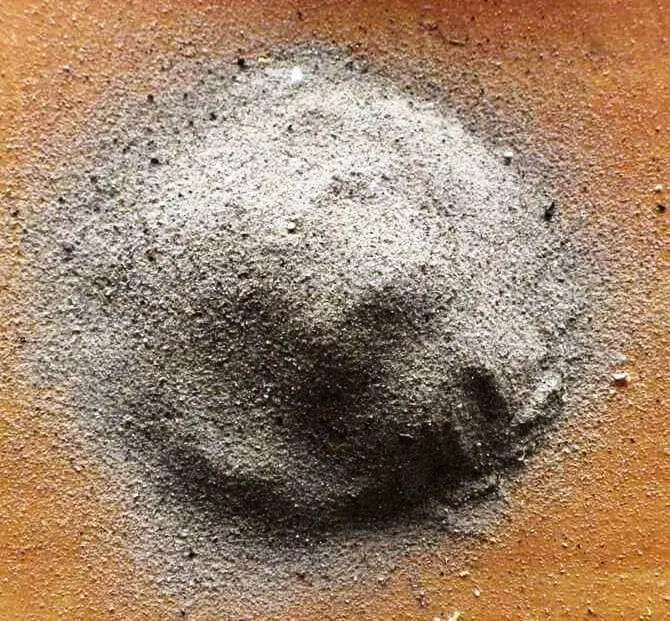
- Wood ashes are another welcome addition.
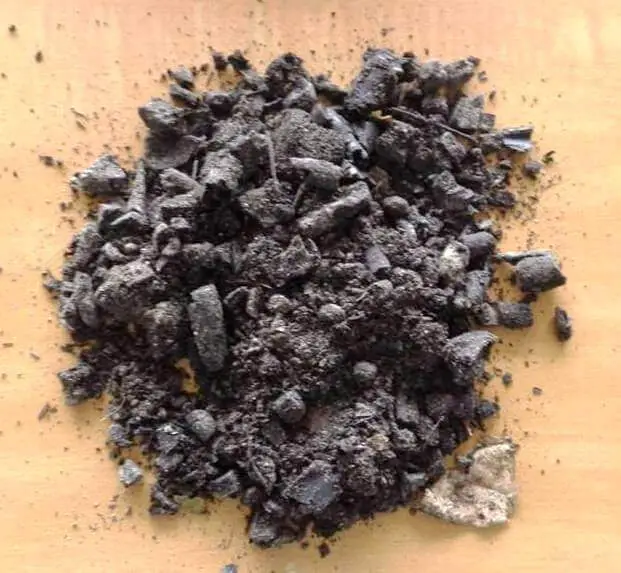
Wood as is a great way to keep your soil sweet and alkaline. We’ll get into ph problems and acidity later.
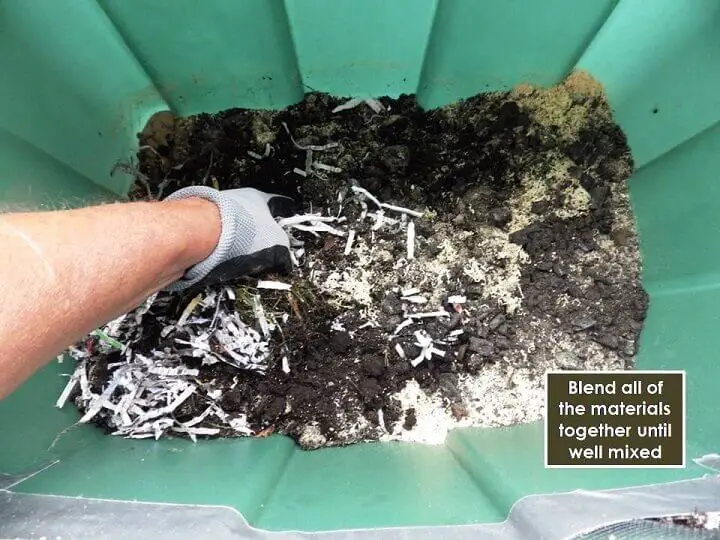
The idea is to blend all of these materials together in the vermicomposter to create a mix that allows the worms to move around easily in the bedding. The value of newspaper is that the newsprint is highly absorbent and will retain moisture in the mix.
This is also true if you spread a whole sheet of newspaper over the top, and some vermicomposting experts recommend a sheet of burlap over the top of everything instead of covering it with a lid. That’s up to you. Try it and if it doesn’t give you good results, put the lid back on.
If you don’t have newspaper you can use any other paper in a pinch for your bedding but the value of newspaper is that it’s a form of paper called “newsprint” and is highly absorbent -more so than standard papers especially glossy papers from magazines.
One final note on bedding: If you are severely stressed for bedding materials, you can start with just shredded newspapers topped with soil and some sand for your bedding. It’s the bare minimum and should work, but adding the more robust materials we listed may get you off to a better start.
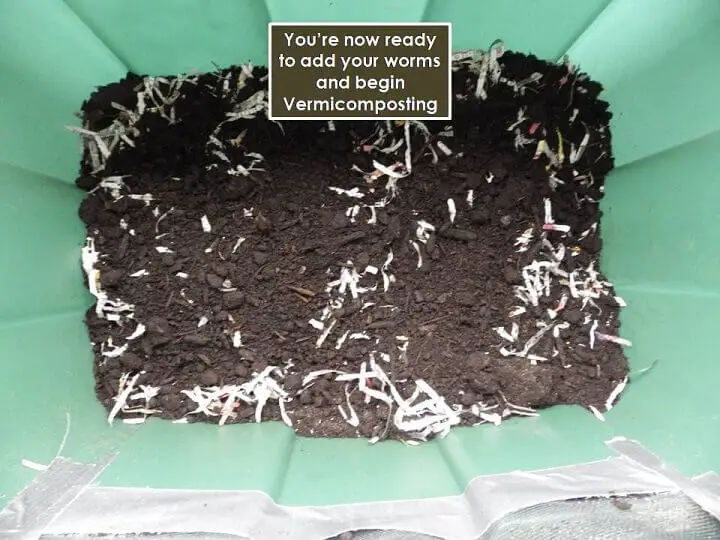
Adding the Worms
If you’ve ordered a lot of worms in bulk, you want to get your bedding materials into your vermicomposter first. Don’t forget to mix them around.
Add some water but be careful, you don’t want the bedding material to be too wet. You want it moist. A water spray bottle is best. Grab a clump and if it holds some shape without a lot of dripping water you’re good to go. Your drain holes will evacuate any excess water.
Continue to spray your worm bedding as time goes on. The water in many fruits and vegetables will also help.
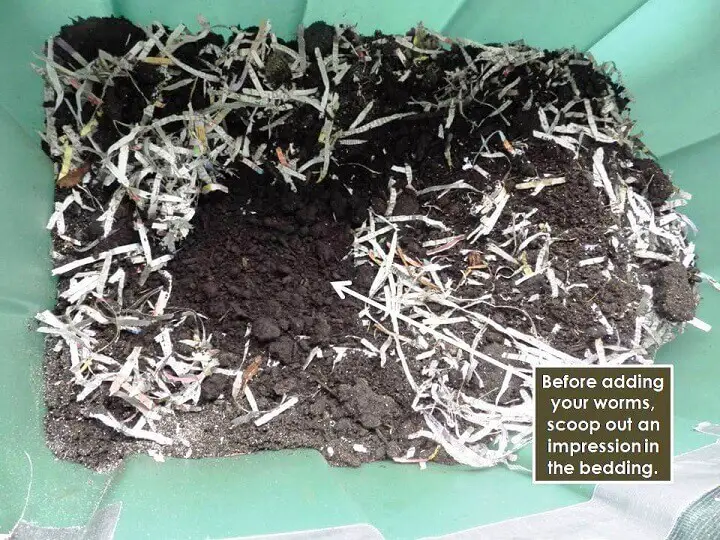
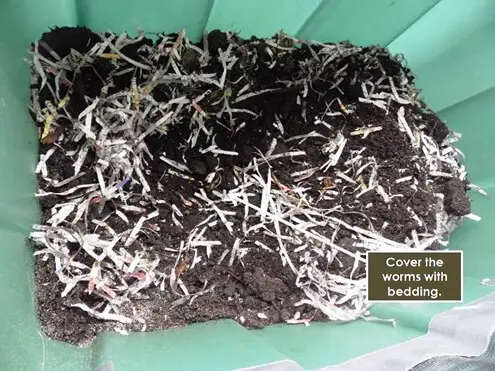
Before adding a lot of worms, create a shallow impression or hole on one side of your vermicomposter. Move the soil from this hole to the side.
- Add the worms and gently stir them around to break up any “worm clumps.”
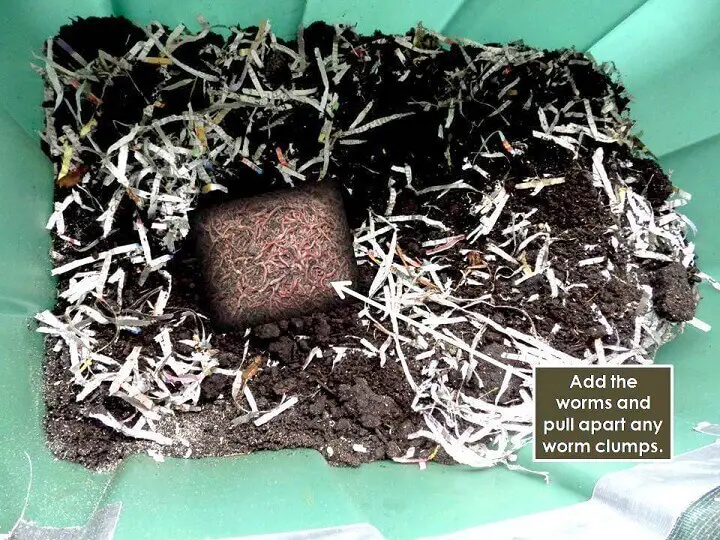
- You then pull some of the bedding you’ve moved to the side for your wiggling worms and pull it over them until they’re totally covered. Some might emerge, but in time they will all burrow into the dark, moist safety of your bedding materials.
- Some people choose to buy their red wiggler worms from a tackle shop in the bait section. That might not be a good idea. They’ll work fine but they’re expensive pound for pound versus the worms you can buy online and you usually get only a couple of dozen in a Styrofoam cup from a bait shop.
- If you end up starting with a smaller worm population you need to carefully watch your feeding while the worms reproduce. How long that will take depends on a variety of factors but feed sparsely and monitor your vermicomposter carefully if starting with worms you’ve either harvested yourself or bought in limited quantities.
Feeding Your Vermicomposter
At the outset, less is more. You don’t want to over feed your worms. You’ll need to become familiar with their behavior and output. Even if you have a pound of worms (about a thousand worms) don’t just dump a pound of chopped vegetation into the vermicomposter.
Add a little less and see what happens after a day. It’s going to take them a while to get used to their environment and get into a regular feeding pattern.
Once things have settled down and you notice that your added worm foods are being rapidly turned into castings you can try adding a little more. But remember, if you have a healthy worm environment and keep them properly fed, they will start to reproduce. As a result you may need to increase the amount of food you add and at some point, start a new vermicomposter… or go fishing.
One of the most critical things to remember when feeding is to alternate the feeding sides of your vermicomposter. If you’ve added and covered your vegetation on the left side of the vermicomposter one day, make sure you feed on the right side or other side the next time.
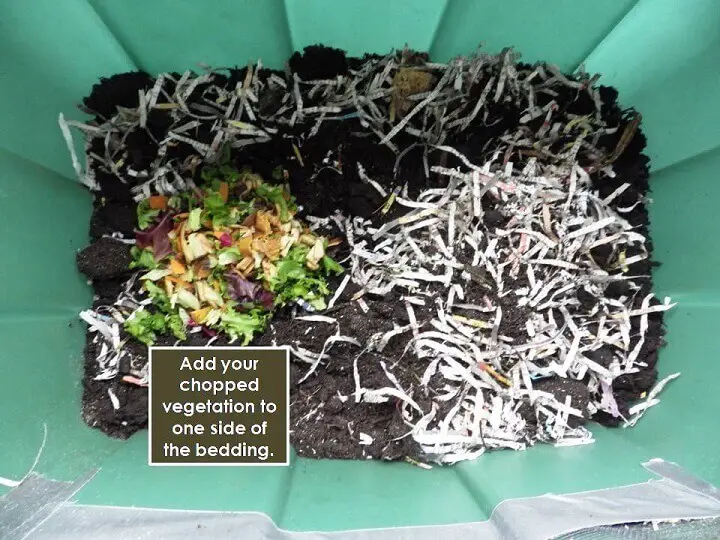
Continue to alternate your feeding locations from right to left. The worms will migrate through the bedding as you relocate their food. This will make it easier for you when it’s time to harvest the castings.
You’ll only harvest the composted castings from the side where the food has been consumed by the worms and wait to harvest the side where you have just added food. You’ll also have fewer worms to separate from the composted castings if you do it this way.
One thing to remember when it comes to all of the things you have to do with your vermicomposter is lift the lid as little as possible. Light will drive your worms deep into the bedding and they will be inactive for a while.
Try to combine feeding, misting and soil checks and any other activity to one occasion where you do as much as possible with only one lift of the lid. You can take your time but repeatedly lifting the lid will slow down the whole process.
Vermicomposting Fails
Like anything else, things can go wrong with a vermicomposter. Here are some of the typical fail points for vermicomposting:
Temperature Extremes
As a general rule, worms in a vermicomposter prefer a temperature in a range between 55° to 85° Fahrenheit. When the temp goes below 55 the worms become inactive and as it approaches freezing, most will die off. Worms in the ground can dig deep to escape freezing. Worms in a vermicomposter have nowhere to go.
Temperatures above 85 will cause them to die off faster. The ideal temperature is around 70° F. or room temperature. That’s easy enough if you’re storing your vermicomposter indoors but few people do.
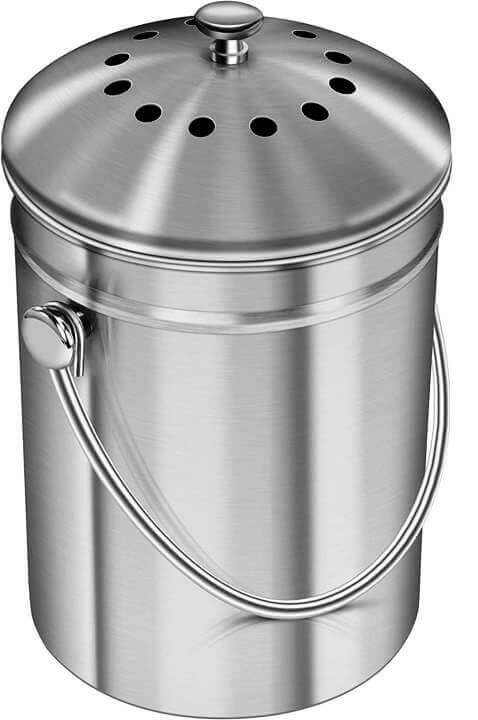
However, there are fabricated vermicomposters that people store under their sink to take care of kitchen scraps. These tend to be small, cylindrical vermicomposters and while many people are uncomfortable with the idea of worms under the sink, just as many off-gridders are very used to alternative approaches to many things.
And if you think about it, many apartment dwellers depending on gardening in pots may welcome a vermicomposter under the sink or at least on the patio.
The easiest way to manage temperature outdoors is to make sure the vermicomposter is located in a shady location. Another possibility is a garage or other outbuilding where the temperature is somewhat moderated.
Note: If storing your vermicomposter indoors, make sure you put a tray or other contrivance to catch any water drippings from the drain holes in the bottom.
If you live in an area where temperatures soar into the hundreds, which is getting more common these days, you can consider the basement as an alternative location. If outdoors is your only option, some vermicomposter aficionados will freeze plastic water bottles and place them on the top and into the bedding during the hottest part of the day to keep things cool.
If temperature extremes are an issue at your location, there are soil thermometers with probes you can insert into the bedding that will show the temperature readings on a dial or gauge.
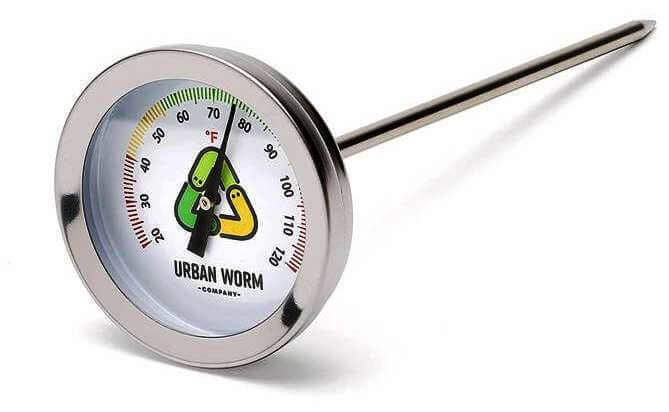
That’s a bit ambitious but if you’re reliant on vermiculture in a hot climate it may be worth the effort.
As far as winter is concerned, any temperatures below 55 will require your vermicomposter be moved indoors or at least a garage that maintains a temperature above freezing. The basement may be the second best alternative or you can just release your worms into the wild and start over in the spring.
Improper Moisture Management
The ideal moisture level for your bedding should be around 80%. When you start to go above or below that average your worms will start becoming less active and eventually die off. High moisture levels also create odors and often lead to fruit fly outbreaks and fungus.
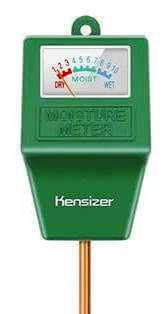
An ambitious solution is another gauge that measures moisture levels.
You insert it into the bedding and can read it whenever you lift the lid. It’s a common gauge used by some gardeners. Some have a probe and an external dial or gauge.
Most beginners simply grab a small handful of the bedding and gently squeeze it. If it holds together in some clumps and feels moist you may be about right. Either way, check your bedding often for its moisture level.
Your drainage holes will prevent them from drowning but will also cause moisture to regularly escape. Spray your bedding daily after you feed your worms and assess the moisture level each time.
Overfeeding
If you overfeed your vermicomposter you can hope that a traditional composting process will occur or the worms will catch up but that may not be the case. The biggest problems with food that remains unconsumed by the worms are odors and fungus. Odors may eventually pass but fungus is a real problem.
Once a fungus get into your vermicomposter you’ll need to clear it out and start over. That could include your worms unless you want to try giving them a quick shower with a garden hose in a worm bag made of mosquito netting.
That’s a real hassle without guarantees so don’t overfeed. A mycologist would tell you that the fungus is still residing in the worm’s gut and will soon be reintroduced to your fresh, new bin.
High Acidity
Another cause of fungal growth is bedding that has become acidic. This is why you really want to avoid adding trimmings from acidic fruits or vegetables to your vermicomposter. If you think about it, a cool, damp and dark area is an ideal breeding ground for fungus. Don’t give them any other reasons to get started.

One way to moderate acidity is to add wood ashes to your bedding. Don’t overdo it. About a half cup sprinkled over the top should be enough to sweeten the soil and make it more alkaline. For the rocket scientists out there you can buy ph soil meters.
The ideal pH for a vermicomposter is between 6.0 which is slightly alkaline to 7.0 which is neutral.
Bad Bugs
Fruit flies are the biggest problem especially if your vermicomposter is indoors. The simplest solution is a fine, mesh screen covering any ventilation holes but even lifting the lid can allow a fruit fly or two to find its way inside.
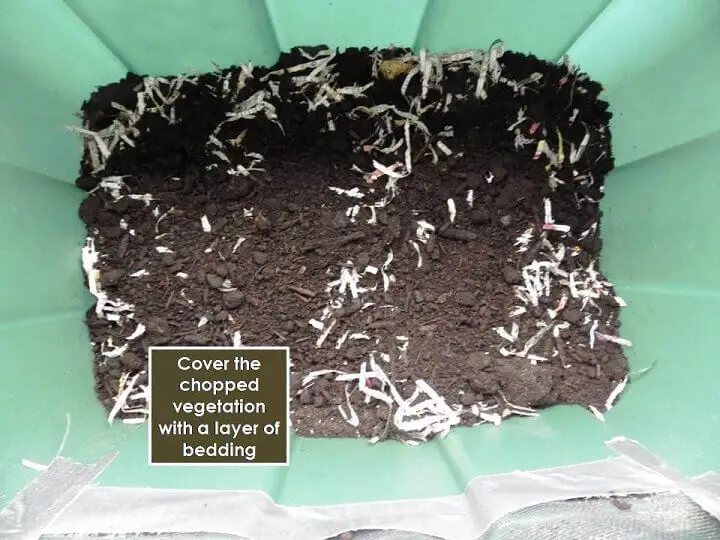
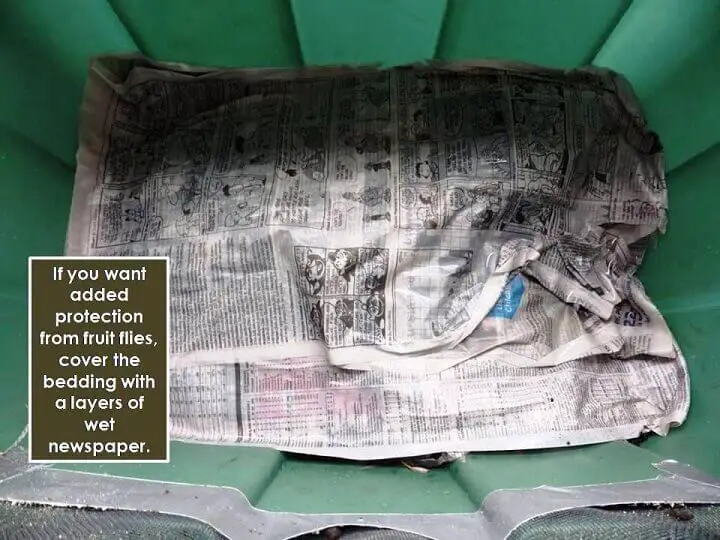
The best solution is to keep any compost materials like vegetable trimmings covered with your bedding after you add the trimmings. If the vegetation is unexposed to the air the fruit flies or any other bugs are less likely to be attracted or stick around. It’s also another argument for covering your bedding with burlap or wet sheets of newspaper even if you’re using a lid on top.
Covering your worm food is especially important if you’re adding banana peels or any other peels from apples or melons. They are fruit fly magnets so keep them well covered with bedding and soil and if the bugs are a problem, put wet sheets of newspaper or burlap over the top of the bedding.
Harvesting Your Worm Castings
This is the fun part. It’s when you finally get the benefit of your fussing around with a tub full of worms. And there are some simple tricks to make sure you only harvest the castings and not bits of undecomposed vegetation and newspaper or a rogue worm.
- The best way to know when to harvest is when you notice an over-abundance of castings filling your vermicomposter.
- The trick is to start by harvesting the side of the vermicomposter that appears to have the most worm castings and the least amount of undigested vegetation.
- You then take a few handfuls of castings and form them into a cone-shaped pyramid on a board or tarp.
Make as many pyramids as you can harvest. They’ll be about 4 to 5 inches high.
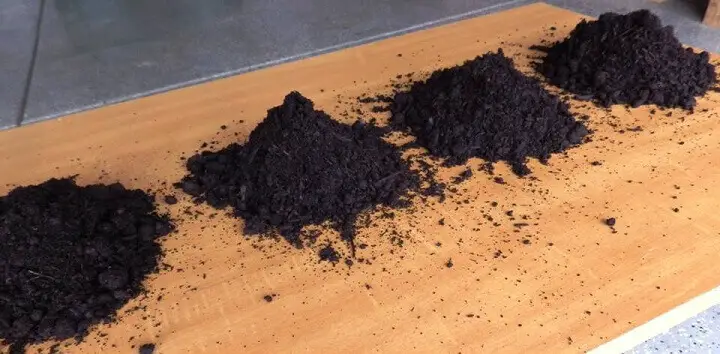
- Let the little pyramids sit for about a half an hour. Do this in a well lit area but shaded from the sun.
- After about a half an hour, any worms in the little pyramids will have migrated down and towards the center of the cone. They are evading the light.
- You can now grab and cup the worm-free castings from the top and base of the pyramid and fill your worm casting bucket. If a rogue worm shows up, toss it back in the vermicomposter.
- If you find a lot of undigested newspaper or vegetation, toss it back in the vermicomposter or try scooping castings from a different spot. You could also try screening out large bits of newspaper and vegetation but that’s another mess. Best to wait until you have a good bin of castings.
Is Vermicomposting Safe?
Pretty much. In fact, some cultures eat worms as a regular protein source in their diets. The key is to make your vermicomposter an ideal environment for worms, not fungus or bacteria.
If you moderate temperatures; moisture and feed them properly your worms will reward you not only with endless organic fertilizer, but one of the best fertilizers you can use.
Like this post? Don't Forget to Pin It On Pinterest!
You May Also Like: