Estimated reading time: 6 minutes
Canning is a time-honored process that has recently become more popular. While many of us have fond memories of our grandmothers canning in the kitchen, we also strive to preserve this vital tradition that can literally save our bacon down the road.
While canning is simple enough to do, it can be dangerous if you don't know what you're doing. Those new to homesteading may be hesitant to try canning due to the things that can go wrong in the process.
However, doing your research and learning about canning can make you more comfortable with canning and preserving your food. To get you started, here are four canning dangers you should be aware of.
Want to save this post for later? Click Here to Pin It on Pinterest!
1. Botulism
This rare food poisoning can be fatal and is a large part of why many homesteaders are wary of canning. Botulism is caused by the Clostridium botulinum bacteria which produces a toxin in canned goods. The toxin attacks the nervous system and can paralyze the body as well as cause death. Botulism is sometimes found in those foods that have not been properly sealed.
The best way to ensure that your canned foods don't have botulism is to follow the proper canning methods. Pressure canning is the best way to fight against this deadly toxin, which is very heat resistant. Water bath canning methods often don't produce high enough heat to kill the bacteria in some foods.
2. Low Acid Foods
You may find different canning recipes that mention canning in a water bath. Water bath canners, as opposed to pressure canners, can be sufficient for a few types of high-acid foods. Tomatoes and fruits are often canned using nothing but boiling water due to their high acid levels. These foods are often less likely to form dangerous toxins due to having more natural acid.
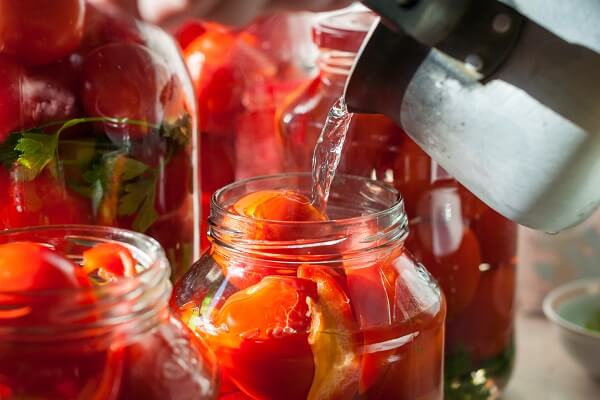
However, low acid foods like vegetables need to process in a pressure canner to kill toxins. There are so many low acid foods, in fact, that you really need to have a pressure canner if you want to preserve a wide variety of foods. You can even use a pressure canner for high-acid foods to be safe if you're worried about the dangers of canning.
3. Contaminated Tools
You may have seen your grandmother simply wash and dry her glass jars for canning. However, safe canning practices require that cans are sterile for ultimate safety. Creating a sterile environment is crucial for minimizing the risk of toxin or bacteria growth. Start with clean glass jars that you run through the dishwasher.
The best way to sterilize jars is to place them in boiling water for at least 10 minutes. Placing them in a warm oven during the canning process will help keep the jars warm and won't compromise their sterile condition.
Boiling water is a friend to all canning homesteaders. Place a small pot of boiling water on the stove and keep it boiling throughout the entire day. Place new lids and rings in the water to sterilize them as well.
Making your kitchen and work area sterile is essential during the canning process. Dip your tongs and other canning tools into boiling water for just a few seconds to keep your area clean and ensure that there is no cross-contamination.
Again, a pot of boiling water left on the stove will help make the canning process easier as well as faster so that items are easily sterilized when needed.
4. Using Old Lids
While you can reuse canning jars and rings from year to year, it is imperative that you always purchase brand new lids for your canning process. Lids include a rubber ring around the inside bottom edge which is only suitable for one canning use.
If you reuse lids, you could be using a top that doesn't seal properly, which can ruin your canned food. A bad seal also invites bacteria and toxins to enter your food, which could make you sick or even kill you.
We recommend marking those lids when you can so that you don't get confused next year on which lid is new or old. Recycle used caps for other creative uses on the homestead or use them to top other jars that are not shelf-stable and kept in the fridge.
Common Signs of Danger
One of the best things to learn is how to spot potential issues right after the canning process is over. Test your completed and cooled cans by pushing down on the lid. If you can move the lid at all, the can is not sealed.
Knowing signs of danger when you choose to open a canned jar is also essential. Toxins and bacteria are not always easy to spot. Inspect the outside of the jar for any signs of cracks, leaks, or swollen spots. Make sure that you hear a pop or suction noise when you open a canned jar from the pantry.
The ring should be easy to turn, but the lid should be well suctioned onto the jar. Lift up the jar and inspect the underside of it for any signs of bacteria or growth. Inspect the top of your canned food and look for any odd liquid or foam. If you notice discolored, moldy, or stinky food, do not use it.
Make sure that everyone in your household knows what to look for when opening a canning jar from the pantry. Children who often open jars of jam or fruit should know the signs of a bad seal and when to use caution. Teaching them the signs to watch out for could very well save their lives.
Tasting Questionable Food
One of the best rules of thumb when canning is to toss any food that looks odd. If you doubt your canning skills or think that something looks off, throw it out. Never taste food that looks suspicious as a small amount of it could be toxic or even deadly.
As you learn more about canning, you'll understand what is normal and abnormal. Don't risk eating something that could cause death. When in doubt, throw it out!
Canning is an integral part of homesteading and can be easy to do. However, knowing the dangers of canning is essential if you want to keep yourself and your family safe.
Like this post? Don't Forget to Pin It on Pinterest!







When pressure canning, you only need to start with clean jars. The canning process reaches 240F, much hotter than boiling water (212F) or whatever your dishwasher can achieve unless the dry cycle reaches higher temperatures. Waterbath canners reach 212F, so unless you bake your jars in the oven at 240F or more, you won’t ‘sterilize’ them any better than just using them in the waterbath.