If you're a vegetable gardener, self-watering planters are one of the best inventions ever. Probably the most common mistake gardeners make is to overwater their plants. It's just instinct to want to give your plant a drink if it doesn't look well. But oftentimes, you end up drowning your plant.
With self-watering planters, this is never a problem. The soil gets exactly the amount of water it needs and any excess water drains out the side. This is also really helpful for people who tend to underwater their plants. You only have to refill the planter every once in a while, so you're plants are unlikely to dry up.
Want to save this post for later? Click Here to Pin It on Pinterest!
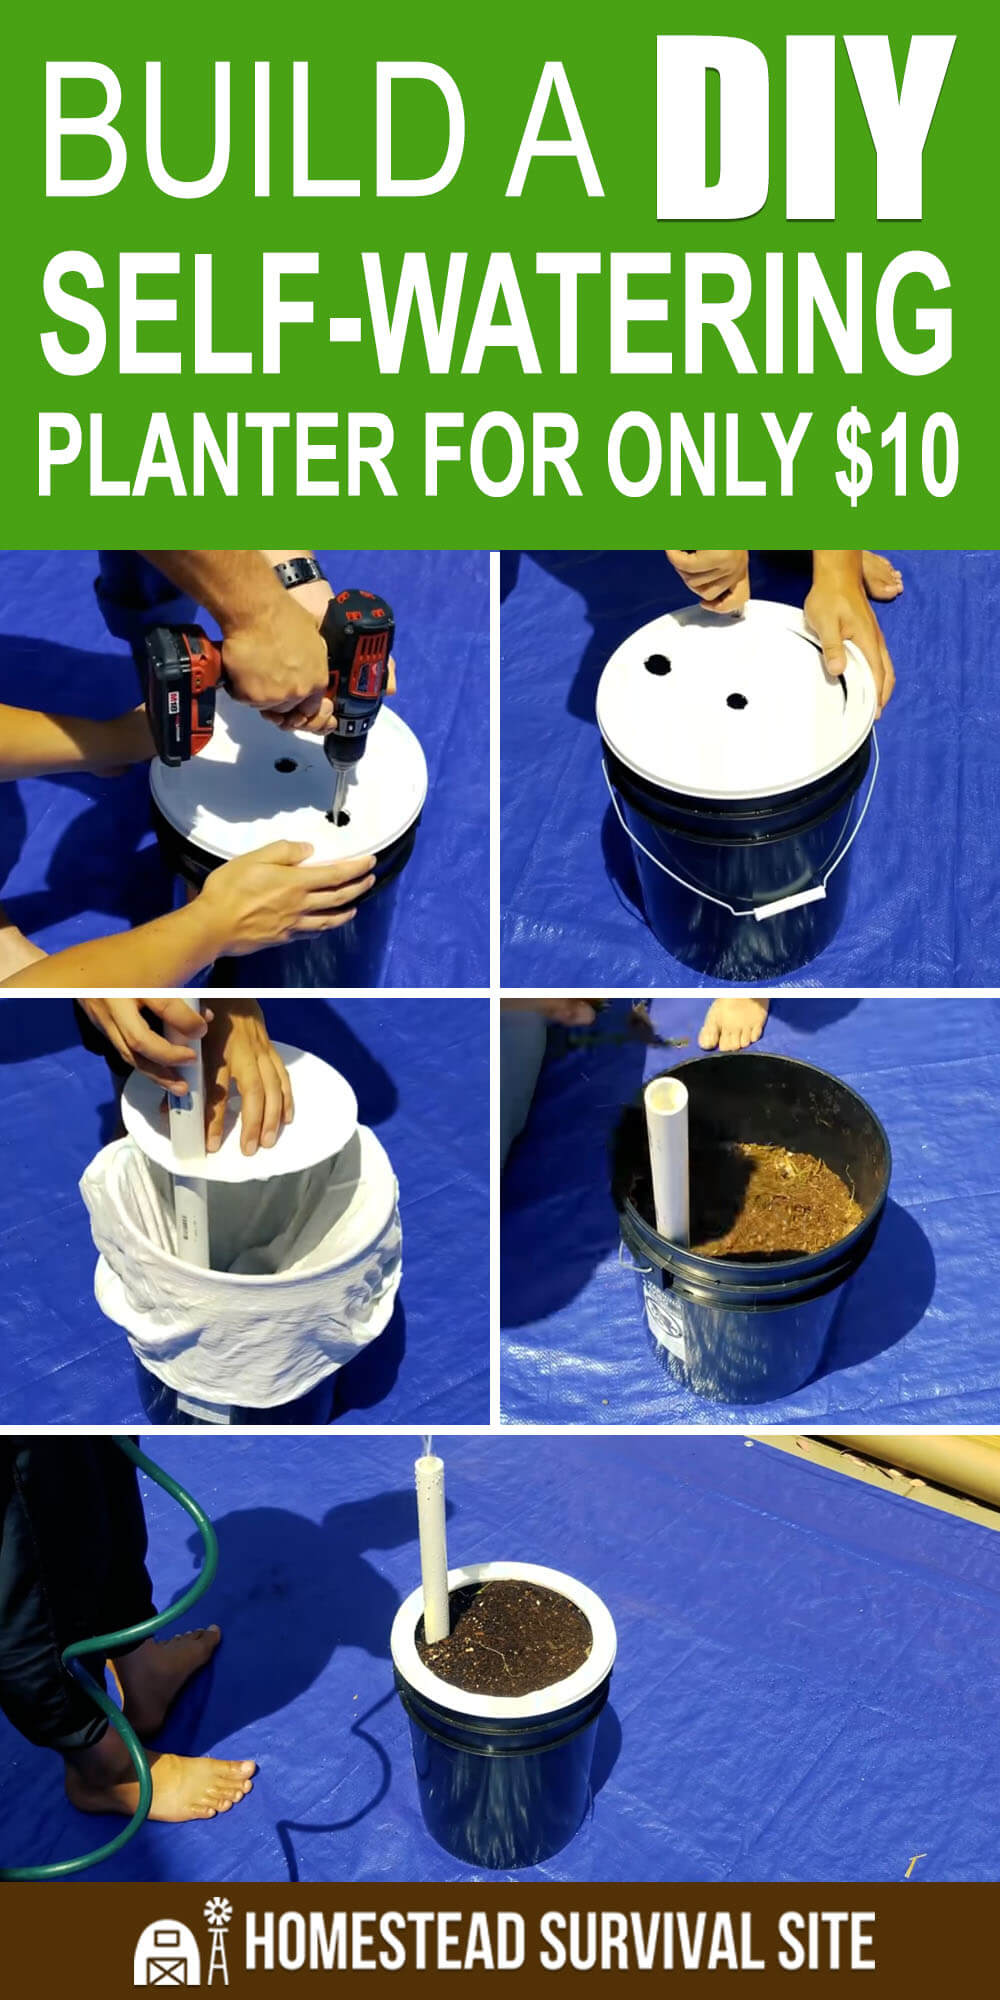
In this video, Epic Gardening explains how to make a simple DIY self-watering planter using only $10 worth of materials.
Here's what you need:
- A long, 1″ PVC pipe
- A bucket
- And old T-shirt
- A short, 6″ PVC pipe
Here's what to do:
- Drill a one-inch hole in the center of the lid.
- Drill a one-inch hole near the side of the lid.
- Cut out the inside of the lid (leave about one inch on the edges).
- Cut the 6″ PVC pipe in half long ways. These half-rings will go in the bottom of the bucket.
- Drill two drainage holes about a centimeter below the height of the half-rings.
- Put the two half-rings into the bucket.
- Put the T-shirt into the bucket like you would a trash bag.
- Push the long PVC pipe through the hole near the side of the lid.
- Put the resulting piece into the bucket. Push the lid down so it is resting on the half-rings.
- Now wrap the T-shirt around the pipe and stuff it into the center hole.
- Fill the bucket up with potting soil.
- Put the ring of the lid back onto the bucket.
- Fill with water through the PVC pipe. You know it's full when water comes out the drainage holes.
Watch the video below to see exactly how it's done.


