

Estimated reading time: 8 minutes
Would you like to jumpstart your growing season? You can by starting your seeds indoors this winter. Not only does it let you begin gardening in late winter or early spring when the ground is too cold to plant outside, but indoor seed-starting can save you money.
Seeds are less expensive than purchasing starter plants. It also an easy and rewarding project in which the whole family can be involved.
Want to save this post for later? Click Here to Pin It On Pinterest!
Why Start Seeds Indoors?
Some of our favorite fruits and veggies, including tomatoes, lettuce, peppers, melons, squashes, cabbage, kale, and broccoli, require a long growing season. If you have known the frustration of scrambling to save a bumper crop of tomatoes from the frost, you can imagine how having more time on the other end of the season can be an advantage.
By starting your seeds indoors in late February through April (depending on your climate), you can get your plants off to a good start before the weather warms. Then you can move your healthy starter plants into your outdoor garden.
Timing is Everything
Begin with a timetable. Your goal is to have your seedlings ready to transplant outside after the danger of frost has passed. Check your seed packets for a timetable for your particular climate zone.
Select a transplant date for each fruit or vegetable you want to have in your garden this year, and then count back the number of weeks needed to grow and harvest it. The Old Farmer’s Almanac has a free online planting calendar for vegetables.
Purchase only fresh, high-quality seeds for your indoor gardening. You will not save money in the long run by buying cheap, out-of-date seeds. The seed package should list the current year.
Although some seeds can remain viable for up to three years, germination decreases as seeds age. Saved seeds from last year’s garden are an option if you have stored them in a cool, dry, dark location.
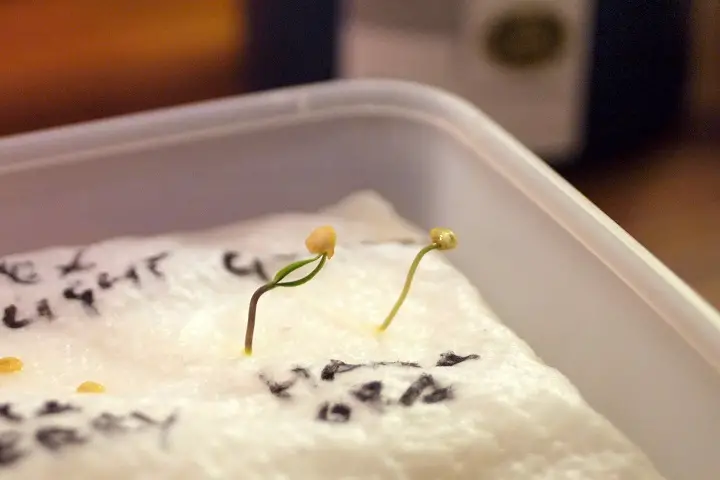
Are you unsure about the viability of your stored seeds? Here is a method to test them from the Kansas State University Extension Service.
- Place 10 seeds on a paper towel that is moistened with warm water. Cover seeds with a second moist towel.
- Roll up the two towels, and place them inside a closed zippered plastic bag. Poke a few holes in the bag to allow for air exchange.
- Place the bag in a warm spot (such as the top of the refrigerator), remoistening the towels with warm water daily or as needed.
- Check the seeds for signs of germination after one week and again after two weeks. Remove and plant germinated seeds in starter pots.
Here’s more information on using the paper towel method for starting your seeds indoors.
You’ll find that fresh, high-quality seeds have a higher germination rate. Visit your local nursery or check out these online sites.
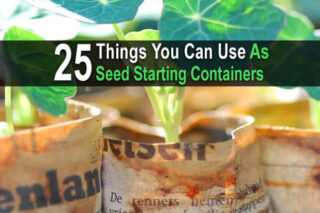
Choose the Right Containers
While many containers on the market are designed for indoor seed starting, the reality is that you can use many things you have around the home for this project. Clean milk cartons or yogurt cups work very well, for instance.
The key requirements are that the containers are two- to three inches deep and that they offer drainage. You can easily punch holes in the bottom of recycled containers for drainage. (Egg cartons are handy, but unless you are starting tiny plants, you will need to transplant them quickly.)
It’s easy to get seedlings mixed up, so you’ll want to label your containers with tape or stakes. If your plants outgrow these starter pots before planting, you can gently repot them into larger quarters. Label these too!
Forget the Outdoor Garden Soil
Resist the temptation to use your garden soil for your indoor seeds. Outdoor soil may introduce disease to your seeds, and it often doesn’t drain as well as a seed-starting mix. Choose a fresh sterile potting mix that is designed for seed starting.
These mixes help your starter plants retain moisture while also draining well. If you’d like to mix your own soil, try combining peat moss with equal parts vermiculite and perlite. Here’s a video showing how to make your own indoor potting soil mixture.
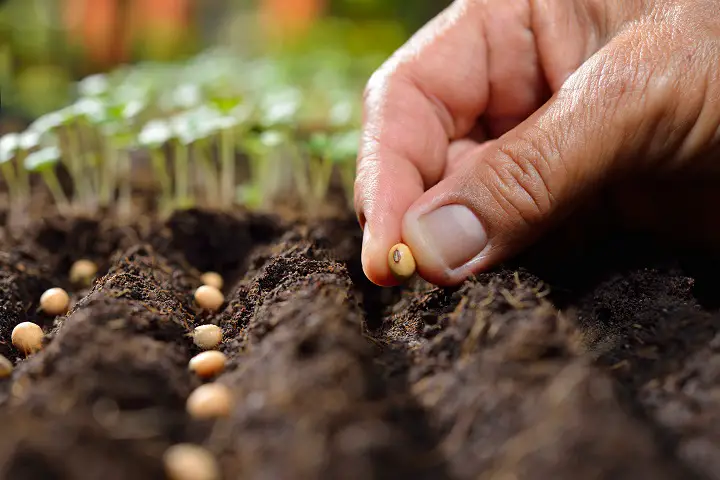
Sowing Your Seeds
Fill the containers with your potting mix, then press the soil down with your fingers to reduce and prevent air pockets. Lightly moisten the soil before planting your seeds. Then drop seeds onto the surface, spacing them evenly and covering them to the depth mentioned on the seed packet. Usually, the depth is about two to three times as deep as the width of the seed itself.
As a general rule, plant two to three seeds per pot or cell. You will be thinning out the weaker seedlings later as they grow. When planting large seeds (such as melons, squash, and cucumbers), sow only one seed in each hole.
Location, Location
It is important to keep your newly-sown seeds warm. Set the pots near your radiator or on top of the refrigerator. Or you can use a heat mat or cover the pots with a loose sheet of plastic or a plastic dome to maintain heat until the seeds germinate.
Check your containers daily for signs of germination. As soon as seedlings appear, move them to a light-filled location. A sunny south-facing windowsill will do part of the job, but winter sunlight usually is not enough for healthy growth.
Most seedlings need at least eight hours of light each day to grow well, so plan for supplemental lighting such as a suspended fluorescent fixture above your containers. Plants have different light intensity needs, but most seedlings do well with the light source about two to four inches above them.
There are many lighting options available, depending on your space and your budget. You do not need to spend the extra money for special “grow lights.” Standard fluorescent fixtures do just fine.
Keep in mind that, while your seedlings need light to flourish, they no longer need that extra warmth. Your plants will grow stronger and healthier in indoor temperatures that do not exceed the upper 60s. Higher temperatures can lead to unhealthy, leggy growth.
Watering and Feed Your Starter Plants
Aim to keep the soil moist but not soggy as your plants grow. Any nutrients present in your seed-starting soil mixture will be depleted after about three weeks.
To keep your plants healthy, fertilize them with a half-strength water-soluble liquid fertilizer mixture every week after leaves appear.
Thinning Your Plants
After leaves have merged, it’s time to examine your pots for the strongest seedling. Snip off the other seedlings at the surface of the soil and throw them away. This thinning process allows the healthiest plant to continue to grow strong.
Preparing for The Move Outdoors
By now, the days are lengthening, and the temperatures are rising, and it is time to begin acclimating your plants to the outdoors. Begin by placing your pots in a sunny protected location (such as a covered porch or patio) for an hour or two each day.
Gradually increase the time each day, and also slowly increase exposure to the elements. After about two weeks, your plants should be ready for transplanting into your outdoor garden.
Gently shake and scoop them out of their containers. Aim to keep all the root structure intact, and try to handle them as little as possible. Water your plants lightly after planting to help them settle into their new home.
Be patient. Sometimes transplants look a bit droopy after you have put them in the ground. Don’t give up! They often perk up after about a week of adjusting to their new environment.
By this time of the winter, many of us have more than an itch to get our hands in some dirt. Growing your own seedlings is a great way to satisfy that itch and to jumpstart the growing season. When compared with purchasing starter plants, it also is cost-effective.
If you are an organic gardener, starting your own seeds indoors offers you more control in how your plants are raised. This knowledge can give you valuable peace of mind.
Another advantage of starting your own seeds indoors is that you can try a wider variety of vegetables and fruits than you can if you purchase starter plants. Nurseries tend to stock the most popular choices, while seeds catalogs can provide you with many new options.
You can try unusual colors (like purple carrots and chocolate peppers!) that offer different tastes and textures (and fun) than the old stand-bys.
Finally, indoor seed starting is a creative project for the whole family. It’s a hands-on way to get the kids involved and interested in gardening, and they enjoy seeing the quick results of their labors.
For more information on jump-starting your garden, here are a few helpful websites:
Like this post? Don't Forget to Pin It On Pinterest!
You May Also Like:


It is impossible to get a seed crop from seeds for microgreen, but they have their advantages:
1. No need to wait long. It can be eaten on the second day as seedlings. Or cut off as microgreen after five to ten days.
2. The composition of vitamins and minerals is ten times greater than adult plants.
3. Only a LED red lamp and water (hydroponics) are needed for germination. You can also sprout without soil – on paper or on hemp growing medium.
4. Can be grown indoors without sunlight.
5. Low cost of seeds per kg. compared to ordinary seeds.
Not GMOs. Organics
Storage like ordinary seeds, depending on the type of seeds 2-6 years. Seeds are certified by the European Union. Security. Quality assurance. High germination.