Estimated reading time: 8 minutes

No matter what climate zone you live in, the growing season never seems long enough when you are growing your own fruits and vegetables.
The best way to extend that time-frame is by giving it a jump start with your own seed starts. When you grow seedlings indoors, you save time and money. Your young plants will be able to take off in spring warmth and sunshine, and you will not have to purchase costly starter plants at the nursery. Plus, starting seeds is a satisfying experience that lets you scratch your gardening itch in the winter.
However, germinating your own seeds — and then successfully transplanting them to your outdoor garden later — requires that you follow some basic steps. Here are eight seed starting methods expert gardeners rely on.
Want to save this post for later? Click Here to Pin It On Pinterest!
1. Selecting Quality Seeds
A big mistake many home gardeners make is to think all seeds are the same and to purchase seeds based on price or convenience. It doesn’t matter how well you do on the other steps for seed starting if you start with inferior seeds.
There are many online merchants of quality seeds, but gardening experts contend that your best bet is to buy local. Why? Local providers develop seeds that are adapted to your specific growing region. Therefore, they generally will grow better in your soil and your climate.
Seed packets offer more than just photos of the mature plant. However, some of the terminology can be confusing. Here is a quick primer.
- Open Pollinated – The seeds will be “breed true,” meaning the plants they produce will be either the same or very similar to their parents. Look for this label if you want to practice seed saving.
- Hybrid – These seeds were developed by crossing two different varieties of plants. Therefore, they may have more vigor than the parent plants, but the seeds are not “breed true.”
- Heirloom – These seed varieties usually are open pollinated and have been saved over several generations.
- Certified Organic – These seeds come from plants that comply with the USDA’s organic standards.
- Non-GMO – These seeds come from plants not grown with “recombinant DNA technology.” An organic label alone does not mean Non-GMO.
How do you know what seeds to choose? Here are two simple rules. First, consider what your family likes to eat. And second, select from seeds that grow well in your area. Be sure to select options that can be planted at different times throughout the growing season.
Here is a helpful video on seed selection.
And here are some top seed catalog companies:
2. Choosing The Container
There are about as many different opinions on the best containers for seed starting as there are gardeners. The right container depends on your budget, the plants you are growing, and the space you have.
Options that are both budget-friendly and easy on the environment focus on recyclable materials. Did you know you can start seeds in castaway items such as eggshells, egg cartons, rolled-up newspaper, and toilet paper rolls?
Many gardeners prefer the extra root space in recycled plastic tubs such as plastic yogurt cups. Just be sure to poke holes for drainage if you choose this option. Cell packs that you have saved from nursery purchases also work well for seed starting. Seed blocks and peat pots are other options.
Related: 25 Things You Can Use As Seed Starting Containers
The most important factor to consider when choosing your container is drainage. Next, think about portability, since you will be moving your plants in and out as the weather warms.
No matter what type of container you use, it must be clean or you run the risk of introducing pathogens to your new seedlings. You can sanitize used plastic containers by soaking them in a 10 percent bleach solution for at least 15 minutes and then letting them air dry.
Here is an article on using recycled containers for seed starts.
3. Label and Organize Your Seedlings
It’s surprisingly easy to forget what you planted where — especially when seedlings look nearly identical in their early stages. Always label each container clearly with the plant name and variety. You can use craft sticks, plastic tags, or even cut-up yogurt lids.
Consider organizing trays by plant type or maturity date. This makes it easier to manage lighting, watering, and eventually the hardening-off process. It also helps prevent mix-ups when transplanting to the garden, ensuring proper spacing and companion planting.
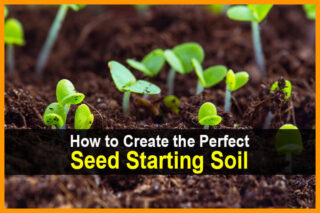
4. Using The Right Potting Mix
Using fresh potting material is crucial to the success of your plants. The wrong mix can encourage fungal disease that can kill your plants. This disease, which is often called damping-off, can be caused by too much moisture and inadequate air circulation.
Quality store-bought mixes are formulated to discourage common pathogens and help retain both water and air. You can also make your own potting mix by starting with either peat moss or coir as your base and then blending it with compost. Small amounts of vermiculite can help seedlings absorb and retain moisture.
This video shares a recipe for a soil-less potting mix that is easy to prepare.
5. Providing Enough Light
The seeds that tend to germinate the best receive 12 to 16 hours of sunlight each day. You can make the most of the sunlight by placing your seed containers in a sunny, south-facing window and giving the container a quarter turn each day. This slight movement helps keep seedlings from developing weak, elongated stems from reaching toward the light.
What’s the problem with this scenario? Winter days are short on sunlight, and even on sunny days, window light may be weak this time of year. Therefore, successful winter seed starts usually need supplemental lighting.
One easy way to offer your plants artificial lighting is by placing your containers on a heavy-duty, wire storage shelving unit and hanging shop lights from the undersides of the shelves.
Here are some indoor garden lighting options available from Amazon to help give you some ideas that will work for your space.
6. Keeping Them Warm
Grow lights offer heat as well as light but, depending on where you have your containers, some of your plants may need a little extra warmth.
Most seed varieties require temperatures of 65° to 75°F for germination. A special heating pad designed for plant use may be just what you need. Keep in mind that with using an additional heat source, your containers will dry out more quickly. Be sure to check moisture levels frequently.
7. Maintaining The Right Amount Of Moisture
Seeds are very sensitive to overwatering and underwatering. One way to keep the moisture levels in a freshly-sown seed container is by securing plastic wrap over the container surface.
To rehydrate the seed container, place the entire pot in a basin with about two inches of warm water. Allow the planting medium to wick the moisture from the bottom. If just the surface of the pot is dry, you can lift the plastic wrap and briefly spritz the surface with water.
When your seeds germinate, remove the plastic wrap.
This video shows how when and how to water your fragile indoor seedlings.
8. Adding Proper Nutrients
As a seed first develops, the endosperm supplies its nutrients. After true leaves emerge, however, it's time to help fuel the growth with fertilizer.
Begin with a one-fourth strength water-soluble fertilizer on a weekly basis. Gradually increase the concentration of the fertilizer as more true leaves emerge. Continue to water with plain water as needed.
If your seedlings start looking spindly or leggy and you’re certain that lack of light is not a factor, they may be getting too much fertilizer. Try reducing the concentration or skipping a week.
This video shares tips on how and when to water and fertilize for healthy growth.
9. Avoid Common Seed Starting Mistakes
Even experienced gardeners can stumble with seed starting. Here are a few of the most common pitfalls:
- Planting seeds too deep – Always follow the depth instructions on the seed packet. Some seeds need light to germinate and should barely be covered.
- Overcrowding – It’s tempting to sow densely “just in case,” but overcrowding leads to poor airflow, leggy growth, and increased disease risk.
- Neglecting airflow – Stagnant air can lead to damping-off disease. Use a small fan near your seedlings to circulate air and strengthen stems.
- Skipping the hardening-off process – Even one day of intense sun or cold wind can shock your plants if not properly acclimated.
10. Timing The Move Outside
It takes some careful planning to transition your young plants outside to your spring garden. A good first step is to check your seed packet for a timetable.
Before you can plant your seedlings outdoors, however, you need to acclimate them to direct sunlight and to fluctuating temperatures. Try doing this hardening process over a seven to ten day period.
Choose a sunny, warm day to begin. Place containers in direct sunlight in a protected spot (such as a porch) during the morning only on the first day and then bring them inside. Repeat each day, gradually increasing their time outside and their exposure to wind and sun by a few hours each day.
After about ten days, leave the plants outside overnight. Then they should be ready for transplanting into the ground. This video shows the hardening off process.
Like this post? Don't Forget to Pin It On Pinterest!
You May Also Like: