

Estimated reading time: 10 minutes
For many of us, seed saving is new and uncharted territory. However, harvesting seeds from your garden is meaningful, beneficial for your family garden and the environment, and saves you money.
Keep reading to learn how to choose which seeds to save, and how to harvest, prepare, and store your seeds for the best fertility.
Want to save this post for later? Click Here to Pin It On Pinterest!
Why Save Seeds from Your Garden?
There are many reasons to save seeds from your own garden. First, for many homesteaders, it is a sustainable practice. Being able to grow your own food, year after year, involves saving seeds to use again the next year.
Other people like to save seeds because it saves money. Planting just a few extra plants will give you enough seeds to fill out your garden next year, saving the costs of purchasing new seeds.
Lastly, saving seeds is good for the environment. The plants you have successfully grown in your own garden will be well-adapted to the micro-climate that occurs in your garden. Those seeds will be best suited to grow there again, giving you higher success rates and improving the quality of those specific plants.
For these reasons and more, you may want to save your own seeds.
What Are Heirloom Seeds?
Heirloom seeds are seeds with a legacy. They are the seeds that have been passed down from generation to generation, the tried-and-true favorites that continue to produce consistent plants and vegetables over the years.
Heirloom seeds will breed true; they are not hybrid plants and do not contain GMOs. Heirloom seeds could be organic, but they do not have to be. They are an open-pollinated seed that breeds true generation after generation.
Open-pollinated seeds have been pollinated by natural sources such as wind, bugs, or bees but have not been cross-pollinated by a plant that will produce a hybrid.
How to Choose the Best Seeds from Your Garden to Harvest?
When saving your own seeds, it is best to save heirloom seeds because you know what the results will be next year. If you choose to save hybrid seeds, you might have consistent results, but you also might have vegetables and plants that grow into completely different breeds than what you started with.
When saving seeds, you will want to collect the seeds from healthy plants with the best and biggest fruit. The better, healthier plants you can harvest your seeds from will mean healthier, sturdier plants with the best fruit the following year.
Over time, the quality of your plants should improve with this type of selective seed saving.
How to Begin Seed Saving
If you are new to seed saving, start with easy crops. Peas, beans, lettuce, and tomato make easy seeds to save with great fertility rates. Keep in mind that some crops, such as carrots and onions, will not flower until their second year. These plants need to go through a cold season in order to flower and grow seeds.
Some plants will need to be over-ripe in order for the seeds to be ready. Cucumbers, for example, need to be yellowed and past prime eating conditions in order for the seeds to be viable.
How to Harvest Seeds from Different Types of Plants?
Different types of seeds need to be harvested in different ways. There are two main types of seeds for harvesting and saving – dry seeds and wet seeds.
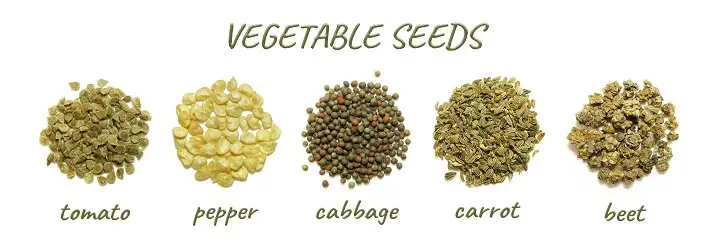
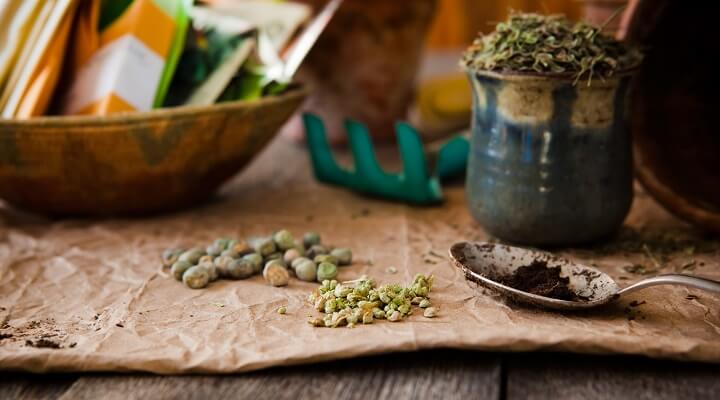
Dry seeds are very easy to save. Dry seeds include beans, peas, peppers, basil, and even onions and carrots. Most seeds that you save will need the dry method of seed saving, which is very simple.
Simply allow the seeds to dry in their pod or husk while it is still on the plant. Once the pod or husk has dried, you can pick it from the plant. When the pod is completely dried, it will crumble away easily.
Once the seeds are released, you can put them into a bowl and gently shake until the chaff rises to the top. You can remove these pieces by hand and save them in a clean, dry jar or container.
Wet seeds are also easy to save but may need an additional step. Wet seeds are plants that store their seeds in a succulent fruit, such as tomatoes, squashes, and cucumbers. Although tomatoes and peppers are a little more forgiving, vegetables such as summer squash and cucumbers must be over-ripe before the seeds are ready to save.
Scoop the seeds out of the fruit and pour them and the pulp into a bowl and add water. The viable seeds will sink to the bottom, the dead seeds and pulp should float. Gently pour off the dead seeds and pulp so you don’t lose the good seeds on the bottom.
Rinse the seeds, then drain them in a small strainer. Pat the seeds dry with a towel and then place them on a plate or towel to dry in a cool, shady area for a few days. Once they are completely dry, they can be stored in jars.
Fermenting Seeds
Some seeds need to be fermented to prevent diseases and make them better able to germinate. You can use fermentation for tomato seeds, squash seeds, and eggplant seeds.
Place the seeds and the pulp into a jar with water – about as much water as there is pulp. Keep the seed mixture in a warm place for several days, usually two to five days will be sufficient. Once there is mold starting to form or there is bubbling at the surface, you can clean the seeds according to the previous directions.
If the seeds ferment too long, they may begin to germinate, swell, or sprout, in which case, it is too late to dry them for storage. Squash seeds, in particular, will germinate quickly after fermenting, so watch them closely.
Herb Seeds
Herb seeds are easy to save. Many herbs are self-seeding, which means they will drop their seeds in the fall and they will grow on their own the following spring. However, you may want to collect seeds just in case the conditions are not right for this to occur.
To collect herb seeds, allow the seeds to dry on the plant for as long as possible. The head will probably be drooping over. Using a small brown paper bag, hold it underneath the head of the herb flower, and gently remove the flower and drop it into the bag.
Make sure you use the healthiest, most robust plants and seeds out of all of the herbs in your garden.
Bring the flowerheads indoors and lay them out on a flat surface to dry, keeping any loose seeds and flower heads together. Make sure you can identify your seeds so you don’t lose track of what you are going to grow.
Once the seeds are completely dry, you can remove the seeds from the head and store them in an envelope or airtight container.
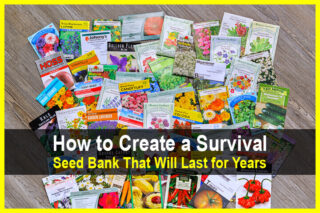
Tips for Labeling Seeds
After you’ve collected your seeds, you’ll want to store them in a safe container. Some people prefer glass jars while others prefer paper envelopes. Use whatever system works for you and your space.
However, you will need to label each set of seeds. This could be as simple as writing the information on a piece of masking tape and placing it on the bottle or envelope.
You need to keep each species and breed of seeds separate from each other. For example, if you saved seeds from green peppers, red peppers, and hot peppers, you will need to package each type separately so you know which is which at planting time.
On each envelope or jar, you will need to record what type of seed it is (e.g. pepper), what specific cultivar of pepper (i.e. sweet California wonder), the date harvested, and the location of where it was harvested from. Don’t rely on your memory, especially if you will be sharing or trading these seeds in the future.
What Conditions Do Seeds Need?
Seeds are not dead; they contain life. They need to be stored correctly to keep them viable for planting the following spring.
First, seeds need to be kept dry. Any bit of moisture could cause them to germinate prematurely, rot, or mold.
Second, the seeds need to be kept in a cool place away from direct sunlight. This will protect the seeds as much as possible. Some seeds do well when kept in the freezer until use.
How Long Do Seeds Stay Viable?
Different types of seeds will be viable for different lengths of time. Most seeds, if stored correctly, will last for at least a couple of years.
Seeds such as cucumbers, tomatoes, and melons can last five years or more. Squash seeds can last up to five years if stored well.
How Do You Know if Your Seeds Are Still Good?
If you’ve had some seeds hanging around for a while, you might want to know if they are still good before you plant them in your garden. You could simply plant them and hope for the best, or you could do a viability test.

It’s easy to see if seeds are still viable and you do not need to wait for spring to test them:
- Fold a paper towel so that it will fit in a plastic bag.
- Wet the paper towel so that it is damp but not soaked.
- Place ten seeds on the paper towel and put it inside the bag.
- Place the bag in a warm, dark spot such as the top of your refrigerator.
- Check back in a week to see if any of the seeds have sprouted. If not, wait a few more days and check again.
Your viability rate is based on how many seeds out of ten have sprouted. If one seed sprouted, your fertility rate is 10%. If 9 have sprouted, your fertility rate is 90%.
If the fertility rate is low, you can still try planting your seeds, just plant them more closely together than you normally would. Be prepared for them not to sprout, you may simply need to purchase new seeds. If the fertility rate is high, you can plant as normal.
Saving seeds is worth the effort for sustainability, frugality, and good ecology. Don’t be afraid to try saving seeds for the first time. Peas and beans are easy to save and generally have good fertility rates, even for beginners.
The worst that can happen is the seeds simply don’t grow and you have to purchase new ones. But if you are successful, you are ready to grow a whole new crop of vegetables from your very own garden.
Like this post? Don't Forget to Pin It On Pinterest!
You May Also Like:


I continue to notice that no one ever talks about the seeds for Potatoes which is possibly the most important vegetable in the west.
Assuming that you will always be able to buy seed potatoes is seriously stupid since the favorite topic of the time is the collapse of society.
One would think that the most important forms of carbohydrates would be a real point of interest to the world of those whom choose to prepare for such a collapse.
Yet no information is available its as if it were a secret.
I suspect that there is such a thing as seed for a potato plant I really do not know.
You make a really good point. There is very little discussion of seed potatoes online. You can store them in the fridge, but if you’re looking for a more off-grid solution, you’ll need to keep them in some kind of root cellar that stays below 50 degrees F.