


Estimated reading time: 6 minutes

Wheatgrass has been a staple in the health and wellness world for decades. It's one of the most nutrient-dense foods, loaded with vitamins A, C, and E, iron, magnesium, calcium, and chlorophyll. A small shot of wheatgrass juice packs a serious nutritional punch, and many people swear by it for boosting energy, supporting digestion, and strengthening the immune system.
The nutrition in a wheatgrass seed is self-contained. When the seed sprouts and grows, all of that energy comes from within the seed itself. By the time it reaches harvest length, it's already at its full nutritional potential without ever needing to draw anything from the ground.
If you've ever bought wheatgrass shots at a juice bar, you already know they aren't cheap. Growing your own at home is a fraction of the cost and surprisingly easy to do. It doesn't need much space, doesn't take long to mature, and doesn't even require soil.
Want to save this post for later? Click Here to Pin It On Pinterest!
In this video from the Youtube channel, Brad & Christa, they demonstrate how to grow wheatgrass at scale. It's a simple, low-maintenance approach that works well for juicing, and any leftover root mats can even be fed to chickens or rabbits, so there's virtually no waste.
What You'll Need
- Wheat berries (hard winter wheat is commonly used)
- Mason jar with a lid modified to hold a small piece of window screen (for straining)
- Growing tray with drainage holes drilled in the bottom
- Filtered water
- A dark spot or towel to cover the jar during soaking
Step 1: Measure and Rinse Your Wheat Berries
Start with one cup of wheat berries per tray. The amount you use will depend on the size of your growing tray. One cup works well for a standard-sized tray, but scale up or down based on what you're working with.
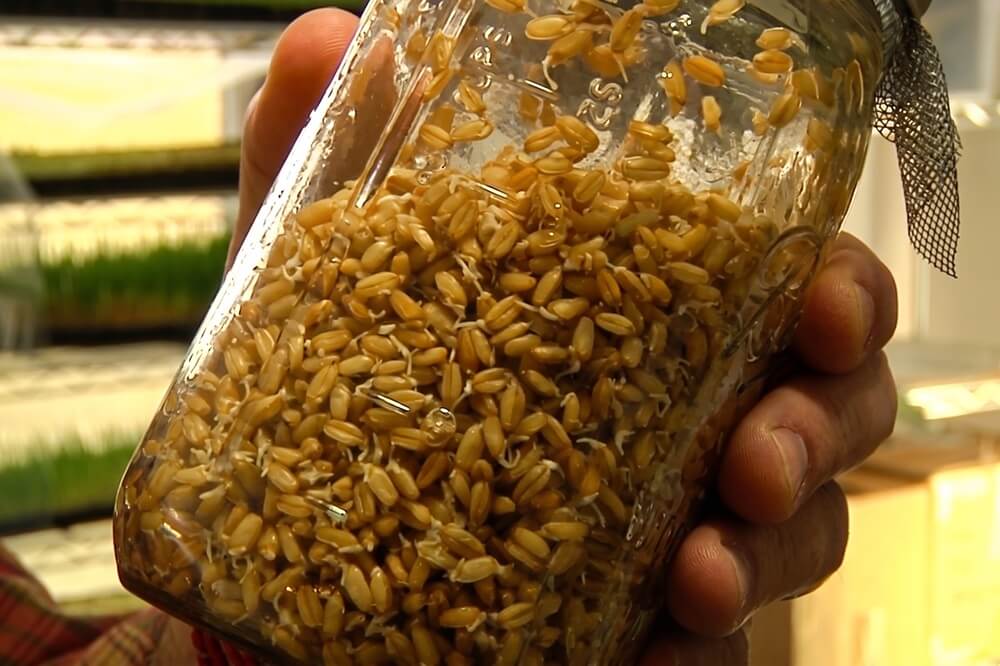
Place the wheat berries in a mason jar. For easy rinsing and draining, get some strainer lids so water can flow through without the berries spilling out.
Fill the jar with water and swish the berries around to rinse them well. Drain the water. You can rinse them twice if you want to be thorough.
Step 2: Soak in the Dark for 12 Hours
After rinsing, refill the jar with water to about double the height of the wheat berries. You want them fully submerged with room to expand.
Place the jar in a dark location or cover it with a towel and leave it for 12 hours. The darkness helps trigger germination.

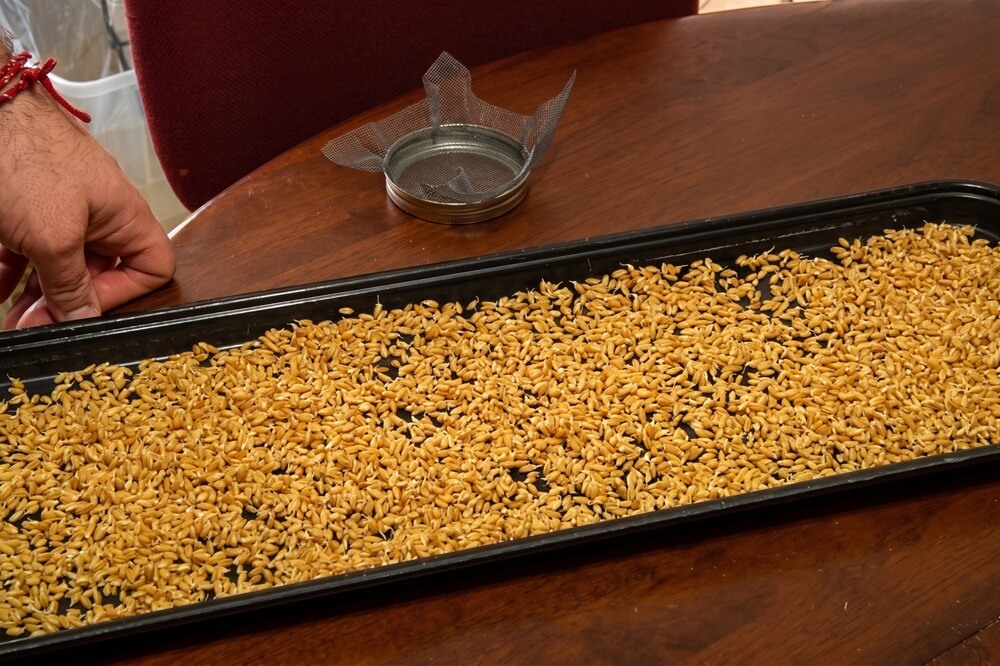
Step 3: Drain and Wait for Sprouts
After 12 hours, drain off the water. The berries will have swelled slightly, and some may already be showing a tiny tail, the beginning of a sprout.
Cover the jar again and return it to its dark spot. In about one to one and a half more days, the seeds will have developed small sprouts with visible tails. That's your cue that they're ready to move to the growing tray.
Step 4: Transfer Sprouted Seeds to Your Tray
Take your sprouted wheat berries and spread them out evenly across the bottom of your growing tray. Try to keep the layer as close to a single seed deep as possible, spreading them out evenly helps prevent mold and promotes even growth.
Your tray should have drainage holes so that water can flow through without pooling. Brad's setup uses old commercial donut trays with holes drilled in the bottom, but any shallow tray with drainage will work.
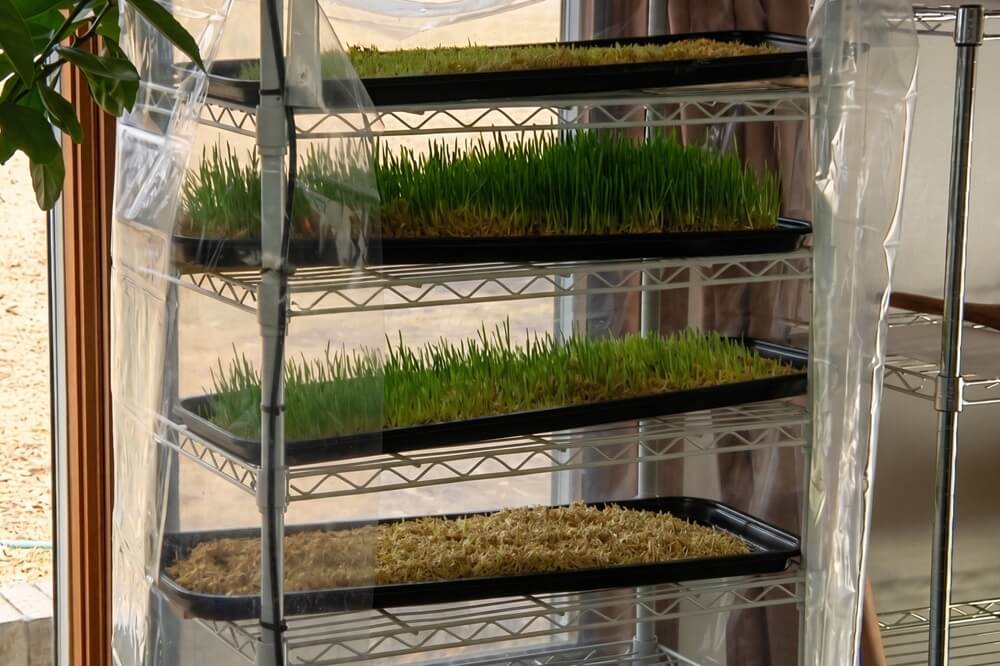
Step 5: Water Twice Daily
Once the seeds are in the tray, they just need consistent moisture, but not too much. Overwatering is the most common mistake and leads to mold.
Brad & Christa have a setup where water is pumped onto the top tray, then flows down and drips onto the second tray down, and so forth all the way back to the bottom. They run the about twice a day for about 15-20 minutes of watering.
Depending on your watering method, you'll want to experiment to figure out the right amount of water to maximize growth. Remember, the goal is to keep the seeds and young roots moist without letting them sit in standing water.
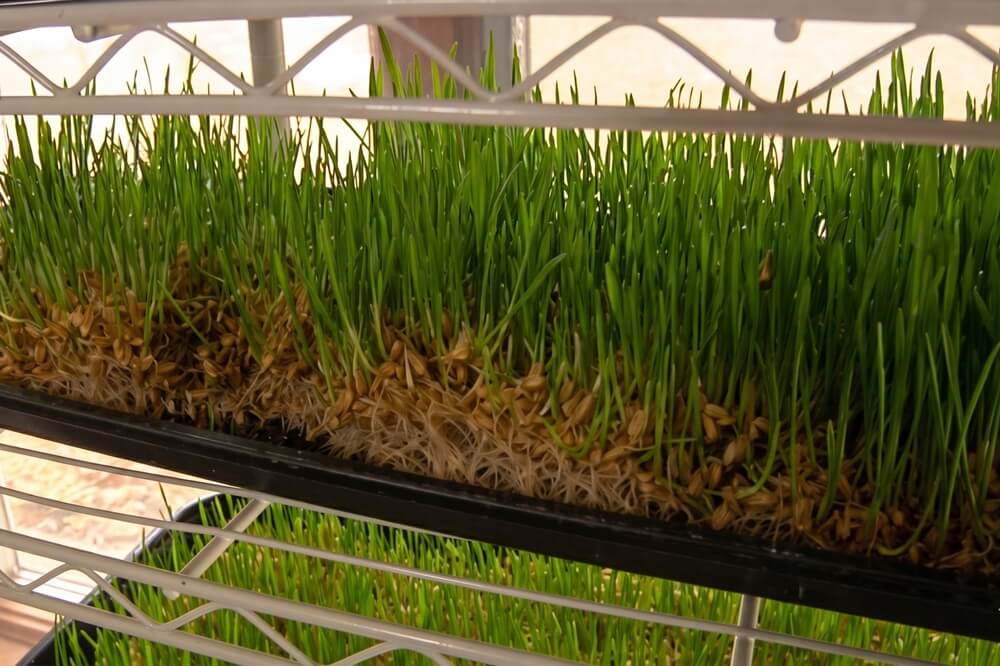
Step 6: Harvest at 5–6 Inches
From the time the seeds are placed in the tray, expect 7 to 8 days until the wheatgrass is ready to harvest. You're looking for grass that's reached 5 to 6 inches tall and has a lush, deep green color. That's when it's at its peak nutritional value and ideal for juicing.
Use scissors or a sharp knife to cut the grass just above the root mat. Juice it fresh for the best results.
What to Do With the Leftovers
One of the best things about this method is that nothing goes to waste. After harvesting, the root mat and any remaining seed kernels can be fed to chickens, rabbits, or other small animals. They love it, and it's highly nutritious for them too.
A Few Tips for Success
- Use filtered water if possible. Chlorinated tap water can interfere with germination and early growth.
- Don't skip the dark soak. It's what gets germination going properly before the seeds hit the tray.
- Spread seeds in a single layer. Clumping leads to uneven growth and increases the risk of mold.
- Keep air moving. If you're growing indoors, a little airflow around your trays helps prevent mold, especially in humid environments.
- Harvest on time. Wheatgrass is at its best at 5–6 inches. Letting it grow much taller past that point diminishes its nutritional quality.
Growing your own wheatgrass at home means you can have a steady, fresh supply for pennies per tray. Far cheaper than store-bought shots or supplements. Once you get the rhythm down, it becomes a simple part of your weekly routine.
Like this post? Don't Forget to Pin It On Pinterest!
You May Also Like: