Estimated reading time: 12 minutes
The primary thing that defines a soda is carbonation. It’s a suspension of carbon dioxide bubbles held under pressure in liquid in a sealed container. The base for the liquid is usually water, and all types of flavoring give the soda its taste.
The tricky part is carbonating the water. There are mechanical carbonators that you can buy, but we’re going to take a pioneer approach and use fermentation to create our carbonation.
Want to save this post for later? Click Here to Pin It On Pinterest!
Wild Yeast is the Key
Wild yeast is everywhere, drifting through the air and descending onto just about everything. What’s important is to find wild yeast that has found a sweet spot that encourages it to thrive and grow.
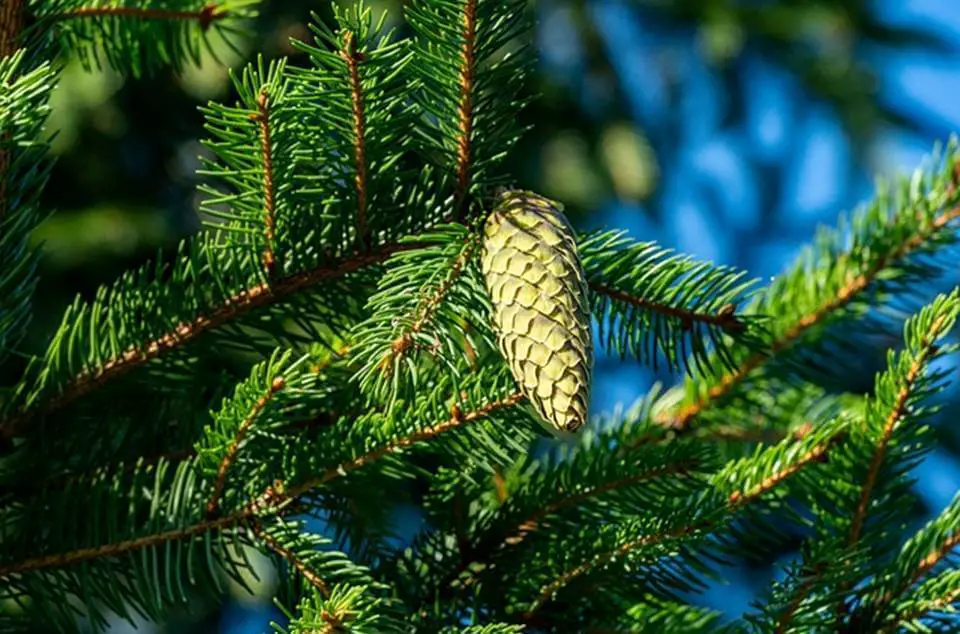
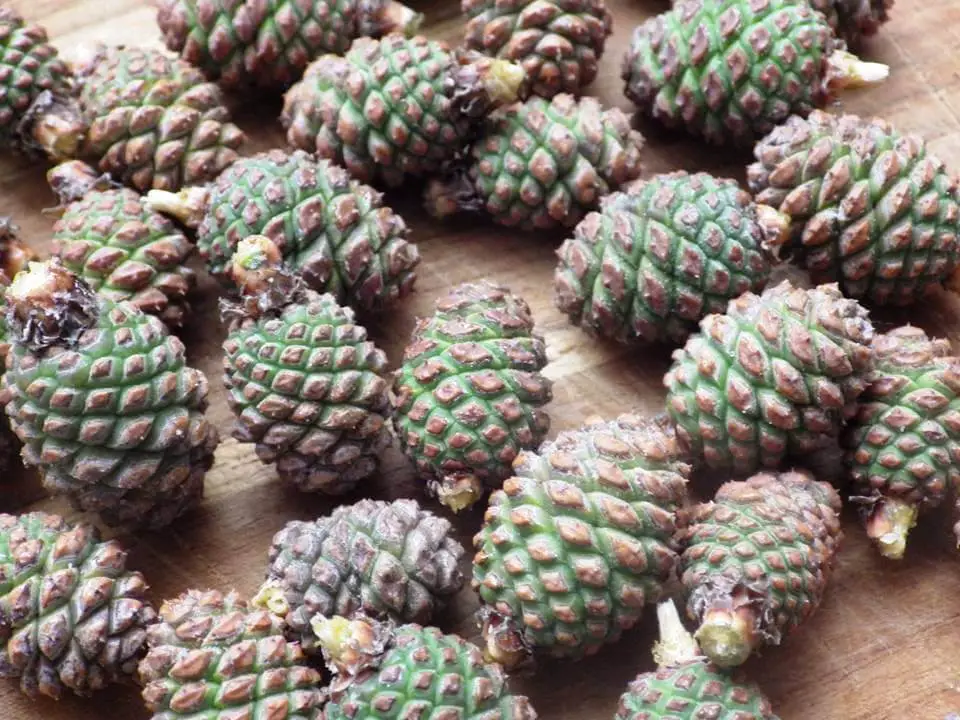
This “wild” yeast often appears as a thin, dusty white film on plants and fruits. If you’ve ever seen white dust on grapes, you’re looking at wild yeast. The good news is that wild yeast thrives on things beyond grapes, and green pine cones are included in that group.
Pine Cone Varieties Matter
Before you go out and harvest every green pine cone you see, be forewarned. Some pine or “conifer” trees are toxic and will produce a soda flavor somewhere between turpentine and Pine-sol. You need to know your pines and select the right pine cones.
White pines are the most common tree for pine cone soda. The green cones from a White Pine produce a soda with some lemony flavor notes and a delicate pine scent.
Pinyon pine cones are actually the best pine cones for pine cone soda, but they grow in a limited range in the western United States. For those of us who don't live there, that leaves the White Pines, but Spruce can also work. Here’s the basic list of trees that are safe for pine cone soda:
- Pines including white pine or pitch pine
- Fir trees including Fraser fir, Douglas fir, or balsam fir
- Spruce trees including Norway spruce, or white spruce
What’s important is to avoid pine cones from trees like cedar, cypress and yew.
The trees are toxic and parts of the yew are actually poisonous.
Collecting the Pine Cones
Spring into early summer is the best time of year to collect green pine cones. You’ll need to pick them directly from the tree. One challenge is the fact that many of these green pine cones grow towards the top of the tree, so you may need a ladder or fruit harvesting pole.
Green pine cones tend to be smaller in early spring and larger as you get into summer. Avoid any pine cones that have started to turn brown. They don’t have as much flavor or wild yeast, and can even impart an off-flavor to your soda.
The easiest way to pluck a green pine cone from a tree is to twist it off. With any luck, you’ll find some low-hanging branches that are easier to harvest. Just keep looking around the perimeter of the tree. Climb if you must.
Remember to wear gloves when harvesting green pine cones. They are often loaded with a sticky sap and can be a mess. The sap cleans off with hot water and soap, but gloves help when you’re harvesting.
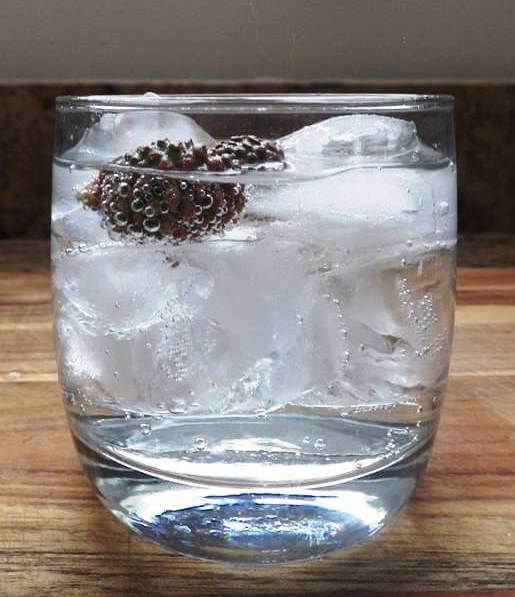
You don’t need hundreds of green pine cones. Anywhere from a half-dozen large to a dozen smaller green cones will make a half-gallon of soda. Just make sure they’re green and don’t show any signs of bugs or other damage. You want clean cones. However, don’t wash them. That will wash off the yeast. Just make sure they look good.
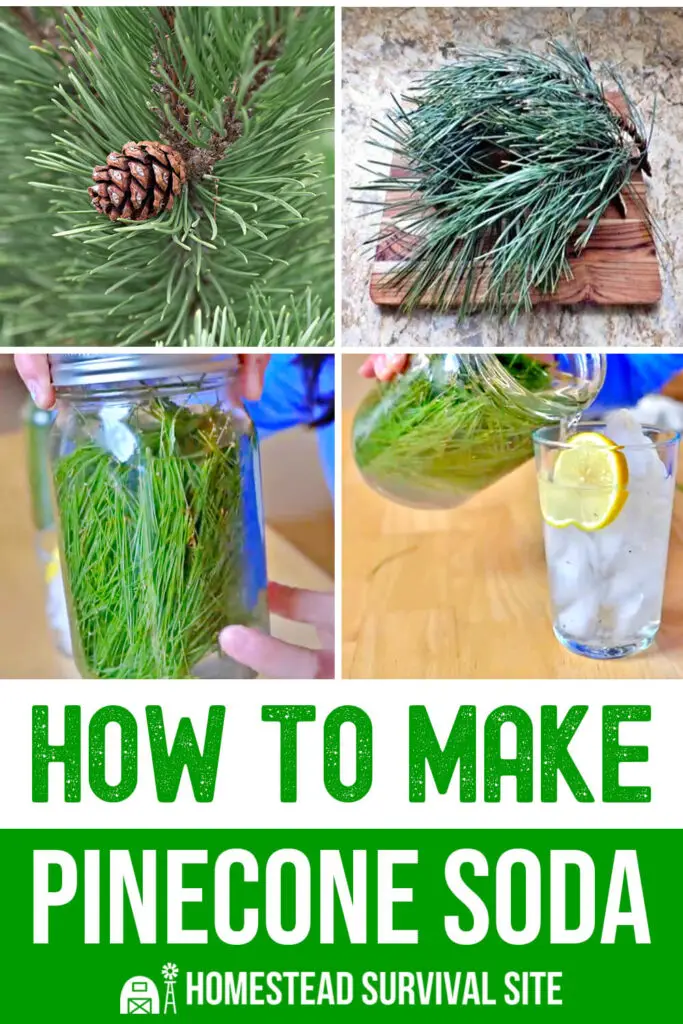
Making Pine Cone Soda
It takes about a week to make pine cone soda, and it should be kept refrigerated and consumed in about a week. This isn’t about long term food storage; it’s just a way to create a carbonated beverage from available resources around you.
We’re going to cover the basics for making pine cone soda, and then go over a variation for pine needle soda.
The pine needle soda is a good option in fall and winter when green pine cones are few and far between, but you still want to make a pine soda.
Pine Cone Soda Recipe
Equipment:
- A large, sterile glass container or crock with a fairly tight fitting lid. You want the lid to be somewhat loose so any excess carbon dioxide gases can escape.
- A wooden spoon or some way to stir your mixture.
- Empty and sterile plastic bottles, glass bottles or canning jars to store your pine cone soda. What’s important is a very tight fitting lid to hold in the carbonation.
Ingredients:
This is for a small batch. Double or triple the recipe if you want to make more.
- 2 quarts of water
- 6 to 12 green pine cones depending on size.
- ¾ cup of white or brown sugar ( You can substitute equal amounts of honey, molasses or maple syrup. They will impart a light, amber tinge to your soda similar to what you see in cream soda. The sugar is important to activate the yeast to release carbon dioxide for carbonation. You could add a cup and a half of sugar if you want to ferment your mixture into a light alcohol, but be sure you measure carefully with ¾ cup of any sugar if you’re making soda for the kids.)
Directions:
1. Add your pine cones to the jar.

2. Add ¾ cup of sugar.
3. Add 2 quarts of water.
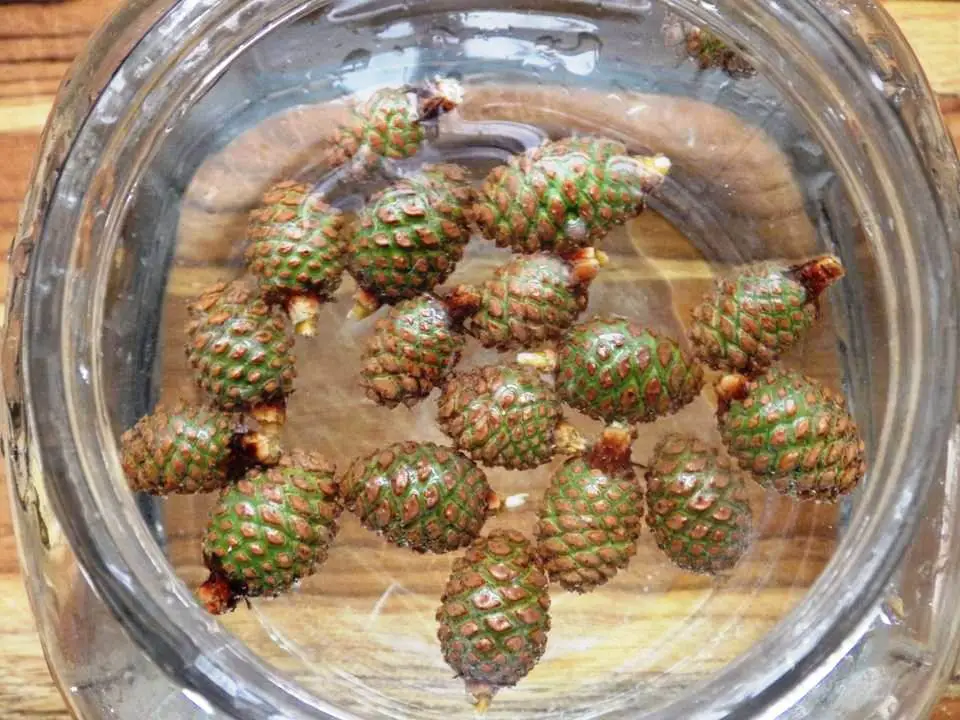
4. Stir with the wooden spoon until the sugar is dissolved.
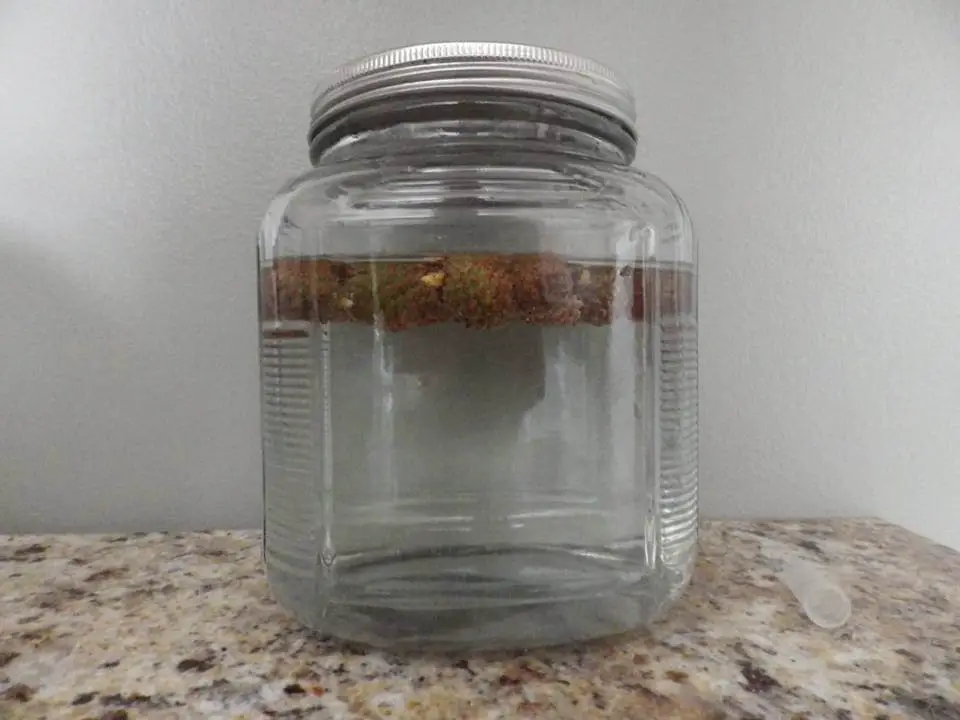
5. Place in a cool, dark place covered.
6. Shake or stir the mixture 2 to times a day.
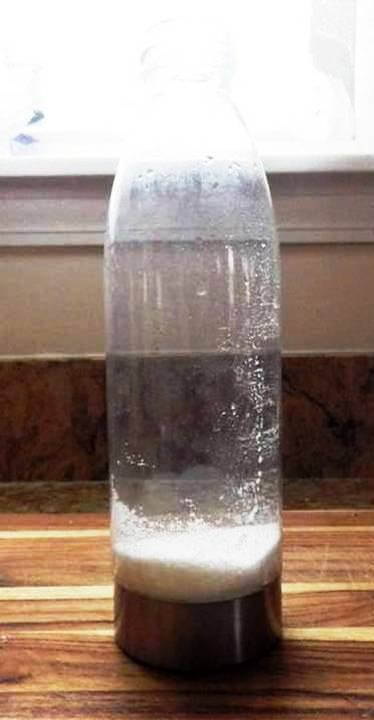
7. After 2 or 3 days you’ll start to see bubbles forming.
8. Taste when the bubbles start to show up until you like the flavor and level of carbonation.
9. Carefully and slowly pour into your sterile containers and cap tightly.
Keep refrigerated and try to drink it within the next week.
Pine Cone Soda Fails
- If the pine cone water turns cloudy, try filtering it through a coffee filter. It may just be a cloudy result from particulate matter adhering to the pine cones. If the pine cone water turns cloudy once again, smell it. If it has a septic or mildew odor, just discard it and start over. Lots of things can adhere to the surface of a pine cone besides yeast, and you may have a polluted batch.
- If you never see any bubbles, that means the yeast isn’t growing. Capturing wild yeast is a bit of a hit or miss proposition, and it's possible you just happened to harvest some pine cones that had little or no yeast. This can happen if you are harvesting very early in spring. As time goes on, the higher the likelihood that your green pine cones will have a coating of wild yeast.
- The soda goes flat. This is usually because of a packaging problem. Just make sure you pour the pine cone soda slowly into your container so you don’t release too many bubbles, and make sure it is sealed tightly to hold in the carbonation as much as possible.
- It just doesn’t taste good. Hopefully you’ve tasted before bottling, and if it tasted good going in, it should taste good later. If it doesn’t, you may have a bad batch; it has become contaminated somehow, or you have a variety of pine cone that has partially toxic properties. Make sure you know how to identify your pines so you harvest the right pine cones.
Pine Needle Soda Recipe
By late summer and going into fall and winter, green pine cones can be hard to find. They might still be out there, but by then most have turned brown, opened to release their nuts, and either stay on the tree or fall to the ground.
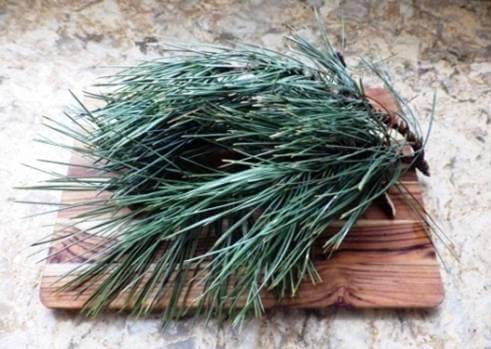
The good news is that pine trees are evergreens which basically means that they are green all the time. The pine needles maintain their color and moisture year-round, and the same wild yeast that dusts the green pine cones also coat the needles.
The same trees that you harvest for green pine cones can be harvested for their needles to make pine needle soda. You should also avoid those trees we mentioned when harvesting pine cones. These include cedar, cypress and yew
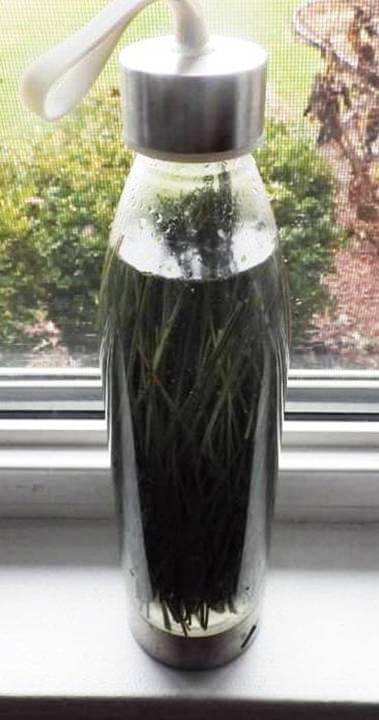
The flavor of pine needle soda is less intense than pine cone soda with a lighter lemony flavor with some mild hints of ginger flavor notes. It is also a clear soda color and will often be much clearer than some batches of pine cone soda.
Equipment:
- 2-pint bottles with a cap or lid (flip tops are best to release any excess carbon dioxide gas while the soda ferments but the caps should be able to be sealed tight for final bottling)
Ingredients:
- 4 cups of Water (filtered water with some minerals is best, don’t use tap water because it may contain chlorine which will kill the wild yeast).
- 8 Tablespoons of Sugar (you can substitute brown sugar, honey, molasses or maple syrup in equal measures)
- 2 cups of long White Pine needles (White pine needles grow in bundles of 5 or more needles. You can use equal amounts of other pine varieties we’ve already identified).
Directions:
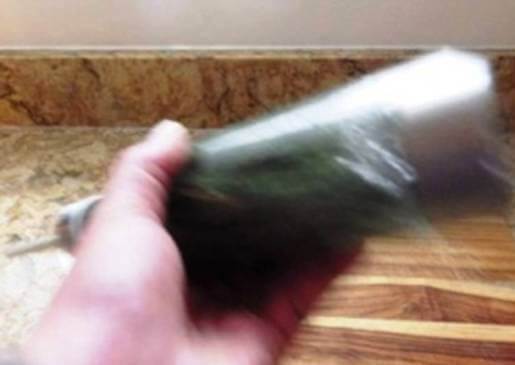
1. Collect pine needles from white pine trees or other edible conifers. Remove the woody ends from the pine needles. Do not wash or rinse the pine needles. You will lose the wild yeast.
2. Pour 4 tbsps. of sugar into the bottle or substitute an equal amount of brown sugar, honey, molasses, or maple syrup.
3. Place the pine needles in bottle. Make sure they don’t protrude above the top where you partially seal the lid.
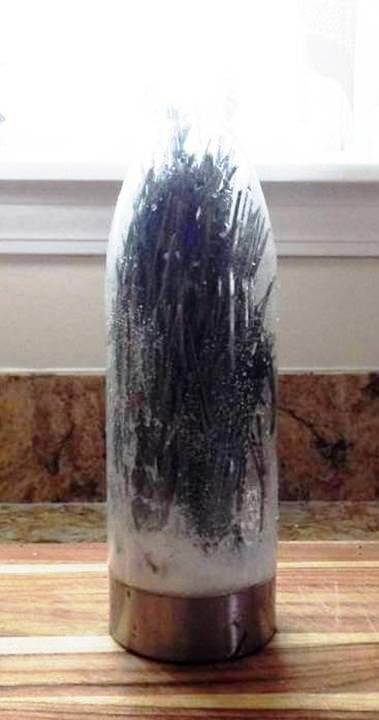
4. Fill the bottle with filtered or bottled water. Avoid chlorinated tap water.
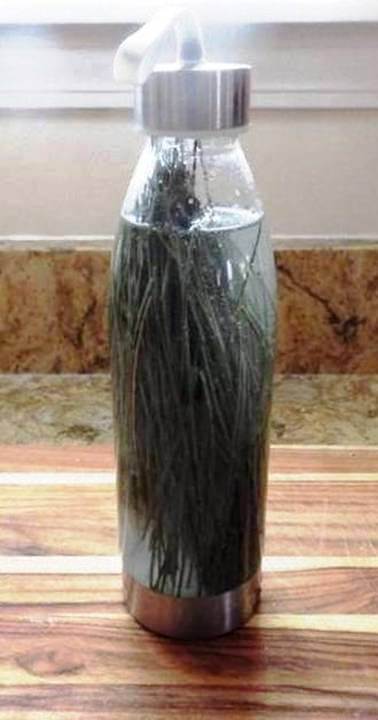
5. Close the lid and give the bottle a good shake until the sugar or other sweeteners are dissolved and equally distributed.
In cold weather, you can put the bottle by a window but keep it out of direct sunlight. The UV rays from the sun could kill the will yeast. If outdoors and in hot weather, keep the bottle in the shade and out of direct sunlight.
6. Shake the bottles 2 or times a day and make sure the lid can vent excess carbon dioxide. Taste as you go and when it suits your taste, tightly cap it.
7. Refrigerate and drink within a week. If you have any doubts about the purity, filter it and rebottle.
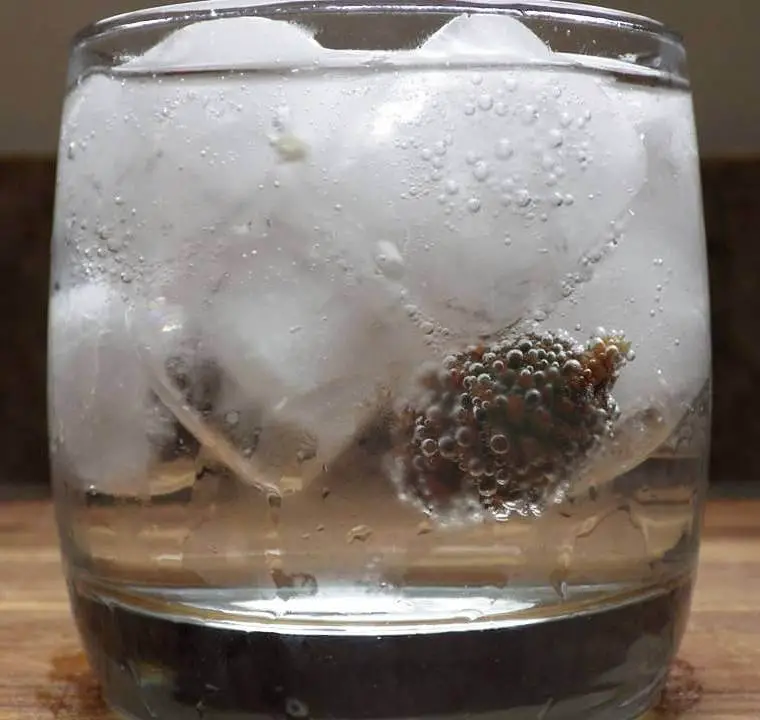
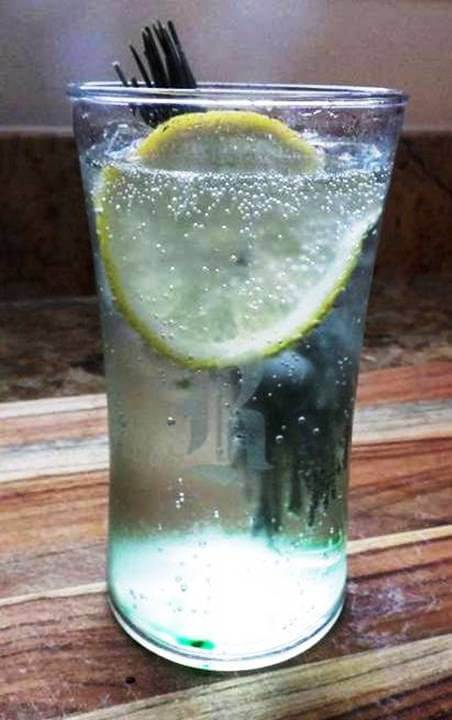
8. To serve, fill a cup with ice cubes and a few slices of lemon. Open
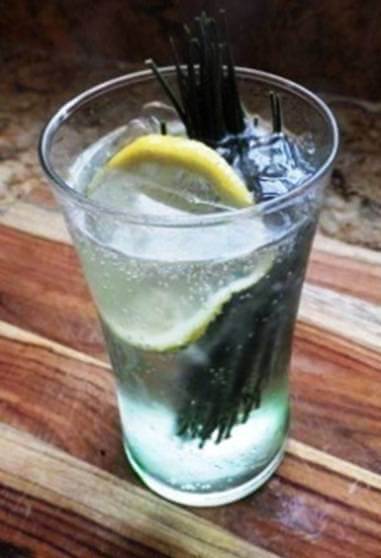
the bottle and pour the pine needle soda over the ice cubes. Stir and enjoy. Maybe add a few pine needles as a garnish.
It Could be a Regular Thing
Nothing’s getting cheaper these days, and the ability to make something as fun and refreshing as your own soft-drinks kind of makes sense. The only downside is there’s still sugars in the beverage, but the sugars are necessary to activate the yeast. You also might want to think about filtering and purifying the final result because washing the pine cones or pine needles removes the wild yeast. That’s up to you.
After a few trial runs making pine cone and pine needle soda could become a regular thing. It’s fun and easy to do and kids would no doubt enjoy the process. In time it may become the only way you drink soda.
Like this post? Don't Forget to Pin It On Pinterest!
You May Also Like: