Estimated reading time: 11 minutes
There’s a good chance you know some basic knots, but there are some knots that might surprise you. Better yet, once you know how to tie them, you won’t forget. At least most of them.
We’re going to cover ten knots with directions and photos, starting with some basics and progressing towards the complex. We’ll also highlight the historical and practical uses for each.
For the record, The Ashley Book of Knots lists 3900 different types of knots. That’s not surprising. Knots are as old as rope, and that’s old.
Many people who are adept at knot tying actually used it as a form of mediation, and there are many examples of knots that have been turned into everything from artwork to something as elegant and functional as a macramé plant hanger.
These 10 knots fall in the category of general use and are some of the most often used. Many of these knots are so simple that all you have to do is look at the pictures to understand how to tie them.
In some instances, there is a bit of explanation, but what will become apparent is that explaining how to tie a knot is best done with pictures.
Want to save this post for later? Click Here to Pin It On Pinterest!
The 10 Knots
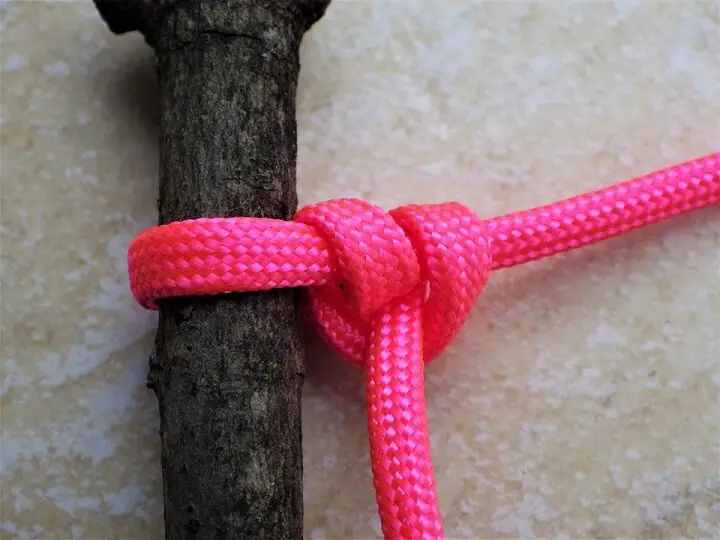
1. How To Tie Two Half Hitches
Two half hitches appear frequently across a range of uses on any homestead. This knot is commonly used to secure a rope to a tree or poles; as a knot for tying tarps for shelters, to hang hammocks, secure a clothesline, or to attach one rope to the middle of another rope.
You start by tying one half-hitch and then wrapping the rope around the same way to add a second hitch. The knot is self-tightening and should give you a secure hitch. If you need extra assurance, add another hitch.
2. How To Tie A Square knot
A square knot is a rather elegant knot with two loops wrapped into each other to connect two ropes. But be forewarned. The square knot is a bit over-rated and is not reliable if you are using it to lift heavy loads.
And don’t even think about using it to connect two ropes for mountain climbing or rappelling. There are numerous knots for mountaineering that are far superior, including the Blood Knot which we’ll cover next.
3. How to Tie a Blood Knot (Barrel Knot)
The Blood Knot is also known as the Barrel Knot because the finished knot looks like two barrels connected end to end. It’s a popular fishing knot for tying two fishing lines together. In actual fact, any knot that works with monofilament fishing line is a good proof-of-concept for knot integrity.
Monofilament is unforgiving with any knot that is not self-tightening. If you want to see for yourself, try tying a square knot with 20-pound test monofilament. There’s a good chance the loops in the square knot will bow out and come loose with any slack. A Blood Knot is not only self-tightening, but its design keeps it tight.
There are 3 steps to tying a Blood Knot:
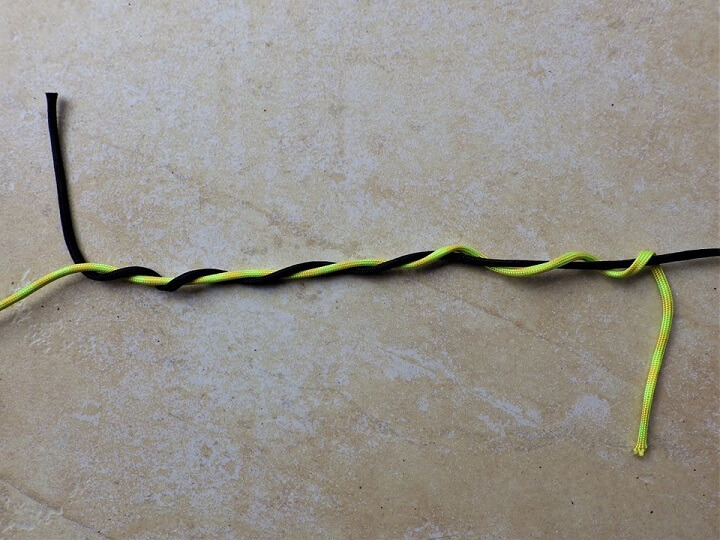
Step 1 – Twist the two ends of rope around each other so you have 6 to 8 twists.
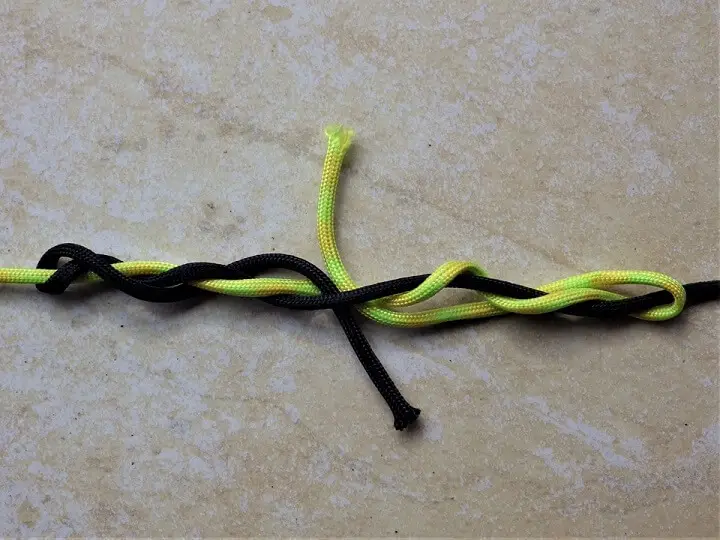
Step 2 – Insert the ends into the center twist in opposite directions.
Step 3 – Pull on the two ends of the rope to pull the twists together into a barrel shape. You may have to step on the two loose ends or hold them in your teeth while you do this.
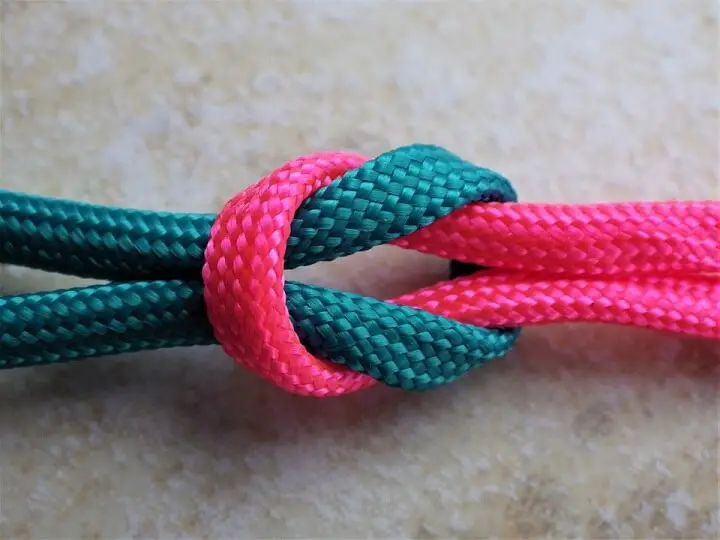
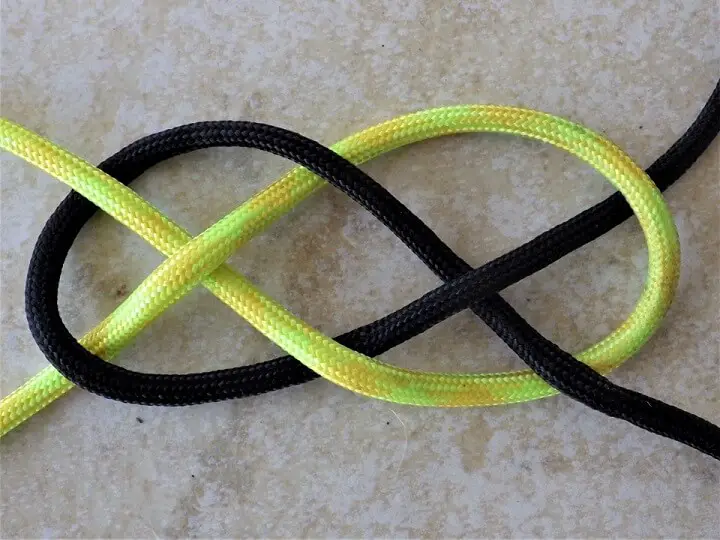
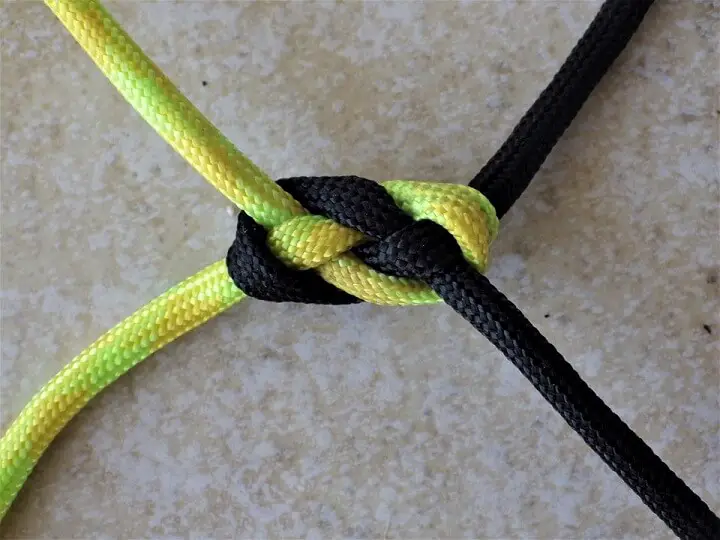
4. How to Tie a Carrick Bend (Pretzel Knot)
The Carrick Knot is a Square Knot variation. It ties two ropes together more securely than a square knot and even after tightening, it’s easier to untie than a square knot.
It’s sometimes confused with a Granny Knot which is an incorrectly tied Square Knot, but the Carrick Bend has much more integrity than a Granny. The Carrick is also referred to as a Pretzel Knot but there are variations on a Pretzel Knot, so Carrick is the best designation.
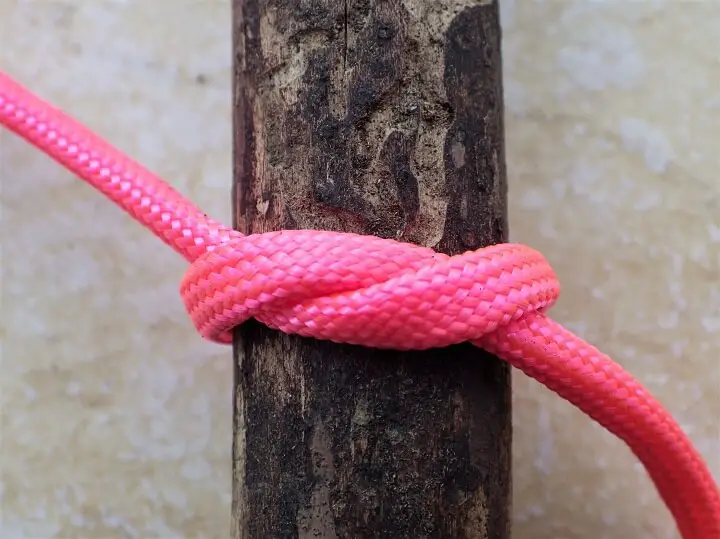
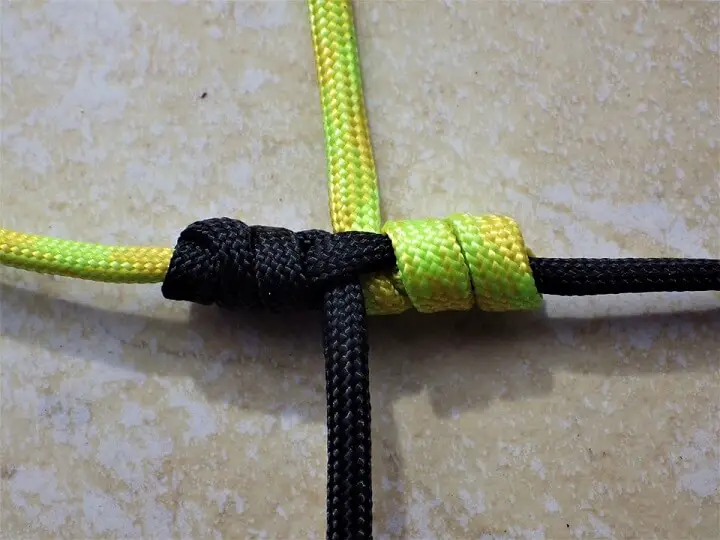
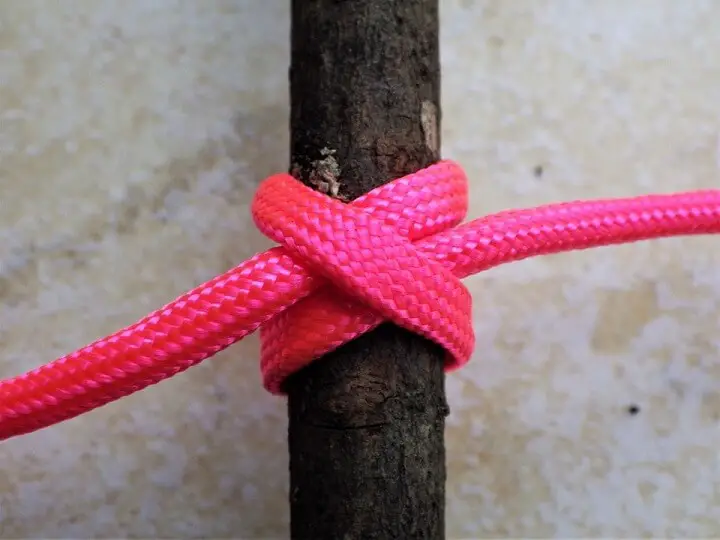
5. How to Tie a Clove hitch
The Clove Hitch is the standard knot for tying a rope to an upright tree or pole. It was also used by pioneers to start and finish lashings for tripods, shear lashings and round lashing.
You start by wrapping the rope around the pole and crossing the rope into an “X” and bringing the shorter end of the rope around the pole again and under the other length of rope. The picture tells the story better.
6. How to Tie a Bowline
It’s the first knot you learn in the military and it’s a standard knot across all activities from homesteading to boating, mountaineering, and survival.
The key is to tie a knot that does not allow the bow or looped end to tighten or slip. It’s commonly used for lifesaving and is worth practicing until you’ve mastered it.
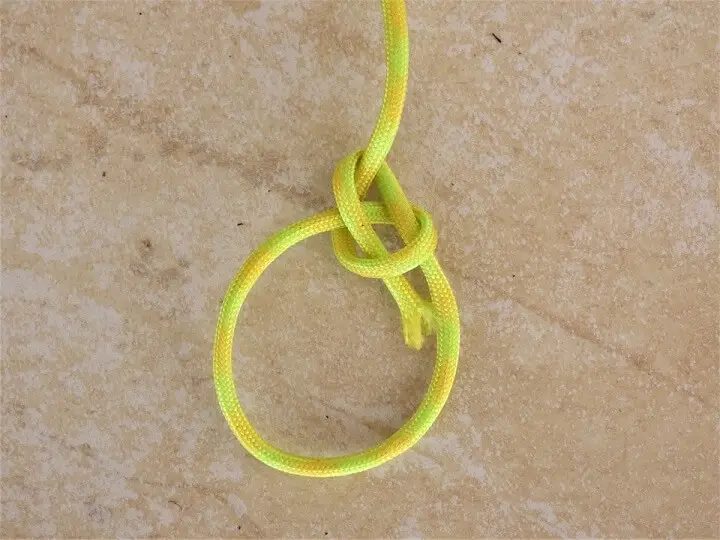
7. How to Tie a Lasso
A lasso is the knot of the old west where cowboys on horseback would gallop after a stray steer and throw a lasso around its horns to bring it back to the herd. It’s not a difficult knot to tie.
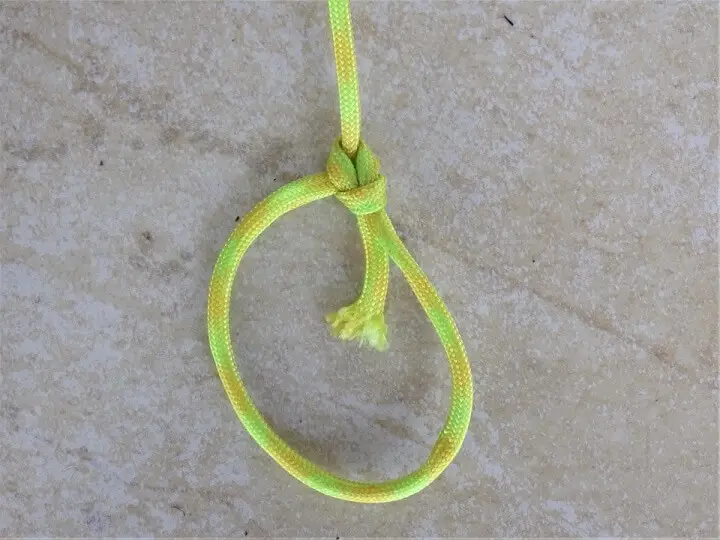
The hard part is knowing how to throw a lasso. It consists of two knot-steps. The first step is to tie something called a “Honda” knot. This is like a bowline in the sense that it will not slip or collapse on itself. A small overhand knot should be tied at the end to keep the rope end from slipping through the Honda Knot.
The other end of the rope is then passed through the open Honda Knot to create a loop. This is the lasso.
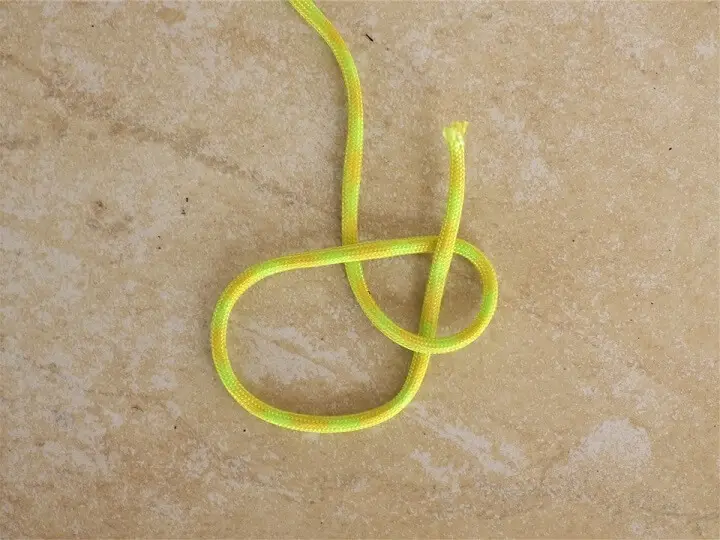
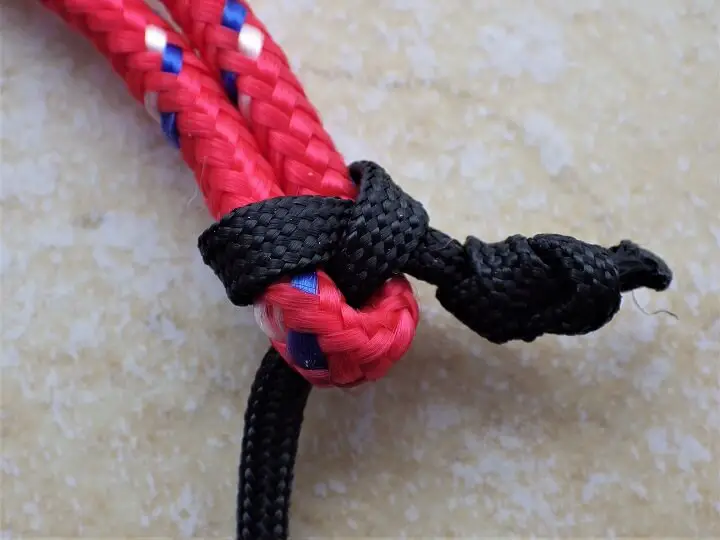
8. How to Tie a Sheet bend
The Sheet Bend is used to connect a smaller rope to a larger, thicker rope. You start by tying a Figure Eight Knot in the end of the smaller rope, and then you loop it through the loop end of the larger rope, as indicated in the photo.

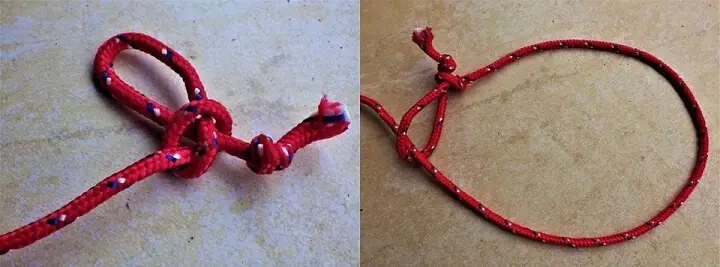
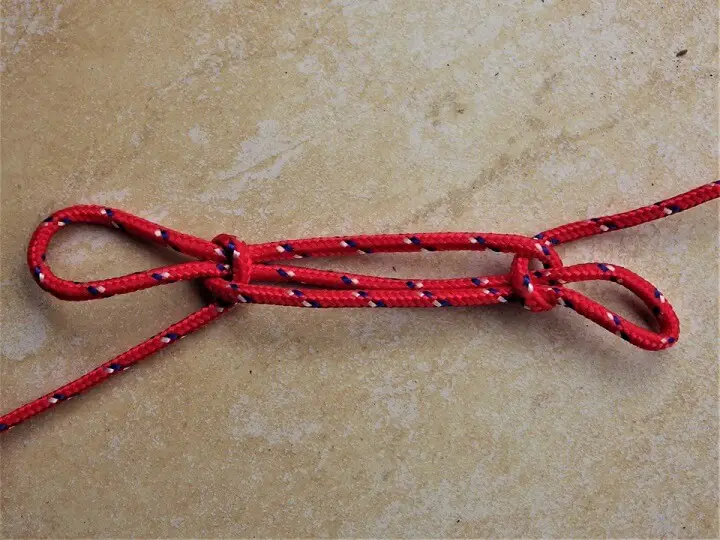
9. How to Tie a Sheepshank
A Sheepshank is used to shorten a length of rope without cutting and knotting it. Multiple Sheepshanks can be tied into the length of a rope until it’s the desired length.
They are self-tightening and easily untied to return the rope to its original length. The picture tells the story.
10. How to Tie a Timber Hitch
The Timber Hitch was the go-to knot for logging. It was designed to firmly grip logs and timbers that were then dragged across the homestead or through the woods by a horse team, pickup truck or ATV.
The hitch was easy to tie and untie and kept a firm grip on the log as it twisted and turned its way through forest and field.
The Timber Hitch is a two-step knot.
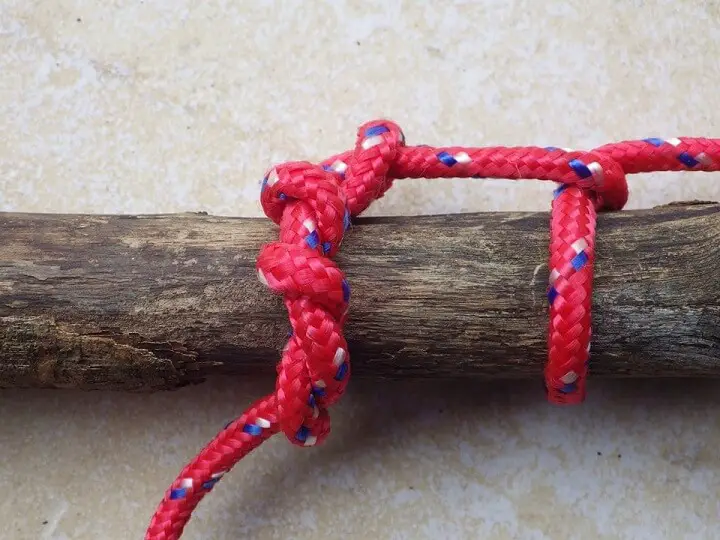
The first step is to wrap the rope end around the log down about 6 to 8 feet from the cut end of the trunk. You then tie 3 to 4 twists down along the length of the rope next to the log.
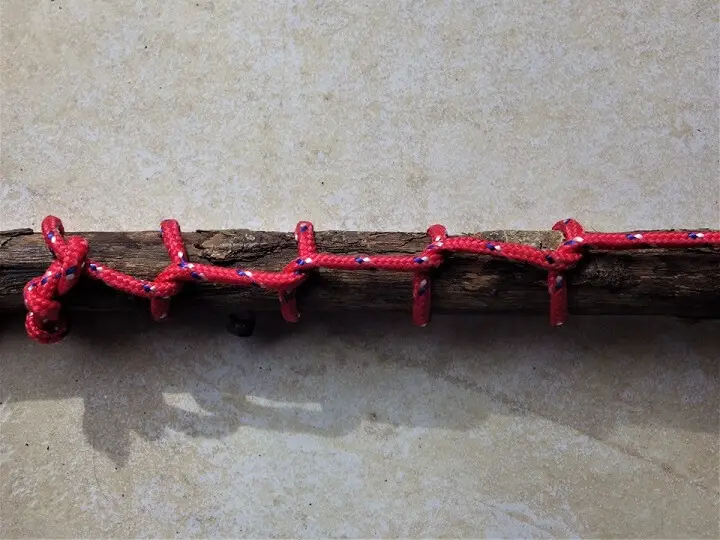
The second step is to wrap the rope around the log down a foot or two from the first hitch and cross the rope and mover forward along the log a foot or two to the next wrap. This is done to create 3 or 4 progressive hitches.
The long length of rope is then hitched up to the horses or the truck and the log should track well as it’s pulled from the woods.
But wait! There’s more!
These 10 knots are the tip of the iceberg when it comes to the variations, permutations, and complications of knot tying. The best way to learn them is to tie them. Over and over again. When you actually get around to using some of them regularly, knot tying will come as second nature to you.
An excellent resource is a website called animated knots. The simple animated steps make it easier to tie some of the more complex knots. Another is NetKnots. You might want to take a look, especially if you’re struggling with any kind of knot for any use or occasion.
The knot possibilities aren’t endless, but the variations and uses may surprise you. Some of the homesteading categories that have a long and deep history of knots include:
- Logging
- Mountaineering
- Animal Husbandry
- Survival
- Boating
- Lashings
- Looping
- Hitching
- Fishing and Hunting
- Field Surgery
We’ll try to cover some of them at a later date, so this is knot the end…. Sorry. Couldn’t resist.
Like this post? Don't Forget to Pin It On Pinterest!
You May Also Like: