Estimated reading time: 27 minutes
Are you really prepared for the unexpected? Sure, if disaster strikes suddenly, there’s no real way to predict how events will unfold. You might find yourself without access to stores or a grocery market – and that means having backup options at your disposal is critical.
To help make sure you're fully prepped and ready, here are 25 recommendations of survival food recipes that could save your life someday. Let's get cooking!
When it comes to preparing for an emergency, knowledge is power. Knowing how to cook survival recipes is a critical skill that can help you and your family stay alive in the event of a disaster.
We’ve compiled 25 essential survival recipes that you should practice making now so you’ll be ready in the event of an emergency.
Want to save this post for later? Click Here to Pin It On Pinterest!
1. Basic Pioneer Cornbread
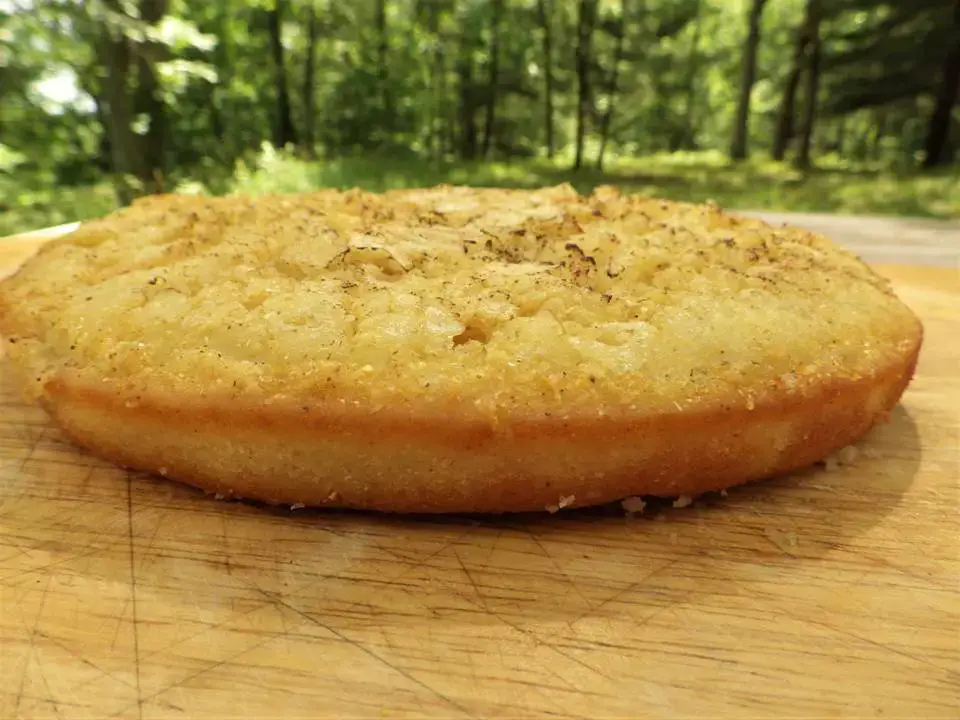
This classic recipe is simple, but it packs an incredible amount of nutrition into one meal. It requires just a few ingredients and can be cooked over an open fire or on top of a camp stove.
Cornbread is filling and provides valuable carbohydrates for energy, as well as some protein and other important vitamins and minerals.
Here's a simple recipe to follow.
2. Hardtack
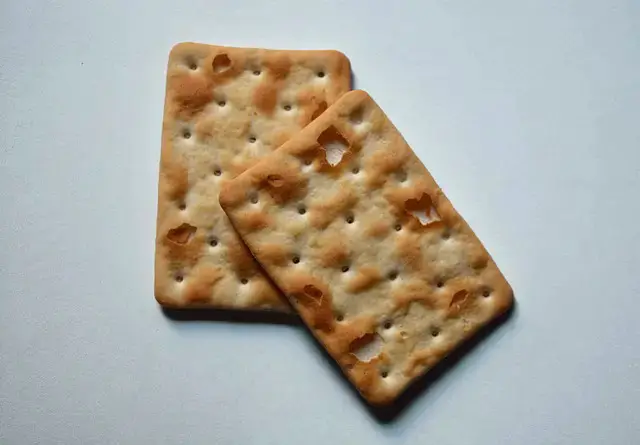
Hardtack is a type of hard biscuit that was popular during the Civil War era. The reason why this recipe makes such great survival food is that it has a long shelf life and can provide essential nutrients in the event of a shortage.
Making hardtack is a satisfying activity for both experienced and inexperienced bakers alike, as it is a very simple, quick bread that does not require any form of rising.
Once made and cooled, the pieces can be stored in airtight containers until they are ready to be consumed.
Ingredients:
- Flour
- Water
- Salt
Directions:
- Once you have your ingredients gathered together, the next step is to mix them together into a dough. This can be done either by hand with a spoon or with an electric mixer if you have one available.
- You want your finished dough to be stiff enough that it can easily hold its shape when rolled out on a lightly floured surface. Once your dough has reached this consistency, roll it out until it's about ¼” thick before cutting it into small squares or rectangles using a knife or pizza cutter (the exact size isn't important).
- Finally, prick each piece several times with a fork before baking at 350°F for 30 minutes per side—flipping once during baking—until they are golden brown and crisp on both sides.
3. Pemmican

Pemmican was developed by Native Americans hundreds of years ago as a way to store meat without refrigeration or preservation techniques. This recipe combines dried meat with fat, nuts, berries, and spices for maximum flavor and nutrition.
It’s one of the oldest survival recipes still used today and makes a great source of portable energy when there are no other options available.
Ingredients:
- Lean meat, cut into strips (venison, beef, elk, turkey)
- Dried berries (cranberries or blueberries work well)
Directions:
- The first step in making pemmican is to dry your meat. You can either do this in an oven set to a low temperature (175-200°F) or by using a food dehydrator if you have one available. This process should take between 6-10 hours, depending on how much moisture remains in the meat when it goes into the oven/dehydrator.
- Once your meat is completely dry, it's time to grind it into a powdery consistency. This can be done with a mortar and pestle or in a blender/food processor.
- Once your ground meat has reached the desired consistency, mix together equal parts of rendered fat and ground meat in a bowl until fully combined.
- Then add your desired amount of dried fruit/berries (amounts will vary based on preference) to the mixture and continue mixing until all ingredients are evenly distributed throughout the mixture.
- The final step is to form small balls out of your mixture using your hands—these will be what you ultimately eat!
Your homemade pemmican should last up to 10 years without refrigeration if stored properly in an airtight container away from direct sunlight and moisture sources such as humidifiers or water heaters.
4. Native American Fry Bread
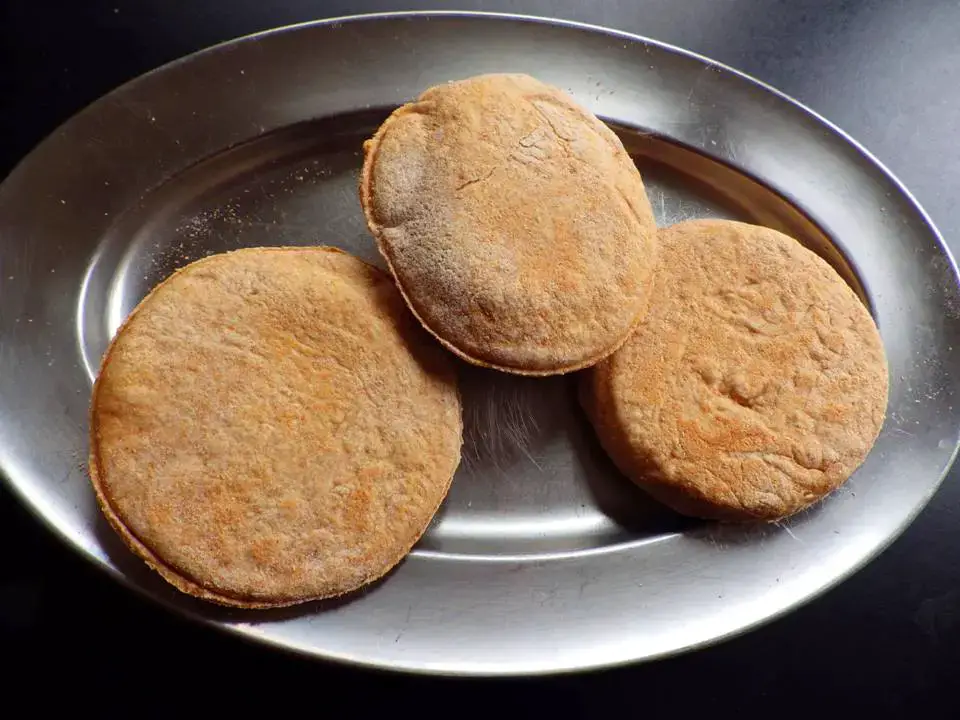
Native American fry bread is an iconic and delicious dish with centuries-old ties to some of the continent’s oldest cultures. Made of simple ingredients like flour, baking powder, salt, and water, this traditional recipe has been passed down through generations and served hot as hearty comfort food.
Ingredients:
- 2 cups all-purpose flour
- 1 teaspoon baking powder
- ½ teaspoon salt
- ¼ cup vegetable oil
- ⅔ cup lukewarm water
- Vegetable shortening/oil, for frying
Directions:
- Start by combining the flour, baking powder, salt, and oil in a large bowl. Next, add the lukewarm water and mix everything together until it forms a soft dough.
- Knead the dough on a lightly floured surface until it is smooth and elastic (about 5 minutes).
- Cover the dough with a damp cloth and let it rest for about 15 minutes.
- After resting, divide the dough into 8 equal parts and shape each piece into rounds about ¼ inch thick.
- Heat about ½ inch of oil or shortening in a large skillet over medium-high heat until it reaches 350°F (175°C).
- Gently place one round at a time into the hot oil/shortening and cook until golden brown on both sides (about 1-2 minutes per side).
- Remove from pan with tongs or slotted spoon onto paper towels to drain excess grease before serving warm. Enjoy!
5. Biltong
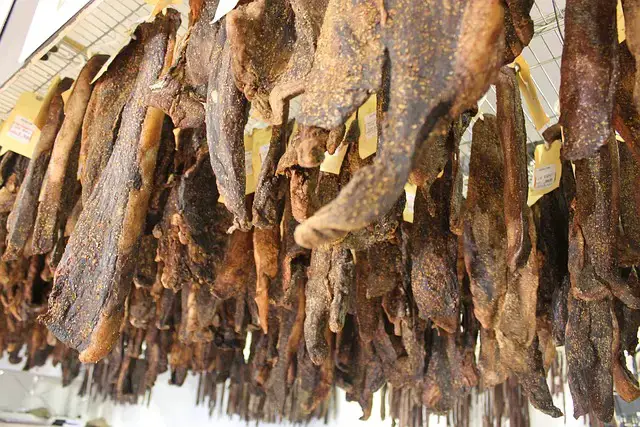
Biltong is one of the best survival recipes to know, as it has long been a favorite snack among outdoorsmen and adventurers that allows them to be adequately sustained on their expeditions.
Together, these ingredients create a truly flavorsome meat jerky full of protein without artificial preservatives or additives, which makes it ideal for long treks in the outback. Furthermore, with only minimal preparation required for biltong before you head out into the wilderness, it's easy to see why so many adventurers consider it an essential part of their kit.
Ingredients:
- 2 lbs of lean beef (sirloin or round steak)
- 1/4 cup Worcestershire sauce
- 3 tablespoons white vinegar
- 2 tablespoons kosher salt
- 2 teaspoons ground black pepper
- 2 teaspoons sugar
- 1 teaspoon garlic powder
- 1 teaspoon allspice
Directions:
- First, you will need to prepare the meat by trimming off any visible fat and cutting into slices that are no more than one inch thick.
- Then, combine the Worcestershire sauce, white vinegar, salt, pepper, sugar, garlic powder, and allspice in a shallow dish until evenly mixed.
- Place the pieces of meat into the marinade mixture and let sit for two hours in the refrigerator.
- After two hours have passed, remove the meat from the marinade mixture and pat dry with paper towels.
- Hang each piece of meat on hooks or drying racks in an area with plenty of air circulation.
- Let dry for at least three days until it reaches your desired level of hardness; then slice against the grain into thin strips before enjoying!
6. Cornmeal Mush

Cornmeal mush is one of the oldest, simplest, and most filling survival recipes. Rich in carbohydrates and vitamins, it is easy to make with few ingredients.
Sprinkle it with butter before serving it as an added flavor boost. As such a versatile meal option for when supplies are scarce, it's no wonder cornmeal mush ranks among the best survival recipes you can make!
Ingredients:
- 1 cup cornmeal
- 1 tsp salt
- 4 cups boiling water
Directions:
- Once you have all your ingredients together, it's time to get cooking! Start by bringing your 4 cups of water to a boil in a medium-sized saucepan over high heat.
- Once the water is boiling rapidly, reduce the heat to low and gradually add in your cup of coarsely ground cornmeal while stirring continuously with a wooden spoon or whisk.
- Be sure to stir constantly as you add the grain to avoid clumping or lumps forming in your mixture. This process should take about 5 minutes or less.
- When all the cornmeal has been added and stirred into the boiling water, reduce the heat even further so that it simmers gently (you don't want it bubbling too vigorously).
- Add in your teaspoon of salt and continue stirring periodically over low heat for around 25 minutes (or until most of the liquid has been absorbed).
- Remove from heat and let cool for about 10 minutes before serving hot in individual bowls.
7. Bannock
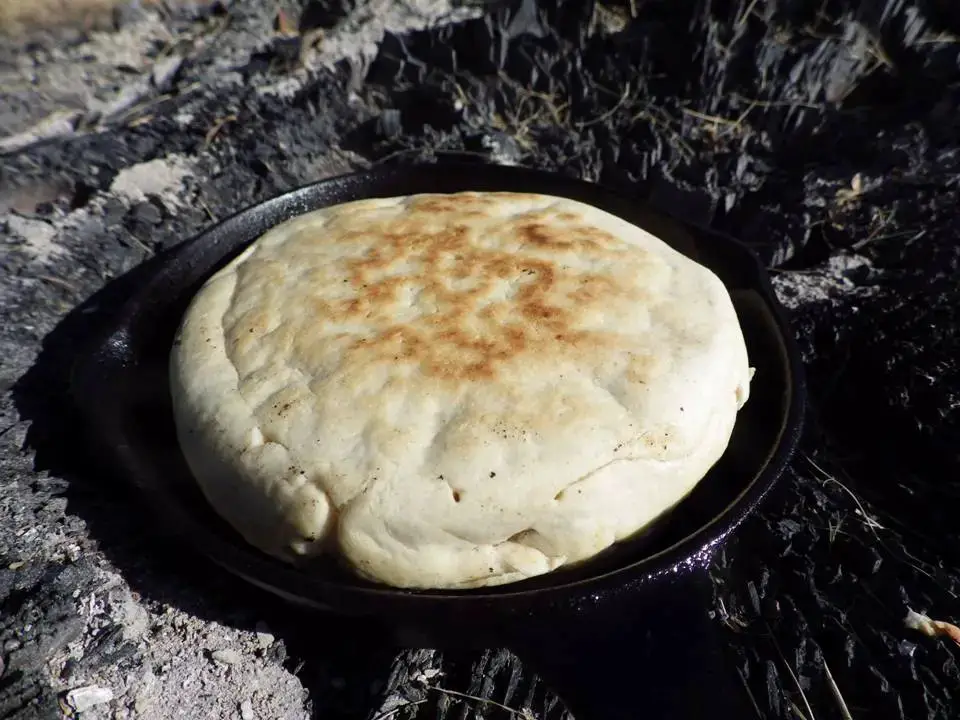
Bannock is a simple and delicious survival food that you can cook over a fire or on your stove. It's an easy and wholesome way to get nourishment when you are stuck in the wild or just don't have access to other foods.
The versatility of bannock makes it one of the best survival recipes to know since it can be served with virtually any type of topping, from meat to fruit preserves–whichever wet or dry ingredients you may find along the wilderness trail.
Ingredients:
- Flour
- Baking powder
- Salt
- Bacon grease or lard
Directions:
- Start by combining the dry ingredients in a bowl—flour, baking powder, and salt—and mix them together until they are evenly distributed throughout the bowl.
- Then add your fat (lard/butter/oil) to the mixture and use your hands or a fork to mix it until it resembles coarse crumbs.
- Add enough water or milk so that everything comes together into a workable dough ball.
- If necessary, add additional liquid as needed until it becomes workable; however, do not add too much liquid, as this will cause the finished product to be too dense or heavy when cooked.
- Once everything is mixed together, turn out onto a lightly floured surface and knead until smooth (about 5 minutes).
- Then shape it into either one large round loaf or several smaller loaves, depending on how many people you are trying to feed with your bannock creation!
- Place on an ungreased baking sheet or skillet and place in a hot oven for approximately 20-30 minutes until golden brown on top – then serve warm with butter, honey, or jam.
8. Red Beans and Rice

Red beans and rice is an inexpensive and delicious recipe that makes for an ideal survival recipe. It requires just a short list of ingredients, most of which can be kept stored in your kitchen pantry. The dish itself is filling, especially if served with a side of cornbread or jalapeño cornbread muffins.
Not only that, but it’s packed with proteins, minerals, and vitamins, thanks to the red beans.
Cooking it up is also incredibly simple – all you need is a pot and some spices to bring out the flavor. This means even with minimal cooking equipment, you can still enjoy a satisfying meal.
Ingredients:
- 1 lb dried red beans
- 1 large onion
- 4 cloves of garlic
- 2 tbsp olive oil or butter
- 2 tbsp ketchup
- 1 tsp cumin
- Salt and pepper to taste
- 2 cups of cooked rice
Directions:
- Cover the beans with cold water until they are completely submerged – cover the pot and leave the beans to soak overnight.
- The next day, drain the soaking liquid from the pot.
- In a medium-sized pot over medium heat, add your olive oil or butter and chopped onion. Sauté until soft, then add your garlic cloves.
- After another minute or so, add your soaked beans along with two quarts of fresh water – bring everything up to a boil before reducing the heat to low-medium.
- Simmer for about an hour and a half, stirring occasionally until the beans are tender but not mushy (add more water as needed).
- Finally, add your ketchup along with cumin and seasonings – simmer for another five minutes before removing from heat. Serve over cooked white rice!
9. Pinole
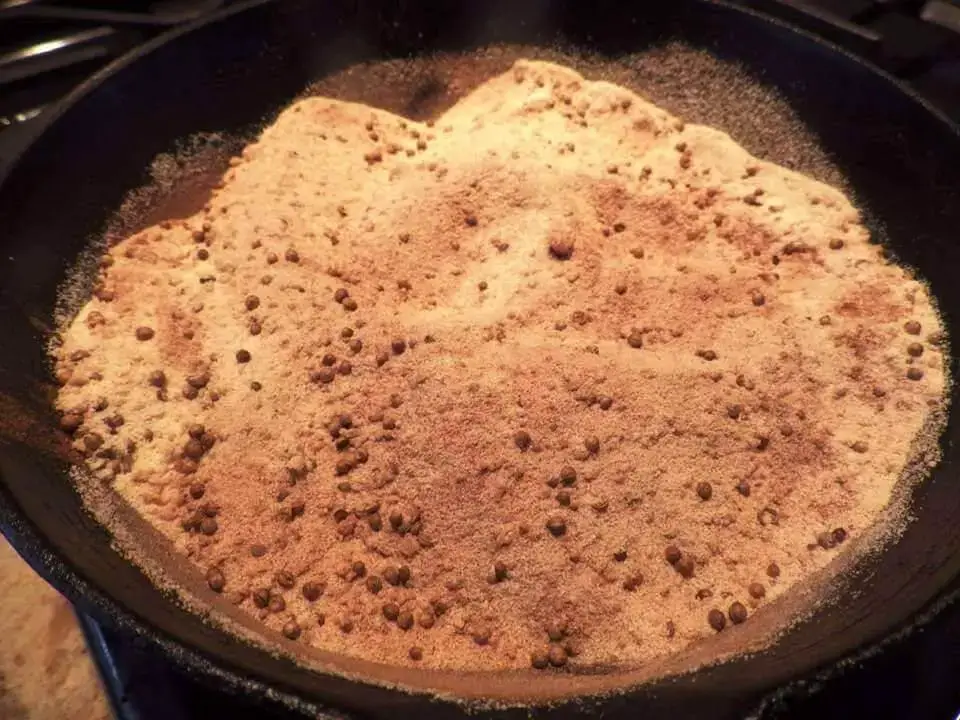
Pinole is a delicious and nutritious survival meal that can easily be made with basic ingredients. It consists of finely ground maize, traditionally toasted in a pan with some oil. The end result is packed full of flavor and provides your body with some much-needed carbs and proteins for energy.
Pinole is one of the best survival recipes to know because it has fantastic nourishing properties, can be made anywhere on the go, and doesn't require any refrigeration. Plus, it's a great way to use up any leftover grains you may have around the house.
Here's a simple recipe to try.
10. Dumplings
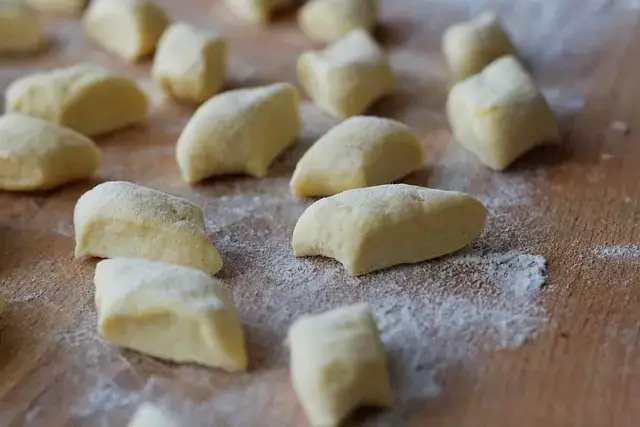
If you're looking for an easy and tasty meal that you can make with limited resources, then dumplings are a perfect choice! Not only are they relatively simple and quick to prepare, but their versatility allows you to use up whatever odds and ends of ingredients you may have on hand.
Generally, all that's needed are some flour, fat such as butter or lard, and any kind of filling like cooked vegetables or ground meats. Dumplings can be boiled like Chinese jiaozi or Russian pelmeni and served with a helping of sour cream or simply fried in a pan for a tasty snack.
Ingredients:
- 2 cups of all-purpose flour
- 2/3 cup of cold water
- 1 teaspoon of salt
- 1 teaspoon of baking powder
Directions:
- Start by whisking together the flour, salt, and baking powder in a medium bowl.
- Slowly stir in the cold water until everything is combined into a dough. Knead the dough for 5-7 minutes until it is soft and smooth.
- Divide the dough into 8 equal pieces and roll each piece out into thin circles (about 6 inches across). If needed, add more flour to prevent sticking.
- Place about 1 tablespoon of your favorite filling in the center of each circle. You can use cooked chicken or beef, vegetables like carrots or cabbage, or even sweet fillings like apples or berries!
- Fold each circle in half over the filling to form a semi-circle shape. Pinch edges together with your fingers to seal in the filling and prevent any leakage during cooking.
- Bring a pot of salted water to a boil over medium heat on your stovetop or campfire, then carefully drop dumplings into boiling water one at a time using tongs or a slotted spoon (they should be done once they float up to the surface).
- Serve hot!
11. Corn Dodgers

Corn dodgers are a classic southern dish that can be traced back to early settlers and is still enjoyed today for its simple, yet delicious flavor.
It's one of the best survival recipes to know due to its portability and ability to work with whatever ingredients may be available in your pantry or in the wild. Not only do they make a great side dish, but corn dodgers are also a fantastic breakfast on their own with a little bit of honey.
Ingredients:
- 2 cups finely ground cornmeal
- 1 teaspoon salt
- 1/2 cup lard or vegetable shortening
- 1/2 cup plus 2 tablespoons water
- Vegetable oil, for frying
Directions:
- In a medium bowl, mix together the cornmeal and salt. Add in the lard or vegetable shortening and mix with your hands until it resembles coarse crumbs. Slowly add in the water while stirring with your hands until the dough forms a ball. The dough should be slightly sticky but not too wet or dry.
- Roll out the dough on a lightly floured surface into a rectangle about ¼ inch thick. Cut into 3-inch rounds using either a biscuit cutter or glass cup. Using your fingers, press an indentation into each round of dough in order to form a pocket for the filling.
- Fill each round of dough with about one tablespoon of filling (see below). Fold up each side around the filling so that it creates an oblong shape resembling an envelope; pinch together any open ends so that the filling doesn’t leak out during cooking.
- Repeat this process with all of your rounds of dough until they are all filled and sealed shut securely.
- Heat enough vegetable oil in a large skillet over medium-high heat until it reaches 375 degrees F (190 degrees C).
- Carefully place two or three filled rounds at a time into hot oil; fry for about 3 minutes per side until golden brown and crispy on both sides; adjust heat if necessary to prevent burning or over-browning.
- Remove from oil with a slotted spoon and drain on paper towels before serving warm with honey butter or syrup as desired!
12. Pan Fried Pork Chops
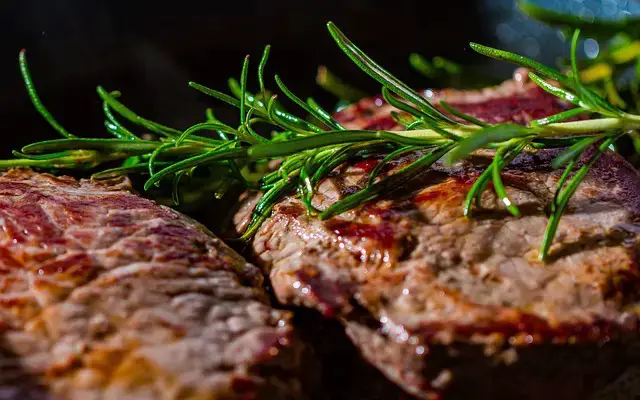
Made with just a few pantry staples, it's simple to make this meal even in difficult times.
Just fry pork chops in oil on each side over medium heat for about six minutes, until browned and cooked through.
Then remove from the pan, add a sprinkle of your favorite herbs and seasonings, and let cool.
This creates wonderfully crunchy golden-brown chops that work as a standalone dish or can be served alongside other ingredients.
Here's an easy recipe to try.
13. Potato Cakes

Potato cakes are an all-time favorite when it comes to survival recipes, as they are simple and don't require too many ingredients. This dish is great as a breakfast meal or even as a snack in between meals.
Here's a basic recipe.
14. Oxtail Potjie
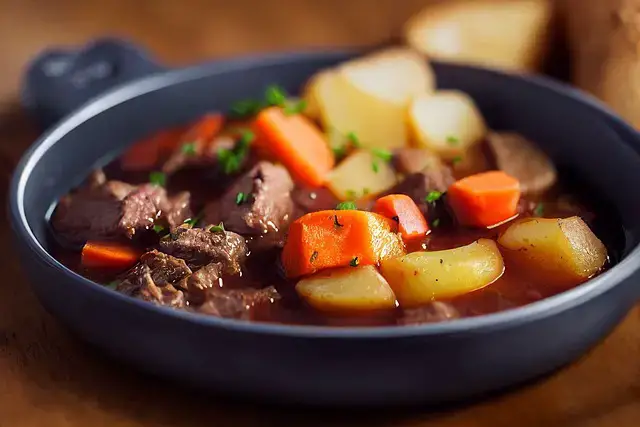
Oxtail potjie is an incredibly hearty, flavorful dish that is surprisingly easy to make.
The traditional South African recipe originated as an ingenious way for travelers to cook with minimal ingredients and survive in the wilderness.
Best yet, this recipe requires little tending while it cooks in a large pot over an open fire, making it one of the best survival recipes that anyone can make.
Here's an easy recipe to get you started.
15. Fish on a Stick

To make this favorite outdoor treat, you'll need just a few simple ingredients: fish filets or your preferred type of seafood, skewers, and your favorite marinade.
Here's a simple recipe.
16. Vetkoek

Vetkoek is a dish originating from South Africa that is loved by many people all over the world. It's a great survival recipe because you can make it with the simplest of ingredients, most of which are likely already in your pantry or fridge.
Here's a simple recipe.
17. Rusks
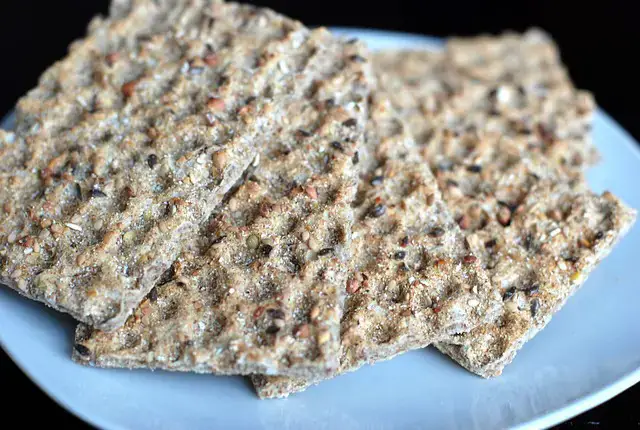
Rusks, also known as hardtack or ship’s biscuit, are a traditional sea-faring staple. Highly nutritious and simple to make, they’re the perfect food for any sailor on a long voyage – or even those hoping to prepare for the future.
Best of all, the core ingredients used to make rusks require virtually no prep time: All you need is some flour, water, salt, and baking soda. Combined together in a bowl, these ingredients are shaped into dough and then baked until dry and crunchy.
Here's a recipe.
18. Buffalo Jerky
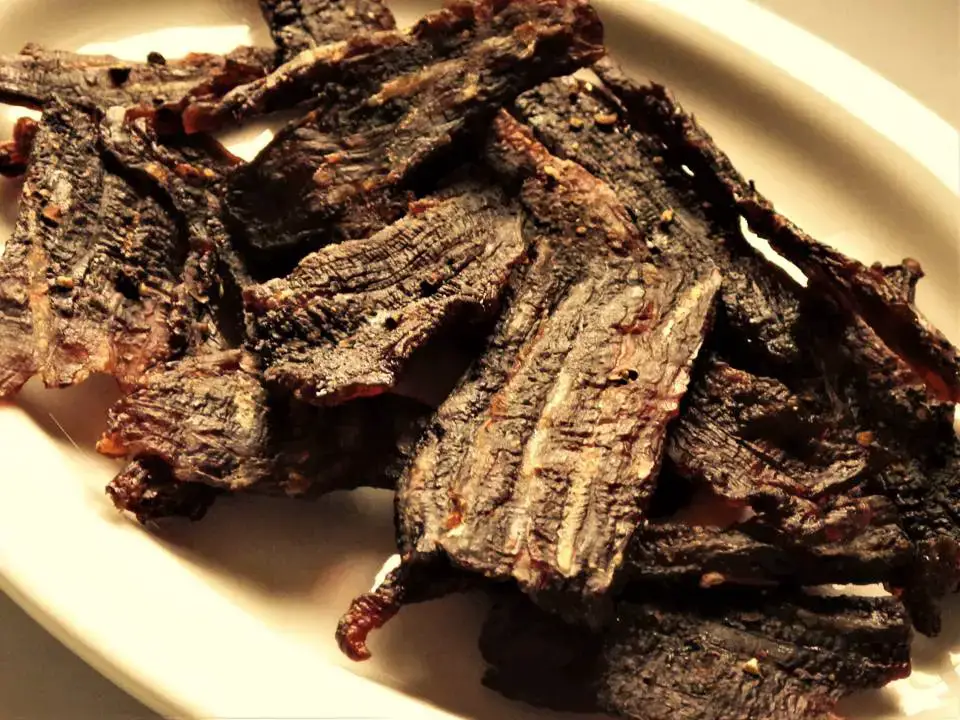
Buffalo jerky is an ideal survival recipe – it's easy to make, highly nutritious, and will last for a long time.
Here's a recipe.
19. Pioneer Bread
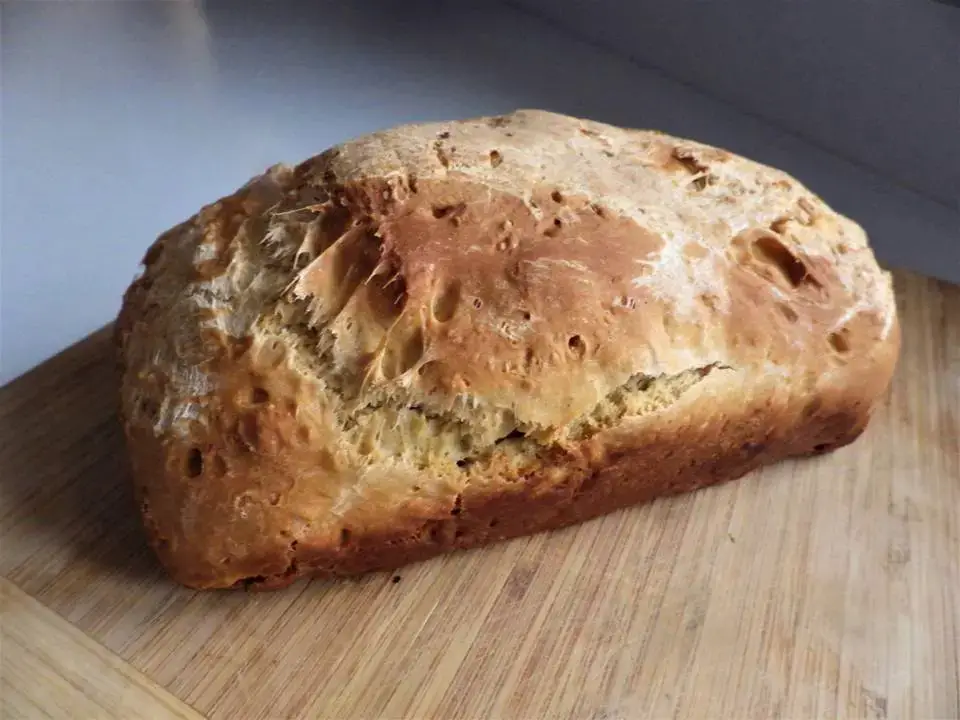
Pioneer bread is an excellent choice for a survival recipe that is delicious and nutritious. Not only does it require minimal ingredients and preparation, but it also lasts for weeks with no refrigeration needed.
Here's an easy recipe.
20. Johnny Cakes
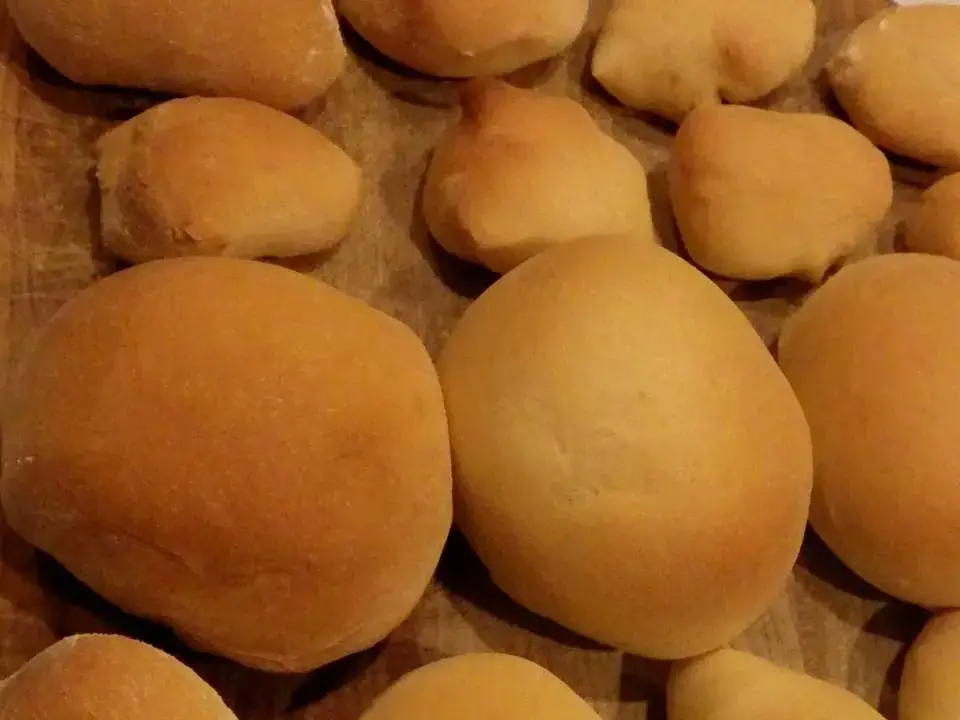
Furthermore, Johnny Cakes have the advantage of requiring no special cooking equipment; they can be baked in a pan over an open flame, so you don't even need an oven!
A traditional New England favorite, this delicious dish is as versatile as it is simple to make – all you need are flour, sugar, and water or milk. Most ingredients can be found in any kitchen pantry, and the preparation time is minimal.
Ingredients:
- 1 cup of white cornmeal
- 1 teaspoon of baking powder
- 3 tablespoons of sugar
- ½ teaspoon of salt
- 2 tablespoons of melted butter
Directions:
- Start by mixing together all the dry ingredients in a bowl.
- Then melt the butter and slowly mix it into the dry ingredients until everything is evenly blended. If necessary, add small amounts of milk or water until the batter has a thick but pourable consistency.
- Heat some oil or bacon fat in a skillet over medium-high heat and drop spoonfuls of batter into it.
- Cook each side until golden brown before flipping them over and repeating on the other side.
- Serve hot with butter or honey.
21. Venison Stew
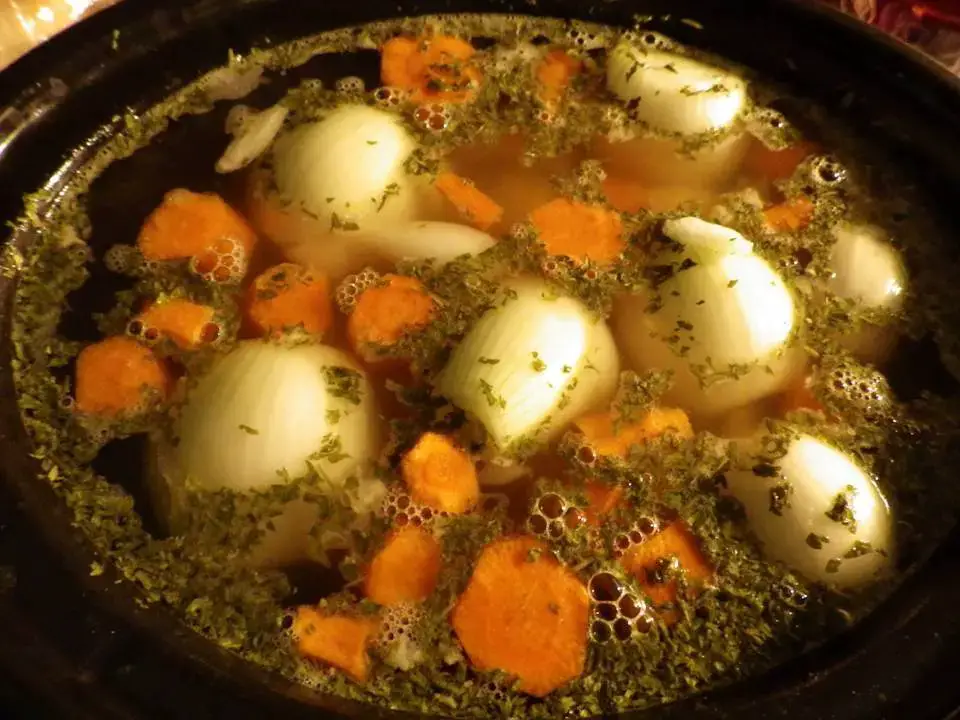
Venison stew is an incredibly nutritious and delicious survival recipe – it's packed full of vitamins and minerals that are essential to human health. As a result, when you find yourself in a situation where you must rely on food sources other than grocery stores or restaurants, venison stew is one of the best recipes you can make.
You can easily prepare venison meat by simmering it with some simple ingredients like onions, potatoes, carrots, garlic, red wine, or broth – any combination you desire will do!
Making the stew allows the gamey flavor of the meat to be softened by the depth of flavors from all the elements in perfect harmony.
Venison stew is definitely one of the best dishes for surviving challenging times because its versatility allows for almost anything to be added. This makes it both nourishing and satisfying.
Ingredients:
- 2 pounds of cubed venison
- 2 tablespoons of olive oil (or other cooking oil)
- 1 large onion (diced)
- 2 cloves of garlic (minced)
- 1 teaspoon of dried thyme leaves
- 2 bay leaves
- 1 tablespoon of tomato paste
- 4 cups of beef broth or stock
- 4 carrots (sliced into half-inch pieces)
- 2 medium potatoes (cut into cubes)
- 1 cup of frozen green peas
- Salt and pepper to taste
Directions:
- First, heat the oil in a large pot over medium-high heat. Add the diced onion and cook until softened.
- Next, add the garlic and cook for another minute before stirring in the cubed venison. Cook until the venison is lightly browned on the outside.
- Then add the thyme leaves, bay leaves, tomato paste, and beef broth or stock to the pot; bring the mixture to a boil before reducing the heat to low. Cover with a lid and simmer for 1 ½ hours or until meat is tender.
- Add carrots and potatoes to the pot. Cover again with a lid and simmer for an additional 40 minutes or until vegetables are tender.
- Stir in frozen green peas and season with salt and pepper if desired.
- Cook for another 10 minutes before serving.
22. Dried Fruit
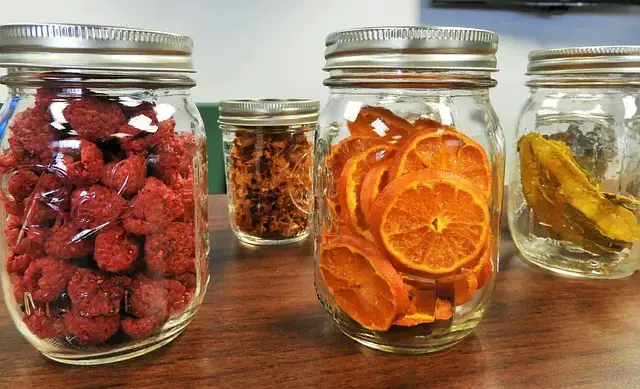
Dried fruit is a great survival recipe to know because it’s simple, nutritious, and can last a long time. Making your own dried fruit is an easy process – you can use an oven, dehydrator, air fryer, or even the sun!
Ingredients:
- Fruit of your choice (apples, apricots, bananas, berries, etc.)
- Sugar (optional)
- Citric acid (optional)
- Salt (optional)
Directions:
- Choose any type of fruit that you would like to dry. Wash it off and cut it into small slices or cubes. For some fruits, such as apples, it’s best to soak them in water with a tablespoon of lemon juice or citric acid for about 15 minutes before drying them. This will help preserve their color and prevent browning. If desired, you can also sprinkle sugar and/or salt onto the fruit before drying it.
- Preheat the oven to 150-175 degrees Fahrenheit, depending on what type of fruit you are drying and how moist they are. The lower the temperature, the slower the drying process will be, but it will also help prevent burning or over-drying the fruit.
- Place the sliced or cubed fruit onto baking sheets lined with parchment paper or silicone mats. Be sure that there is plenty of space between each piece so that air can circulate freely around them as they dry out in the oven.
- Bake for 2-10 hours, depending on how thickly sliced/chopped your pieces are – thicker pieces will take longer than thinner ones! Check periodically during the baking time to make sure that they aren't burning or over-drying.
- Once done baking, allow your dried fruit pieces to cool completely before storing them in an airtight container at room temperature for up to 6 months! You can also freeze dried fruits for up to one year if desired.
23. Peasant Bread
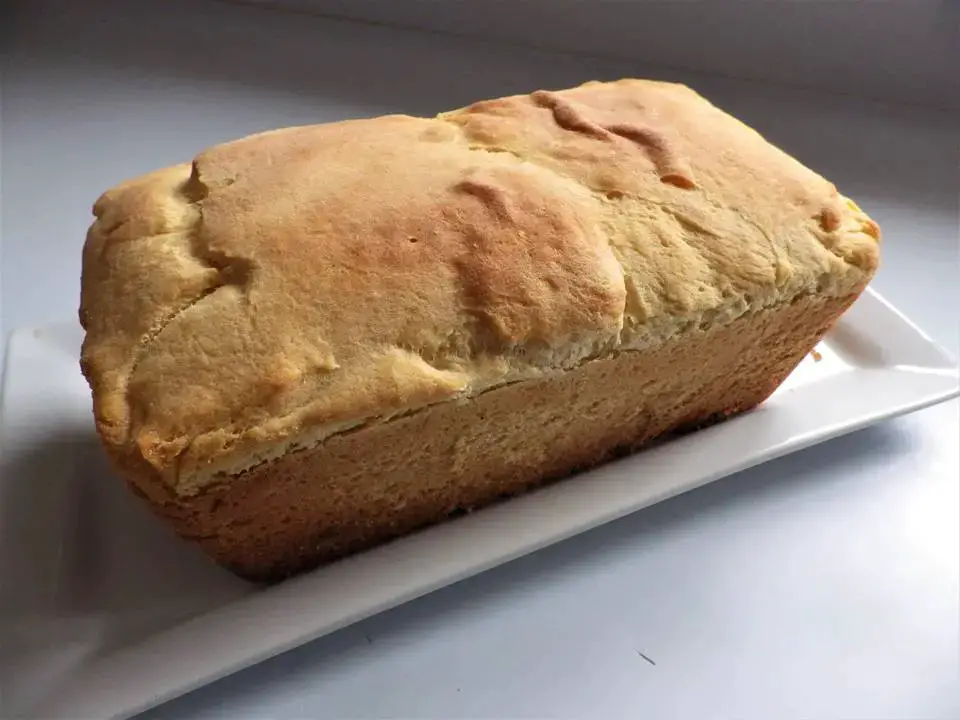
Peasant Bread is one of the easiest – and tastiest – recipes for survival. Not only does it require only five simple ingredients, but you don't even need an oven!
Apart from the good taste, this bread is great for use in emergency scenarios because it stores very well and is almost impossible to spoil, as long as you keep it away from moisture. It can last up to a week on countertops and months if you refrigerate or freeze it.
Ingredients:
- All-purpose flour
- Baking powder
- Salt
- Butter or oil
- Warm water
- Honey
Directions:
- Preheat your oven to 350 degrees Fahrenheit (180 degrees Celsius). This should take about 10 minutes.
- In a medium bowl, mix together 2 cups of all-purpose flour with 1 teaspoon of baking powder and ½ teaspoon of salt. You can adjust the amount of salt depending on how salty you like your bread.
- Cut 2 tablespoons of butter or oil into the dry ingredients until it resembles coarse crumbs. If you are using honey or sugar, add it now as well.1 tablespoon is sufficient for a mild sweetness, but feel free to adjust accordingly based on your preference.
- Slowly pour in 1 cup of warm water while stirring the mixture with a wooden spoon until it forms a dough ball that is slightly sticky but not wet.
- Knead the dough on a lightly floured surface for 3 minutes until it is smooth and elastic, then shape it into a loaf roughly 8 inches long by 4 inches wide by 2 inches high and place it onto an ungreased cookie sheet lined with parchment paper
- Bake at 350°F (180°C) for 25 minutes until golden brown, then remove from oven and allow to cool before slicing and serving
24. Hasty Pudding

Hasty pudding is one of the best survival recipes to know because it can be prepared quickly (hence the name!) and with just a few ingredients.
Here's an easy recipe.
25. Old Fashioned Stack Cake
This delicious treat takes minutes to make, requires very few ingredients, and is sure to nourish body and soul.
Ingredients:
The ingredients needed to make the perfect stack cake are simple and can easily be found in your pantry or local grocery store. Here’s what you need:
- 2 cups all-purpose flour
- 1 teaspoon baking powder
- 1/2 teaspoon baking soda
- 1/4 teaspoon ground cinnamon
- 1/4 teaspoon salt
- 3/4 cup butter, softened
- 2 cups firmly packed light brown sugar
- 3 eggs
- 3/4 cup buttermilk or regular milk
Directions:
- Preheat the oven to 350°F and lightly grease two 8-inch round cake pans.
- In a medium bowl, combine flour, baking powder, baking soda, cinnamon and salt; set aside.
- In a large bowl, cream together butter and sugar until fluffy. Add eggs one at a time while mixing on low speed until combined into the mixture.
- Add half of the dry ingredients to the wet ingredients and mix until just blended then add buttermilk (or regular milk) and mix until combined. Add remaining dry ingredients and mix until just blended together (do not overmix).
- Divide batter evenly between prepared pans and spread out into an even layer with a spatula or spoon (the batter will be thick). Place pans in a preheated oven and bake for 25 minutes or until golden brown on top (test with a toothpick if necessary). Let cool completely before assembling the stack cake.
- For the filling, combine melted butter, brown sugar, and cinnamon in a small bowl; set aside.
- When the cakes have cooled completely, begin assembling your stack cake by spreading ½ of the filling onto one side of each cooled cake layer (make sure they are facing up so that they are easier to spread).
- Place the first layer on the serving plate (filling side down), then place the second layer on top (filling side up). Spread the remaining filling on top of the second layer, then sprinkle with walnuts if desired. Serve immediately or cover tightly with plastic wrap if stored overnight before serving.
Final Thoughts
Being able to cook up delicious meals with nothing more than what you have on hand is an incredibly valuable skill when it comes time for a disaster situation. Even if disaster never strikes, these recipes can be used in day-to-day life. They don't cost much, and they're delicious!
Like this post? Don't Forget to Pin It On Pinterest!
You May Also Like:


