

Estimated reading time: 8 minutes
If you live on any kind of land, it is highly possible that you enjoy your own farm-fresh eggs. Raising hens is a great way to ensure that you always have a steady supply of protein on the homestead.
While most homesteaders store eggs at room temperature or in the fridge, there will come a time when you have too many eggs. Finding ways to use and preserve eggs is a great way to prolong their use as well as enjoy a tasty snack.
While there are different ways to preserve eggs, pickling them is one of the easiest ways to prolong their use. Pickling is a time-honored tradition that involves using vinegar or brine to extend the food.
It takes a few weeks for the eggs to soak in the brine, and then you can enjoy them for 3-4 months as long as the eggs are fully submerged in the liquid. Keep reading to learn how to pickle eggs.
Want to save this post for later? Click Here to Pin It On Pinterest!
First Step: Find a Recipe
One of the best parts about pickling eggs is that you can mix up the recipe in terms of flavor and ingredients you have on hand. As long as you make sure that there is at least 50% vinegar involved, you can choose different things to add or subtract.
I chose this pickled egg recipe because it looked relatively easy, and I (thought) I had everything it called for. It turns out that I didn’t, so I did what a homesteader does best and improvised!
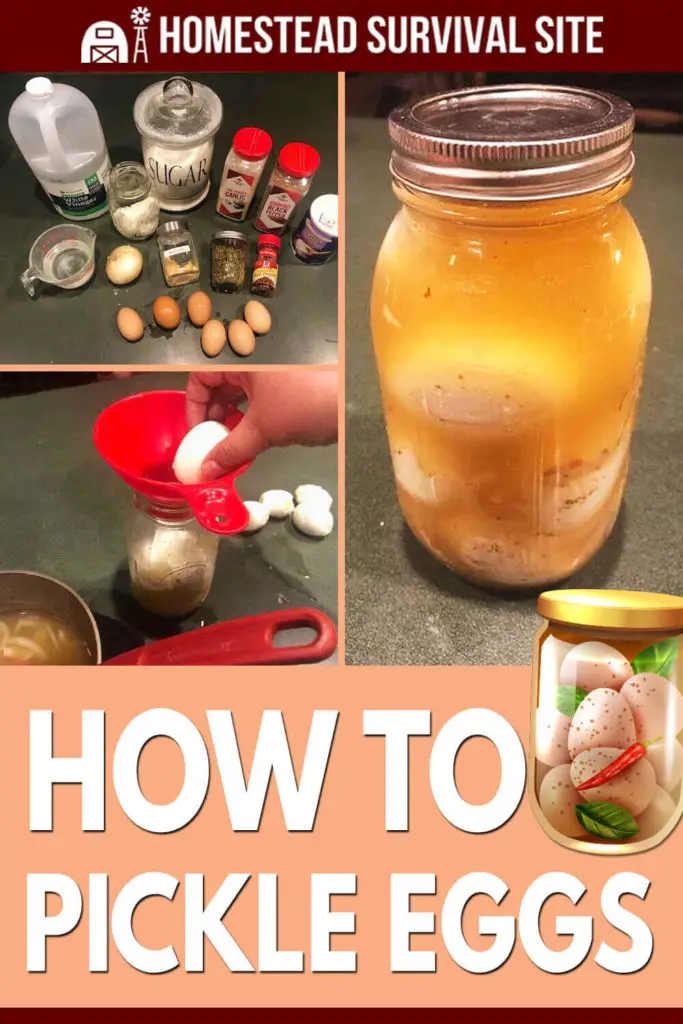
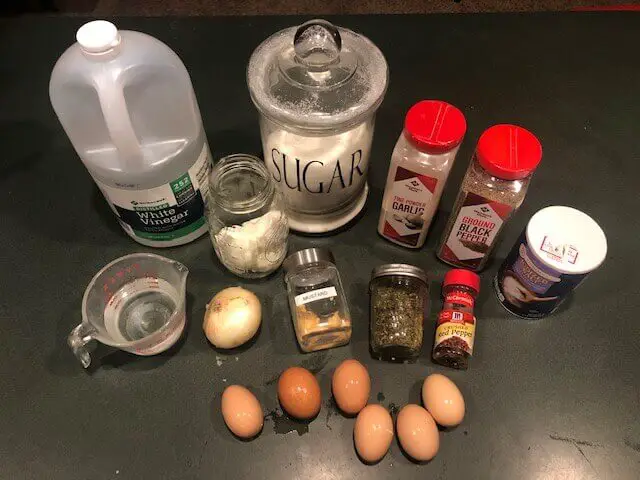
Second Step: Gather the Ingredients
Choosing and substituting ingredients is an easy way to customize your pickled eggs to whatever your family prefers. Mine doesn’t like dill very much, so I just didn’t use it. I also have homegrown garlic processed with olive oil, and I wasn’t sure how that would do in the brine. So, I used garlic powder instead.
If your family likes heat, you can add jalapeno or other peppers as well to the mix.
Ingredients Needed:
- 12 hard-boiled eggs (peeled and cooled)
- 2-3 sprigs of fresh dill
- 1 clove garlic
- 3 cups white vinegar
- 1 cup water
- 1 teaspoon of coarse salt (I used table salt)
- 1 large onion, thinly sliced
- 1 bay leaf (I was out of these)
- ⅓ cup sugar
- 4 teaspoons pickling spices
You can use premade pickling spices, but I have never been a fan of the premade stuff. I grabbed the following spices from my cupboard and made my own pickling spice concoction. Use whatever flavors and spices your family likes!
- 1 teaspoon of dry mustard
- 1 teaspoon of garlic powder
- ½ teaspoon of black pepper
- ½ teaspoon of red pepper flakes
- 1 teaspoon of dried basil
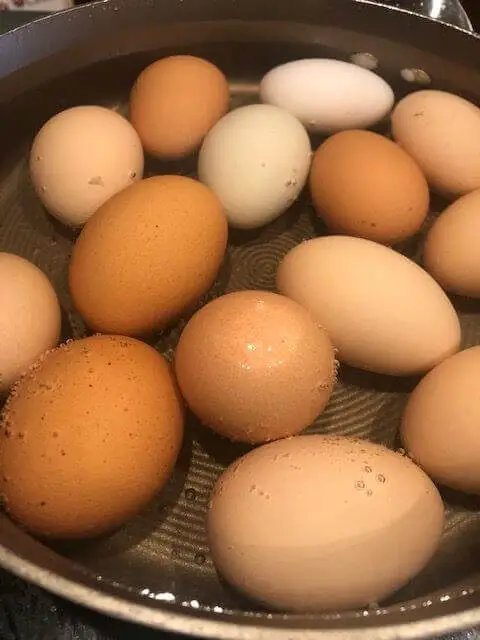
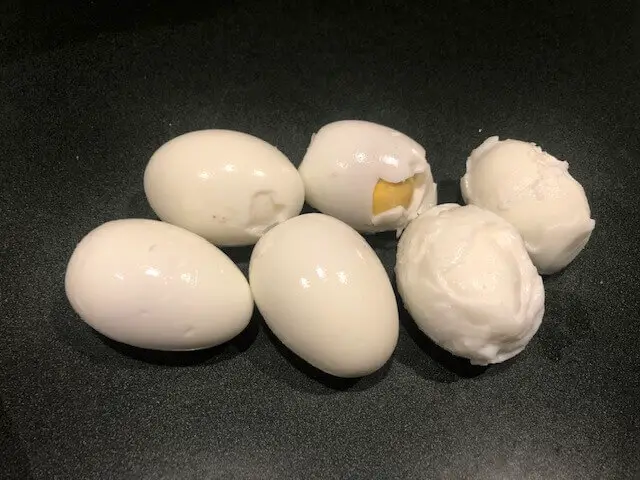
Before you start the pickling process, it is important to hard boil the eggs and allow them to cool enough to peel them. Farm fresh eggs are the best for many reasons, but they often don’t peel very well. I got lucky and peeled some perfectly while others turned out looking rough.
While perfectly peeled eggs would look nicer in the jar, the ugly ones will work just as well.
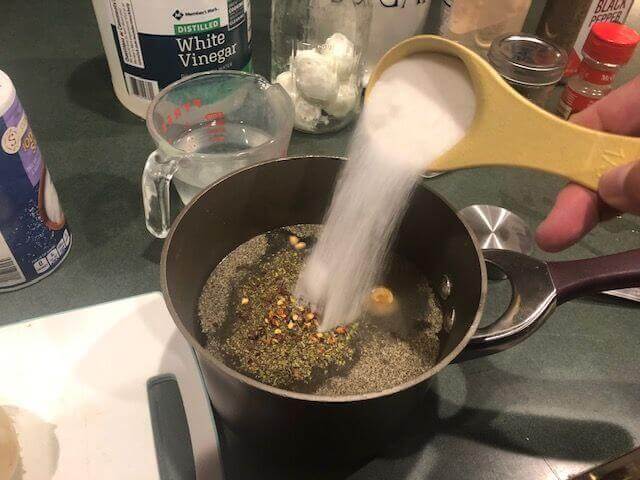
Third Step: Create the Brine
The recipe that I used stated to place the garlic clove, dill, and a few hard-boiled eggs in the bottom of a clean quart mason jar. Then I combined the rest of the ingredients in a small pot and brought it to a boil on the stove.
I allowed the mixture to simmer for 5 minutes and then took it off the heat.
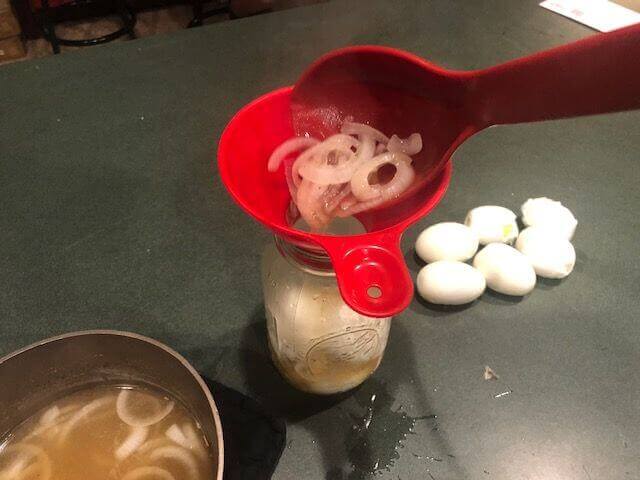
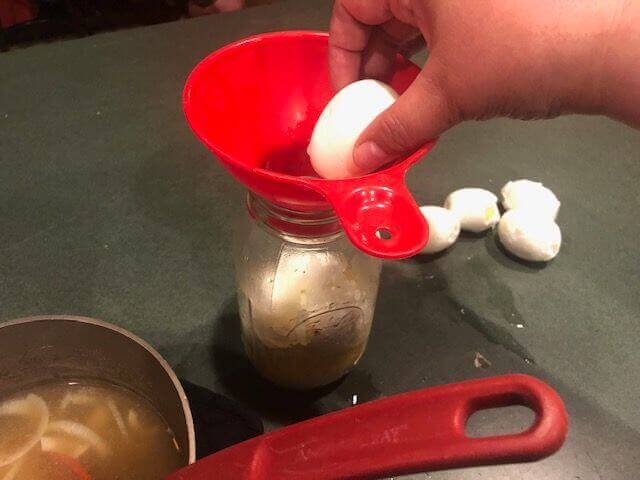
Step Four: Fill the Jar
With the bottom of the jar partially filled with garlic, dill, and a few eggs, ladle the brine into the jar until the eggs are covered. Then add in a few more hard-boiled eggs and repeat the process until the jar is full. It is beneficial to use a canning funnel, but I still made a mess, as you can spot here!

Step Five: Top the Jar and Store
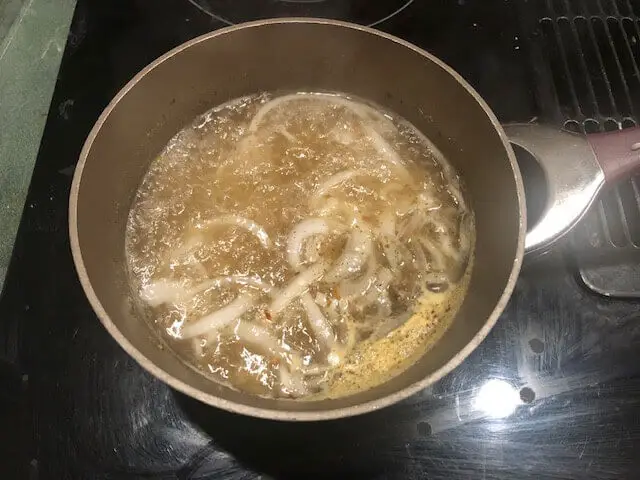
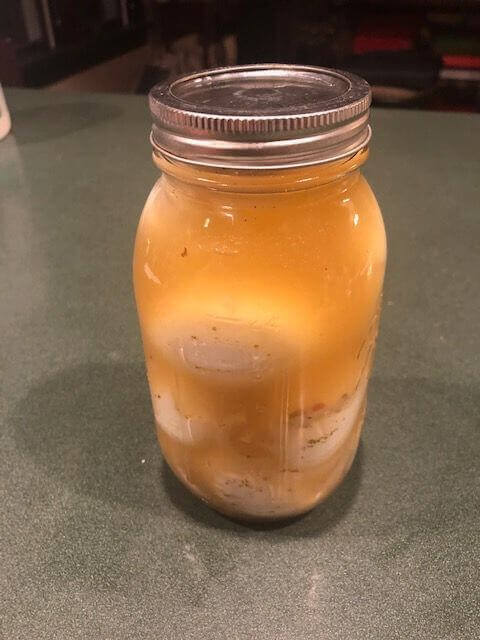
I fit ten large eggs into a quart jar and probably could have packed another one into the jar if needed. My brine turned out to be quite yellow due to the dry mustard that I used. When using mustard seeds, the brine would be clear.
You can also use beet juice in the brine, which would give the jar a beautiful light purple color and add some sweetness to the mix.
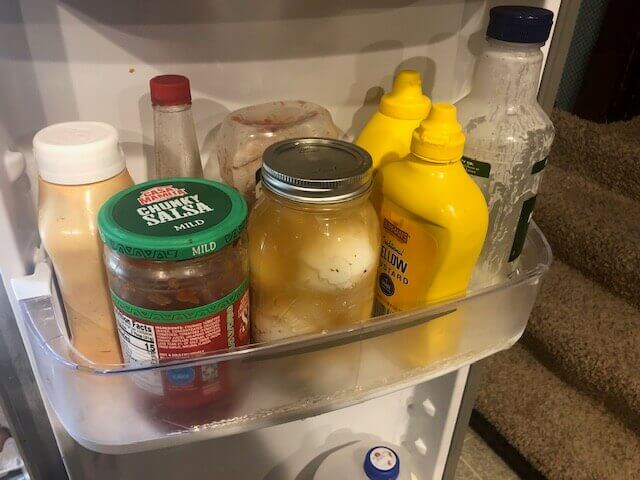
I topped the jar with a canning lid and band and then popped it into the fridge. The jar needs at least one week to infuse the eggs with all of the vinegar and spices. A quart jar fits well in the fridge door, and the jar can be opened whenever you need a quick and healthy snack.
A Note About Canning Pickled Eggs
There is a lot of controversy about canning pickled eggs. While some homesteaders can homemade pickled eggs to create shelf-stable food, it is not recommended by the USDA or the National Center for Home Food Preservation. Always use caution when canning your own food as botulism is a real danger that could cause harm or even death.
Pickling eggs is a great way to store eggs for 3-4 months in the refrigerator. The acidic qualities of the vinegar and brine are healthy as well. Remember that you can pop open the lid multiple times as long as the brine covers the eggs inside.
Enjoy pickled eggs as a quick snack, salads, or deviled. Try pickling your eggs today to learn this easiest way to preserve eggs.
Like this post? Don't Forget to Pin It On Pinterest!
You May Also Like:


Okay look you have another article on preserving eggs and it’s just a video explaining how to pickle them. Except in that video there are no ratios or measurements mentioned and the guy says you never have to refrigerate them.
I’d like to know do you have to refrigerate them or not. I’ve seen jars of pickled eggs left out on shelves or counters many times.
If you do everything properly, they should keep months without refrigeration (especially in a cool, dark location). However, you’re taking more of a risk if you do that. They will last longer and are more likely to be safe when kept in the refrigerator.