

Estimated reading time: 9 minutes
Fall is officially here, and that means pumpkin everything is about to explode. Pumpkin coffee, pumpkin cookies, and pumpkin pie – oh my! Between September and December, pumpkins are in their prime season, and learning about cooking pumpkins can lead to the most delicious recipes you’ve ever tried.
Perhaps the best thing about pumpkin is that it can be used everywhere. You can use it in breakfasts, dinners, and desserts. It's versatile, and you can substitute it for different ingredients to make a unique and delicious dish.
Want to save this post for later? Click Here to Pin It on Pinterest!
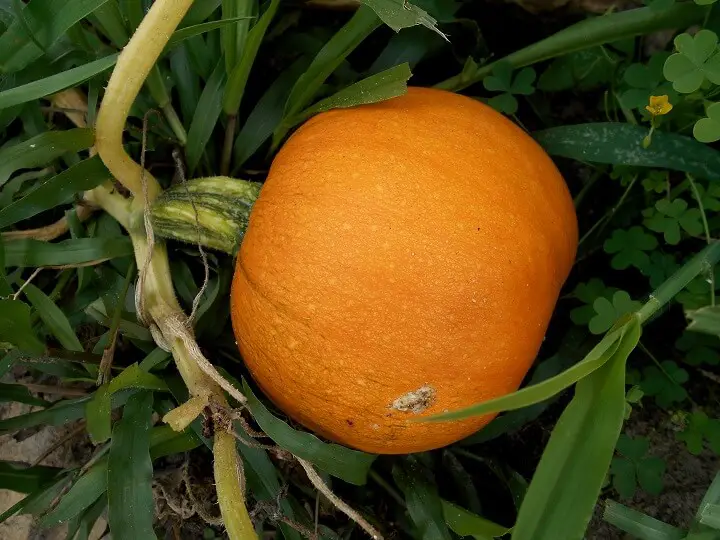
Buying The Best Pumpkins
While growing pumpkins in your garden is easy, it takes up a lot of space that you might not have to spare. Most stores and local farms start to sell pumpkins between September and October. Not all pumpkins are created equal, and not all are good for cooking and baking. You have to purchase or grow the right ones.
Those giant pumpkins you find at pumpkin patches aren't meant for cooking and baking. You can carve them, but if you try to cook with them, you'll find that they're stringy, bland, and watery.
Which Pumpkins Are Best for Cooking & Baking
Look for pumpkins that are labeled “sugar pumpkins” or “pie pumpkins.” These pumpkins are sweet, flavorful, and have a smooth-textured flesh. In some regions, these pumpkins are called eating pumpkins, and not all of the varieties look the same.
Some of these pumpkins are round or oblong. They might be orange, but other pumpkins are beige or even white. Despite the wide variety, all of these pumpkins have one thing in common – they aren’t field or decorative pumpkins.
A few specific names you might find include:
- Baby Pam
- Autumn Gold
- Ghost Rider
- New England Pie Pumpkin
- Lumina
- Cinderella
- Fairy Tail
Tips to Find the Best Pumpkins
Now that you found the type of pumpkin you want to purchase, here is how you pick the best one out of the batch.
- Look for pumpkins between four to eight pounds.
- Make sure there are no big bruises or soft spots.
- Find a pumpkin that has a well-attached brown, dry stem, which is a sign that it’s mature enough to be harvested.
- Don't judge it by its color. The hue will dull as it ages, but as long as the skin is flawless and free of bruises, the flesh is edible and sweet.
How to Store Pumpkins
One of the reasons that settlers and pioneers loved and grew pumpkins is because they have a long shelf life. Pumpkins can store for months at cold room temperature.
Don’t make the mistake of trying to store them outside, even if the temperatures are low. The excess moisture can cause the pumpkins to rot.
Instead, try storing them in a root cellar or basement. The temperatures in those locations are consistent enough to store pumpkins without any moisture or freezing problems.
Storing Cooked Pumpkin
Storing cooked pumpkin is different than storing whole pumpkins. Ideally, the cooked pumpkin should be used immediately in the recipe that you pick.
It doesn’t always work that way. If you have extra cooked pumpkin, you can store it in the refrigerator for seven days. You also can store it in freezer bags or containers in the freezer for a year.
How to Prepare Pumpkins
You can’t just take a pumpkin off the shelf and turn it into a delicious pie. You have to prepare it before cooking it, just like you do any other hard winter squash.
Tools You’ll Need
Before you start to prepare your pumpkins, make sure you have all of the tools that you’ll need. The tools that you’ll need depends on the cooking method you’ll use.
- A long chef’s knife or a serrated knife
- A large cutting board
- Metal cooking spoon
- Sheet pan
- A stockpot with a steamer insert
- An immersion blender
- Food processor
- Large metal or glass mixing bowl
- Mesh strainer or a colander
- Cheesecloth
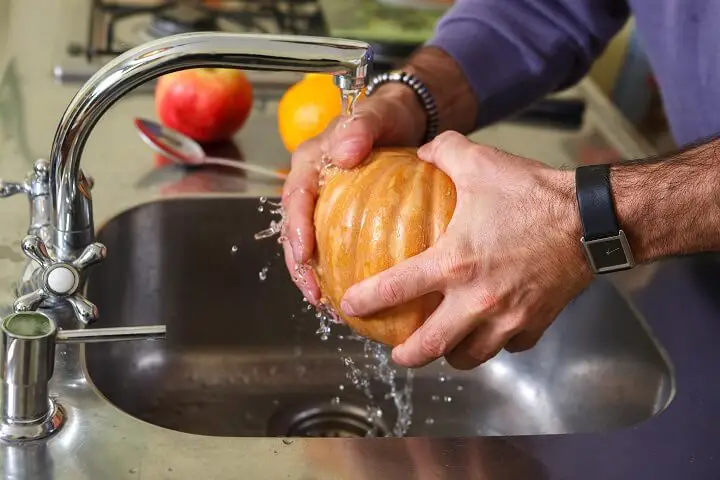
Prepping Your Pumpkins
The first thing you need to do is give the pumpkin a quick wash in cool water. Don’t go overboard and scrub the pumpkins too much since you don’t eat the outer skin. Just make sure you rinse away any dust, dirt, or debris that are on the outside of the pumpkin.
Here is how to prepare a pumpkin to be cooked.
- Trim the stem if it’s too long. You can trim it off.
- Cut the pumpkin in half and into quarters.
- Remove the seeds and scrape out the stringy portions. It’s best if you use a metal spoon or something that can handle this job. Make sure you save the seeds for roasting, but it can be a messy chore to separate the seeds from the pulp.
- Then, cut the pumpkin into larger pieces.
Now, you have these large pieces of pumpkin, but you still aren’t ready to make a pie or soup. Those pieces need to turn into real food. Here is what you need to do.
- Heat one inch or more of water in a saucepot and put it over high heat. Let the water come to a boil. Then, add the pumpkin pieces to the water.
- Reduce heat to medium-high heat. Cover the pot and cook until tender, which takes between 25-30 minutes.
- Drain the water from the pot and let the pieces of pumpkin cool. Then, peel each piece.
From this point, you can mash your pumpkin or toss it in a blender or food processor to make a puree. If you want to puree it, make sure you line a sieve with a paper towel and let it drain for an hour or so. Puree needs to have the same thickness as canned pumpkin.
Not all pumpkins need to be drained because some pumpkins contain more liquid than others. Draining is most commonly required if you steamed your pumpkin. Some pumpkins yield as much as two cups of water!
A Note About Peeling Pumpkins
You can peel pumpkins before or after boiling. The choice is up to you. You can use a potato peeler to remove the peels easily, or you can use a serrated knife to remove the skin. The only downside to peeling pumpkins after you steam them is that they need to be cooled before handling.
How to Cook Pumpkins
If you don’t need to puree your pumpkin, another option is to roast the pumpkin cut-side-up on a sheet pan. Before you roast pumpkins, make sure you brush the pieces with olive oil and sprinkle with a bit of sea salt.
To roast pumpkins, preheat your over at 400℉, and once it’s heated, put the pumpkins that are on the sheet pan into the oven for 35-45 minutes. The flesh should be soft.
A lot of people just eat pumpkin like this! Roasted pumpkin is a delicious side dish that can be served with different main courses.
Once roasted or pureed, there are dozens of ways that you can use pumpkin in recipes. Here are some recipes that you need to give a try.
- Pumpkin Pancakes
- Soft and Delicious Pumpkin Cookies
- Pumpkin Soup
- Spicy Roasted Pumpkin Wedges
- Homemade Pumpkin Pie
- Pumpkin Beer Cheese Soup
- Savory Baked Pumpkin
How to Roast Pumpkin Seeds
Don’t throw out those seeds! Pumpkin seeds are a delicious, nutritious snack that you can make when you’re preparing your pumpkin. They have an addictive texture, and you can add a multitude of flavors to them for a bit of excitement.
Pumpkin seeds are made of two parts – the creamy colored shell and the kernel center which is olive green. Both of these parts are edible so that you can roast the entire seed for maximum nutritional benefits and flavor.
The first thing that you have to do is remove the seeds from the pumpkin. You’ll do this as you prepare the pumpkin and cut it in half. Here are the next steps.
1. Wash and Dry the Seeds
Put the seeds in a colander, and wash them to remove any pulp left on the seeds. Some pumpkin flesh might remain, but that's okay. Once you wash the seeds, dry them off with a towel to the best of your ability. The drier you get the seeds, the better the seeds will crisp up during roasting. Extra moisture prolongs the cooking process and time.
2. Season the Pumpkin Seeds
Now, put the seeds into a bowl with olive oil, salt, black pepper, garlic powder, paprika, and whatever other seasonings you want to use. You can customize the pumpkin seeds as you want, such as adding cayenne pepper to make a spicy pumpkin seed or cumin for a bit of a Mexican flavor.
3. Roast the Seeds
Spread the pumpkin seeds out on a greased sheet pan in a single layer. Roast the seeds on 350℉ for 20-30 minutes. Make sure you toss the seeds every 10 minutes for even browning. Once they’re browned and have a nutty aroma, they’re ready to eat.
Final Thoughts
Fall and pumpkin go hand in hand, and making your own pumpkin puree from whole pumpkins makes you feel accomplished in the kitchen. Cooking pumpkins isn’t as hard as one might think, but it can be cost-effective. Plus, anything homemade always tastes better!
Like this post? Don't Forget to Pin It on Pinterest!
You May Also Like:


how do you cut something into larger pieces?