This post may contain affiliate links.* As an Amazon Associate I earn from qualifying purchases. Click here to read our affiliate policy.
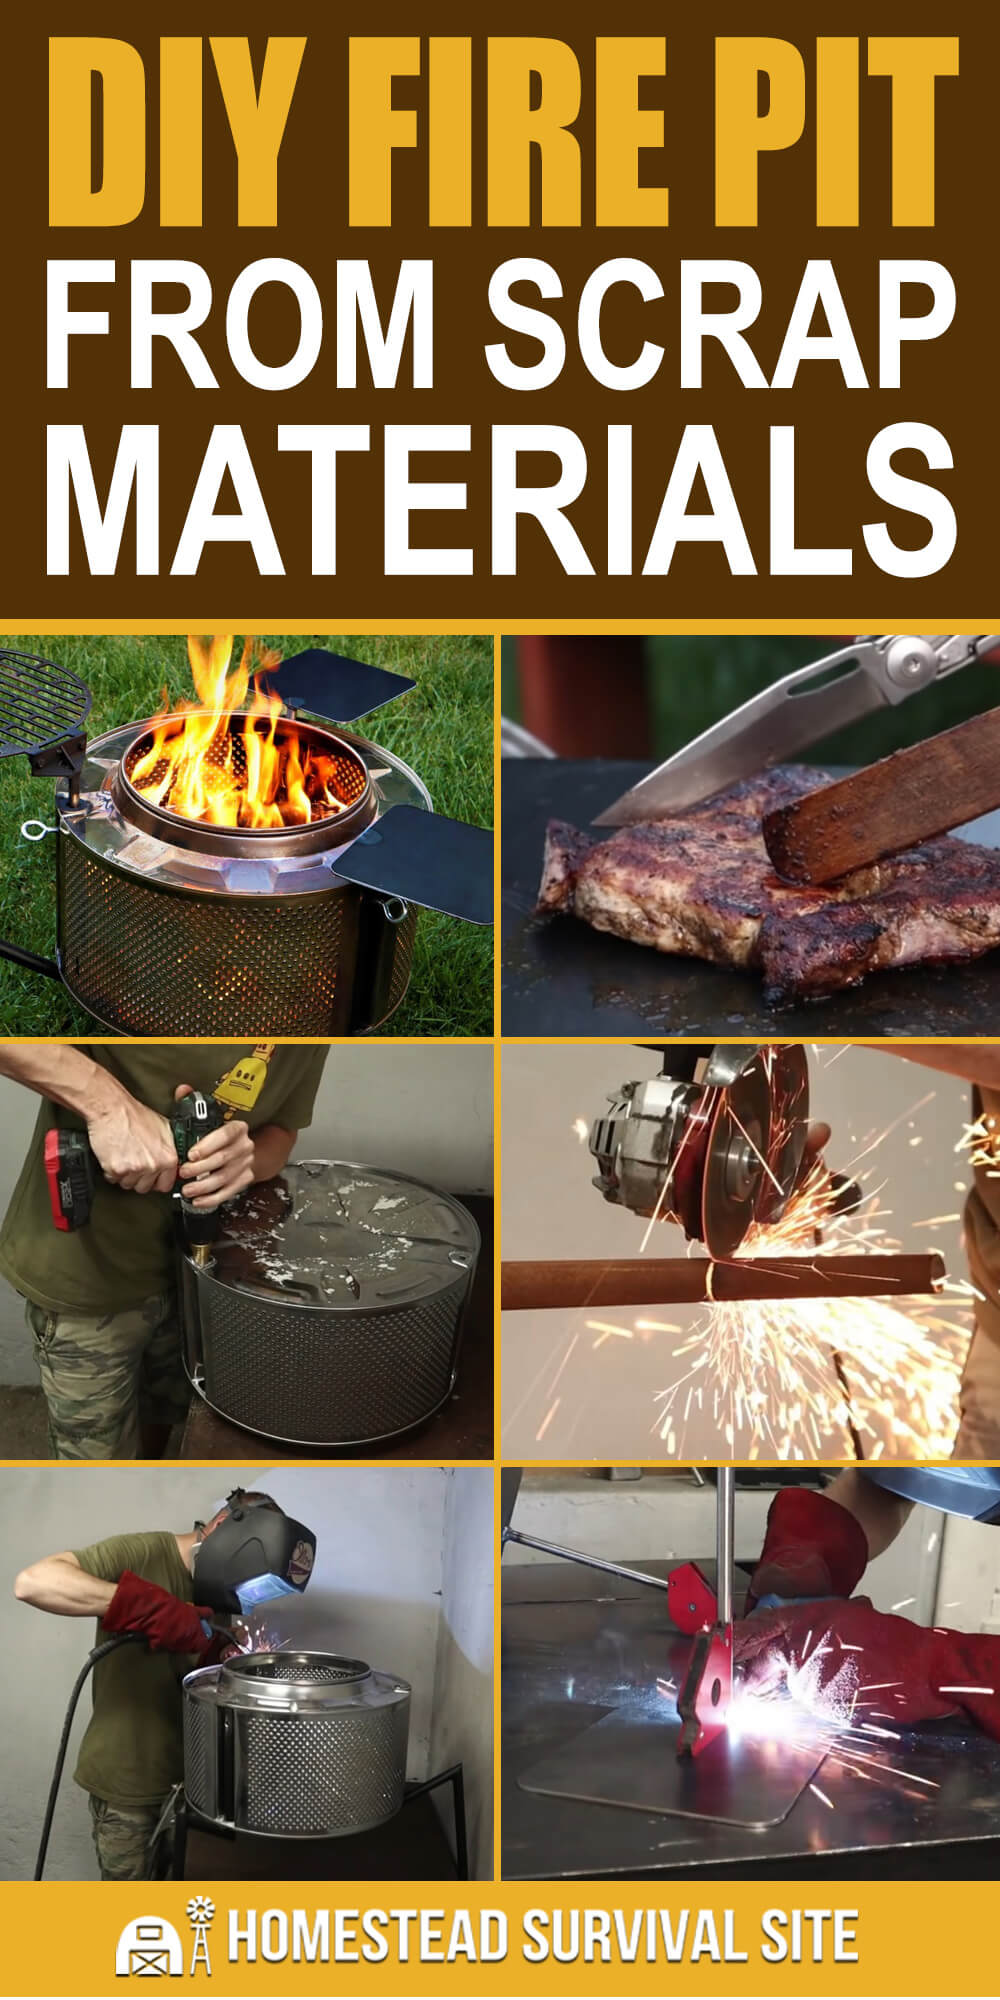
If you have some basic welding skills and any experience with metalworking you can easily salvage scrap metal to make a unique and highly functional fire pit and grill.
In this video, Ollari's explains how to customize the perfect firepit and grill from scrap materials. Here's what you'll need…
Want to save this post for later? Click Here to Pin It on Pinterest!
Equipment:
- Arc welder
- Metal cut-saw with blade
- Circular sander
- Drill
- Metal Step-Drill-Bit terraced from 1/8” up to 1” or more
- Old stainless-steel drum from a clothes dryer
- White vinegar to remove calcium and lime from a drum
- Circular sandpaper
- 3 – Looped bolts with 1” loop with ¼” diameter threaded shank and 2 inches long
- 3 – ¼” nuts
- 8 feet of 1” metal pipe (electrical conduit pipe could work)
- 3 – metal rods about 1” diameter and as long as the dryer drum is high (old horseshoe stakes could work)
- 3 large washers with a 1” interior diameter
- Heavy metal Hibachi grill grate
- 6-inches of metal corner piece about 1/8” thick and 1” wide on each side of the bend
- 2 – 1” bolts ¼” diameter
- 2 – ¼” nuts
- 2– metal grip washers
- 2 – 1-foot square sheets of stainless steel ¼” thick with rounded and sanded edges
Directions:
- Remove the driveshaft attachments from the back of the dryer drum
- Scrape off any calcium or lime residue and scrub with vinegar to a final finish
- Turn the drum base up and using the step-drill-bit, cut three 1” diameter holes where the bolts attached the drive assembly on the bottom of the base
- Repeat the 1” drilling step on the other side of the drum opposite the holes you drilled in the base
- Cut six 8-inch pieces from the 1” diameter pipe with a flat bottom on one end and a 45-degree angle on the other end
- Cut three 8-inch pieces from the 1” diameter pipe with a 45-degree angle on both sides
- Weld 3 of the 8-inch length pipes together using the piece with double 45-degree angles as the middle section to make a “Z” shaped leg
- Repeat the welds until you have 3 “Z” shaped legs
- Sand the Z-legs and drill a ¼’ diameter hole 1 ½” from the top of each leg in line with the Z shape. Test to see if the ¼” shank of the looped bolt fits
- Spray paint each Z-leg with a flat black, high-temperature paint
- Insert the legs into the 1” diameter holes you drilled with the ¼” hole in the legs at the top
- At the top of the drum, spot weld a 1” interior diameter washer to the protruding leg to hold the leg to the drum
- Thread the ¼” nut onto the looped bolt about a ½” and insert into the ¼” hole you drilled in the leg and spot weld the nut only to the drum. You want the looped bolt to turn freely to tighten to the rods. Do this with all 3 legs
- Mask the tops of the legs and touch up with spray paint
- Prep your metal rods by cutting them from scrap
- Sand the rods to bare metal
- Sand and clean the old Hibachi grill top
- Insert the metal ½” rods in the 1” metal pipe of the Z-legs and place the Hibachi grill on top of the drum
- Take the 4-inch corner piece of metal and place on the grill top to align with the rod. Mark the rod where the bottom of the metal corner meets
- Cut the ends of the 4” metal corner piece at a 45-degree angle on both sides
- Cut a ½” square notch dead-center in one side of the corner piece
- Put the corner piece against the Hibachi grill top and mark holes from the grill top if it has a hinge. Drill a ¼” hole on the marks
- Attach the old hibachi grill top hinge to the corner piece using the ¼” bolts, washers and nuts and invert the top with the angled metal piece down. Weld the metal rod to the corner piece at the 1/2'” notch. If you can’t do this, weld the grill top directly to the angled piece
- Drop the rod with the grill top attached into one of the pipe legs and tighten the looped bolt to see if adjustment works
- Weld the other two rods cut to the same length to the stainless-steel squares in the middle at one end
- Insert the rods with the stainless-steel plates attached and rotate away from the Hibachi grill to use as platforms for ingredients or tools
- Start your fire outdoors and wipe down the metal plates with vegetable oil
- Wipe down the grill cover with the vegetable oil before using for the first time
- Cook and stay warm
Watch the video below to follow along:


