

Estimated reading time: 5 minutes

There are many ways to make your own yeast, but arguably the easiest way is to grow a sourdough starter. To do this, all you have to do is capture wild yeast using flour and water.
Though there are other methods that are fairly easy, I recommend this method for a couple of reasons. First, it involves basic ingredients that everyone already has on hand: flour and water. You can start your yeast today and not have to run to the store.
Second, wheat for the flour can be grown on the homestead for those looking to be as self-sufficient as possible. It’s also a proven method that has been used for thousands of years!
Sound good? Here’s what you’ll need to get started.
Want to save this post for later? Click Here to Pin It on Pinterest!
Supplies
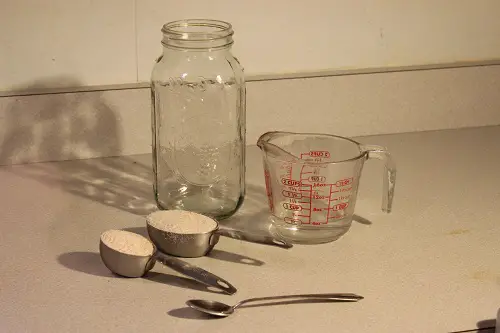
Flour – Any unbleached, wheat type flour will do except self-rising as it has baking soda added to it. You can use all-purpose bread flour, whole wheat, or rye.
Water – It’s important that the water is non-chlorinated as chlorine will kill wild yeast.
A Large Jar or Container – For your jar and stirring device, use non-reactive materials like stainless steel, glass, or plastic.
A Spoon or Stirring Device – Clean cloth or coffee filter and a rubber band or string.
Instructions
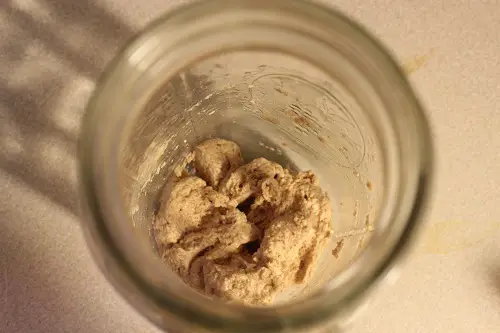
• In a large glass container, mix 1/2 cup of water with 3/4 cup of any wheat type flour.
• Stir well, ensuring there’s no dry flour.
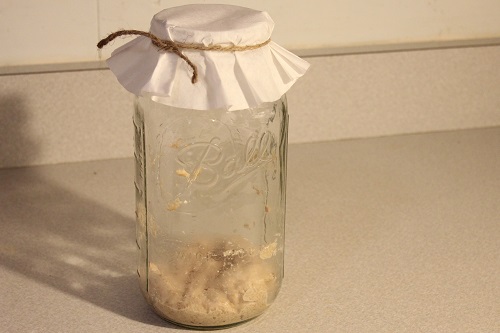
• Cover with a breathable but fly-proof lid. A small piece of clean cloth or a coffee filter and a string or rubber band should suffice.
Related Article: How The Pioneers Made Bread With No Yeast
You can leave your container on your counter. It will work better if it’s kept between 70°-85°F. After 12-24 hours you should start to see bubbles.
Feeding Your Starter
You should also begin “feeding” your starter at the 24-hour mark. To feed your starter, take out half of it before adding another 1/2 cup of water and 3/4 cup of flour.
Then begin repeating this feeding process every 12 hours. Don’t worry, you don’t have to waste the removed half. It can be used to make bread or given to a friend to start their own. It will store in the fridge for several days.
Related Article: How To Master The Art Of Bread Baking
After 5-7 days, it should rise until doubled between feedings and have a distinct sourdough smell. At this point, you can start using it to make sourdough.
Always feed it before using and leave at least 1 cup of starter to ensure you don’t have to repeat the process! Different recipes will require different amounts of starter.
If at any time you notice an “off” smell, mold, or pinkish color, discard your starter and try again. The starter may darken, but it shouldn’t look moldy and should only smell like sourdough.
Storing Your Starter
After your starter is established, you can also store it in the refrigerator with a tight lid. The cool temperature slows down the yeast, and therefore it won’t need as much food. If stored in the fridge, you should feed it about once a week and let it rest on the counter for about 2 hours each time you feed it.
If you know you cannot take care of your starter for an extended period, you may choose to dry it. First, feed your starter and let it sit until it’s good and bubbly. Then spread it in a thin layer on a parchment paper covered cookie sheet(s) or dehydrator rack(s). Then let it dry at room temperature.
Once it's completely dry and brittle, you can break it up and store it in an airtight container. The drying process can take up to five days.
To rehydrate your starter and begin using it again, you can soak each 1/3 cup of dried sourdough pieces with 1/4 cup of water until the pieces are fully dissolved. This may take several hours with occasional stirring.
When it’s all dissolved, begin feeding it every 12 hours without discarding any until your starter has begun to bubble and rise again. Then you can resume normal feeding and usage.
This no-nonsense method of capturing wild yeast can provide you with delicious bread and increased self-sufficiency. Keep a sourdough starter in your kitchen for its flavor, practicality, and rich heritage.
Like this post? Don't forget to Pin It on Pinterest!
You May Also Like:


“A Spoon or Stirring Device – Clean cloth or coffee filter and a rubber band or string.”
clean…coffee filter…huh whaaa..???
Cover the mixture with a coffee filter , hold it on to the jar with a rubber band or tie a string around it OR you can use a clean cloth instead of a coffee filter to cover the top of the mixture that is inside the jar.
Very good article. Thank you!
Do you have a suitable sourdough recipe using this yeast? I’d love to try it but wouldn’t know how or how much to use otherwise. Thank you.
How much starter is to be used per recipe?
I would also like to know how to use it, let’s say, to make a loaf of bread? Most recipes ask for the packet of yeast. How do I convert this starter to use in any recipe?
google recipes for sourdough bread and you will find many recipes.
There are many sourdough recipes out there, depending on your available time and interest. Mom taught me a couple of variations.
The basic: 2 1/2 cups of starter, 3 1/2 cups flour, 1+ cup lukewarm water, 1tsp salt. Mix them together, add water until you reach a good consistency, knead the dough for 10-20 minutes (the more you knead, the tougher/harder the bread will be). Cover, leave in warm area to rise. When risen (can be many hours later, depending on your starter), punch down, make into two loaves, put in pans, cover, let rise again. When ready, bake at 375 for 35-40 minutes (golden brown, sounds hollow when tapped).
Notes: This is low salt, adding salt will slow the process. Adding sugar or molasses speeds it up. How much? It varies. Adding a few tablespoons of oil will keep the bread fresh longer. Mom would add 1/2 cup powdered milk (or scald and cool a cup of milk to replace that initial cup of water) sometimes to boost the nutritional value.
How are you supposed to have so much starter for the recipe if you have such a small amount in the jar?
Thank you so much for this recipe I just finished writing it all down. 🤗
Can this recipe be made gluten free?
Can you use the first starter you take out?
Do you continue the step of removing half when feeding after the first feed?
Yeah, but if you take it out of the frig, let it warm up to room temperature and then take a 1/2 cup that should be active starter. Check it to see if it is bubbly and having that sourdough smell. If so, it is good to use in place of yeast. This trick cut my yeast cost from 30 cents a loaf (Artesian bread) to 2 cents a loaf!
Can u add a pkg of yeast if doesn’t rise?
Can you use the dried starter without rehydrating it.
An off smell? Well, at around day 4 the starter takes on an off smell, like puke for a couple days. Change the vessel to another “clean,” canning jar. The wild yeast is bacteria from the environment, both good and bad. Once the good bacteria takes over, your starter will take on a pleasant aroma. Keep changing your vessel to a new one if the starter gets crusty. Any liquid on top is called hooch and can either be stirred in or removed. I pour off half before using.
That’s not yeast!!!! Though is a good way to make bread.
I’ve done this in the past. If you live in an area with low humidity this will take a while. Don’t give up! I live in Wyoming and It took about a week before the process really took off.
How would you go about turning this into dried yeast?
I was disappointed. I want to least how the bakery’s of the early 1900s cake yeast were made. You also don’t have to let your mixture sour. There is a method used in other countries that keep the mixture of flour and water cooler than room temp. It doesn’t sour, but still aids in the rising of the dough without the extreme sour taste. The bread is amazing. I still want to know how to make yeast. Thanks for sharing, but your title is misleading
I’m on my third day, do I take half out again then add flour and water in clean jar.