Estimated reading time: 6 minutes
Whether you are building an emergency food pantry or planning a long camping trip, you may want to consider making your own MREs. This article takes a brief look at military MREs and explains how you can make your own versions at home.
What are MREs?
MREs (Meals Ready to Eat) are self-contained individual meals that require no preparation. Designed as military rations for American troops in combat or field positions, MREs typically contain an entrée, sides, condiments, and a drink enclosed in lightweight, flexible packaging.
According to the Defense Logistics Agency, MRE “components are selected to complement each entree as well as provide necessary nutrition” when “organized food service facilities” are unavailable.
The agency reports that MRE components and packaging must withstand the “intense, highly mobile combat situations of the modern battlefield” and also support the civilian sector with humanitarian feeding.” Aside from the typical powdered drink packet, which needs water, the whole meal is, as the name says, ready to eat.
Want to save this post for later? Click Here to Pin It On Pinterest!
MREs, which were first produced in the early 1980s, replaced a long line of U.S. military rations that included heavy, cumbersome metal cans and less focus on complete nutrition. Although service members sometimes disparage the MRE acronym by saying it stands for “Meals, Rejected by Everyone,” the meals are continually under review, with higher-rated meals replacing lower-rated meals.
Like most pantry foods, the shelf life of military MREs depends on how and where they are stored. The website MREinfo reports that MREs stored at 50 degrees F should last five years, while those stored at 120 degrees F might last only one month.
How To Make Your Own MREs
Although you can find MREs for sale labeled as “genuine military MREs,” buying or selling U.S. Military meals is illegal. However, you can buy MREs online and in brick-and-mortar stores designed for civilian use.
For example, The Ready Store sells a three-month supply of MRE meals for $1,196. Dozens of companies offer their versions of MREs on Amazon, with many offering options for dietary restrictions.
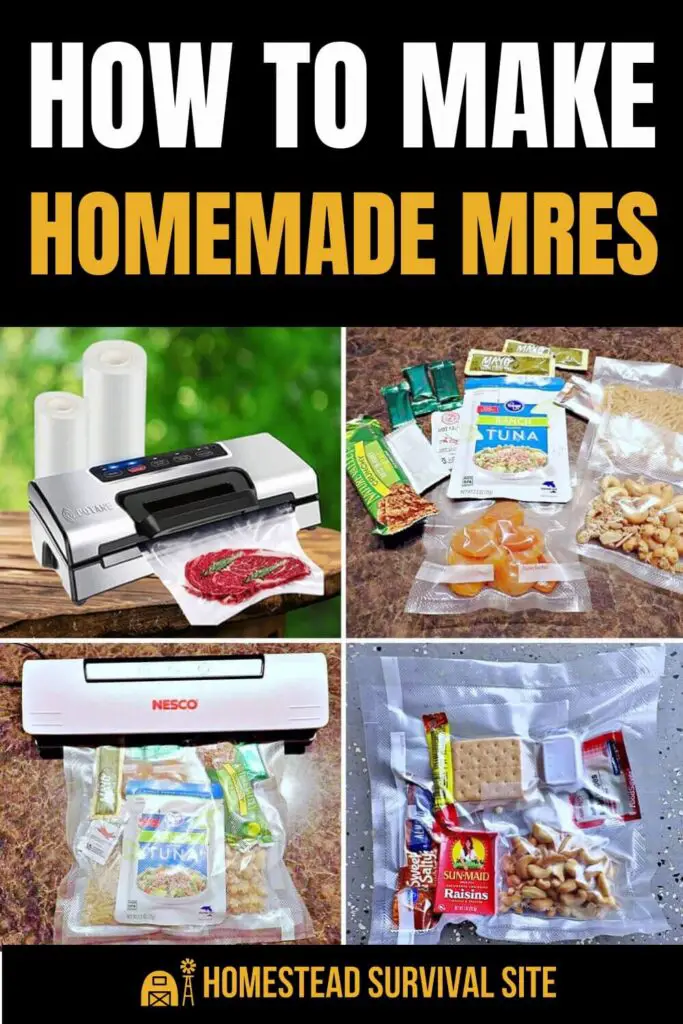
If your budget is stretched too thin for these options, or you'd simply prefer to customize your own to suit your family's tastes, you can skip these commercial versions. DIY MREs can be easy and inexpensive to prepare. In addition to the food ingredients, here are the supplies you'll need.
- Vacuum-sealable bags
- Vacuum sealer
- Oxygen absorbers
- Outer zippered bags
- Labels or marker to label bags
You can include freeze-dried, dehydrated food items in your MREs, or you can include individually packaged processed foods. Here are some possible choices.
- Canned tuna or chicken
- Spam
- Beef jerky
- Dehydrated fruits
- Dehydrated vegetables
- Instant rice, instant potatoes
- Granola, cereal, protein bars
- Dried fruit
- Ramen noodles
- Instant oatmeal
- Crackers
- Nuts
- Peanut butter
- Instant drink mixes
- Candy or cookie packs
- Single servings of salt, pepper, and condiments
- Plasticware
Your next step is to organize the ingredients for one meal into a group. For example, a breakfast MRE might contain a package of oatmeal, dried fruit, instant coffee, and instant orange drink.
A lunch or dinner MRE might contain ramen noodles, freeze-dried beef, dehydrated vegetables, instant drink mix, and cookies. You can add plasticware and condiments to suit the meal.
Now, you will place each meal's ingredients into a vacuum-sealable bag (like these or these). It's a good idea to add a desiccant in humid locations or an oxygen absorber. This article explains the differences between these two components and when to use them. Then, seal each individual meal bag with a vacuum sealer machine.
The next step in making a DIY MRE is easy but essential. You'll need to label each bag with the date you packaged it and a name for the meal that makes it easy to identify. Here are a few examples.
- Breakfast: Oatmeal and dried fruit
- Lunch: Peanut butter and crackers and beef jerky
- Dinner: Ramen and dried beef
- Dinner: Tuna and rice
How To Store MREs
Storing MREs in the right environment is critical to the length of their shelf life. Here are some guidelines.
- Choose a cool, dry, and dark location that is not exposed to extreme temperature changes.
- For protection from pests, place the MRE pouches in another container, such as a lidded five-gallon bucket.
- Store containers on shelving that is off the floor or ground for protection against flooding, temperature changes, and pests.
- Rotate out MREs, replacing them with fresher ones.
MRE Recipes
Here are a few recipes we found for DIY MREs.
Fiesta Burrito Bowl
(From Wallaby Goods)
Ingredients:
- ½ cup dried beans
- ½ cup dried chicken
- ¼ cup instant rice (or dehydrated rice)
- ½ cup dried salsa
- ¼ tsp chili powder
- ¼ tsp garlic powder
- ¼ tsp onion powder
- ¼ tsp cumin
Instructions:
- When you're ready to prepare this meal, boil about two cups of water and add the ingredients.
- Wait about 15 minutes for the ingredients to rehydrate fully.
- Stir and add more water or time is needed.
- When all the water is absorbed and the chicken is soft, it is ready to eat.
Ramen Noodles
(From Survival Mastery)
Ingredients:
- 1 package of ramen noodles
- ½ cup of dried crab meat or dried shrimp
- ½ cup of dried mixed vegetables
- ½ cup of tomato leather
- 4 TB parmesan cheese
- 2 cups water
Instructions:
- Break noodles into pieces
- Combine all ingredients except parmesan cheese in pan
- Bring water to a boil and cover
- Remove from heat and allow to stand for five to 10 minutes
- Stir in parmesan cheese
Pack the noodles and dried vegetables in the same sealed bag and everything else in its own bag. Add a sweet snack and a powdered drink mix.
Ranger Pudding
(From MREInfo)
Ingredients:
- 1 packet of cocoa beverage powder
- 1 packet of coffee creamer
- 1 packet of sugar
- Water as needed
Instructions:
- Stir together all three dry ingredients.
- Add water, mixing well to achieve the desired pudding-like consistency.
For more recipes and ideas for homemade MREs, here are some additional resources:
- The Ultimate MRE Recipe Cookbook by Julio Medina
- Cooking with Sgt. Perez by N. Alessandro Penington
- Homemade MRE Ration Pack for Your Bugout Bag
- 4 Homemade MREs
- Homemade MRE's DIY Emergency Meals
Like this post? Don't Forget to Pin It On Pinterest!
You May Also Like: