A Practical Beginner’s Guide to Small-Space Self-Sufficiency
Table of Contents
Introduction
Do you ever find yourself dreaming of your ideal homestead? The green pastures… the swaying trees… the soft clucks of chickens in the morning… the rich scent of soil and blooming herbs… sunshine on your face, a breeze in your hair. You can almost feel it.
And then reality hits. You’re in a small apartment or a house with no yard. Maybe you're on the third floor of a building with only a balcony—or no outdoor space at all.
I get it. I’ve been there. And I’m here to tell you: you can start homesteading right now, no matter where you live.
This guide is for people who want to be more self-sufficient, eat better, reconnect with the earth, and feel the pride that comes from doing things yourself—even if you're starting with a single potted tomato plant on a windowsill.
Maybe you live in the city. Maybe you rent. Maybe your job or family situation keeps you rooted right where you are. That doesn’t mean you have to put your homestead dream on hold. You just have to start small.
What is a Homesteader, Really?
Forget the stereotype of the off-grid farmer with 40 acres and a wood stove. Homesteading isn't about how much land you have—it’s about your mindset and your actions.
Homesteading is about doing what you can with what you have. It’s about growing your own food, making things from scratch, reducing your dependence on fragile systems, and taking responsibility for your well-being and your future.
Whether you’re in a suburban home, a tiny apartment, or a shared rental with roommates, you can be a homesteader.
This guide is going to show you how.
How to Use This Guide
This isn’t a textbook. It’s not meant to overwhelm you with information. Instead, it’s a hands-on roadmap to help you take real steps toward your homesteading goals—starting today.
Each chapter gives you an overview of one key area: growing food, raising animals (even if just quail or worms), preserving harvests, making simple remedies, collecting rainwater, and more. I’ll also point you to deeper resources on my website if you want to go further with any topic.
You don’t have to do everything. Just pick a starting point, take one step, and build from there.
So let’s dig in and start homesteading—right where you are.
Note: At the end of each chapter, you’ll find a list of links with more information on the tops discussed in the article. Most of them are to my sites, but many are to other sites I love. Don’t forget to check them out!
1. The Homesteader Mindset
Self-Sufficiency vs. Self-Reliance
Homesteading isn’t about living off-grid in the woods—unless you want it to be. It’s about cultivating a mindset of self-reliance no matter where you are. That means knowing how to care for yourself and your family, even if the grocery store shelves are empty or your utilities go out for a week.
You don’t need acres of land to start down that path. You can grow food in containers, preserve it in a small kitchen, make simple herbal remedies, and become more independent one step at a time.
Homesteading today is less about total self-sufficiency—which is nearly impossible—and more about resilience. It’s about making thoughtful choices that prioritize skill over convenience, quality over quantity, and community over consumption.
Building Skills Over Stuff
You don’t need a tractor, a barn, or a fancy solar setup to be a homesteader. What you really need is the willingness to learn, do, and adapt.
Modern homesteaders value:
- Making things from scratch instead of buying them pre-made.
- Fixing things instead of throwing them away.
- Using what they have instead of chasing the latest gadget.
- Trading and bartering instead of relying solely on cash.
- Supporting local growers and makers instead of big box stores.
Homesteading is a slow shift from consumer to producer. That might look like baking bread for the first time, learning to dehydrate herbs, or figuring out how to grow lettuce in a tote on your balcony.
You don’t need all the answers right now—you just need to start building your skills. Every skill you learn makes you a little more independent.
Creating a Custom Homestead Plan
Every homestead looks different because every life is different. Your homestead will depend on where you live, how much space you have, what your budget is, and what skills you’re excited to learn.
Ask yourself:
- What space do I have available (windowsill, balcony, backyard)?
- How much time can I realistically dedicate each week?
- What are my top priorities: growing food, herbal health, saving money, learning skills?
- What are my local laws or restrictions I need to work around?
Start small. Start simple. A couple of herb pots. A compost bin. A rain barrel. The point is to start something—and then build from there.

The Modern Homesteading Spirit
The original homesteaders were given land in exchange for hard work. Today, we bring that same spirit into the city, the suburbs, or wherever we find ourselves. It’s not about the land. It’s about your values and actions.
Here’s how you know you’re ready to homestead:
- You crave hands-on learning.
- You want to live more simply and intentionally.
- You’re done with waste and want to make do with what you have.
- You’re curious about growing, preserving, creating, and sharing.
- You’re willing to learn, fail, and try again.
There will be limitations. Maybe your city won’t let you keep chickens. Maybe your HOA bans front-yard gardens. That’s okay. Homesteading is about adapting and overcoming, not waiting for perfect conditions.
The best time to start your homestead?
Right now. With what you have. Wherever you are.
You’re not waiting on land—you’re cultivating a lifestyle. Welcome to the journey.
More Resources:
- What Exactly Is Homesteading?
- 7 Things To Know Before You Start Homesteading
- 9 Tips for New Homesteaders
- 10 Homestead Survival Tips For Beginners
- 12 Worst Mistakes New Homesteaders Make
- 17 Simple Ways to Be a Little More Self-Sufficient
- Self-Sufficient Living 101
- Top 10 Books for Homesteaders
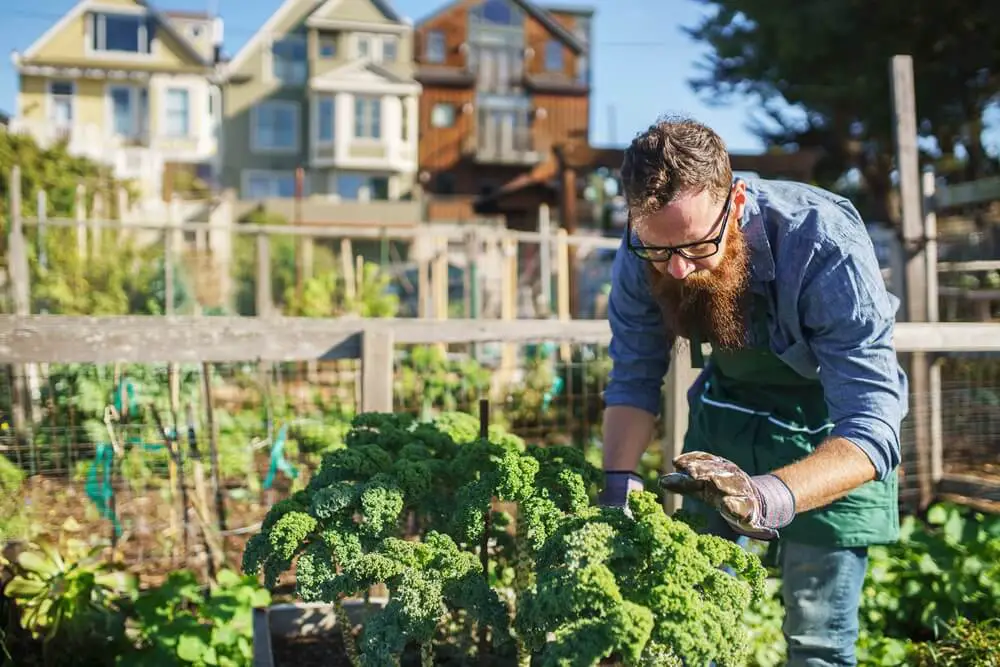
2. Growing Your Own Food
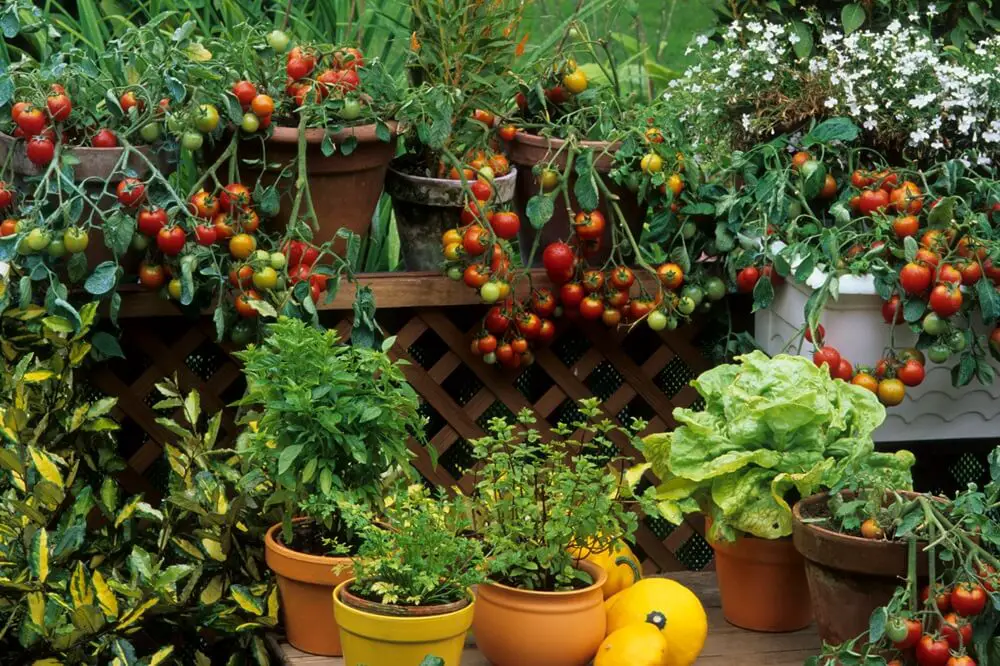
Container Gardening Basics
One of the biggest myths in homesteading is that you need a huge yard to grow your own groceries. The truth is, with smart planning and a few containers, you can grow a surprising amount of food in even the smallest spaces.
If you have a balcony, patio, porch, fire escape, or sunny window, you have room to grow. Here’s how:
- Five-Gallon Buckets: Cheap, easy, and versatile. Just drill drainage holes, fill with quality soil, and you can grow tomatoes, peppers, lettuce, and even dwarf fruit trees.
- Plastic Barrels: Drill planting holes in the sides and bottom to grow strawberries, onions, or carrots vertically—cuts down on weeding, too.
- Window Boxes & Hanging Planters: Great for herbs, greens, and shallow-root crops like radishes or green onions.
Even if you only grow a few ingredients, it builds your skills, saves money, and reconnects you with your food.
Vertical Gardening & Indoor Growing
When floor space is limited, go up. Vertical gardening makes use of walls, fences, railing, and even inside your home.
- Vertical Grow Bags or Planters: Hang these on fences, walls, or railings for herbs, greens, strawberries, or even potatoes.
- Wall-mounted Shelves or Racks: Indoors, use grow lights and shelves for seed starting or microgreens.
- Indoor Hydroponics or Aquaponics: If you're feeling adventurous, small countertop systems can grow lettuce and herbs year-round.
You can even grow rice in a shallow tub or pond setup—yep, even in urban areas.
Balcony, Window, and Small Yard Solutions
Start by looking at your space with new eyes:
- Where can I hang planters or set up shelving?
- Can I build a raised bed or cold frame in a corner of the yard?
- What gets full sun? What’s shaded?
- What zoning or HOA rules should I check before planting?
You can turn balconies into jungle-like food forests with trellises, buckets, and hanging containers. Enclose a porch and it becomes a mini greenhouse. Small yards can hold raised beds, dwarf fruit trees, and even a rabbit hutch or chicken tractor.
Think of it like homesteading Tetris—place your biggest elements first (like a compost bin or coop), then fit everything else around them.
Homesteading Time Savers
Homesteading—even on a small scale—can eat up your time fast. But there are ways to work smarter:
- Drip Irrigation or Soaker Hoses: Automate watering to save time and prevent under- or over-watering.
- Self-Watering Spikes or Tubes: Place these in pots and only refill weekly.
- Low-Maintenance Crops: Stick with hardy plants like herbs, kale, bush beans, potatoes, and cherry tomatoes that don’t require constant babysitting.
- Raised Beds on Stilts: Easier on your back, and they double as storage underneath.
The key is to make your setup work for you, not the other way around.
Final Thoughts
Urban and suburban homesteading is all about creativity, flexibility, and making the most of every inch. Don’t worry if you can’t grow everything—the goal is progress, not perfection.
And remember: even seasoned rural homesteaders use raised beds, barrels, and vertical systems to save time and reduce strain. Efficiency is part of the lifestyle.
More Resources:
- Container Gardening 101: Everything You Need to Get Started
- 25+ Container Gardening Mistakes That Will Kill Your Plants
- How to Grow Food in Buckets: A Step by Step Guide
- 25 Foods You Can Grow In Buckets Year Round
- Vertical Gardening: A Great Option for Urban Preppers
- 20 Best Plants For Your Vertical Garden
- The Beginner’s Guide to Survival Balcony Gardening
3. Raising Your Own Protein
Raising your own meat and eggs is one of the most empowering steps a homesteader can take—but it doesn’t require a full-blown farm. With smart planning (and a little creativity), even small yards or suburban patios can support healthy, humane livestock production. And if you’re in an apartment? There are still ways to source quality protein that supports your homesteading values.
Chickens in Suburbia
Chickens are one of the easiest and most popular backyard animals for good reason: they’re relatively quiet, productive, and fun to raise. But before you buy chicks, do your homework.
Check state, county, and city ordinances, as well as HOA rules. Some common restrictions include:
- Hens only (no roosters)
- Limit on number of birds
- “Quiet breeds” only
- Restrictions on butchering or coop placement

Coop Design Tips:
- Go up instead of out—chickens love height, and vertical coops save space.
- Always use hardware cloth, not chicken wire, to protect against predators.
- Shade is essential—overheating kills more birds than cold.
- Provide a dust bath (sand, ash, or soil) to prevent mites and for enrichment.
- Add herbs like oregano and cinnamon to water/feed to boost immunity naturally.
Top Quiet Chicken Breeds:
- Barred Rock Plymouth
- Buckeyes
- Buff Orpington
- Rhode Island Reds
- Wyandottes
All of these will give you over 100 eggs per year and are known for being docile.
Quail & Rabbits in Small Spaces
If your town doesn’t allow chickens, consider quail—they’re small, quiet, and mature quickly. They're great for eggs and meat, and you can raise them in stacked cages indoors or on a patio.
Rabbits are another top-tier small-space protein source. They breed quickly, grow fast, and their droppings are garden gold.
Tips for Raising Meat Rabbits:
- Keep one buck per two does for a steady supply of meat.
- Does need a nesting box with soft material for kits.
- Rabbits can get territorial—keep males and females separate unless breeding.
- Raise hutches above a compost pile for easy cleanup and fertilizer collection.
Top Meat Rabbit Breeds:
- Californians
- Continental Giants
- Flemish Giants
- New Zealands
- Silver Fox
Goats (For Larger Yards)
If you have a little more space and the zoning allows it, small goats like Nigerian Dwarfs or Pygmies are perfect for milk and brush control. Just be aware that:
- They need secure fencing (they will escape).
- Shade and water are essential.
- Intact males (Billy goats) are loud and not always legal to keep.
Goats are browsers, not grazers—if it’s not fenced, they’ll eat it. You can even use a dog house as a low-cost shelter. And if you can’t keep a male for breeding, look into stud services from local farms.
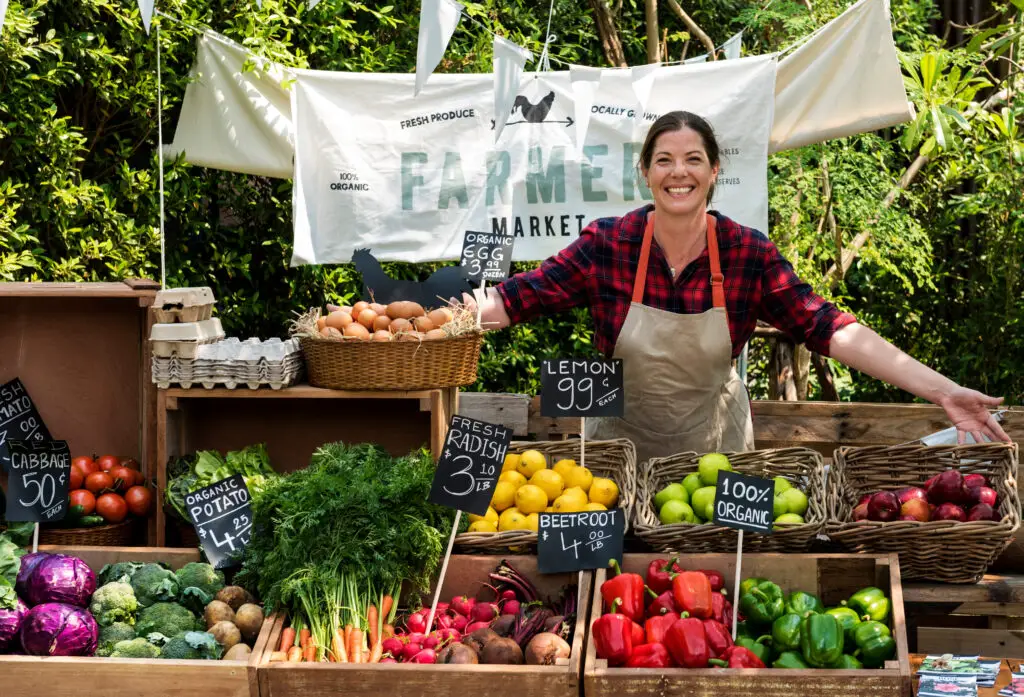
Sourcing Local Meat & Eggs
If you can’t raise animals, that doesn’t mean you can’t take part in ethical, local food systems. Here’s how:
- Join a CSA that offers meat and eggs.
- Buy direct from local farms or farmers markets.
- Look into meat shares (cow/pig shares split between families).
- Barter with local growers if you grow produce or have other skills.
You’ll still be taking control of your protein source—and supporting the local food economy in the process.
Apartment-Friendly Protein Options
Yep, you read that right—there are ways to raise protein in apartments:
- Mealworms or BSF larvae for chickens, quail, or composting.
- Mushrooms (high in protein, easy to grow indoors).
- Sprouts and microgreens (great plant-based protein boost).
- Fish in aquaponics setups (if you’re a bit more advanced).
These may not sound traditional, but they align with the same values: growing your own food, learning skills, and becoming more self-reliant.
Final Thoughts
Raising your own protein—whether it’s a flock of chickens or a container of mushrooms—is deeply rewarding. You’ll know exactly what went into your food and how the animals were treated. You’ll build real skills and move closer to full food independence.
More Resources:
- The Homesteader’s Guide to Raising Chickens
- 8 Things To Know BEFORE You Buy Chickens
- 12 Quieter Chicken Breeds for Urban Homesteaders
- 16 Easy Chicken Coop Designs
- How to Buy Your First Chickens
- Chicken Brooding Beginner’s Guide
- The Complete List of Foods Chickens CAN and CAN’T Eat
- 18 Chicken Keeping Mistakes You Must Avoid
- Raising Quail: A Guide for Beginners
- 7 Reasons You Should Start Raising Rabbits
- 15 Best Rabbit Breeds for Raising Meat
- How to Start Raising Rabbits for Meat
- Raising Goats 101: Here’s How To Get Started
- 15 Best Goat Breeds for Homesteaders
- How to Grow Mushrooms in a 5-Gallon Bucket
- How to Grow Microgreens Step by Step
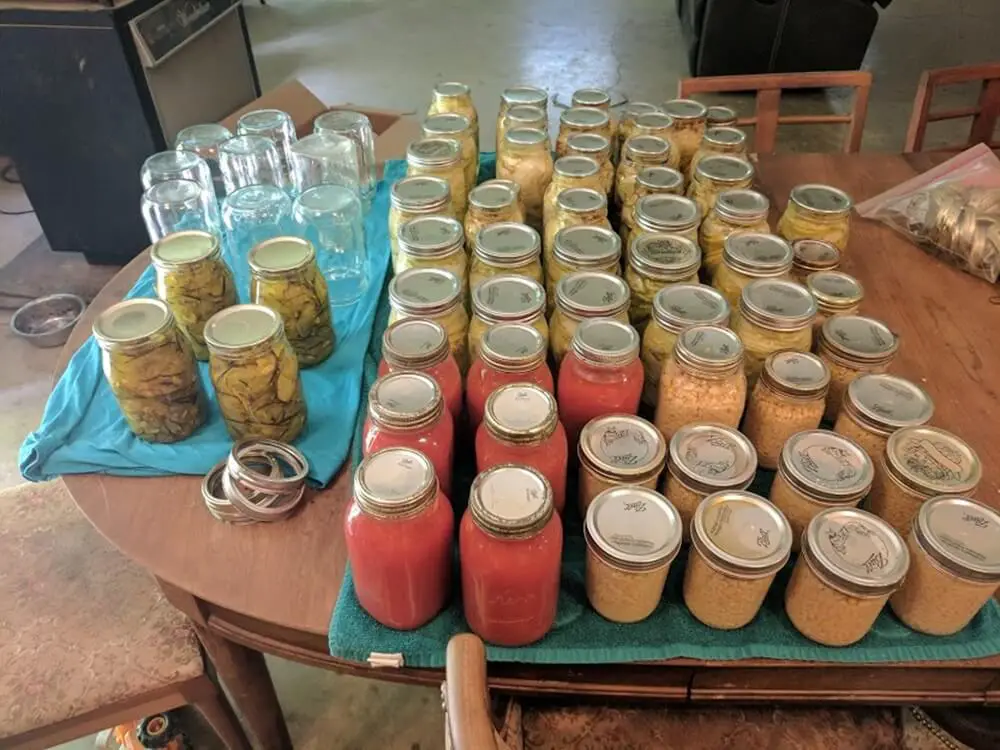
4. Preserving Food Year-Round
When your garden (or local market haul) starts overflowing with fresh produce, preserving that food becomes one of the most valuable skills you can develop. It’s the key to food security, long-term storage, and eating clean year-round.
The good news? Most preservation methods can be done in a regular kitchen, even if you live in an apartment. And once you get the hang of it, preserving your own food can save you money, reduce waste, and give you a deep sense of satisfaction.
Introduction to Food Preservation
Preserving food means locking in its nutrition, flavor, and usability for the weeks—or even years—to come. Whether you're storing sun-dried tomatoes or pressure-canning green beans, the goal is simple: waste less, eat better, and prepare for anything.
Some methods require time and tools, but most can be done on a budget with just a few supplies and a little patience.
Canning (Water Bath & Pressure)
Canning is one of the most popular preservation methods for good reason: it keeps food shelf-stable for a year or more, requires no electricity, and works for everything from tomatoes to meat.
- Water Bath Canning: Great for high-acid foods like fruits, pickles, jams, and salsas.
- Pressure Canning: Required for low-acid foods like vegetables, beans, and all meats.
Basic Canning Supplies:
- Mason jars, lids, and rings
- Water bath canner or pressure canner
- Funnel, jar lifter, and magnetic lid wand
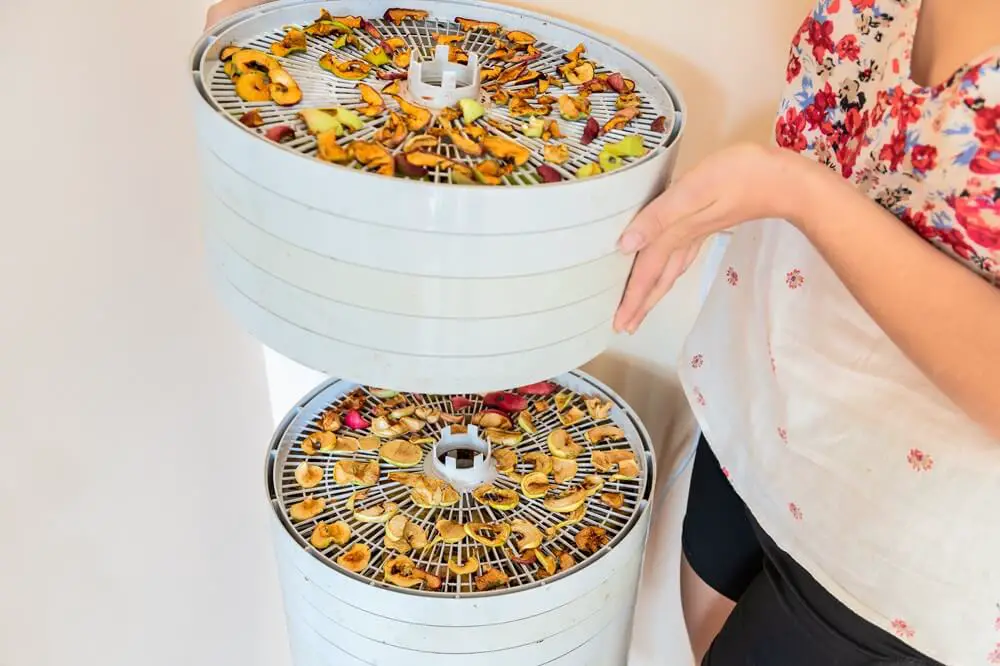
Dehydrating
Dehydrating is one of the easiest and most space-efficient ways to preserve food. All you need is a dehydrator (or a low-temp oven) and some basic prep skills.
You can dehydrate:
- Fruits and veggies
- Herbs and mushrooms
- Cooked meats (for jerky)
- Soups and sauces (with tray liners)
Tips for Success:
- Slice food evenly for consistent drying.
- Store in airtight containers or vacuum-sealed bags.
- Label with dates—dried food can last up to a year or more in a cool, dark place.
Budget dehydrators like Nesco work great, but Excalibur is a top-tier brand if you're going all in.
Freezing
Freezing is the go-to preservation method for most people, and it works well for everything from blanched veggies to leftover meals.
- Use freezer bags or vacuum sealers for best results.
- Label and date everything to avoid freezer mystery meals.
- Be aware that frozen food requires power—so it’s not the best standalone prepper solution.
Pickling & Fermenting
This old-school method uses brine (salt, sugar, vinegar) and time to transform your food into probiotic-rich powerhouse meals.
You can pickle:
- Cucumbers, carrots, onions
- Eggs
- Beets, green beans, garlic
Or ferment:
- Sauerkraut
- Kimchi
- Kombucha or kefir
Start simple with a basic mason jar, weight, and an airlock lid—or go traditional with a covered crock.
Freeze Drying
Freeze drying gives food a crazy long shelf life (decades!), but it comes at a price.
- Home freeze dryers cost $2,000–$4,000.
- You can freeze-dry without a machine, but it takes weeks and requires specific temps.
If long-term prepping is your goal, freeze-drying is powerful—but not essential for beginners.
Smoking & Salting
These traditional preservation techniques are powerful, but they take space, tools, and a bit of know-how.
- Smoking: Done in a smokehouse or backyard smoker. Great for flavor and preservation, but not apartment-friendly.
- Salting: Uses kosher or sea salt to pull moisture from meat. Must be done carefully in cool, dry areas.
These are more advanced skills, but if you’re serious about protein preservation—or just love old-school methods—they’re worth exploring.
Long-Term Storage Basics
No matter how you preserve your food, proper storage is key.
- Use airtight containers, Mylar bags, or vacuum sealers.
- Keep everything in a cool, dark, dry place.
- Rotate your stock (first in, first out).
Even if you’re just saving up for winter meals, your future self will thank you when the pantry is full of homemade chili, dried apples, and pickled green beans.
More Resources:
- The Homesteader’s Guide to Emergency Food Storage
- 15 Food Storage Methods – Which One Is Best?
- 33 Survival Foods That Last For Decades
- Hurdling: A Food Storage Technique That Extends Shelf Life By Years
- Canning Food for Beginners: How to Can Safely and Confidently
- 6 Rules for Safe Canning
- 150 Easy Canning Recipes For Beginners
- Food Dehydration 101: Things to Know Before You Start
- 15 Essential Rules for Dehydrating Food
- 22 Foods You Can Freeze (And How To Freeze Them)
- How to Flash Freeze Food at Home
- Fermentation 101: How to Make Yogurt, Sauerkraut, and More
- The Beginner’s Guide to Freeze-Dried Food
- Home Freeze Dryers For Emergency Food Storage
- Smoking Meat For Long-term Storage
- Using Salt to Preserve Meat The Old Fashioned Way
- Vacuum Sealing: The Best Way to Preserve Anything
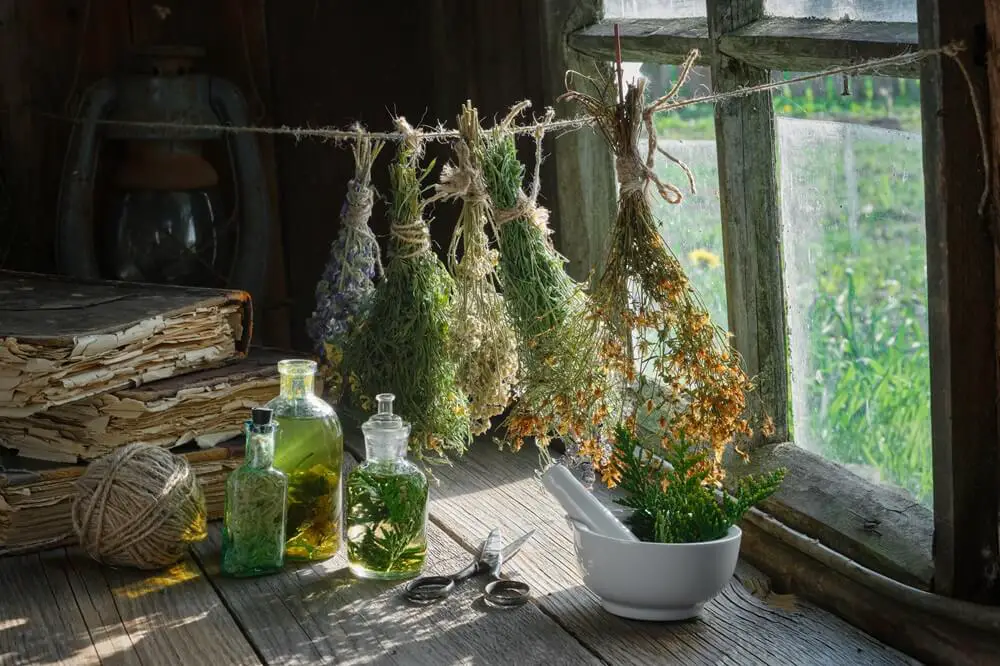
5. Herbal Remedies & Natural Health
Why Every Homesteader Needs an Apothecary
Every homesteader, no matter the space or skill level, should have a basic herbal apothecary. Not because you’re anti-modern medicine, but because learning to use plants for simple health issues is a core homesteading skill—and a huge step toward self-reliance.
You don’t need to know everything or grow every herb to get started. In fact, just a few powerful herbs and a basic kit of tools can carry you a long way. This chapter is about keeping it simple, safe, and practical.
⚠️ Disclaimer: This info is for educational purposes only. Always consult your doctor, especially if you’re pregnant, nursing, taking medications, or treating kids.
Top 5 Herbs to Start With
These herbs are easy to grow (or source), simple to use, and pack serious healing power:
- Garlic – Nature’s antibiotic. Great for immunity, infections, and detox.
- Chamomile – Calming, sleep-aiding, and anti-inflammatory. Use in teas and skin soaks.
- Cayenne – Boosts circulation, stops bleeding, and relieves pain.
- Holy Basil (Tulsi) – Balances stress, supports immunity, and has anti-inflammatory benefits.
- Turmeric – Known for curcumin, a potent anti-inflammatory and antioxidant.
When to Grow vs. When to Buy
Not every herb grows well in every location—but that doesn’t mean you can’t still use them.
Grow If:
- You have a sunny windowsill, porch, or patio.
- You love fresh herbs in teas or meals.
- The herb grows well in your growing zone.
Buy or Stockpile If:
- The herb is tropical or seasonal (like turmeric or cinnamon).
- You’re prepping for long-term storage.
- You don’t have space to grow much.
💡 Pro tip: Store bought herbs should always be organic and sourced from trusted suppliers. Avoid old or faded products that have lost potency.
Must-Have Apothecary Supplies
Here’s what you’ll want to keep on hand to start crafting your own herbal remedies:
Basic Tools:
- Mason jars (for infusions, tinctures, and storage)
- Cheesecloth or muslin (for straining)
- Measuring spoons & cups
- Mortar & pestle or spice grinder
- Mini funnel (makes bottling easier)
For Tinctures & Oils:
- Amber glass dropper bottles (1 or 2 oz sizes)
- Dark glass jars for infusions
- Vodka or apple cider vinegar (as tincture bases)
- Olive oil, almond oil, or coconut oil (for infusions)
For Salves & Balms:
- Beeswax pellets or bars
- Double boiler or makeshift version (bowl over pot of water)
- Small tins or balm containers
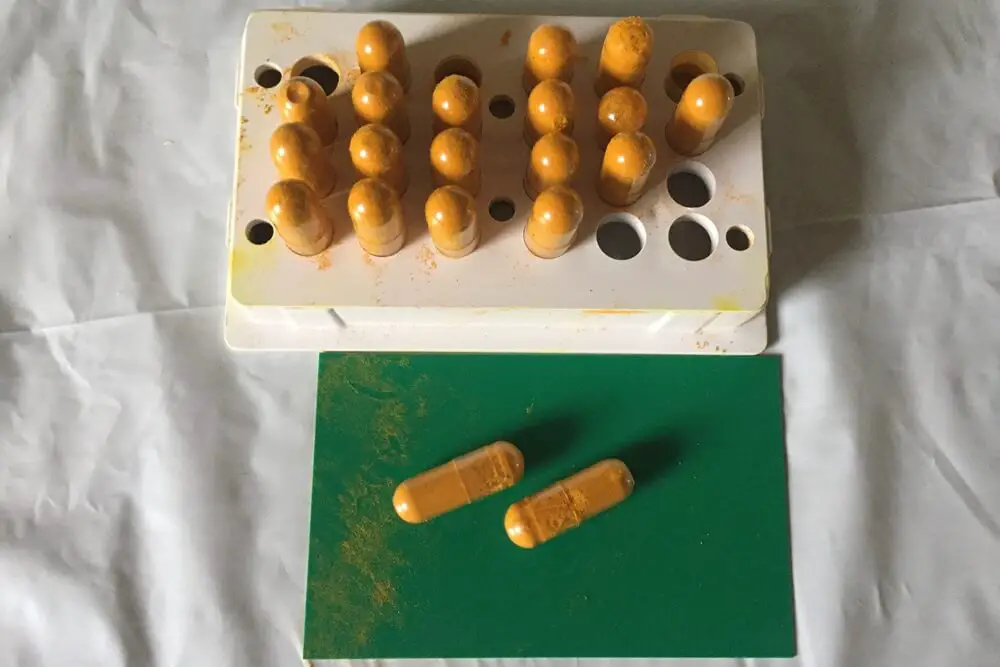
For Capsules:
- Manual capsule maker
- Empty gel caps (size 0 or 00)
- Gloves and scoop spatula for mixing powders
What You Can Make (Even as a Beginner)
With just your Top 5 herbs and the supplies above, you can start making:
- Infused oils (for massage or salves)
- Tinctures (for immune support, stress relief, digestion)
- Herbal teas
- Salves and balms (for cuts, burns, sore muscles)
- Capsules (for pain relief or daily wellness)
Start Your Herbal Reference Binder
Make your own go-to guide! Use a binder or digital file to collect:
- Growing tips for each herb
- What parts of the plant to use (root, leaf, flower, etc.)
- How to prepare it (tea, tincture, oil, poultice, capsule, etc.)
- Cautions or contraindications
- Your favorite recipes
This becomes your personal herbal playbook—and it’ll grow right along with your skills.
Final Thoughts
Learning herbal remedies isn’t just about prepping for emergencies—it’s about reclaiming lost knowledge, making your own health decisions, and reducing your dependence on drugstore shelves.
Start with just one herb. Make one remedy. See how empowering that feels. Then keep going.
More Resources:
- Herbalism for Beginners: How to Get Started
- Kitchen Herb Gardening: Essential Herbs and Tips
- Top 50 Medicinal Plants and How to Use Them
- 15 Herbs and Flowers That Can Ease Your Aches and Pains
- 20 Powerful Medicinal Herbs You Should Grow
- How To Harvest Herbs For Maximum Potency
- 10 Ways to Preserve Fresh Herbs
- 100+ Lost Remedies from Centuries Past
- 25 Amish Home Remedies You Might Need Someday
- 7 Homemade Healing Salves a Century Ago
- How to Make a DIY Poultice for Cuts and Scrapes
6. Off-Grid Living in Small Doses
Most homesteaders dream of going off-grid—living independently from the power company, using the sun and wind for energy, and never worrying about an outage again. But the reality? It’s expensive, and depending on where you live, it might even be restricted or regulated out of reach.
The good news: you don’t have to go all in to start reaping the benefits of off-grid living. There are plenty of simple, affordable ways to reduce your dependency on the grid and build true self-reliance, one step at a time.
Simple Steps Toward Energy Independence
Going fully off-grid could cost tens of thousands of dollars. But starting small can save you hundreds (or more) every year, while making your home more resilient in emergencies.
Here are some smart entry points:
- Switch to propane appliances (like water heaters, stoves, or wall-mounted heaters).
- Use a wood stove for heating instead of electric or gas. Much more efficient than fireplaces.
- Cook outdoors (on a grill, smoker, or rocket stove) when weather allows.
- Hang dry laundry on a clothesline instead of using a dryer.
- Reuse gray water (with proper safety measures) to water your garden.
- Harvest rainwater for non-potable use like gardening, flushing toilets, or washing.
Small changes like these can dramatically reduce your reliance on utilities—and most can be done on a tight budget.
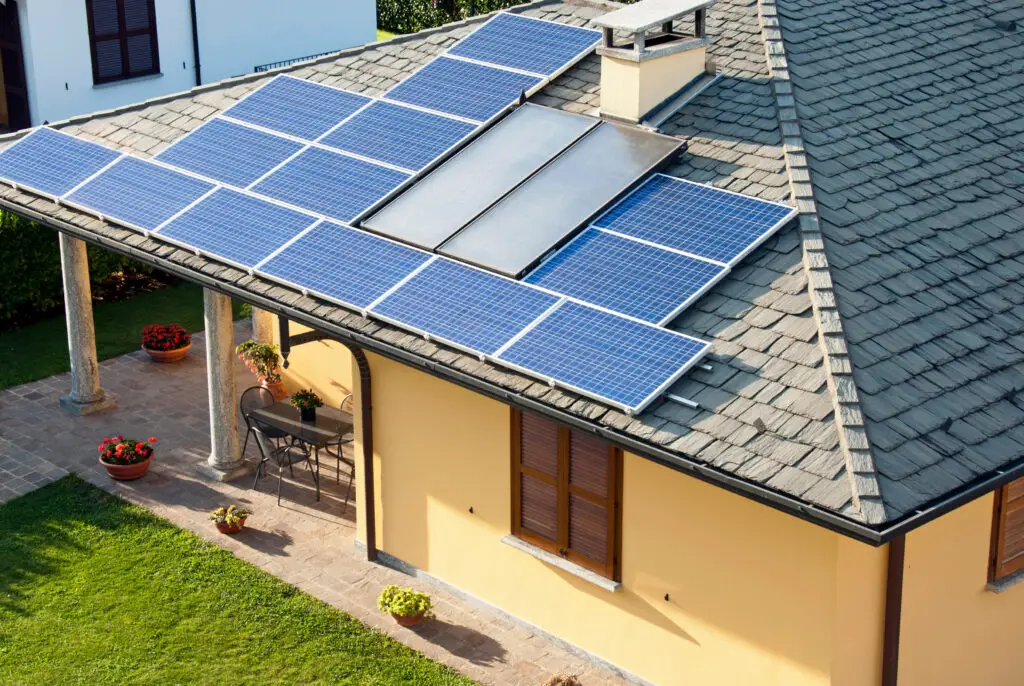
Solar Basics for Renters & Homeowners
Solar is the gateway into off-grid living for most people. You don’t need a $30,000 system to get started.
For Renters or Apartment Dwellers:
- Portable solar panels (great for charging devices or powering small appliances)
- Solar-powered lights and lanterns
- Solar banks and battery packs
- Foldable solar phone chargers
These options are affordable, portable, and effective—and they’re perfect for camping or bug-out gear too.
For Homeowners:
- Start with small solar upgrades like motion lights, bug zappers, or garden lights.
- Invest in a solar generator as backup power during outages (silent, clean, and reliable).
- Work toward larger panels over time, especially if you can offset one part of your energy use, like your shed, garage, or outdoor tools.
💡 Just remember: always check local zoning laws, HOA rules, or building codes before installing solar setups.
Solar-Powered Gear to Start With
Check outdoors or camping stores (or my recommended gear list on the site) for low-cost, practical solar-powered options:
- Solar phone charger
- Solar generator (Jackery or Bluetti are solid starter brands)
- Solar motion lights for home security
- Solar bug zapper/lantern combos
- Solar-powered flashlights and radios
- Solar fountain pump for ponds or decorative water features
- Solar-powered shower (great for summer off-grid hygiene)
These tools are small, but they’re powerful building blocks toward a more independent lifestyle.
Non-Electric Solutions for Daily Life
A big part of going off-grid is using less electricity to begin with. These old-school, low-tech solutions still work beautifully today:
- Manual grain mill or coffee grinder
- Hand-cranked blender or food processor
- Gravity-fed water filter (like Berkey)
- Solar shower bags and privacy enclosures
- Kerosene or oil lamps (stored safely)
- Thermos for passive cooking or heat retention
- Rocket stove or fire pit cooking setups
When you replace electric appliances with mechanical or solar-powered versions, you lower your need for energy—and increase your resilience when the grid goes down.
Final Thoughts
Living off-grid doesn’t happen overnight—and it doesn’t have to. Start where you are. Replace one tool at a time. Learn what works for you.
Every solar light, every dropped utility bill, every gallon of rainwater you collect—it all adds up. Bit by bit, you’ll move closer to the off-grid dream without breaking the bank or getting overwhelmed.
You’ve already taken the first step just by thinking differently—and that’s what homesteading is all about.
More Resources:
- How to Cook on a Wood Stove
- The Beginner’s Guide to Campfire Cooking
- The Ultimate Guide To Cooking Without Power
- Dutch Oven Cooking: The Complete Guide for Beginners
- How to Wash Clothes by Hand
- How to Hang Dry Laundry (Inside or Outside)
- Greywater: A Crucial Concept for Off-Grid Living
- The Prepper’s Guide to Solar Generators
- How To Get Your Home Off The Grid And Onto Solar Power
- 9 Ways To Harness Solar Energy
- How to Make Flour with a Grain Mill
- How to Build a Brick Rocket Stove
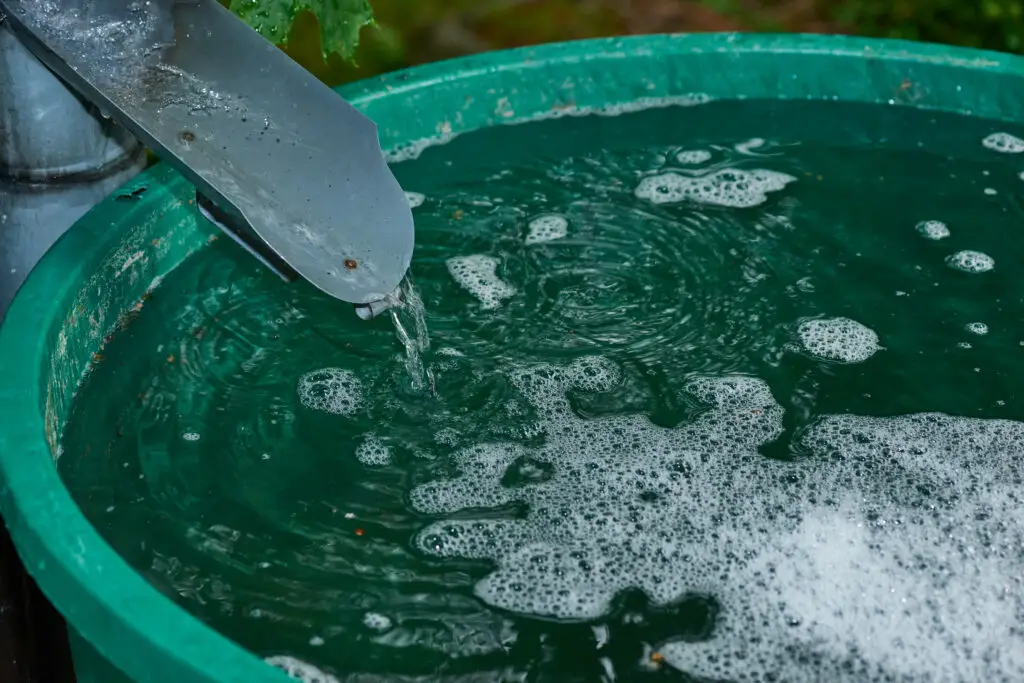
7. Collecting & Using Rainwater
Rainwater is one of the most underutilized natural resources in urban and suburban homesteading. Whether you want to water your garden, wash your dog, or have a backup source in an emergency, collecting rainwater can help reduce your reliance on city water while building self-reliance.
And the best part? It’s affordable and easy to set up—even on a small lot or patio.
Setting Up a Simple Rainwater System
A basic rainwater catchment system can be built in a single weekend with just a few simple components:
Step-by-Step Setup:
- Choose a corner of your home or shed with an existing downspout and a flat, accessible area.
- Set your barrel on a raised platform using pavers, bricks, or a stand—12–15 inches off the ground is ideal for gravity-fed water flow.
- Cut your downspout and attach an elbow joint to divert water into your barrel.
- Install a spigot near the bottom using PVC fittings and a waterproof seal.
- Add a mesh screen over the top to filter out leaves, bugs, and debris.
💡 Pro tip: You can connect two or more barrels together with PVC pipe to increase your storage capacity for those long dry spells.
Best Uses for Collected Water
Rainwater is a free and versatile resource. You can use it for:
- Watering gardens, houseplants, and raised beds
- Washing pets or outdoor gear
- Flushing toilets (with a bucket)
- Doing laundry (with pre-filtering)
- Filling outdoor ponds or fountains
- Outdoor cleaning jobs (vehicles, tools, etc.)
⚠️ Important: Rainwater is not drinkable unless filtered or purified properly. Even clean-looking rainwater can carry bacteria, chemicals, and bird droppings from your roof.
Legal Considerations & Safety Tips
Before you set up your system, it’s critical to check local regulations. Some areas require permits, limit how much you can collect, or restrict rain catchment altogether.
- Contact your city or county zoning office to confirm.
- Rules can change—check annually if needed.
- Never assume last year’s approval still applies.
💡 Keep a printout of any permits or local laws on hand to avoid issues with HOAs or inspectors.
Choosing the Right Barrel & Materials
Your barrel is the heart of the system, so choose carefully:
- Use food-grade plastic barrels that haven’t stored chemicals.
- Avoid used barrels unless you know what was inside previously.
- Look for barrels made specifically for rainwater—they usually include mesh tops, spigot holes, and tight-fitting lids.
Barrels with clear tops or poorly sealed openings can become breeding grounds for mosquitoes and algae, so cover and shade them when possible.
Understanding Roof Safety
The type of roof you have matters. Some roof materials can leach toxins into your water supply:
Best Roof Types:
- Metal (steel, aluminum)
- Concrete or clay tiles
- Untreated wood shingles
Caution With:
- Asphalt shingles (especially older ones)
- Composite or treated materials
- Roofs with moss, mold, or heavy bird activity
Test your rainwater’s pH and quality if you’re unsure. Filters help, but they don’t catch everything.
Maintenance Tips
- Flush the gutters and downspouts before connecting.
- Prune trees overhead to reduce debris.
- Check for leaks after your first big rain.
- Clean barrels seasonally with mild soap and water.
- Test water quality annually, especially if you’re using it for irrigation or hygiene.
💡 Bonus: Dig a small overflow channel to divert water away from buildings—or connect a second barrel to capture overflow.
Final Thoughts
Rainwater collection is one of the most satisfying DIY projects for urban homesteaders. It’s low-cost, low-maintenance, and incredibly useful.
Start small with one barrel and a few garden uses, then expand as you learn. Before long, you’ll wonder why you didn’t start sooner.
More Resources:
- How to Start Collecting Rainwater
- 7 Rainwater Collection Systems
- How To Harvest And Drink Rainwater
- How to Remove “Forever Chemicals” from Rainwater
- 13 Mistakes to Avoid When Harvesting Rainwater
8. Upcycling, DIY, and Bartering
Homesteading is rooted in resourcefulness. While some people think it’s all about “going back to the land,” a big part of the lifestyle is simply learning to do more with less.
That’s where upcycling, DIY, and bartering come in. These aren’t just creative hobbies—they’re practical tools for building a more self-sufficient life, especially when money and space are limited.
The Homesteader’s Resourcefulness Toolkit
Upcycling vs. Recycling
While recycling breaks things down to reuse the raw materials, upcycling is about reimagining what already exists and giving it a new purpose—no factories required.
Upcycling helps you:
- Save money
- Reduce waste
- Practice creative problem-solving
- Gain DIY skills
- Create unique, useful tools and décor for your homestead
Upcycling Ideas to Get You Started:
- Plastic bottles → herb planters or watering globes
- Wood pallets → compost bins, garden beds, or vertical planters
- Coat hangers → plant stakes, S-hooks, food skewers
- T-shirts → Swiffer sock, dust rags, braided belt
- Tin cans → lanterns, seed starters, or tool organizers
💡 Bonus: You can even make money from your upcycling skills by selling handmade goods locally or online (Etsy, Facebook Marketplace, craft fairs).
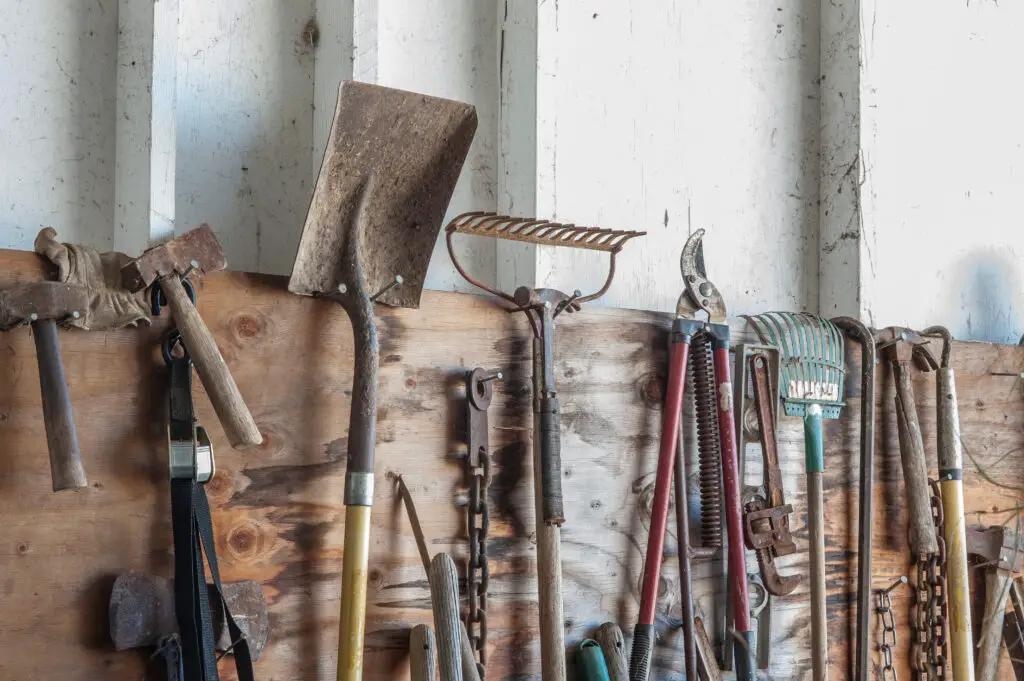
Top Tools for Small-Space Projects
You don’t need a full-blown workshop to start upcycling and building. Just a few key tools will get you going—and most are easy to power off-grid or with solar if needed.
Top 10 Essential Homestead Tools:
- Hammer – For basic construction, repairs, and breaking down materials.
- Circular Saw – Cuts wood fast and clean; ideal for furniture or raised beds.
- Power Drill – A must-have for drilling holes or driving screws (solar charging options available).
- Pliers – Perfect for fencing repairs and pulling nails.
- Wrench Set – For mechanical fixes, plumbing projects, and equipment maintenance.
- Staple Gun – Handy for attaching chicken wire, garden netting, or upholstery work.
- Electric Sander – Preps old wood for projects like planters or furniture.
- Axe or Hatchet – For chopping wood, shaping logs, or salvaging scrap.
- Nail Gun (optional) – A huge time-saver for frequent builders.
- Sewing Machine – Don’t sleep on this one! From mending clothes to making your own reusable goods, it’s a powerful tool of self-reliance.
✨ Don’t be intimidated if you’ve never sewn or built anything. Everyone starts somewhere. Begin with one project—and let that first win build your confidence.
How to Barter & Trade in the Modern World
Bartering is alive and well—especially in the homesteading and preparedness communities. It’s one of the oldest forms of economy, and it fits perfectly with a lifestyle that values skills over stuff.
Things You Can Barter:
- Fresh produce or eggs
- Preserved food (canned goods, jams, dried herbs)
- Handmade items (salves, soap, crafts)
- Skills (carpentry, sewing, animal care)
- Upcycled tools, gear, or furniture
- Time and labor (gardening, fence repair, babysitting)
Where to Barter:
- Local Facebook groups
- Buy/sell/trade boards
- Farmer’s markets and swap meets
- Local community gardens or co-ops
- Through friends, neighbors, or church groups
Rule of thumb: Always barter from abundance. Offer what you have plenty of or can create with ease, and trade for what you need but don’t want to spend money on.
Final Thoughts
Living the homestead lifestyle means thinking differently. You’ll start to see old stuff as raw material. You’ll develop skills that let you repair instead of replace. And you’ll connect with others through trading, teaching, and sharing.
Start small. Reuse something today. Learn a new tool tomorrow. You’ll be amazed at how fast your confidence—and self-reliance—will grow.
More Resources:
- 10 Multipurpose Items Every Homesteader Should Own
- 10 Things Homesteaders Should Never Throw Away
- 65 Things You Should Stop Trashing And Start Reusing
- 2500 Survival Uses for Everyday Items
- How to Repurpose Your Garbage
- 30 Hand-Powered Tools You Need to Live Off the Grid
- 50 Most Important Homestead Tools
- 250 Items You Can Barter After The Collapse
9. Building Your Homesteading Network
Homesteading is about doing more for yourself—but that doesn’t mean doing it by yourself. Whether you're in a bustling city or a sleepy suburb, finding like-minded people can make your journey easier, faster, and far more fulfilling.
You’re not alone. You’re part of a growing movement of people reclaiming forgotten skills, building resilience, and reshaping the future—one garden bed at a time.
Finding Mentors and Online Communities
It’s easy to feel like the odd one out when you’re the only person on your block raising chickens, collecting rainwater, or drying herbs on your windowsill. But there are so many others on the same path—you just have to know where to look.
How to Find a Mentor:
- Check local farmers markets, seed swaps, or garden clubs
- Join community garden projects or urban farming initiatives
- Take a homesteading workshop or DIY class
- Ask around at feed stores, farm supply shops, or local hardware stores
- Post in Facebook groups or Reddit communities like r/homestead or r/homesteading
Most homesteaders love to teach. Don’t be shy about introducing yourself as a beginner—they’ll probably light up at the chance to help.
💬 “Hey, I’m just getting into homesteading and I’d love to learn more. Any tips on who I should talk to or what to try next?”
That one sentence can open doors—and often leads to new friends, free advice, and maybe even some hands-on help.
Local Resources & Groups
You don’t need to live in the country to connect with homesteaders. In fact, many urban areas now have thriving local homesteading scenes.
Look for:
- Permaculture or sustainability meetups
- Food co-ops and CSA programs
- Extension office classes (usually run by your state’s agriculture department)
- “Buy Nothing” groups or Tool Libraries
- Maker spaces or community workshops
These places are goldmines for inspiration, connection, and collaboration.
Homesteading with Family or Partners
Sometimes your most valuable support system is already under your roof—or just across town.
Team Up Locally:
- Coordinate planting schedules to trade extra produce
- Share equipment like pressure canners, dehydrators, or tools
- Trade labor during harvest or project days (coop building party, anyone?)
Form Regional Partnerships:
If you’re limited on space or restricted by local ordinances, consider building a partnership with a rural homesteader.
Example: You raise herbs and greens in your city plot; they raise goats or pigs. You split the harvest, or exchange labor and supplies.
Just make sure to start small and get clear on expectations. Managing your own setup and helping elsewhere is a lot. Wait until you’ve got your feet under you before diving into shared livestock or long-distance bartering arrangements.
Why Community Matters
You might start homesteading to grow tomatoes or save money—but you’ll stay for the sense of connection and purpose.
- You’ll have someone to cheer you on when your seeds sprout or your chickens lay their first egg.
- You’ll get honest help when something breaks or fails.
- And you’ll pass on that same encouragement to someone else one day.
That’s what makes homesteading different from other hobbies—it’s a way of life built on sharing, teaching, and community.
More Resources:
- 40 Sites Where You Can Trade & Barter For What You Need
- How to Build a Survival Community
- Farmer’s Markets: 9 Tips for Making A Bundle of Cash
- Why You Should Join a Food Co-op
10. Putting It All Together
You’ve made it this far—so give yourself a pat on the back. You’re not just thinking about homesteading anymore. You’re planning, preparing, and getting ready to do the thing.
Remember: homesteading isn’t about doing everything all at once. It’s about learning one skill, trying one new habit, growing one plant… and letting those small wins build your confidence over time.
In this final chapter, we’ll put all the pieces together into a 30-day action plan to help you start where you are, stay motivated, and avoid common pitfalls.
Build Your First 30-Day Homesteading Plan
Here’s a simple weekly roadmap to kick off your homesteading journey without the overwhelm:
Week 1: Reset Your Mindset
- Reread Chapter 1.
- Choose three habits to shift (ex: buy less plastic, cook from scratch, avoid single-use items).
- Walk around your home with fresh eyes—identify sunlight areas, unused spaces, and storage zones.
- Make a list of skills you want to learn and rank them by excitement or urgency.
Week 2: Grow Something
- Choose one easy edible to grow—herbs, lettuce, or cherry tomatoes are great starters.
- If you’re in an apartment, get a pot or container and place it near a sunny window or on a balcony.
- Learn about watering routines and simple soil care.
Week 3: DIY Something Useful
- Pick a small upcycling or DIY project (like a bucket planter, herb rack, or reusable cloth item).
- Check Chapter 8 for tool suggestions and materials to repurpose.
- Set a day or two for your “maker time.”
Week 4: Preserve or Stock Something
- Choose one method: freezing, drying, or basic canning.
- Preserve a food item you already use often (onions, herbs, fruit).
- Or, start stockpiling one herbal remedy or self-sufficiency supply (garlic, vinegar, jars, bandages, etc.).
Each week, you’ll be learning, practicing, and seeing real results—which builds momentum and motivation.

Common Mistakes and How to Avoid Them
Even seasoned homesteaders mess up sometimes. But you can avoid these rookie mistakes:
- Trying to do everything at once – Start small, or you’ll burn out. Focus on one skill, one project, one habit.
- Ignoring local laws – Always check city and county rules before raising animals, collecting rainwater, or building anything permanent.
- Not asking for help – Find mentors. Ask questions. Join groups. Homesteaders love helping new folks get started.
- Getting discouraged by comparison – Your journey is yours. Don't compare your windowsill herb garden to someone else’s 20-acre plot.
- Not planning for failure – Plants die. Projects flop. That’s normal. Learn from it and try again.
Next Steps and Continued Learning
You’ve got a solid foundation now. But homesteading is a lifelong journey. There’s always more to explore, more to try, and more to master.
Here are some next-level paths you can take:
- Learn to compost or raise worms
- Try fermenting or pressure canning
- Build a rainwater catchment system
- Grow mushrooms indoors
- Start a neighborhood barter group
- Raise rabbits or quail
- Make your own salves and tinctures
- Add solar lighting or a small generator
You don’t have to do them all. Just keep adding skills and making progress one season at a time.
Afterword
By now, you’ve probably realized that homesteading isn’t about where you live—it’s about how you live.
It’s not about owning land or living miles from civilization. It’s about building a mindset of self-reliance, one step at a time. It’s about growing what you can, fixing what you have, and creating a life that’s less dependent on fragile systems and more rooted in real skills and values.
If one day you do get land in the country, this guide will have given you a huge head start. But even if that dream doesn’t materialize—you are still a homesteader. Right now. Right where you are.
Because being a homesteader means:
- Choosing to grow something instead of buying it.
- Learning to make or mend instead of replace.
- Trading or bartering instead of consuming.
- Building community instead of waiting for rescue.
You’re part of a movement—a growing number of people who are pushing back against convenience culture and choosing a more meaningful, resilient way of life.
And here’s the beautiful part: Along the way, you’ll save money, eat better, breathe easier, and find deep satisfaction in knowing you can do things for yourself.
Keep Learning. Keep Growing. Keep Going.
If you’re ready to dive deeper, I’ve got hundreds of free guides, how-tos, and ideas here on HomesteadSurvivalSite.com.
From herbal remedies and food preservation to prepping, gardening, and off-grid hacks—it’s all there. And I’d love to have you be part of the community.
Thanks for reading this guide. I truly hope it gives you the clarity, confidence, and encouragement to start building your homestead—no matter where you live or what your circumstances are.
Remember: You don’t need a farm. You don’t need a fortune. You just need the willingness to begin.
Now go out there and homestead your heart out.
— Heidi Hawthorn
